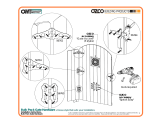
OWT Ornamental Wood Ties 16651 Installation guide
- Type
- Installation guide

OWT Timber
Bolts installed
shown with 56637 Post
to Beam Bolt Inline
connector
dato cut
required
dato cut
required
Timber Bolts may be
installed as standalone
fastener or with many
OZCO connector options
1
Installation Instructions,
OWT Timber Bolts
V1.00 - Installation Instructions effective May 1, 2015 and reflects information that available as of April 10, 2014. This information is
updated periodically and should not be relied upon after May 1, 2015. Please visit www.OZCOBP.com to get current information
Installation Instructions, OWT Timber Bolts

[101-152] 4-6"
Assembly, OWT Timber Bolt 4-6"
56649-10
[152-203] 6-8"
Assembly, OWT Timber Bolt 6-8"
56650-10
[203-254] 8-10"
Assembly, OWT Timber Bolt 8-10"
56651-10
[254-304] 10-12"
Assembly, OWT Timber Bolt 10-12"
56652-10
.375
5/16"
clearance
hole
3/4"
clearance
hole
19.05
.75
15.88
.63
38.10
1.50
25.40
1.00
15.24
.60
OZCO
V1.00 - Installation Instructions effective May 1, 2015 and reflects information that available as of April 10, 2014. This information is
updated periodically and should not be relied upon after May 1, 2015. Please visit www.OZCOBP.com to get current information
Installation Instructions, OWT Timber Bolts
2

V1.00 - Installation Instructions effective May 1, 2015 and reflects information that available as of April 10, 2014. This information is
updated periodically and should not be relied upon after May 1, 2015. Please visit www.OZCOBP.com to get current information
Installation Instructions, OWT Timber Bolts
Suggested Tools
(others may be required)
3

mark locations
plate temporarily installed
for installations without
post to beam connector,
proceed to next step
step 1
V1.00 - Installation Instructions effective May 1, 2015 and reflects information that available as of April 10, 2014. This information is
updated periodically and should not be relied upon after May 1, 2015. Please visit www.OZCOBP.com to get current information
Installation Instructions, OWT Timber Bolts
4

plate from
step 1
removed
secure as desired
beam can be nailed/screwed in
place(instead of clamped) in area
covered by plate shown in step 1
pencil marks
step 2
V1.00 - Installation Instructions effective May 1, 2015 and reflects information that available as of April 10, 2014. This information is
updated periodically and should not be relied upon after May 1, 2015. Please visit www.OZCOBP.com to get current information
Installation Instructions, OWT Timber Bolts
5

3/4
drill through
beam & post"
installation example
without post to beam
connector
step 3
V1.00 - Installation Instructions effective May 1, 2015 and reflects information that available as of April 10, 2014. This information is
updated periodically and should not be relied upon after May 1, 2015. Please visit www.OZCOBP.com to get current information
Installation Instructions, OWT Timber Bolts
6

adjust as necessary
before installation
repeat on
opposite side
installation example
without post to beam
connector
step 4
V1.00 - Installation Instructions effective May 1, 2015 and reflects information that available as of April 10, 2014. This information is
updated periodically and should not be relied upon after May 1, 2015. Please visit www.OZCOBP.com to get current information
Installation Instructions, OWT Timber Bolts
7

Tool Required
3/8" Driver
(Hex Cap Nut)
provided
install caps finger tight; both sides
DO NOT USE POWER DRIVER
3/8" Driver
cutaway view
step 5
V1.00 - Installation Instructions effective May 1, 2015 and reflects information that available as of April 10, 2014. This information is
updated periodically and should not be relied upon after May 1, 2015. Please visit www.OZCOBP.com to get current information
Installation Instructions, OWT Timber Bolts
8
-
 1
1
-
 2
2
-
 3
3
-
 4
4
-
 5
5
-
 6
6
-
 7
7
-
 8
8
OWT Ornamental Wood Ties 16651 Installation guide
- Type
- Installation guide
Ask a question and I''ll find the answer in the document
Finding information in a document is now easier with AI
Related papers
-
OWT Timber Bolts 16673 Specification
-
OWT Timber Bolts 56697 Specification
-
OWT Ornamental Wood Ties 51777 Installation guide
-
OWT Ornamental Wood Ties 56677 Installation guide
-
OWT Ornamental Wood Ties 56676 Installation guide
-
OWT Timber Screws 56629 Specification
-
OWT Ornamental Wood Ties 56620 Installation guide
-
OWT Ornamental Wood Ties 56616 Installation guide
-
OWT Ornamental Wood Ties 56667 Installation guide
-
OWT Ornamental Wood Ties 51735 Installation guide
Other documents
-
 OZCO 56661 Gate T Hinge Operating instructions
-
Oz-Post 52803 Installation guide
-
Oz-Post 50140 Installation guide
-
Oz-Post 30500 Installation guide
-
Oz-Post 30361 Dimensions Guide
-
 Design Craft MIllworks 60000 Installation guide
-
Crosby SU6674 User manual
-
 Design Craft MIllworks 61012 Installation guide
-
 Design Craft MIllworks 61010 Installation guide


