Page is loading ...

1
Questions or Concerns?
Please contact us Mon-Fri 9:00AM-5:00PM PST
at (888) 726-8520 or email [email protected]
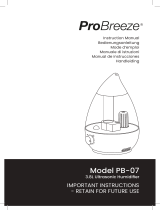
Hybrid Ultrasonic Humidifier
Model No.: LV550HH
Questions or Concerns?
ENGLISH • DEUTSCH

2
EN DE
Package Contents
Specifications
Safety Information
Getting to Know Your Humidifier
·LED Display
·Control Panel
Getting Started
Operation
·General Operation
·Button Controls
·Humidity Sensor
·Automatic Shut O
·Memory Function
Using the Aroma Box
Preventing Water Leaks
Keeping Things Clean
·General Cleaning
·Cleaning the Aroma Pad
·Disinfecting the Humidifier
·Replacing the Remote
Control Battery
Troubleshooting
Warranty Information
Packungsinhalt
Spezifikationen
Sicherungshinweis
Lernen Sie Ihren Befeuchter Kennen
·LED-Anzeige
·Schalttafel
Anfangen
Betrieb
·Allgemeiner Betrieb
·Tastensteuerung
·Feuchtesensor
·Automatische
·Speicher-Funktion
Verwendung des Aroma-Boxes
Verwendung von Wasserlecks
Sauberhaltung
·Allgemeine Reinigung
·Reinigung der Aroma-Pad
·Desinfektion des Luftbefeuchters
·Ersetzung der Batterien der
Fernbedienung
Fehlerbehebung
Garantie
3
3
4
6
8
8
9
12
12
13
17
18
18
19
21
25
25
27
27
28
29
33
34
34
35
38
40
40
41
44
44
45
49
50
50
51
53
57
57
59
59
60
61
65
TABLE OF CONTENTS INHALTSVERZEICHNIS
English Deutsch

EN
3
SPECIFICATIONS
1 x LV550HH Hybrid Ultrasonic Humidifier
1 x Cleaning Brush
3 x Aroma Pads (1 Pre-installed)
1 x Remote
1 x 3V CR2025 Battery (Pre-installed)
1 x User Manual
PACKAGE CONTENTS
Power Supply 220-240V 50/60Hz
Rated Power 110W
Water Tank
Capacity
5.5 L (1.4 gallons)
Customizable
Humidity Range
30%–80% RH
Max Moisture
Capacity
Cool Mist: 300 mL/h
Warm Mist: 450 mL/h
Max Warm Mist
Temperature
40˚C (104˚F)
Eective Range 40–70 m² (430–753 ft²)
English
Ultrasonic Cool Mist Humidifier
Model No.: LV550HH
Français
Español
Italiano

EN
4
SAFETY INFORMATION
IMPORTANT: Please read, understand, and comply with all of the instructions provided in this manual before
using the device. Failure to comply with the instructions given in this manual and/or using the device in ways
other than the ones mentioned in this manual may result in serious injury and/or damage to the product.
• Always make sure to place the humidifier on a
flat, elevated surface before operation.
[Figure 2.1 on page 12]
• When moving the humidifier, remove the
water tank from the base and pour out any
excess water remaining in the inner chamber.
Do not attempt to move the humidifier while
the water tank is attached to the base.
• DO NOT use the handle on the water tank to
move the humidifier while the tank is attached
to the base.
• DO NOT place the humidifier near sources
of heat, such as stove tops, ovens, radiators
or computers. It is recommended to keep the
humidifier at least 254 mm away from these
heat sources.
• DO NOT place the humidifier near any large
pieces of furniture or in any high-trac area
where it can be easily knocked over.
• DO NOT use your hand or any other object to
cover the nozzle while the unit is on. Doing so
may damage the product or cause injury.
• Fill the water tank with at least 2 cups of water
before operating the humidifier.
General Safety Use & Care
Only use this humidifier as described in this
manual.
• Ensure that the plug fits properly into a
polarized power socket.
• When not in use, turn the machine o and
disconnect from a power source by removing
the plug from the outlet.
• DO NOT attempt to open the base or attempt
to remove the water level sensor for self-
servicing. Doing so will void your warranty
and may increase the risk of damage to the
product, electric shock, or injury.
• DO NOT handle the power cord or plug with
hands that are wet. Keep the plug and power
cord away from liquids.
• DO NOT use this product in wet
environments.
• DO NOT allow children to play with or near
the device. Keep the machine out of reach
from children.
• DO NOT immerse the humidifier base,
humidity sensor, power cord, or plug while
cleaning the unit

EN
5
• DO NOT fill the water tank through the nozzle or
mist tube. Doing so may damage the humidifier.
• DO NOT add essential oils or medicated
vapor liquids directly into the water tank or
through the mist tube.
• DO NOT add supplemental water treatment
liquids or filters into the water tank.
• Always remember to turn the safety lock to
the lock position when placing the water tank
back onto the base.
• Position the humidifier so that there is at least
a 254 mm clearance away from walls.
• DO NOT
direct the nozzle toward walls.
• DO NOT allow mist or water to enter the humidity
sensor. Moisture buildup inside the sensor will
result in incorrect relative humidity readings.
• If the relative humidity in your room exceeds
68% while operating the humidifier, it is
recommended to use the lowest mist setting
or to turn o the device.
• Make sure your room is well-ventilated. This
will better help humidify your room.
• Unplug the unit when not in use, or while
cleaning it out.
• DO NOT clean the unit while it is connected
to a power source or while it is on.
• DO NOT clean the device right after turning it
o, especially after it has been diusing warm
mist. Allow the humidifier to completely cool
down before cleaning.
• DO NOT use cleaning detergents to clean
the humidifier. Only follow the instructions
provided in this manual for cleaning and
disinfecting (page 27).
• DO NOT disassemble the base to repair the
humidifier in any way. Doing so may damage
the device and will void your warranty.
• DO NOT use the humidifier if it is damaged
or if it is not functioning properly due to
manufacturer flaws. Discontinue use and
contact Customer Support immediately
(page 33). Do not discard the humidifier.
SAVE THESE INSTRUCTIONS


EN
8
LED Display
Control Panel
1. Timer
2. Mist Icon
3. No Water Indicator
4. Warm Mist Icon
5. Night Light Icon
6. Auto Mode Indicator
7. Relative Humidity
Level (RH)
8. Mist Level Indicator
9. Temperature Unit
10. Ambient
Temperature
1. Power Button
2. Display Button
3. Warm Mist Button
4. Night Light Button
5. Humidity Button
6. Timer Button
7. Mist Level
Controls
8. Minus Button
9. Plus Button
1
10
1 2 3 4 5 6
7 8 9
2 3 4 5
7
6
8
9
ON/OFF DISPLAY WARM LIGHT HUMIDITY TIMER

EN
9
GETTING STARTED
1. Turn the safety lock to the position.
[Figure 1.1]
Figure 1.1
Figure 1.4
Figure 1.3
Figure 1.2
3. Lift up the handle, then pull up on the
handle to remove the water tank from
the base. [Figure 1.3]
2. Remove the nozzle from the top of the
water tank. [Figure 1.2]4. Flip the tank over and twist the water
tank cap counterclockwise to remove it.
[Figure 1.4]

EN
10
GETTING STARTED (cont.)
5. Fill the tank with cold or room
temperature water. Use distilled water
for best results. You can gauge how
much water is in the tank by looking
through the water tank. The maximum
capacity is 1.4 gallons (5.5 L). [Figure 1.5]
6. Replace the cap once you have filled
the tank to your desired level. Twist
it clockwise to secure it tightly to the
water tank. [Figure 1.6]
Figure 1.5
Figure 1.6
NOTE:
• For best results, fill the water tank with distilled water.
• DO NOT add water through the nozzle or mist tube. [Figure 1.7]
• DO NOT add essential oils or medicated vapor liquids directly
into the water tank or through the mist tube. [Figure 1.8]
Figure 1.7
Figure 1.8

EN
11
7. Carefully place the water tank back on
the base, making sure to align the water
tank cap with its respective opening.
[Figure 1.9]
8. Turn the safety lock to the position.
[Figure 1.10]
9. Replace the nozzle. [Figure 1.11]
Figure 1.9
Figure 1.10
NOTE: Wipe o any excess water on the top and bottom of the base before replacing the water tank.
Figure 1.11

EN
12
OPERATION
General Operation
1. Place the humidifier on a flat, elevated
surface. [Figure 2.1]
2. Properly fill the water tank as mentioned
in the Getting Started section (page 9).
3. Plug the humidifier into a powered
electrical outlet. The humidifier will
chime, indicating that it is connected to
a power source.
4. Press once to turn on the humidifier.
The humidifier will start producing mist.
[Figure 2.2]
5. (Optional) Press the mist level controls
to change the mist level.
[Figure 2.3]
6. Press once more to turn o the
humidifier.
Figure 2.1
Figure 2.2
Figure 2.3
ON / OFF DISPLAYW ARML IGHT
ON / OFFD ISPLAY WARM LIGHT HUMID ITYT IMER

EN
13
Button Controls
Power Button
Press once to turn on or turn o the humidifier.
NOTE:
• For added convenience, the same button controls can be found on the included remote control.
• The LED display will automatically dim after 10 seconds of inactivity while the humidifier is operating.
Display Button
Press once to turn on or turn o the display on the humidifier.
• Switching Temperature Units: To change the temperature units on the
humidifier from °C to °F, press and hold for 2 seconds.
Warm Mist Button
Press once to turn on or turn o the warm mist function on the humidifier.
Night Light Button
Press once to turn on or turn o the built-in night light.
NOTE:
• CAUTION: The warm mist being produced is 40°C (104°F ). Do not place your bare hands,
face, or other exposed skin over the nozzle while using the warm mist function.
• The warm mist function will remain o if the humidifier is not producing mist.
• Allow 10 minutes for the humidifier to warm up. The humidifier will start to produce warm
mist 15 minutes after pressing .
NOTE: The night light can be turned on or turned o while the humidifier is on standby
(plugged in, but not producing mist).

EN
14
Button Controls (cont.)
Chart A
Humidity Button
The humidity button has 3 functions for this humidifier:
i. Auto Mode: Press once to activate the automatic (Auto) mode for
the humidifier. The Auto Mode will produce mist as needed to maintain
the relative humidity (RH) at a comfortable level based on the ambient
temperature [Chart A]. To turn o Auto Mode press once, and the “AUTO”
symbol will disappear from the display.
NOTE: Pressing any of the mist level controls while using Auto Mode will automatically
turn o Auto Mode.
Ambient
Temperature (°C)
Relative Humidity
(%RH)
≤ 19°C 70%
20°–21°C 65%
22°–23°C 60%
24°–25°C 55%
26°–27°C 50%
28°–29°C 40%
30°–32°C 35%
33°–36°C 30%
≥ 37°C 25%

EN
15
Figure 3.1 Figure 3.2
ON / OFF DISPLAYW ARML IGHT HUMID ITYT IMER
ii. Customizable Humidity
1. Hold for two seconds to access the humidity level selection. You will see
“Mist Level” at the bottom right corner of the display along with a flashing
number above it, indicating that you can now select a humidity level. [Figure 3.1]
2. Use + or - to select a humidity level anywhere from 30–80% RH. Please note
that the adjustable levels increase and decrease in increments of five. [Figure 3.2]
3. The relative humidity section on the display will flash 5 times before the
programmed humidity level is set. The display will then show the humidity icon
along with the current humidity level, and the humidifier will start to produce
mist until it reaches the programmed level.
4. The humidifier will stop producing mist once it reaches the programmed level.
It will resume operation when the humidity drops below 3% of the programmed
level in order to maintain the humidity in the room.
5. To cancel the Customizable Humidity Mode, press while the “Mist Level”
message is on the display.
NOTE:
• When selecting your desired humidity level, you can also press to confirm your selection.
• While the humidifier is operating on the Customizable Humidity mode, you can press + or -
to program a dierent humidity level.
• Pressing the mist level controls will cancel the Customizable Humidity Mode.
iii. Cancel Mist Functions: To cancel any mist function while the humidifier is
operating, simply press .

EN
16
Timer Button
The humidifier is equipped with a built-in 12-hour timer. The humidifier will
automatically turn o when the programmed timer finishes counting down.
1. Press to activate the function.
2. Use the + or - buttons to select a time anywhere from 1–12 hours.
[Figure 4.1]
3. Once you have selected your desired time, the timer section on the display
will flash 5 times before the timer is set. [Figure 4.2]
4. To cancel the timer function, keep pressing the until the timer section on
the display reads “----”. [Figure 4.3]
NOTE: The device will automatically turn o when the timer has finished counting down.
Figure 4.2
X5 ON / OFF DI SPLAYW ARML IGHT HUMI DITY TIME R
ON / OFF DISP LAYW ARML IG HT HUMIDIT YT IMER
Figure 4.3
Figure 4.1
Button Controls (cont.)

EN
17
Mist Level Controls
Humidity Sensor
Press the mist level controls at the bottom of the control panel to select a mist
level for the humidifier. There are 5 mist levels to choose from. Each level has its
own button. You can also use the + or - buttons to select a mist level.
The humidity sensor on the power cord is a vital component to this appliance. Please
note the following tips to ensure that the sensor is properly functioning:
• DO NOT pull on the humidity sensor or the cord it is attached to.
• DO NOT point the nozzle toward the humidity sensor.
• DO NOT allow excessive moisture to build up inside the sensor. This will result in
incorrect relative humidity readings. [Figure 5.1]
• If there is moisture inside the humidity sensor, turn o the humidifier and allow the
sensor to completely dry before resuming use.
• DO NOT use hot air to dry the sensor. Doing so will cause it to malfunction.
Figure 5.1

EN
18
Automatic Shut O
Memory Function
The humidifier will automatically turn o when all of the water in the tank has been
diused, or when a programmed timer has finished counting down. When the water
level is low the display will continue showing “ ” until more water is added to the
water tank. [Figure 6.1]
The humidifier will remember its programmed settings when turned o, and will resume
these settings when it is turned back on. Please note that the humidifier must remain
plugged in for this memory function to work.
NOTE: The memory function does not work with the built-in timer.
ON / OFF DISP LAYW ARML IGHT HUMID ITYT IMER
Figure 6.1

EN
19
Figure 7.1
Figure 7.2
Figure 7.3
USING THE AROMA BOX
Your new humidifier can also be used as an aroma diuser to provide added
comfort in your home.
1. Turn o and unplug the humidifier from
its power source.
2. Locate the aroma box at the back of the
base. [Figure 7.1]
3. Gently push the aroma box into the
base, and it will automatically spring out.
Once the the aroma box is released,
remove it from the base.
[Figures 7.2 & 7.3]

EN
20
4. Add 2-3 drops of essential oil on the
aroma pad. [Figure 7.4]
5. Carefully replace the aroma box. Fill the
water tank with water and gently place
it back on the base as mentioned in
the Getting Started section (page 9).
[Figure 7.5]
6. Plug in and turn on the humidifier.
Figure 7.5
Figure 7.4
NOTE:
• You can also add medicated vaporizing steam liquid to the aroma pad.
• The aroma pad can be cleaned and reused after diusing essential oils (see page 27).
USING THE AROMA BOX (cont.)
/