Page is loading ...

E60
Instructions For Use. Page 1
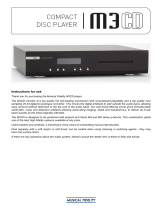
E60 CD PLAYER
INSTRUCTIONS FOR USE
Thank you for purchasing the Musical Fidelity
Elektra E60 CD Player. Used properly and carefully, it
should give you many years of outstanding musical
reproduction.
The E60 is the result of many years painstaking
research and development. It is designed for ultra-high
definition performance.
Aesthetically, the E60 is a perfect match for the
Elektra E10 or E101 amplifiers and the E50 tuner.
Together, they form one of the finest hi fi systems that you
can own today.
Dust regularly with a soft duster or soft brush but do
not use cleaning or polishing agents - they may harm the
surface finish.
If you have any questions about anything in your
audio system, please consult your dealer who is there to
help and advise you.
INTRODUCTION

E60
Instructions For Use. Page 2
IMPORTANT!
This unit is supplied in the UK with a mains lead fitted with a moulded 13 amp plug. If,
for any reason, you need to cut off this plug, please observe the following safety precautions.
Please dispose of the cut-off plug safely. It must not be plugged into a mains power
supply.
The wires in the mains lead supplied with this appliance are coloured in accordance with
the following code:
Green and yellow..............Earth
Blue...............................Neutral
Brown................................Live
WARNING - THIS APPLIANCE MUST BE EARTHED.
As the colours of the wires of the mains lead of this appliance may not correspond with
the coloured markings identifying the terminals in your plug, proceed as follows:
• The wire which is coloured green-and-yellow must be connected to the terminal in the
plug which is marked with the letter E or coloured green or green-and-yellow, or by the earth
symbol .
• The wire which is coloured brown must be connected to the terminal which is marked
with the letter L or coloured red.
• The wire which is coloured blue must be connected to the terminal which is marked
with the letter N or coloured black.
• If connecting to a BS1363 plug, a 10 amp fuse must be used.
WARNING - RADIO FREQUENCY INTERFERENCE
This hi-fi product has been tested to ensure that its operation will not be adversely
affected by normal background levels of Radio Frequency Interference (RFI). It is possi-
ble that if this product is subjected to abnormally high levels of RFI the unit may be suscep-
tible and not perform as expected. In the unlikely event of this happening on a regular
basis, please contact Musical Fidelity's Customer Service Department.
The unit has also been tested to ensure that it does not radiate excessive levels of
RFI that could affect other pieces of electronic or electrical equipment.
The electronics in modern hi-fi equipment is complex and hence may be damaged by
lightning. It is possible that during electrical storms the operation of some equipment may
be adversely affected. For complete protection of your hi-fi system during such storms,
mains plugs should be removed and aerial leads disconnected.
Always ensure that when disconnecting and reconnecting your hi-fi equipment the
mains supply is switched off.
SAFETY INFORMATION

E60
Instructions For Use. Page 3
To comply with North American regulations this equipment has been tested and
found to comply with the limits for a Class B digital device, pursuant to part 15 of the FCC
rules. These limits are designed to provide reasonable protection against harmful interfer-
ence in a residential installation.
WARNING - ANY MODIFICATIONS OR CHANGES TO THIS UNIT
NOT EXPRESSLY APPROVED BY MUSICAL FIDELITY WHO ARE
THE PARTY RESPONSIBLE FOR COMPLIANCE COULD VOID THE
USER'S AUTHORITY TO OPERATE THIS EQUIPMENT.
This equipment generates, uses and can radiate radio frequency energy and, if not
installed and used in accordance with the instructions, may cause harmful interference to
radio communications. As it cannot be guaranteed that interference will not occur in a
particular installation the user is encouraged to try to correct any interference experienced,
for instance to radio or TV broadcasts, by one or more of the following measures.
• Identify the source of interference, turn off the CD player, check whether the
interference disappears.
• Reorientate or relocate the receiving aerial.
• Increase the separation between the CD player and receiver.
• Connect the CD player into a mains outlet on a different circuit from the receiver.
• Consult a dealer or experienced TV/radio technician for help.
WARNING - THIS CD PLAYER CONTAINS A LASER.
This equipment contains a laser which emits invisible radiation. Only a qualified
service person should remove the cover or attempt to service this device due to possible
eye injury.
Optical pickup type: KSS-150A / KSS-210A
Manufacturer : Sony Corporation
Laser output : Less than 0.4mW on the objective lens
Wavelength : 760 - 800 nm
SAFETY INFORMATION

E60
Instructions For Use. Page 4
CLASS 1 LASER PRODUCTS
This CD player has been designed and manufactured according to FDA regulations
"title 21, CFR, chapter 1, subchapter J, based on the Radiation Control for Health and
Safety Act of 1968", and is classified as a Class 1 laser product. There is no hazardous
radiation during normal use because invisible radiation emitted inside this product is com-
pletely confined within the protective housing. However you must comply with the following
important cautions.
CAUTION !
• THIS CD PLAYER OPERATES WITH INVISIBLE LASER LIGHT.
WHEN THE PLAYER OPERATES LASER LIGHT IS RADIATED
INTERNALLY. DO NOT REMOVE THE PROTECTIVE HOUSINGS.
• USE OF CONTROLS OR ADJUSTMENTS OR PERFORMANCE OF
PROCEDURES OTHER THAN THOSE SPECIFIED HEREIN MAY
RESULT IN HAZARDOUS RADIATION EXPOSURE.
• IF THIS PRODUCT DEVELOPS A FAULT PLEASE CONTACT YOUR
AUTHORISED MUSICAL FIDELITY SERVICE AGENT. DO NOT
ATTEMPT TO SERVICE IT YOURSELF AND DO NOT CONTINUE TO
USE THIS PRODUCT IN A FAULTY STATE.
WARNING AND INFORMATION LABELS:
CAUTION !
CLASS 1
LASER
PRODUCT
FITTED INTERNALLY TO MECHANISM
FITTED INTERNALLY TO CHASSIS
SAFETY INFORMATION

E60
Instructions For Use. Page 5
FACILITIES AND CONNECTIONS
3
5
12
16
17
19
7
8
6
9
11
10
18
20
21
22
23
24
25
22 ONE/ALL to select repeat mode
23 PROGRAM to enter tracks for
programmed playback
24 CALL to check programmed tracks
25 CLEAR to clear programme memory
26 A/B to select continuous play mode
27 RANDOM to play back tracks in
random order
28 INTRO to play beginning of each track
27
26
28
Front Panel/Remote Control
1 CD transport drawer
2 CD player display
3 1-10, +10 for direct track selection
4 POWER mains switch to switch
the CD player ON/OFF
5 OPEN/CLOSE to open and
close the CD transport drawer
6 SEARCH fast reverse
7 SEARCH forward search
8 SKIP reverse track selector
9 SKIP forward track selector
10 STOP to stop CD playback
11 PLAY /PAUSE to start CD
playback/to stop and restart CD
playback
12 EDIT selects the recording time
on the cassette
Rear Panel
13 LINE OUTPUT
14 DIGITAL OUTPUT
15 IEC type mains inlet
Remote Control
16 REVERSE tracks played back in
reverse order
17 AUTO SPACE playback with 4 seconds
pause between each title
18/19 INDEX to select an index point
20 TIME to change time display
21 DIMMER to change brightness of LCD
display
13
14 15
65 7 8 9 10 114
1
2
12
3

E60
Instructions For Use. Page 6
INSTALLATION PRECAUTIONS
Your new E60 is designed and built to provide trouble-free performance
but it is sensible to observe a few precautions. Please ensure that you have
complied with them before you connect any AC power to your system. Retain
this guide for future reference.
ýý Do not use near water.
ýý Do not place the CD
Player near direct heat
sources such as radiators or
other equipment that pro-
duces heat.
ýý Do not remove any
covers or try to gain access
to the inside. The warranty
will be invalid if the unit has
been tampered with. There
are no user adjustments
within. Refer all service
work to an authorised Mu-
sical Fidelity agent.
þ Heed all warnings on
the back of the unit.
þþ Place your Elektra
E60 where there is ad-
equate ventilation.
þþ Only connect the
unit to a power supply of
the type marked on the
back of the unit.
þþ Position the power
supply lead and signal in-
terconnect leads where
they are not likely to be
walked on or trapped by
items placed on them.
The remote control enables you to activate the main functions of the stereo
system from the comfort of your armchair. Several of the functions described
in this manual are only available on the remote handset. Identical inscriptions
on the remote control and CD player denote identical functions. The follow-
ing should be noted when operating the player using the remote control: -
Point the remote control (transmitter) towards the display on the player. - Visual
contact must exist between the transmitter and receiver. - If the range of the
remote control decreases dramatically, replace the batteries with new ones.
Before Switching on the Stereo System
Please read carefully the instructions on the following pages. The functional
arrangement of the controls makes the stereo system easier to operate. To make
use of all the options available. You should nevertheless study these instructions
carefully.
Important! Unauthorised opening of the equipment will invalidate any
warranty claims.
Note: To help your dealer identify your CD player if after-sales service is
required, please quote the serial number written on the rear panel of the unit.
GENERAL ADVICE

E60
Instructions For Use. Page 7
BEFORE YOU SWITCH ON
Follow this routine before you
listen for the first time, and each time
you change any connections.
1 Check all the connections
to the E60 and your audio system.
2 Then check again.
3 Turn the volume control of
your amplifier to zero ( Fully anti-
clockwise).
4 Select “CD/AUX” input
via your amplifier.
5 Now you can switch on the
power, insert your CD, and carefully
advance the volume control of your
amplifier to the level you desire.
6 Enjoy the music.
INSTALLATION
Take the individual housing situa-
tion into consideration (arrangement of
mains wall sockets etc.).
Place your set on a stable, horizon-
tal, vibration-free surface where there is
no risk of the set falling over or being
subjected to vibrations. This could oth-
erwise damage the sensitive electronics
inside.
Any heat generated by the set must
be free to escape. Any heat buildup may
cause the electronic components to mal-
function or fail.
Therefore, if you place your set in a
cabinet or on a shelf, make sure that there
is enough room for heat to dissipate and
air to circulate around the set. If in doubt,
ask your dealer.
Avoid placing your set next to ra-
diators or in sunlight where additional
heat could affect the set.
Protect your set from humidity. Do
not place your set under a window, oth-
erwise, in the worst case, rain could fall
onto the set. Do not place any containers
filled with water on the set, e.g. flower
vases, potted plants, etc. If the container
should fall over and water enters the set,
damage is unavoidable.
However, if water does enter the set,
immediately pull out the power plug and
inform your dealer. He will then check
the set before you use it again.
- Liquid entering the set could
cause dangerous short-circuits which,
in the worst case, could cause a fire.
If you move your set from a cold
place to a warm place, leave the set
switched off for a few hours. Condensa-
tion could form inside the set.
CLEANING
Before cleaning the set, switch off
the main switch on the set. Clean the
housing of the set and the remote control
unit using a moist cloth. Do not use any
solvents, white spirits, thinners, etc.
Otherwise, they could damage the surface
of the unit.
AUDIO CONNECTION
The CD player is connected to the
amplifier (CD/tape socket) by audio ca-
ble with RCA type (phono) connectors.
This is connected to the LINE OUTPUT
sockets. Please see your authorised dealer
if an adapter cable is necessary for con-
nection to the amplifier. Make sure that
you plug in the leads correctly to the right
and left channels. Alternatively, you can
use the DIGITAL OUTPUTS for connec-
tion to an outboard Digital-to-Analogue
converter or digital amplifier.
NOTES ON USING COMPACT
DISCS
Always hold discs by the edges and
make sure they remain clean. Do not touch
the shiny rainbow surface. Do not stick any
paper or adhesive tape on the side of disc
with the label. Keep discs away from direct
sunlight and heat sources, such as radiators.
Do not leave discs in a car which is parked
INSTALLATION

E60
Instructions For Use. Page 8
ceed the 74 minute specified limit. Press the
OPEN/CLOSE button to close the transport
drawer again. The following message appears
in the display panel:
The CD system scans the contents of
the disc as soon as the disc compartment
is closed. The number of tracks on the CD
then appears in the display unit and the
total playing time of the CD. All numbers
of the CD tracks (max. 20) appear in the
calendar display.
PLAYING THE WHOLE DISC
Once the compact disc player has read
and displayed the contents of the CD, the
CD is ready for playing. Briefly press the
PLAY/PAUSE button to start play. An
arrow appears in the display unit to indi-
cate playback.
During playback the number of the
current selection and its elapsed playing
time and INDEX are displayed:
Note: You can see on the CD cover
whether the disc has an index or not.
If a track is played, its number disap-
pears from the calendar display. When all
tracks on the CD have been played, play-
back stops and this indication appears in
the display:
Note: - if you insert a CD the wrong
way up, i.e. with the label side facing down-
wards, the following will appear in the dis-
play unit:
When PLAY/PAUSE is pressed af-
ter inserting the CD, the disc will begin to
play automatically immediately after the
in direct sunlight, since the temperature inside
the car can become extremely high. Clean
discs with a cloth before playing them. Do
not use any solvents such as benzene, thinners,
commercially available cleaners or antistatic
spray intended for analogue discs to clean
your compact discs. After playing, store a
disc in its case again.
MOISTURE
If the unit is exposed to extreme tem-
perature fluctuations, moisture will form
inside it. Condensation will form on the
lens and on other parts inside the unit. If
the CD player is operated under these con-
ditions, the laser beam will not be able to
read the signals. In this case you should
remove the CD, close the disc compart-
ment, set the unit to Stand-by and leave it
alone for around 1 hour. The moisture will
then have evaporated and you will be able
to use your CD player again.
INSERTING AND REMOVING
COMPACT DISCS
After switching on the CD player, the
following is displayed on the display unit:
If a disc is not inserted now, the dis-
play below will appear after approximately
5 sec.:
Press the “OPEN/CLOSE” button to
open the transport drawer to insert or re-
move the CD. The following message ap-
pears in the display unit:
Then insert the CD with the labelled side
facing upwards. You can also play CD sin-
gles without an adapter. Perfect functioning
of the CD player is only ensured with com-
pact discs whose playing time does not ex-
BASIC OPERATION

E60
Instructions For Use. Page 9
disc slot has been retracted.
PLAYBACK OF A SELECTED
INDEX POINT
If the various tracks of the CD have a
call up index, you can select a particular
index during playback.
Press the appropriate INDEX key
until the desired index appears on the dis-
play, e.g.:
CONTINUOUS PLAY
Continuous play provides you with
the option of playing a certain part of the
disc over and over again.
Example: You want to listen to a cer-
tain section of a track several times in a
row. After pressing the PLAY/PAUSE key
you can select the beginning of the desired
section by pressing the A-B button .
You can use the display unit to help
you find the desired section or you can set
it by ear. When you reach the desired point,
press button A-B. The display unit will
show the symbol A- and the flashing let-
ter B.
If the scanner has reached the end of
the desired section, press A-B again. The
letters A-B will remain illuminated in the
display unit. Now the set selection will be
repeated until the continuous play is
switched off by pressing button A-B again
or by pressing buttons STOP, INTRO or
RANDOM. The unit will now return to
normal operation or to the function corre-
sponding to the button pressed.
PLAYBACK TIME
You can select the following display
modes by pushing the TIME push-button
several times.
- the length of time the track has
played
- the remaining play time of the track
- the total remaining play time of the
CD or of the programming
- the length of time the CD has played
RANDOM PLAYBACK
If RANDOM is pressed the tracks on
the discs are not played in consecutive or-
der but in random order. With this func-
tion, the individual tracks are played in a
different order each time the disc is played.
The word RANDOM appears in display
unit to provide a visual reminder that the
random function has been activated.
Press the RANDOM button to switch
off the random function.
PAUSE
Press the PLAY/PAUSE” button in
order to stop for a moment during play.
The message below appears in the display
unit:
Press Pause again to restart play.
TRACK SELECTION
The SKIP buttons can be pressed to
select a desired track in either direction.
Press one of the buttons and hold it down
until the desired track appears in the dis-
play unit.
>>| = forwards
|<< = backwards
The display unit provides additional
information.
Select the track using the numeric push-
buttons. To select a two-digit track, select the
tens digit via the “+10” push-button. Select
single digits by pressing the numeric push-
buttons within 4 seconds. The display serves
for check purposes.
SEARCH
You can use the SEARCH buttons to
start a search during playback. This per-
mits you to locate particular passages at
BASIC OPERATION

E60
Instructions For Use. Page 10
high speed. The playback mode is not
switched off.
When you release the button again,
the unit will return to the normal playback
mode.
TITLE SEARCH
Press INTRO to play back the first
ten seconds of each title on the inserted
CD disc and/or of the programmed titles
for about 10 seconds.
Press INTRO lightly again and the
CD player will playback the desired title.
REPEAT
By pressing the ONE/ALL button
once, you can play the track you have just
heard over and over again. The word RE-
PEAT ONE appears in the display unit at
the same time.
If you press the ONE/ALL button
twice, you can play the entire disc or the
programmed selections over and over
again. The word ALL appears in the dis-
play unit.
You can switch off the repeat func-
tion by pressing the ONE/ALL button
again.
EDIT
If you want to pre-program the re-
cording time when you record to a cassette,
press the button marked EDIT. The CD
player automatically selects a CD track
which can be recorded in the time you have
pre-programmed. Prepare your stereo set
for recording according to the steps de-
scribed in the operating instructions.
1. Insert a CD. The number of titles
in addition to the total playback time are
displayed on the display unit.
2. Then press the EDIT key and by
using the "1 -+10" keys you can change
the length of the recording time on both
sides of the tape, e.g. the duration of a 30-
minute recording (press "+10" 3 times and
then "0")
3. Now the tracks that will be re-
corded on side A during time set will ap-
pear. Following this the tracks that can be
recorded during the time set on side B will
appear. The CD recorder then goes into the
Pause position.
4. After pressing PLAY/PAUSE, the
CD player starts to playback the titles that
can be recorded in the pre-programmed
period of time.
5. After playing back these titles, the
real recording time for side B is displayed
for the same period as has been selected
for side A, e.g.:
Now turn the cassette in the cassette
deck to the other side and set the cassette
recorder to recording mode. Press PLAY/
PAUSE to playback the titles for side B.
Note: The recording time of side B
can no longer be changed.
CD playback takes place with the
Auto Space function, i.e. with a pause of 4
seconds between each track. The function
is useful for tape recordings when the re-
corder is equipped with an Automatic
Track Search facility.
PROGRAM MEMORY
The built-in program memory allows
you to store up to 32 tracks and to play
them back in whatever order you wish. If
you should accidentally enter more than
32 tracks, the memory will stop storing
tracks after it has reached 32. It is possible
to store a track more than once in the same
program if desired.
BASIC OPERATION

E60
Instructions For Use. Page 11
Example: You wish to listen to tracks
14, 2, 9, 9,12 and 22 in that order on a disc
with 24 tracks. When the scanner has read
the disc, 24 and the total playing time will
appear in the display unit.
Press the PROGRAM push-button to
switch over to programming mode . Press
the SKIP push-button until the desired
track number appears in the display.
Track 14 can be stored under pro-
gramme number 1 by pressing the PRO-
GRAM button. The message below ap-
pears in the display unit:
Then select by pressing the SKIP but-
ton the 2nd track and store it by pressing
the ‘PROGRAM” button.
The playback time of the newly pro-
grammed title is added to the total play-
back time programmed on the MIN and
SEC display.
You can then store all the remaining
tracks in the same way. If you want to save
a track twice in succession, reselect the
track and save it again by pressing the pro-
gram button.
Once you have stored tracks 12 and
22 according to the same procedure, briefly
press the PLAY/PAUSE button. The pro-
grammed tracks are then played.
When all programmed tracks have been
played, the CD player stops. You can play
the same tracks again by pressing the PLAY/
PAUSE button.
By pressing the CALL push-button
repeatedly, you can check which track is
saved in which position.
Note: The entire program will be
cleared as soon as you open the disc com-
partment.
STOP/CLEAR
You can stop play by pressing the
STOP button once. A track is cleared in
the opposite direction each time you press
the CLEAR push-button.
BASIC OPERATION

E60
Instructions For Use. Page 12
Basic troubleshooting of a CD player is similar to troubleshooting of any other electrical
or electronic equipment. Always check the most obvious possible causes first. To give
you a few ideas of what to look for, check the following:
Problem Probable Cause Remedy
No power when
POWER is pressed
Power plug not inserted securely Plug in securely
No playback when
disc is loaded
Disc loaded with label side down Load with label side up
Disc dirty Clean disc surface
No audio output (or
too low level output)
Connection to stereo system is
incorrect
Check connections
Playback starts when
power is switched on
Compact disc left on the disc tray Remove the disc from the
player unless timer
playback is required
Mistracking (sound
jumping)
Player receiving vibration or shock Change the installation
position of the player
Disc dirty Clean disc surface
Hum
Signal connection plug not
connected securely
Reconnect plug securely
Noise in tuner
Player too near tuner Keep a reasonable
distance between them or
switch off player’s power
Remote control unit
operation is
impossible
Player’s POWER switch set to OFF Set switch to ON
Batteries not inserted in remote
control unit
Insert batteries
If none of these actions effect a cure, please contact your dealer, or an authorised
Musical Fidelity service agent. Remember, never open the case of the E60 yourself, as this
will invalidate the guarantee.
Remember: the most vulnerable part of a CD playing system is the
disc itself. Despite various popular press statements to the
contrary, CDs are not indestructible, nor are they all perfect. The
most likely cause of non-playing of a disc is that the disc is faulty,
either due to imperfect pressing, scratches or simple dirt. If the
player always plays discs which are in good condition and within
the 74 minute time limit stated in the original CD specification, the
fault is certainly with the disc.
TROUBLESHOOTING

E60
Instructions For Use. Page 13
Musical Fidelity reserves the right to make improvements which may result
in specification or feature changes without notice.
AUDIO
Frequency response 20 - 20,000Hz +/-1dB
S/N ratio 105dB
Dynamic range Better than 95dB (1 kHz)
Harmonic distortion 0.009% (1 kHz)
Wow and flutter Not measurable (Quartz accuracy)
Channel separation Better than 92dB (1 kHz)
Output: analog 2.0V rms
digital 0.5Vp-p/75 ohm (Coaxial)
D/A converter “Bitstream” conversion
Digital filter 8-times oversampling
Analog filter 4 pole CHV filter
PICK-UP
Type Objective lens drive, optical 3 beam
laser pick-up
Objective lens 2 dimensional parallel drive
Laser type GaA1As type semiconductor laser
Wavelength 760-805 nm
GENERAL
Power requirements 100/115/230V AC 50/60Hz
Factory preset for country
Power consumption 10 Watts
Dimensions 440 x 95 x 340mm (W x H x D)
Height inludes feet
Standard accessories Remote Control Unit Battery 2 x (SUM-
4, “AAA”, “R03”)
E60 CD Player
SPECIFICATIONS
E60-97-1
/