Musical Fidelity X-RAY Specification

Category
Car media receivers
Type
Specification

This manual is also suitable for

INTRODUCTION
24 BIT CD PLAYER
INSTRUCTIONS FOR USE
Thank you for purchasing the Musical Fidelity
X-RAY 24 bit CD Player.
Used properly and carefully, it should give you many
years of outstanding musical reproduction.
The X-RAY uses the latest 24 Bit DAC technology and
jitter reduction techniques to achieve both an excellent
technical specification and unparalled sound quality.
Aesthetically, the X-RAY is a perfect match for the
X-PLORA FM tuner, X-A1 or X-A100R integrated
amplifiers or the X-P100/X-AS100 Pre/Power amplifier
combination. Together these components form one of the
finest hi-fi systems available.
Dust regularly with a soft duster or soft brush but be
careful when using cleaning or polishing agents - they may
harm the surface finish.
If you have any questions about anything in your
audio system, please consult your dealer who is there to
help and advise you.
X-RAY
Instructions For Use. Page 1
X-RAY
Instructions For Use. Page 2
IMPORTANT!
This unit is supplied in the UK with a mains lead fitted with a moulded 13 amp plug. If,
for any reason, you need to cut off this plug, please observe the following safety precautions.
Please dispose of the cut-off plug safely. It must not be plugged into a mains power
supply.
The wires in the mains lead supplied with this appliance are coloured in accordance with
the following code:
Green and yellow..............Earth
Blue...............................Neutral
Brown................................Live
WARNING - This appliance must be earthed
As the colours of the wires of the mains lead of this appliance may not correspond with
the coloured markings identifying the terminals in your plug, proceed as follows:
• The wire which is coloured green-and-yellow must be connected to the terminal in the
plug which is marked with the letter E or coloured green or green-and-yellow, or by the earth
symbol .
• The wire which is coloured brown must be connected to the terminal which is marked
with the letter L or coloured red.
• The wire which is coloured blue must be connected to the terminal which is marked
with the letter N or coloured black.
• If connecting to a BS1363 plug, a 10 amp fuse must be used.
WARNING - Radio Frequency Interference (RFI)
This hi-fi product has been tested to ensure that its operation will not be adversely
affected by normal background levels of RFI. It is possible that if this product is subjected
to abnormally high levels of RFI the unit may be susceptible and not perform as expected.
In the unlikely event of this happening on a regular basis, please contact Musical Fidelity's
Customer Service Department.
The unit has also been tested to ensure that it does not radiate excessive levels of
RFI that could affect other pieces of electronic or electrical equipment.
The electronics in modern hi-fi equipment is complex and hence may be damaged by
lightning. It is possible that during electrical storms the operation of some equipment may
be adversely affected. For complete protection of your hi-fi system during such storms,
mains plugs should be removed and aerial leads disconnected.
Always ensure that when disconnecting and reconnecting your hi-fi equipment the
mains supply is switched off.
SAFETY INFORMATION
X-RAY
Instructions For Use. Page 3
To comply with North American regulations this equipment has been tested and
found to comply with the limits for a Class B digital device, pursuant to part 15 of the FCC
rules. These limits are designed to provide reasonable protection against harmful interfer-
ence in a residential installation.
WARNING - ANY MODIFICATIONS OR CHANGES TO THIS UNIT
NOT EXPRESSLY APPROVED BY MUSICAL FIDELITY WHO ARE
THE PARTY RESPONSIBLE FOR COMPLIANCE COULD VOID THE
USER'S AUTHORITY TO OPERATE THIS EQUIPMENT
This equipment generates, uses and can radiate radio frequency energy and, if not
installed and used in accordance with the instructions, may cause harmful interference to
radio communications. As it cannot be guaranteed that interference will not occur in a
particular installation the user is encouraged to try to correct any interference experienced,
for instance to radio or TV broadcasts, by one or more of the following measures.
Identify the source of interference, turn off the CD player, check whether the
interference disappears.
Re-orientate or relocate the receiving aerial.
Increase the separation between the CD player and receiver.
Connect the CD player into a mains outlet on a different circuit from the receiver.
Consult a dealer or experienced TV/radio technician for help.
WARNING - THIS CD PLAYER CONTAINS A LASER
This equipment contains a laser which emits invisible radiation. Only a qualified
service person should remove the cover or attempt to service this device due to possible
eye injury.
Optical pick-up type: Manufacturer : Sony Corporation
Block type : BU-5BD10B. Pick-up type : KSS240A
Wavelength : 780-790 nm
SAFETY INFORMATION
X-RAY
Instructions For Use. Page 4
SAFETY INFORMATION
CLASS 1 LASER PRODUCTS
This CD player has been designed and manufactured according to FDA regulations
"title 21, CFR, chapter 1, subchapter J, based on the Radiation Control for Health and
Safety Act of 1968", and is classified as a Class 1 laser product. There is no hazardous
radiation during normal use because invisible radiation emitted inside this product is com-
pletely confined within the protective housing. However you must comply with the following
important cautions.
CAUTION !
• THIS CD PLAYER OPERATES WITH INVISIBLE LASER LIGHT.
WHEN THE PLAYER OPERATES LASER LIGHT IS RADIATED
INTERNALLY. DO NOT REMOVE THE PROTECTIVE HOUSINGS.
• USE OF CONTROLS OR ADJUSTMENTS OR PERFORMANCE OF
PROCEDURES OTHER THAN THOSE SPECIFIED HEREIN MAY
RESULT IN HAZARDOUS RADIATION EXPOSURE.
• IF THIS PRODUCT DEVELOPS A FAULT PLEASE CONTACT YOUR
AUTHORISED MUSICAL FIDELITY SERVICE AGENT. DO NOT
ATTEMPT TO SERVICE IT YOURSELF AND DO NOT CONTINUE TO
USE THIS PRODUCT IN A FAULTY STATE.
WARNING AND INFORMATION LABELS:
FITTED INTERNALLY TO
TOP OF MECHANISM
X-RAY
Instructions For Use. Page 5
FACILITIES AND CONNECTIONS
9 10 11 12
14
16
19
18
17
15
20
13
FRONT PANEL
1 POWER mains on/off switch
2 CD player display
3 PLAY /PAUSE to start CD
playback / pause and resume
CD playback
4 STOP to stop CD playback
5 SKIP BACK track selector
6 SKIP FORWARD track selector
7 CD transport loading drawer
8 OPEN/CLOSE to open and
close drawer
REAR PANEL
9 DIGITAL OUTPUT coaxial
10 DIGITAL OUTPUT optical
11 Left and right LINE OUTPUTS
12 IEC type mains inlet
REMOTE CONTROL
13 OPEN/CLOSE
14 Direct track access buttons
15 Special function buttons - see manual
for details
16 SEARCH buttons to scan forwards or
backwards
17 TRACK back/forward buttons to change
to the last/next track
18 INDEX back/forward buttons to select
an index point
19 PLAY/PAUSE to start and pause
playback
20 STOP to stop playback
1 2 3 4 5 6 7 8
X-RAY
Instructions For Use. Page 6
INSTALLATION PRECAUTIONS
Your new X-RAY is designed and built to provide trouble-free performance
but it is sensible to observe a few precautions. Please ensure that you have complied
with them before you connect any AC power to your system. Retain this guide for
future reference.
GENERAL ADVICE
þ Heed all warnings on
the back of the unit.
þþ Place your X-RAY
where there is adequate
ventilation.
þþ Only connect the
unit to a power supply of
the type marked on the
back of the unit.
þþ Position the power
supply lead and signal in-
terconnect leads where
they are not likely to be
walked on or trapped by
items placed on them.
ýý Do not use near water.
ýý Do not place the
X-RAY near direct heat
sources such as radiators or
other equipment that pro-
duces heat.
ýý Do not remove any
covers or try to gain access
to the inside. The warranty
will be invalid if the unit has
been tampered with. There
are no user adjustments
within. Refer all service
work to an authorised Mu-
sical Fidelity agent.
The remote control enables you to activate the main functions of the CD player
from the comfort of your armchair. Several of the functions described in this manual
are only available on the remote handset. Identical inscriptions on the remote con-
trol and CD player denote identical functions. The following should be noted when
operating the player using the remote control.
- Point the remote control (transmitter) towards the display on the player.
- Visual contact must exist between the transmitter and receiver.
- If the range of the remote control decreases dramatically, replace the
batteries with new ones.
Before Switching on the Stereo System
Please read carefully the instructions on the following pages. The functional
arrangement of the controls makes the stereo system fairly easy to operate. You
should nevertheless study these instructions carefully.
Important! Unauthorised opening of the equipment will invalidate any
warranty claims.
Note: To help your dealer identify your CD player if after-sales service is
required, please quote the serial number written on the rear panel of the unit.
X-RAY
Instructions For Use. Page 7
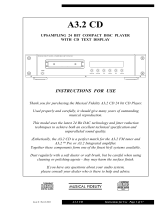
INTRODUCTION
Congratulations on your purchase of
an X-RAY 24 BIT CD player.
The X-RAY uses the latest 24 bit
delta-sigma DAC technology along with
clock and data re-timing circuitry and a
highly stable CMOS oscillator master
clock to achieve an excellent technical and
sonic performance. The X-RAY's excep-
tionally low jitter gives both improved
sound quality and very consistent results
from disc to disc. In addition, for this
model Musical Fidelity developed a
sophisticated linear phase 5 pole analogue
filter which is situated after the Digital to
Analog converter to remove nearly all
digital artefacts above the audio band.
This greatly reduces the spurious noise
and aliasing breakthrough inherent in the
CD process giving improved sound quality
and consistent results with a wide range of
amplifiers.
INSTALLATION
Place your CD player on a stable, hori-
zontal, vibration-free surface where there is
no risk of it falling over or being subjected
to vibrations. Avoid placing your CD player
next to radiators or in direct sunlight.
Protect your CD player from humid-
ity. Avoid placing it under a window. Do not
place any containers filled with water on the
CD player e.g. flower vases or potted
plants. If water does enter the CD player,
immediately pull out the mains plug from the
wall socket and inform your dealer, who
should then check the set before you use it
again.
- Liquid entering the CD player
could cause dangerous short-circuits
which, in the worst case, could cause a
fire.
If you move your CD player from a
cold place to a warm place, leave it switched
off for a few hours before using it again. Con-
densation could form inside the unit and must
be allowed to evaporate.
CLEANING
Before cleaning the CD player always
switch off the main switch and remove the
mains plug from the wall outlet. Clean the
housing and the remote control unit using a
moist cloth. We do not advise that you use
any solvents, white spirits, thinners, etc. as
they could damage the surface finish of the
unit.
AUDIO CONNECTION
The CD player should be connected
to an amplifier (CD or Aux input) by an in-
terconnect cable with RCA/phono type
connectors. This is connected to the Left
and Right AUDIO OUTPUT sockets on the
rear panel of the CD player. Alternatively,
you can use the DIGITAL OUTPUTS (Co-
axial or Optical) for connection to an out-
board Digital-to-Analogue converter or dig-
ital amplifier.
NOTES ON USING COMPACT-
DISCS
Always hold discs by the edges and
make sure they remain clean. Do not touch
the surface. Do not stick any paper or ad-
hesive tape to either side of the disc. Keep
discs away from direct sunlight and heat
sources, such as radiators. Do not leave
discs in a car which is parked in direct sun-
light, since the temperature inside the car can
become extremely high. Clean discs with a
cloth before playing them. Do not use any
solvents such as benzene, thinners, commer-
cially available cleaners or antistatic spray
intended for analogue discs, to clean your
compact discs. After playing, always store
a disc in its case again.
INSTALLATION
X-RAY
Instructions For Use. Page 8
The legend 'DISC' will light up in the dis-
play to show that the CD player is ready to
load a disc.
Once the drawer is fully out, insert the
CD with the labelled side facing upwards
and then either press the OPEN/CLOSE
or PLAY/PAUSE button to close the trans-
port drawer again.
If PLAY/PAUSE is pressed the CD
player will go straight into playback mode,
the arrow indicating playback will appear
and the current track, index point and
elapsed track time will be displayed as pre-
viously shown.
If OPEN/CLOSE is pressed the CD
player scans the contents of the disc as soon
as the disc compartment is closed and a
message similar to that following, will ap-
pear on the display:
The 'DISC' legend indicates that a disc
is loaded, the left-hand digits indicate the
number of tracks on the CD (12 in this ex-
ample). The right-hand ones, the total play-
ing time of the CD. After 3-4 seconds if no
button is pressed the display will then
change to
indicating that a disc is loaded but not
yet playing. To start play, briefly press the
PLAY/PAUSE button, an arrow appears
on the display to confirm playback and the
display changes to show the current track,
index point and elapsed track time, again
as shown previously.
When all tracks on the CD have been
played, playback stops and this indication
appears on the display:
BASIC OPERATION
MOISTURE
If the unit is exposed to extreme tem-
perature fluctuations, moisture can form in-
side. Condensation can form on the lens
and on other parts inside the unit. If the CD
player is operated under these conditions,
the laser beam may not be able to read the
disc. In this case you should remove the
CD, close the disc compartment and leave
the unit switched on for an hour or so. This
will allow sufficient time for the moisture to
evaporate and you will then be able to use
your CD player again.
LOADING AND PLAYING
COMPACT DISCS
After switching on the CD player, the
following is displayed on the display as the
machine begins to search for a disc:
If there is a disc loaded, after 3-4 sec-
onds the X-RAY will automatically start
playing and information similar to that fol-
lowing will be displayed in the display.
The first digit indicates the number of
the currently playing track, the second
smaller digit indicates the current index point
(see explanation later) and the final digits
indicate the elapsed playing time for the cur-
rent track (2 minutes 1 second in this ex-
ample).
However, if no disc is loaded the X-
RAY will display the following after ap-
proximately 3-4 seconds.
In this case, press the “OPEN/
CLOSE” button to open the transport
drawer and insert the desired CD.
X-RAY
Instructions For Use. Page 9
TRACK SELECTION
To change track, the track skip but-
tons |<< and >>| can be pressed to jump
forwards or backwards one track in either
direction. If either button is held down the
X-RAY will quickly step through the
available tracks in the required direction.
Alternatively, you can select a specific
track by directly entering a track number
(using the numeric push-buttons) and then
pressing PLAY/PAUSE. For example to
select track 2 you would press 2 (a flash-
ing 2 will be displayed) then PLAY/PAUSE.
To select track 27 similarly you would press
2 then 7 then PLAY/PAUSE.
STOP
You can stop playback at any time by
pressing the STOP button once.
PLAYBACK OF A SELECTED
INDEX POINT
Some CDs contain index points within
a track to separate a musical piece into dif-
ferent movements. If used these index points
will normally be listed on the CD track list-
ing on its box. With these discs you can se-
lect a particular index point during playback.
To change index, the index skip but-
tons |< and >| can be pressed to jump
forwards or backwards one index in either
direction. If either button is held down the
X-RAY will quickly step through the avail-
able index points in the required direction.
Whilst playing a disc the display always
shows the current index point as the smaller
digit(s) to the right of the main track indica-
tion.
In the example above the current track
is number 4 and the current index point is
number 2.
PLAY/PAUSE
Pressing the "PLAY/PAUSE" button
whilst a disc is playing pauses playback of
the disc. The pause symbol ( || ) appears in
the display window (see below). The disc
will continue spinning but the track does not
advance and the X-RAY's output is muted.
Pressing PLAY/PAUSE again restarts
playback at the place where you left off.
SEARCH
You can use the SEARCH buttons to
fast forward or fast rewind during playback
similar to the way you can with Video or
Tape cassette players. This permits you to
locate particular passages at high speed with
the audio playback of the CD still active.
Pressing the search forwards button
(>>) fast winds forwards whilst the search
backwards button (<<) fast winds back-
wards.
As the unit searches through a track
the track time remaining display (far right
digits) will be seen to rapidly advance in the
required direction.
For both directions the unit will return
to the normal playback mode once the but-
ton is released.
DISPLAYING PLAYBACK TIME
There are 3 playback time display
modes cyclically accessed by pushing the
TIME button. The default mode (e.g. after
switch on) shown below indicates the
elapsed time for the currently playing track
(2 mins 1 sec for this example).
Pushing the TIME button once changes
the display to show the remaining time for
BASIC OPERATION
X-RAY
Instructions For Use. Page 10
the current track (4 mins 29 sec for this
example) as below:
Pushing the TIME button again changes
the display to show the remaining time for the
whole disc (58 mins 12 secs below):
A third press of the TIME button will
now bring the display back to the first (elapsed
track time display) and so on.
REPEAT PLAYBACK
The REPEAT button allows the repeated
playback of either 1 track or all tracks on the
disc.
By pressing the REPEAT button once,
you can repeat the entire disc (or the pro-
grammed selections - see later) over and over
again. The legend REPEAT appears on the
display at the same time as shown below.
If you press the REPEAT button twice,
just the current track is repeated. The leg-
ends REPEAT and 1 appear on the display
as below.
In this example, track 2 will be repeat-
edly played.
CONTINUOUS PLAY
Continuous play provides you with the
option of playing just a certain section of the
disc over and over again.
You can use the display to help you find
the desired section or you can set it by ear.
When you reach the desired starting point,
SPECIAL FEATURES
press button A/B. The display will show the
flashing symbol A-
Once the disc has reached the end of
the desired section, press the A-B button
again. The letters A-B will now be illumi-
nated in the display.
Now the selection you have chosen will
be repeated until the continuous play is
switched off by pressing button A-B again
or by pressing buttons STOP, INTRO or
SHUFFLE.
SHUFFLE PLAYBACK
If SHUFFLE is pressed the tracks on
the discs are not played in consecutive or-
der but in random order. The individual
tracks will also be played in a different or-
der each time the disc is played. The word
SHUFFLE appears on the display to pro-
vide a visual reminder that the SHUFFLE
function has been activated.
If the next track button >>| is pressed
whilst in SHUFFLE mode the X-RAY will
randomly select a new track to play from
those available on the disc which it has not
already played. Press the SHUFFLE but-
ton again to switch off the shuffle random
playback function.
X-RAY
Instructions For Use. Page 11
INTRO/TITLE SEARCH
The INTRO function allows you to play
back just the start of each track on the disc
to, for instance locate by ear a preferred
track.
The first ten seconds of each title on
the CD are played (or the first 10 seconds
of the programmed titles). The playback ar-
row in the display window flashes to indi-
cate that this mode is activated.
Press INTRO again and the CD player
will switch to normal playback starting from
the title which is currently playing.
PROGRAMMING / R.M.S
The built-in program memory (Ran-
dom Music Selection function) allows you
to store up to 24 tracks and to play them
back in the order in which you store them.
Each track is stored as a 'STEP' in the pro-
gram. It is possible to store a track more
than once in the same program if desired.
Example: You wish to listen to tracks
14, 7, 9, 9 and 12 in that order on a disc.
With the disc loaded and the player
stopped first press the numeric button cor-
responding to the first track you wish to store
(14 in our example). That track number will
appear in the display as below.
Now press the PROGRAM push-but-
ton and the display will change to show to
currently programmed track (14), the step
number (1) and the total playing time of all
programmed tracks so far. The RMS logo
also lights to show that Random Music Se-
lection (i.e. program) mode is active.
SPECIAL FEATURES
Next the second track to be pro-
grammed can be selected (7 in our exam-
ple) either by entering the required number
with the numeric buttons or by using the
track skip buttons (|<< and >>|). As the
second track number is selected the step
number will be seen to change to a flashing
2 indicating the program step about to be
filled.
Once the second track is selected on
the display, store it by pressing the PRO-
GRAM button. The display will now change
to show the second programmed step. The
step number will now stop flashing, indicat-
ing that this step has been filled. The play-
back time of the newly programmed title is
added to the total playback time shown on
the min. and sec display (12 mins 1 sec in
our example).
You can then store all the remaining
tracks in the same way.
If you want to save a track twice in
succession (for example 9 followed by 9)
first program in track 9 as normal then
reselect track 9 and save it again by press-
ing the program button.
If you should accidentally enter more
than 24 tracks, the memory will stop stor-
ing tracks after it has reached 24 and the
message FULL will appear in the display as
shown.
If at any time you make a mistake or
wish to delete a track from the list pressing
the CLEAR button will erase the last step.
Repeated pressing of CLEAR will then
erase each step in reverse order.
Once you have stored all your desired
X-RAY
Instructions For Use. Page 12
tracks according to the same procedure,
briefly pressing the PLAY/PAUSE button
will start playback of your program.
When all programmed tracks have
been played, the CD player stops. You can
then if desired, play the same track selec-
tion again by pressing the PLAY/PAUSE
button.
If before playing back your program
you wish to check your selection, the
CHECK button can be used to step through
each step of the program in turn.
Note: The entire program will be
cleared if you open the disc compartment
to load another disc.
AUTOSPACE
The X-RAY's AUTOSPACE function
can be used to insert 4 second silent spaces
in between each track as it is played back.
This can be useful when making cassette re-
cordings of CDs. Some cassette recorders
feature a track skip function which uses the
space between tracks to locate each one
individually. However, some CDs do not
have enough space between tracks for this
function to operate properly. AUTOSPACE
can solve this problem.
Pressing the AUTOSPACE button
once activates the function. The legend
SPACE will appear in the display as below
In this mode, once the X-RAY has
reached the end of a track the SPACE leg-
end will begin to flash and the elapsed time
part of the display will change to count down
from four seconds to zero before play of the
next track commences as shown opposite:
.
.
.
.
Once zero is reached the SPACE leg-
end stops flashing and play continues at the
start of the next track.
DISPLAY
The X-RAY's display can be dimmed
or switched off with the DISPLAY button
on the remote control. Pushing the button
once switches the display off. Pushing the
button a second time brings the display
back on but dimmed. A third press returns
the display to full brightness. When in dis-
play off mode pressing any button will cause
the display to return for 2-3 seconds to con-
firm the new settings before again switch-
ing off.
SPECIAL FEATURES
X-RAY
Instructions For Use. Page 13
Basic troubleshooting of a CD player is similar to troubleshooting of any other electrical
or electronic equipment. Always check the most obvious possible causes first.
To give you a few ideas of what to look for, check the following:
Problem Probable Cause Remedy
No power when POWER is pressed Power plug not inserted securely Plug in securely
No playback when disc is loaded Disc loaded with label side down Load with label side
up
Disc dirty Clean disc surface
No audio output (or too low level
output)
Connection to stereo system is
incorrect
Check connections
Playback starts when power is switched
on
Compact disc left on the disc tray Remove the disc from
the player unless timer
playback is required
Mistracking (sound jumping) Player receiving vibration or shock Change the installation
position of the player
Disc dirty Clean disc surface
Hum Signal connection plug not
connected securely
Reconnect plug
securely
Noise in tuner Player too near tuner Keep a reasonable
distance between units
or switch off players
power
Remote control unit operation is
impossible
Players POWER switch set to
OFF
Set switch to ON
Batteries not inserted in remote
control unit
Insert batteries
TROUBLESHOOTING
If none of these actions effect a cure, please contact your dealer, or an authorised
Musical Fidelity service agent. Remember, never open the case of the X-RAY yourself, as
this will invalidate the guarantee.
Remember: the most vulnerable part of a CD playing system is the
disc itself. The most likely cause of a non-playing disc is that the
disc itself is faulty, scratched or simply dirty.
X-RAY
Instructions For Use. Page 14
Musical Fidelity reserves the right to make improvements which may result
in specification or feature changes without notice.
SPECIFICATIONS
X-RAY-98-2
24 BIT CD PLAYER
DAC architecture 24 bit Delta-Sigma (Bitstream)
8x oversampling
Frequency response 10Hz - 20kHz + 0.2dB
S/N ratio > 96dB unweighted
> 105dB 'A' weighted
THD < 0.006% 10Hz - 20kHz unweighted
< 0.003% 10Hz - 20 kHz 'A' weighted
Total correlated jitter < 170 pS
De-emphasis error < + 0.1dB
Linearity < + 0.2dB to -80dB
Wow and flutter Unmeasurable
Power requirements 100/115/230V AC 50/60Hz
Factory preset for country
Power consumption 15 Watts
Dimensions (approx.) 230 x 110 x 320 mm (W x H x D)
Height and width include feet,
depth includes terminals
Standard accessories Remote Control Handset, 4 Batteries
(SUM-4, AAA, LR03)
  • Page 1 1
  • Page 2 2
  • Page 3 3
  • Page 4 4
  • Page 5 5
  • Page 6 6
  • Page 7 7
  • Page 8 8
  • Page 9 9
  • Page 10 10
  • Page 11 11
  • Page 12 12
  • Page 13 13
  • Page 14 14

Musical Fidelity X-RAY Specification

Category
Car media receivers
Type
Specification
This manual is also suitable for

Ask a question and I''ll find the answer in the document

Finding information in a document is now easier with AI