
Software & Application
User Guide
G52-XXXX1HA

Software Application Guide
Preface
ii
Software Application Guide
Preface
Copyright Notice
The material in this document is the intellectual property of MICRO-STAR INTERNA-
TIONAL. We take every care in the preparation of this document, but no guarantee is
given as to the correctness of its contents. Our products are under continual improve-
ment and we reserve the right to make changes without notice.
Trademarks
All trademarks are the properties of their respective owners.
MSI
®
is registered trademark of Micro-Star Int’l Co.,Ltd.
NVIDIA
®
is registered trademark of NVIDIA Corporation.
ATI
®
is registered trademark of ATI Technologies Inc.
AMD
®
is registered trademarks of AMD Corporation.
Intel
®
is registered trademarks of Intel Corporation.
Windows
®
is registered trademarks of Microsoft Corporation.
AMI
®
is registered trademark of American Megatrends Inc.
Award
®
is a registered trademark of Phoenix Technologies Ltd.
Sound Blaster
®
is registered trademark of Creative Technology Ltd.
Realtek
®
is registered trademark of Realtek Semiconductor Corporation.
JMicron
®
is registered trademark of JMicron Technology Corporation.
iPad
®
, iPhone
®
and iPod
®
are registered trademarks of Apple Inc.
Lucid
®
is trademark of LucidLogix Technologies, Ltd.
Revision History
Revision Revision History Date
V1.0 First release 2010/10
V1.1 Second release 2011/03
V1.2 Add VIRTU 2011/04
V1.3 Update Conter Center for AMD CPU 2011/05
V1.4 Add CLICK BIOS II 2011/06
V1.5 Add VIRTU Universal MVP and Network Genie 2012/01
Technical Support
If a problem arises with your system and no solution can be obtained from the user’s
manual, please contact your place of purchase or local distributor. Alternatively, please
try the following help resources for further guidance.
Visit the MSI website for FAQ, technical guide, BIOS updates, driver updates,
and other information:
http://www.msi.com/service/download/
Contact our technical sta at:
http://support.msi.com/
■
■
■
■
■
■
■
■
■
■
■
■
■
◙
◙

Software Application Guide
Preface
Software Application Guide
Preface
iii
About this guide
This Software Application Guide describes how to install and use the software applica-
tions that come with the MSI’s mainboards. Each chapter describes one of the software
applications. It can help you to operate easily when you use the advanced software
applications designed by MSI.
Control Center - this chapter describes Control Center overview, how to moni-
tor your mainboard hardware, read CPU, memory information and use Control
Center to overclock the system.
Super-Charger - this chapter guides you with Super-Charge to charge your
iPad, iPhone and iPod.
Winki III - this chapter describes how to enter Winki III, introduces the main
window of Winki III and hotkeys.
Audio Genie - this chapter describes how to install and use Audio Genie.
Video Genie - this chapter describes Video Genie overview, and how to enable
Video Genie.
Network Genie - this chapter describes system requirement of Network Genie,
how to select network mode and set applications priority.
Teaming Genie - this chapter describes system requirement of Teaming Genie,
how to install Teaming Genie, Teaming Genie overview, Team mode and how
to create a team.
Live Update 5 - this chapter describes Live Update 5 overview, and how to
update your system.
EasyViewer - this chapter describes functions of Easy Viwer, and how to enable
the 3D eect.
VIRTU - this chapter describes VIRTU, how to connect the display and how to
use i-Mode and d-Mode.
VIRTU Universal MVP - this chapter describes VIRTU Universal MVP, how
to connect the display and how to use i-Mode, d-Mode, HyperFormance and
Virtual Vsync.
CLICK BIOS II - this chapter describes how to use CLICK BIOS II to change
BIOS settings.
◯
◯
◯
◯
◯
◯
◯
◯
◯
◯
◯
◯

Software Application Guide
Preface
iv
Software Application Guide
Preface
CONTENTS
Control Center ................................................................................................1
Control Center Overview ......................................................................................... 2
System Information ................................................................................................. 5
Overclock ................................................................................................................ 7
Green Power ......................................................................................................... 11
Gadget Mode ........................................................................................................ 12
Super-Charger ..............................................................................................13
Enabling Super-Charger ....................................................................................... 14
Winki III .........................................................................................................15
System Requirement ............................................................................................. 16
Entering Winki III ................................................................................................... 16
Winki III overview .................................................................................................. 19
Hotkeys ................................................................................................................. 20
Audio Genie ..................................................................................................21
Installing Audio Genie ........................................................................................... 22
Using Audio Genie ................................................................................................ 22
Hotkeys ................................................................................................................. 24
Using THX Control Panel ...................................................................................... 24
Video Genie ..................................................................................................25
Video Genie overview ........................................................................................... 26
Enabling Video Genie ........................................................................................... 26
Network Genie ..............................................................................................27
System Requirement ............................................................................................. 28
Network Genie Operation ...................................................................................... 28
Network Genie Control Panel ................................................................................ 29
Teaming Genie .............................................................................................33
System Requirement ............................................................................................. 34
Installing Teaming Genie ...................................................................................... 34
Teaming modes .................................................................................................... 34
Teaming Genie Overview ...................................................................................... 35
Creating Team ...................................................................................................... 36
Live Update 5 ...............................................................................................37
Live Update 5 overview ......................................................................................... 38
Updating The System ............................................................................................ 41
Total Installer ......................................................................................................... 42
▍

Software Application Guide
Preface
Software Application Guide
Preface
v
EasyViewer...................................................................................................43
Supported File Formats ......................................................................................... 44
Preview Mode ....................................................................................................... 44
Slide Mode ............................................................................................................ 46
3D Eect ............................................................................................................... 48
VIRTU ...........................................................................................................49
System Requirement ............................................................................................. 50
i-Mode ................................................................................................................... 50
d-Mode .................................................................................................................. 51
Installing VIRTU .................................................................................................... 51
VIRTU Operation ................................................................................................... 52
VIRTU Control Panel ............................................................................................. 53
Virtu Universal MVP ....................................................................................57
System Requirement ............................................................................................. 58
i-Mode ................................................................................................................... 58
d-Mode .................................................................................................................. 59
Installing VIRTU .................................................................................................... 59
VIRTU Operation ................................................................................................... 60
VIRTU Universal MVP Control Panel .................................................................... 61
CLICK BIOS II ..............................................................................................65
CLICK BIOS II Overview ....................................................................................... 66
BIOS Menu Operation ........................................................................................... 67
Changing Boot Priority .......................................................................................... 68


Control Center is an user-friendly software and exclu-
sively developed by MSI, helping users to monitor the
system status, overclock the system and adjust power
saving function under OS. With the help of Control Cen-
ter, making it possible to achieve easier and ecient
monitoring process and adjustments than that under
BIOS.
Control Center

2
Software Application Guide
Control Center
Software Application Guide
Control Center
Control Center Overview
After installing and activating Control Center, you will see Overclock and Green Power
tabs at the top. You can click the tab to switch the control panel.
Overclocking Tab
When you launch Control Center, you will see the Overclock tab at rst, this tab consists
of four blocks which are Mainboard, CPU, Memory and Overclock. You can monitor the
system status, adjust DRAM Timing and voltage under this panel.
Mainboard
information
CPU
information
Memory
information
Overclock
Control
Panel
Advanced
buttons
Prole
buttons
Overclocking
Mode bar
Note
Advanced and DRAM Timing button only appear when you use a Intel mainboard.
Important
The pictures in this guide are for reference only and may vary from the product you pur-
chased. Please refer to the actual screens of your system for detailed information.

Software Application Guide
Control Center
3
Software Application Guide
Control Center
OC Genie/ OC Genie II Tab
To enter the OC Genie/ OC Genie II tab, click the sub-menu under the Overclocking
tab.
Under the OC Genie/ OC Genie II tab, read the introduction on the tab rst. The func-
tions of Intel CPU and AMD CPU may be dierent, that will have dierent screens. The
following gure shows an example of AMD CPU.
OC Genie/ OC
Genie II switch
OC Genie/ OC
Genie II steps
diagram
Introduction
OC Genie Lite
switch
Control
Mode
Selection
Important
If there is a physical OC Genie button on your mainboard and when you select the Auto
mode, the OC Genie/ OC Genie II tab will show the animation as below. Follow the
steps and press the button to control OC Genie/ OC Genie II function by the Control
Center software.

4
Software Application Guide
Control Center
Software Application Guide
Control Center
Green Power Tab
Green Power is an energy saving technology that controls power supply by auto phase
switching for CPU and components. Besides, Green Power can automatically manage
your power conguration, resulting in more ecient power usage and acoustic noise
reduction. You can monitor the power supply status, system temperature and adjust
the fan speed under this panel.
Power
Supply
information
Temperature
information
Power Phase,
Fan Speed
control panel
Green
Power
Mode bar
LED Tab
To enter the LED/TEMP tab,
click the sub-menu under the
Green Power tab.
Under the LED/TEMP tab,
you can turn on/o the on-
board LEDs by clicking each
button. If your mainboard with
Dr.MOS, this screen will dis-
play the status of Dr.MOS.

Software Application Guide
Control Center
5
Software Application Guide
Control Center
System Information
This section describes how to monitor the system information, enter the advanced menu
and adjust the DRAM timing.
Mainboard Information
Mainboard information block is under the Overclock tab. You can refer to the model
name, chipset, and BIOS version of each item to be informed to the hardware status
at all time.
Mainboard Detail Information
Click the “More” button on the right side of the Mainboard
block to open the mainboard detailed information window,
including model name, chipset, BIOS, audio chip, graphic
chip and LAN chip information.
CPU Information
CPU information block is under the Overclock tab. You can read the information of
model and frequency.
Advanced (for Intel CPU)
Click the Advanced button on the right side
of the CPU block to open the Advanced
window. This window shows real-time sta-
tus of CPU cores and iGPU (only on IGP
chipsets), including frequency, ratio and
temperature.

6
Software Application Guide
Control Center
Software Application Guide
Control Center
Memory Information
Memory information block is under the Overclock tab. You can read the information of
each memory DIMM slot, including memory type, manufacturer and speed. You can
select a DIMM slot you want to read by clicking slot button.
Memory Detail Information
Click the “More” button on the right side of the
Memory block to open the memory detailed infor-
mation window, you can select a slot to read infor-
mation, including type, size, manufacturer, speed
and timing table.
CPU Detail Information
Click the “More” button on the right side of the CPU block
to open the CPU detailed information window, including
model name, specications, features and cache informa-
tion.

Software Application Guide
Control Center
7
Software Application Guide
Control Center
Overclock
Under Overclock block, you can select Cooling, Default, Cinema, and Game mode to
reach the most suitable overclocking eect. That is to say, you can set an overclocking
environment in advance, which avoids unnecessary risks and time-consuming manual
adjustment on endless testing.
Selecting Overclock Mode
Under Cinema mode, Control Center provides you 3% plus overclocking eect automat-
ically, 6% plus under Game mode, and 3% less under Cooling mode (for power saving
concerned users) respectively. You can just enjoy the fast and convenient overclocking
eect or make more adjustments based on your need.
Overclocking
Under Overclock block, also you can adjust the CPU base clock、iGPU frequency (only
on IGP chipsets), and its related voltages like CPU Vcore, PCH, DRAM and so on. In
addition, you are able to adjust memory voltage and even memory reference voltages.
The fan speed is also adjustable to meet your power saving or performance demand.
Adjusting DRAM Timings (for Intel chipset)
Click the DRAM Timing button on the right side of the Mem-
ory block to open the DRAM Timings window, you can read
and set parameters.
Important
Please refer to the BIOS chapter in the mainboard user
guide.
Every time you shut down the system, the congured set-
ting will be restored to the factory default. If you want to
use the saved settings, you have to load it every time by
clicking the “Load” button.
•
•

8
Software Application Guide
Control Center
Software Application Guide
Control Center
Applying parameters
You can do all the above mentioned adjustments under each mode, after that, please
click the “Apply” button to execute the congured setting without rebooting the system;
or you can click the “Save” button to save the adjustments for future use.
Important
Every time you shut down the system, the congured setting will be restored to the
factory default. If you want to use the saved settings, you have to load it every time by
clicking the “Load” button.
Manual Overclocking
You can adjust the CPU base clock, CPU ratio and its related voltages to create an
even better overclocking environment, after that, please click the “Apply” button. When
prompted to reboot your computer, click OK to reboot. You can also click the “Save” but-
ton to save the adjustments for future use. You may refer to the following pictures.
Adjust CPU Ratio, click Apply, it will
prompt a message for reboot.
Notication
A good CPU cooler is suggested when users have to overclock manually, the key to
overclocking through Control Center is to increase the smallest increments allowable
on related items.

Software Application Guide
Control Center
9
Software Application Guide
Control Center
Adjusting CPU/ iGPU cores ratio (for Intel CPU)
Click the Advanced button on the right side of the CPU block to open the Advanced
window. You can adjust the CPU/iGPU cores ratio.
Locking maximum GPU ratio (for Intel Chipset)
To lock GPU ratio at the maximum value, click Max. GPU Ratio button in Advanced
window, otherwise it will be dynamically adjusted.
Keeping GPU ratio
In the default setting, for keeping the GPU ratio, Control Center will startup automati-
cally when your system boots and you login. It is minimized to the system tray instead
of the taskbar. If you want to close it, right click icon on the system tray and then
click Exit.

10
Software Application Guide
Control Center
Software Application Guide
Control Center
Unlocking CPU core (for AMD CPU)
To enter the Unclock CPU Core tab, click the sub-menu under the Overclocking tab.
Under the Unclock CPU Core tab, you can unlock CPU core that is original hidden (or
disabled) in CPU to enhance the performance. Therefore, a dual or tri-core CPU turns to
be a quad-core CPU, a quad-core CPU turns to be a hex-core CPU. In another words,
you can gain a quad-core or hex-core CPU.
Unlock CPU
Core control
panel
CPU Core
Control panel
Individual
Core
Control
panel
Important
The success and the stability of core unlocking regard to the CPU physique itself. Not
any CPU could be unlocked successful; by the way, the stability of the unlocked CPU
may be tested later. You can use some burn-in programs or Benchmark to test the
stability of the unlocked CPU.
To unlock CPU core, simply select the Unlock CPU Core column to be "Enable". You
can enable/ disable each core individually when the CPU Core Control column is set
to manual. After that, please click the “Apply” button. When prompted to reboot your
computer, click OK to reboot.

Software Application Guide
Control Center
11
Software Application Guide
Control Center
Green Power
Under the Green Power tab, you can select the Green Power mode, read CPU Phase
status, also select other power phase and control fan speed.
This application provides APS, Intel SVID, and Disable mode for CPU power phase
display. In APS and Intel SVID mode, when you adjust CPU voltage, the CPU phase
control will switch to Disabled mode automatically. You can change the CPU fan and
system fan speed as well to get a good balance between performance and power sav-
ing. After setup is complete, click the “Apply” button at the bottom of the tab to apply
changes or click the “Save” button to save the adjustment for future use.
Important
Every time you shut down the system, the congured setting will be restored to the
factory default. If you want to use the saved settings, you have to load it every time by
clicking the “Load” button.
Green Power Mode
There are two preset mode for fan control.
Default: CPU fan speed: 100%, System fan speed: 100%
Silent: CPU fan speed: 50%, System fan speed: 50%
Important
The Control Center provides a safety funcation. A warning pop-up message will appear
when the CPU temperature reaches 75 degrees. Meanwhile it will automatically switch
to Default mode for maximum fan speed.

12
Software Application Guide
Control Center
Gadget Mode
Control Center provides a gadget mode to monitor the CPU frequency, iGPU frequency
and CPU temperature. Switch to gadget mode by clicking the button as shown in
picture.
Important
The GPU frequency only appears when you use the CPU with integrated GPU.

Super-Charger provides i-Pad, i-Phone and iPod charg-
ing function.
The iPad with very special charging requirements as it
requires 1.6A power supply rather than the 0.5A cur-
rent available with conventional USB interfaces. That
is ordinary computer cannot charge your iPad even at
power on status. The MSI Super-Charger is a Windows
resident program capable of revising power supply mode
of your USB port. Once an iPad is connected to your
USB port the Super-Charger sends a signal to initiate its
charging circuit.
When system goes into suspend, hibernate state or even
shutdown, Super-Charger will be still able to provide
charging function.
Super-Charger

14
Software Application Guide
Super-Charger
Enabling Super-Charger
Install and launch Super-Charger, the dialog as below will appear.
To enable Super-Charger, click the “On/O” button to On.
When a warning prompt window appears, click “Yes” to continue.
Important
When Super-Charger is enabled, the USB port will be changed to Charging mode,
therefore, the data syncing will be disabled.
Page is loading ...
Page is loading ...
Page is loading ...
Page is loading ...
Page is loading ...
Page is loading ...
Page is loading ...
Page is loading ...
Page is loading ...
Page is loading ...
Page is loading ...
Page is loading ...
Page is loading ...
Page is loading ...
Page is loading ...
Page is loading ...
Page is loading ...
Page is loading ...
Page is loading ...
Page is loading ...
Page is loading ...
Page is loading ...
Page is loading ...
Page is loading ...
Page is loading ...
Page is loading ...
Page is loading ...
Page is loading ...
Page is loading ...
Page is loading ...
Page is loading ...
Page is loading ...
Page is loading ...
Page is loading ...
Page is loading ...
Page is loading ...
Page is loading ...
Page is loading ...
Page is loading ...
Page is loading ...
Page is loading ...
Page is loading ...
Page is loading ...
Page is loading ...
Page is loading ...
Page is loading ...
Page is loading ...
Page is loading ...
Page is loading ...
Page is loading ...
Page is loading ...
Page is loading ...
Page is loading ...
Page is loading ...
-
 1
1
-
 2
2
-
 3
3
-
 4
4
-
 5
5
-
 6
6
-
 7
7
-
 8
8
-
 9
9
-
 10
10
-
 11
11
-
 12
12
-
 13
13
-
 14
14
-
 15
15
-
 16
16
-
 17
17
-
 18
18
-
 19
19
-
 20
20
-
 21
21
-
 22
22
-
 23
23
-
 24
24
-
 25
25
-
 26
26
-
 27
27
-
 28
28
-
 29
29
-
 30
30
-
 31
31
-
 32
32
-
 33
33
-
 34
34
-
 35
35
-
 36
36
-
 37
37
-
 38
38
-
 39
39
-
 40
40
-
 41
41
-
 42
42
-
 43
43
-
 44
44
-
 45
45
-
 46
46
-
 47
47
-
 48
48
-
 49
49
-
 50
50
-
 51
51
-
 52
52
-
 53
53
-
 54
54
-
 55
55
-
 56
56
-
 57
57
-
 58
58
-
 59
59
-
 60
60
-
 61
61
-
 62
62
-
 63
63
-
 64
64
-
 65
65
-
 66
66
-
 67
67
-
 68
68
-
 69
69
-
 70
70
-
 71
71
-
 72
72
-
 73
73
-
 74
74
Ask a question and I''ll find the answer in the document
Finding information in a document is now easier with AI
Related papers
-
MSI Stealth 15M User guide
-
MSI B75A-G43 GAMING User manual
-
MSI Z97 MPOWER MAX AC Quick start guide
-
MSI Z68A-GD55 series User manual
-
MSI Z68A-GD80 (G3) User manual
-
MSI B75MA-P45 User manual
-
MSI MS-7760v3.0 Owner's manual
-
MSI Z77MA-G45 User manual
-
MSI MS-7798v1.0 Owner's manual
-
MSI B75MA-G43 User manual
Other documents
-
ECS Z77H2-A2X DELUXE (V1.0) User manual
-
 Lucid Virtu MVP Installation guide
-
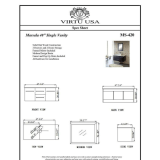 Virtu USA MS-420-S-ES Installation guide
-
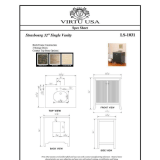 Virtu USA LS-1031T Installation guide
-
X-Micro XDVB-TCU Software Manual
-
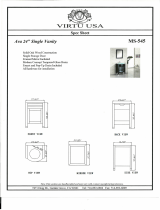 Virtu USA MS-545-G-ES Operating instructions
-
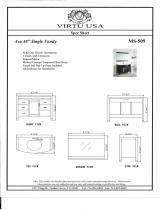 Virtu USA MS-509-G-ES Operating instructions
-
Gigabyte GA-EX38-DS4 User manual
-
 Virtu USA MDC-489-ES Installation guide
-
 Virtu USA MS-48-G-ES Installation guide


