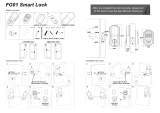
BLE Version

Tuya BLE Version User manual

  • Hello! I am an AI chatbot trained to assist you with the Tuya BLE Version User manual. I’ve already reviewed the document and can help you find the information you need or explain it in simple terms. Just ask your questions, and providing more details will help me assist you more effectively!
TUYA BLE VERSION
Version 1.0 Edition S1
Smart your life!
User Manual-Smart Cylinder
APP
Packing Accessories
Cylinder
Keycard Area
Back Knob
1
Please check the packing box and accessories when you got the
item in hand.
2
Product Specification
Fingerprint Sensor
2
1
Epoxy Card
Dimension
a
Manual
bd
Type-C Port
Manual Key
A-A
A-A
TUYA BL E VERS ION
Versi on 1.0 Edi tion S 1
Smart yo ur lif e!
User Ma nu al-Sm ar t Cylinde r
APP
33
10
58
42
42
Ø17
Reader View
Smart Lock
3
4
c
Manual Key
f
Sucker
Smart Keycard
Smart Keycard
Zoom in
Tool
e
AB
L
58
42
34
31.4
5INSTALLATION STEPS
5.1 Please use the screw driver to take off the screw on the
back knob position, refer the below Pic.1:
5.2 Please insert the cylinder to the existed lock and fix the cylinder
with the long screw as picture 2.
Pic.1 Pic.2
34
e
56
5.3 Please use the screw driver to fasten the screw on the
back knob position, refer the below picture 3:
Pic.3
5.4 Please take off the reader cover with the magnet or sucker
(included in our accessories bag),assemble 1xCR123a alkaline
battery, refer the below picture 4:
Type-C
Battery Box
Manual Keyhole
Pic.4
2
1
Notice after you insert the key into the
key hole and turn clockwise, you shall
turn the reader to unlock the door but
not to use the key to unlock the door
directly.
56
5.5 Please test with your fingerprint under the factory state,
any fingerprint will unlock the door lock, refer the below picture 5:
Pic.5
5.6 Please test the lock with key card after you configure the lock
with Tuya smart APP(Refer the Part 6).
Smar t Key car d
Notice the keycard or fingerprint can only be enrolled by the
Tuya smart APP, so it is important to install this app in your mobile
before start daily use.
Please run the Tuya smart APP and click “Add Device” on the right
top position for auto scan:
Step 2
6.1 Please register one account with your E-mail or mobile number.
6.1.1 Sign Up 6.1.2 Enter mobile or mail
Get Verification Code
6.1.3 Enter the code sent
to your mail or mobile
Please download the Tuyasmart or Smart life on Apple store or
Google play. also you can scan the QR code below to download
the APP directly.
6.Tuya APP Settings 6.2 Intelligent Configuration
6.1.4 Set password and login
Step 1 Step 3
Add Device Activate the lock
Click “Add
Done
Under Tuya smart APP interface, you can see the features for the
smart locks, such as Memeber /unlock records and settings etc.
6.3 Function Description
78
6.4 Add User Fingerprint
Under Tuya smart APP setting, you can click the fingerprint
management and add the fingerprint.
6.5 Add User Card
Step1:
Click Add Fingerprint
Step2 Select User
Step3:
Start Capturing
Step 4:
5 Times and done
910
Under Tuya smart APP setting, you can click the card Management and add the card.
Step1:
Click Add Card
Step2:
Select User
Step3:
Tap Card on the lock
induction area
6.7 Smart Linkage and Settings
Under the settings, you can click the smart linkage for more scene and more
options for the features upon the using condition.
11 12
8. Sales and Service Terms
Limited 1-year Electronic Warranty Limited Lifetime Mechanical
and Finish Warranty
This S1 product comes with a 1-year Limited Warranty on Electronic
Parts and a Limited lifetime. Mechanical and Finish Warranty against
defects in materials and workmanship under normal use to the
original residential user. Proof of purchase and ownership is
required for the warranty to be in effect.
Please read the manual carefully before use!
Any error or question in our manual or sales term, please feel free
to contact with us.
For any wrong operation or installation to the user, we do not
responsible for the duty.
For the damage caused by anthropic factor or inevitable reason,
we do not pay for the loss or maintain for free, please check our
after sale service terms.
Please do not take apart the lock if you are not technician, if
necessary, please make the operations under the guide of technician.
Notice: there maybe a little difference for product pictures with
real product, please subject to our real products.
7. Reset the Lock
Under Tuya smart APP setting, you can click the “Remove Device” to reset the
lock and the lock will be set to factory state, you can use any fingerprint to unlock
the lock.
6.8 Passage Mode
Under Tuya smart APP setting, you can tickautomatic lock switch”, under this
settingthe lock will be in always open state, you can press any valid fingerprint to
cancelthis passage mode.
13
9. FCC warnings
This device complies with part 15 of the FCC Rules. Operation is subject
to the following two conditions: (1) this device may not cause harmful
interference, and (2) this device must accept any interference received,
including interference that may cause undesired operation.
Any changes or modifications not expressly approved by the party
responsible for compliance could void the user's authority to operate the
equipment.
NOTE: This equipment has been tested and found to comply with the
limits for a Class B digital device, pursuant to Part 15 of the FCC Rules.
These limits are designed to provide reasonable protection against
harmful interference in a residential installation. This equipment
generates, uses and can radiate radio frequency energy and, if not
installed and used in accordance with the instructions, may cause harmful
interference to radio communications. However, there is no guarantee
that interference will not occur in a particular installation.
If this equipment does cause harmful interference to radio or television
reception,
which can be determined by turning the equipment off and on, the user
is encouraged to try to correct the interference by one or more of the
following measures:
-- Reorient or relocate the receiving antenna.
-- Increase the separation between the equipment and receiver.
-- Connect the equipment into an outlet on a circuit different
from that to which the receiver is connected.
-- Consult the dealer or an experienced radio/TV technician for help.
To maintain compliance with FCC’s RF Exposure guidelines, This
equipment should be installed and operated with minimum 20cm
distance between the radiator and your body: Use only the supplied
antenna.
/