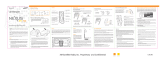
Page is loading ...

43
Delphi Corporation
1441 West Long Lake Road
Troy, Michigan 48098-5090
U.S.A.
Customer Service: [1] 877.GO DELPHI
www.delphi.com
Printed on Recycled Paper
©2005 Delphi Corporation. All rights reserved.
DPSS-05-E-051
roadyXT, the XM name, TuneSelect, and related
logos are trademarks of XM Satellite Radio Inc.
Activating your roadyXT
Activate your XM Satellite Radio service by contacting XM at
http://activate.xmradio.com or by calling 1.800.XM.RADIO (1.800.967.2346).
You will need the XM Radio ID and a major credit card.
XM will send a signal from the satellites to activate the full channel lineup.
Activation normally takes 10 to 15 minutes, but may take up to an hour
during peak busy periods.
When you can access the full channel lineup on your roadyXT, you’re done!
Press the arrow
buttons to find
channel 0. Push
the “select” button
to choose it.
You’ll see an 8-
character XM Radio
ID in the display.
(The XM Radio ID
does not use the
letters I, O, S, and F.)
Do more
• Save favorite channels as presets, which you can instantly recall by
pushing just one button.
• Save and recall the artist names and titles of your favorite songs.
• Use TuneSelect
™
to find your favorite songs when they play on any
XM channel.
• Create a personal stock ticker.
• View sports scores, news, and more.
Check out your roadyXT User Guide for more information.
Using roadyXT at home*
Turn off your roadyXT and your home
stereo. Connect your roadyXT to your
stereo as illustrated.
Place the antenna on a
window or an exterior wall
so that it points south.
Turn on your roadyXT.
To help aim the antenna, use roadyXT’s “Antenna Aiming” feature.
Press the “menu” button. Use the arrow and “select” buttons to choose
“Antenna Aiming.” This feature is most helpful when using the roadyXT in
a stationary home or office environment.
Slowly turn and tilt the antenna. The signal bars on the display will change.
Find the position that gives at least two bars on either “satellite” or
“terrestrial.”
The antenna aiming screen remains as long as it’s needed to help you posi-
tion the antenna. When you’ve found the best position, press the “menu”
button twice to return to normal operation.
*With roadyXT Home Kit, (model SA10176, sold separately)
Mounting roadyXT in your vehicle
We’ve included two types of mounts to help you install your roadyXT in
your vehicle’s interior.
Swivel Mount
Find a suitable location; the mount uses a strong adhesive and you’ll have
difficulty repositioning it after installation. Do not install this mount on a
leather surface. Make sure the air temperature is at least 60°F.
Clean the mounting surface with the surface preparation
cleaning kit, following the directions on the package.
Peel away the adhesive liner and firmly press
the swivel mount to the surface for 30 seconds.
For best results, do not touch or apply any
pressure to the vehicle mount for 24 hours.
To remove the mount, lift the adhesive pad
with your fingers or a spoon. You may warm it with a hair dryer for 2 to 3
minutes to help soften the adhesive. Remove any leftover adhesive from
the dash surface by rubbing with your finger, or use a mild cleaner as
recommended by your vehicle’s manufacturer.
You can adjust the tension of the swivel mount
by using a screwdriver.
Base of mount can be rotated to accommodate
vertical or horizontal surfaces. Choose the best
for your installation.
Caution: Never use a commercial heat gun or paint-stripping gun. This could result in damage to the unit
or to your vehicle.
Warning: roadyXT should be placed in your vehicle where it will not interfere with the function of safety features
(e.g., deployment of airbags). Failure to correctly place roadyXT may result in death and/or injury to yourself or to
others if the unit becomes detached during an accident and/or obstructs the deployment of an airbag.
Vent Mount
Find a horizontal air vent that is strong
enough to hold your roadyXT and its
cradle. Clip the vent mount into the vent.
To remove the mount, push it into the
vent and lift upwards slightly to release
the mount’s hooks from the vent vanes.
Carefully extract the mount.
Insert your roadyXT receiver
into the vehicle cradle.
Attach the power, antenna,
and audio cable (if needed).
Tuck the cables under the
plastic tab.
FCC ID: RS2SA10177
This device complies with Part 15 of the FCC Rules.
Operation is subject to the following two conditions:
1. This device may not cause harmful interference, and
2. This device must accept any interference received,
including interference that may cause undesired operation.
The Delphi XM
®
roadyXT Satellite Radio Receiver incorporates an FM transmitter and is
therefore classified as an intentional transmitter. Changes or modifications to the unit not
expressly approved by Delphi can void your authority to operate this equipment.
Warning: The FCC and FAA have not certified the Delphi XM roadyXT Satellite Radio
Receiver for use in any aircraft (neither portable nor permanent installation). Therefore,
Delphi cannot support this type of application or installation.
This is the safety alert symbol. It is used to alert you to potential personal
injury hazards. Obey all safety messages that follow this symbol to avoid
possible injury or death.
QuickGuide delphi option 7/13/05 8:54 AM Page 1

1
2
Using roadyXT in your vehicle
Because every vehicle is different, we can only provide some general
guidelines. If you need help, consult a professional installer.
• Decide which method (cassette adaptor, wired connection, or wireless
FM transmitter) is best for your vehicle and location.
• Always do a trial run before installing anything permanently. Temporarily
connect all power, audio, and antenna lines. Make sure that you receive
the XM signal and that you hear XM programming through your vehicle’s
audio system.
Audio quality
Placing the antenna
For best reception, place the XM antenna on the vehicle’s metallic roof, at least
6" from any window or sunroof. It can be placed in the front, middle, or rear
of the roof.
If the car is a hard- or soft-top convertible, you may mount the antenna on
the metal trunk lid. It should be at least 4" from the rear window. Ensure that
the antenna and cable don’t interfere with the opening or closing of the
convertible top and the trunk lid.
option 1
option 2
Warning: Failure to properly install the antenna may result in injury to yourself or to
others if it becomes detached during an accident.
Controls
Display
Use the CASSETTE ADAPTOR
if your vehicle’s audio system
has a built-in cassette player.
For a neat, fully integrated instal-
lation, use the DELPHI FM DIRECT
ADAPTOR (model SA10112, sold
separately). The FM Direct
Adaptor must be connected to
your car radio and to the car’s FM
antenna. We recommend that you
consult a professional installer.
The WIRELESS FM TRANSMIT-
TER is the easiest and quickest
way to hear XM programming
in your vehicle. Simply set your
FM radio and your roadyXT to
the same frequency.
disp – change
what you see on
the display
up and down arrows,
select – change chan-
nels, choose menu
options, TuneSelect
™
jump – return to
previous channel;
press and hold to
select one of last
six FM frequencies
used for transmitter
numbers – enter a
channel directly or
select favorite presets
menu – access
advanced features
and configuration
options
pre/dir – select
between direct
channel entry or
up to 30 presets
search – look up channels
by category or scan all
channels
memory – save
and recall up to
20 artist names
or song titles
power
signal strength –
1 to 3 bars
search by scanning
all channels
display
modes 1-5
search channels
by category
channel selection
mode – direct
entry or preset
banks A, B, or C
additional info – channel
name, channel number,
artist, song title, Stock
Ticker, and Info Extras
TIP: If you route the antenna cable through the
trunk seal, use the lowest part of the weather
seal. This should minimize any water leaks.
TIP: If you use your roadyXT’s wireless
FM transmitter, mount the XM antenna
as close to your vehicle’s FM antenna
as possible. The FM antenna may be a
wire or metallic strip embedded in the
windshield or rear window.
TIP: Don’t install the XM antenna inside your
vehicle or on a non-metallic surface. Doing so
will likely degrade the signal and you will probably
experience more signal interruptions.
vehicle vent
mount
What’s in the box?
cassette adaptor
vehicle swivel
mount
vehicle antenna
roadyXT
receiver
vehicle cradle
vehicle power
adaptor
surface prepa-
ration kit
home power
adaptor
audio cables
home cradle
roadyXT
Home Kit
sold separately
(SA10176)
home antenna
remote
Remember to pull out the clear plastic
tab from the remote battery compart-
ment before using the remote.
To remove the battery from the remote,
use your thumb to press the center of
the battery tray and pull it out. Replace
the battery with the equivalent size and
voltage, taking care to insert it with the
positive (+) side up.
up and down arrows, select –
change channels, choose
menu options, TuneSelect
power
search – look up
channels by category
or scan all channels
pre/dir – select between
direct channel entry or
up to 30 presets
disp – change what you
see on the display; show
artist name, song title,
channel number, stock
quotes, or Info Extras
menu – access
advanced features and
configuration options
+ and – change channels,
or control volume if
roadyXT is placed in a
Delphi audio system
jump – return to previous
channel; press and hold
to select one of last six
FM frequencies used for
modulator
numbers – enter a
channel directly or
select favorite presets
memory – save and
recall up to 20 artist
names or song titles
Remote Control*
*Sold separately
Additional Vehicle Kits sold separately (SA10178)
QuickGuide delphi option 7/13/05 8:54 AM Page 2
/