Page is loading ...

1/4
en – Instructions for Use – Axiom® TL REG/PX/X3 implants
0459
Anthogyr
2237 Av. André Lasquin
74700 Sallanches – France
www.anthogyr.com
E-mail: contact@anthogyr.com
Phone: +33(0)4 50 58 02 37
Validity Date: 2022-09
REF: 063IMPL-TL_NOT
SAP code: 707384 Index: B
Axiom® TL REG/PX/X3 implants
Instrucons for Use
1. Product descripon
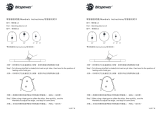
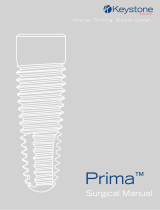
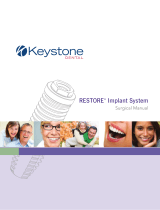
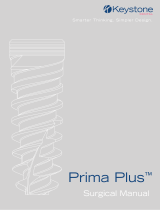
Axiom® Tissue Level
REG implants
Axiom® Tissue
Level PX implants
Axiom® Tissue
Level X3 implants
Axiom® Tissue Level REG/PX/X3 (Axiom® TL REG/
PX/X3) implants are part of the Axiom® Mul Level®
system, an implant concept which oers a range
of endosseous dental implants of various designs
(length, diameter, thread prole, plaorm, etc.) and
the corresponding prosthec parts, healing compo-
nents and ancillary instruments.
Axiom® Mul Level® implants are implants with a
BCP (Biphasic Calcium Phosphate) sandblasted en-
dosseous surface.
Axiom® Mul Level® dental implants can be used
aer extracon or aer the loss of natural teeth
to restore chewing funcon. The prosthec resto-
raons available include single crowns, bridges and
paral or full arch dentures, which are connected
to the implants via the corresponding abutments.
These instrucons for use apply to the following
dental implants:
▪Axiom® TL REG implants
▪Axiom® TL PX implants
▪Axiom® TL X3 implants
A cover screw is supplied with the implant and can
be found in the cap of the implant tube.
Materials:
Titanium-6Aluminium-4Vanadium ELI alloy:
Chemical components Composion, % (mass/mass)
Aluminium 5.50 to 6.50
Vanadium 3.50 to 4.50
Iron ≤ 0.25
Oxygen ≤ 0.13
Carbon ≤ 0.08
Nitrogen ≤ 0.05
Hydrogen ≤ 0.012
Titanium Balance
2. Intended use
Axiom® TL REG/PX/X3 implants are intended for oral
implantaon to replace missing tooth roots, and to
provide support for dental restoraon.
3. Indications
Axiom® TL implants are indicated for stabilisaon of
removable dentures or the xaon of single unit or
mulple unit restoraons.
Axiom® TL implants can be used in one-stage sur-
geries in the upper and lower jaw of parally or
fully edentulous paents to restore the funcon of
a missing tooth. They can be placed with immedi-
ate funcon in appropriate clinical situaons (good
primary stability and appropriate occlusal loading).
Axiom® TL PX implants are designed to achieve good
primary stability in so bone. They are suitable for
immediate or delayed implantaon.
Axiom® TL X3 implants are designed for immediate
use in suitable clinical situaons (sucient primary
stability and appropriate occlusive loads).
4. Clinical benefits
Restore funcon of a missing tooth: osseointegrate
in the jawbone, be biocompable, withstand mas-
cator y forces and provide support for the prosthec
components.
5. Patient type and intended user
Axiom® TL REG/PX/X3 implants are intended for use
with parally or totally edentulous adult paents
who do not present any of the condions menoned
in the "Contraindicaons" secon.
Axiom® TL REG/PX/X3 implants must be used by a
surgeon trained in dental implantology.
6. Contraindications
Axiom® TL REG/PX/X3 implants are contraindicated
in following cases:
▪Allergy or hypersensitivity to chemical compo-
nents in the materials used and mentioned in the
“Product description” section.
▪Absolute contraindications: serious diseases
(tumours, heart disease, etc.), metabolism dis-
orders, uncompensated haematologic diseases,
drug addiction, alcoholism, psychosis, functional
disorders, xerostomia, immune deficiency, leuko-
cyte disorder, local or systemic treatments (ste-
roid, anticoagulant, chemotherapy, or radiation
therapy, etc.).
▪Relative contraindications: bruxism, occlusal
stress, parafunction, unfavourable bone anatomy,
pregnancy, growth not finished, insufficient oral
hygiene, smoking lack of motivation or coopera-
tion, irradiated bone, uncontrolled periodontal
disease, oral infections, or inflammations.
▪
Localised contraindications: Excessive resorption
and/or insufficient bone quality, local radicular
residues.
Specific contraindications:
Axiom® TL X3 implants with a 3.4 mm diameter are
not suitable for single-unit tooth restoraons in the
posterior region.
7. Warning
Implant surgery is a complex dental procedure. In-
correct techniques can cause implant failure and/or
loss of bone support.
Appropriate training and qualicaon and a good
knowledge of surgical techniques with Anthogyr
products are required. Anthogyr offers specific
training.
8. Caution/Precaution
Clinical use:
Single-use devices: do not reuse or re-sterilise. Doing
so increases the risk of contaminaon and risk of
alteraon of the funconal surfaces.
It is important to perform a pre-clinical assessment
and treatment plan that takes into account the ana-
tomical constraints of the future restoraon.
Do not use an implant aer the expiry date indicated
on the packaging.
Specic instruments are necessary for placement
of PX implants in D1 bone. They are sold separately
from Axiom® surgery kits and may not be available
in all countries.
Safety information regarding Magnetic
Resonance Imaging (MRI):
The safety and compability of Anthogyr devices that
remain in the paent ’s body have not been evaluated
in the Magnec Resonance (MR) environment. They
have not been tested for heat build-up, migraon
or artefacts in MR environments. The safety of An-
thogyr devices in an MR environment is unknown.
Performing an MRI examinaon on a paent wearing
such a device may result in injuries.
9. Residuals risks and side effects
The clinical outcome of dental treatment is inu-
enced by mulple factors. The following residual
risks and possible side eects are related to the use
of Axiom® TL REG/PX/X3 and may lead to addional
dental treatment at the dental pracce:

en – Instructions for Use – Axiom® TL REG/PX/X3 implants
2/4
Residual risks:
▪additional treatment at dentist's office
▪bite/mastication/phonetic problems
▪bone compression
▪bone damage
▪damage to adjacent/opposing tooth
▪discomfort
▪hyperplasia
▪hypersensitivity/allergic reaction
▪implant fracture
▪injuries of gingiva
▪irritation/inflammation
▪
local or systemic infection (including peri-implan-
titis, periodontitis, gingivitis, fistula)
▪local pain
▪longer recovery/healing time than expected
▪loss of implant
▪loss of prosthetic component
▪nerve damage possibly resulting in chronic pain
▪paraesthesia, dysaesthesia
▪poor aesthetic outcome
▪possibility of prolongation of surgery
▪possibility of surgical implant explantation
▪possibility to swallow/inhale small parts during
the procedure
▪recall to the dentist's office
▪sinus perforation
Side effects:
▪swelling
▪local inflammation
▪bruising
▪resorption of maxillary/mandibular ridge bone
▪local infection
▪minor bleeding
10. Compatibility information
Anthogyr implants and prosthec components are
available in a wide variety of conguraons. Only
Anthogyr parts that are compable with the implant
connecon are suitable for use. For more informa-
on, please refer to the manuals listed in the “Further
informaon” secon.
11. Cleaning and disinfection
Axiom® TL REG/PX/X3 implants are supplied sterile
(GAMMA sterilisaon) and are intended for single
use. Do not clean or sterilise the implants. Cleaning,
disinfecon and sterilisaon can compromise the
essenal material and design features of the implants
and result in device failure.
12. Sterilisation
Anthogyr dental implants are supplied sterile. Check
that the enre packaging of the device is undamaged
before opening. Implant with a damaged packag-
ing must not be used. It is recommended to have a
replacement implant readily available for use. The
intact blister pack protects the sterilised implant
against any external inuence and, if stored properly,
guarantees sterility unl the expiry date. The blister
pack must not be opened before implant use. When
removing the implant from the sterile packaging,
asepsis rules must be followed.
Anthogyr declines all responsibility for re-sterilised
implants, regardless of who carried out the re-ster-
ilisaon or the method used. Under no circumstanc-
es should a previously used or non-sterile implant
be implanted. If the original packaging is damaged,
Anthogyr will not accept the return of the content.
13. Protocol for use
Refer to the brochures listed in the “Further informa-
on” secon for detailed step-by-step instrucons.
Step 1: Preoperative planning
The type, diameter and length of the implant, the di-
ameter and the height of the plaorm, as well as the
number of implants to be used and their posioning
must be determined in advance, taking into account
the paent’s anatomy and the oral environment.
For this purpose, use the X-ray templates available
in the range or a digital library.
Step 2: Preparation of the implant site
1. Mark the site with a pointer drill or a round bur.
2. Each site should be prepared using a progressive
sequence of drilling diameters in accordance
with the implant diameter and the bone densi-
ty. Make sure never to exceed the depth of the
planned drilling: use of depth stops on each rota-
tional instrument or use of drills with a stop or a
contra-angle fitted with a stop system.
Please refer to the “step-by-step” guidelines listed in
the “Further informaon” secon. The praconer
must adapt the drilling/tapping sequences as best
as possible to the clinical case (especially regarding
the bone density).
Avoid overheang the bone when drilling and ght-
ening the implant to reduce the risk of bone loss
during the osteointegraon phase. The risk of over-
heang the bone can be reduced by using irrigaon.
Step 3: Removing the implant from the packaging
The implant is packaged in a cardboard box with
sterile packaging consisng of a sealed blister pack
and a capped tube.
▪Remove the blister from the cardboard box out-
side of the sterile field.
▪Open the seal without touching the inside of the
blister.
▪
Let the capped tube gently fall on the sterile field.
Warning: All handling should be done so as to avoid
direct contact with the exterior surface of the im-
plant. When handling the implant, be very careful
not to drop it in the paent’s mouth.
The implant is movable once the tube and cap have
been opened. Make sure to keep the tube upright
when handling, with the implant access poinng
upward.
1. Open the packaging with one hand.
2.
Use the corresponding implant wrench or mandrel
to pick up the implant directly.
a. Press the packaging on the indicated areas to
immobilise the implant.
b.
Connect the implant tightening instrument into
the implant.
c. Ensure that the instrument is sufficiently en-
gaged in the implant connection before remov-
ing it from the packaging. To do this, check that
the first grey part is no longer visible.
d. Release the packaging to free the implant.
e. Remove the implant from the packaging.
REPLACE THE IMPLANT IN THE PACKAGING
DURING SURGERY IF NECESSARY
1. Position the implant between the packaging
sheets.
2. Press the packaging on the indicated areas to
immobilise the implant.
3. Disconnect the implant tightening instrument
from the implant.
4. Release the packaging.
Step 4: Insert the implant
PLACEMENT USING A CONTRA-ANGLE:
▪Adjust the output speed of the contra-angle to
the recommended speed of:
▪15 rpm for Axiom® TL PX
▪15 rpm for Axiom® TL X3
▪25 rpm for Axiom® TL REG
▪
Using the contra-angle, screw the implant into the
channel to the desired depth. The Axiom® TL REG/
PX/X3 surgical protocol provides for a 0.5 mm sub-
crestal positioning of the implant and 0.5 to 1 mm
sub-gingival positioning of the implant. Implant
wrenches and mandrels have markings for the
vertical positioning of the implant relative to an-
atomical structures.
▪In case of single-unit restoration, at the end of
the screwing process, orient the implant trilobe
as closely as possible in the appropriate direction,
depending on the desired prosthetic restoration
and the situation in the mouth. To do this, implant
wrenches and mandrels have 3 sides, each of them
Compability informaon table
Type of implant Type of connecon Compable components Compable instruments
Axiom® Tissue Level
inLink® inLink®
Axiom® TL implant instruments (gold)
included in the surgical kit
M1.6 Tissue Level
LOCATOR® (abutments) from ZEST DENTAL
Type of implant Type of plaorm Compable components
Axiom® Tissue Level
Ø 4.0 mm/N Axiom® TL components idened by a “N” laser marked
Axiom® TL components pink
Ø 4.8 mm/R Axiom® TL components idened by a “R” laser marked
Axiom® TL components cyan
An Axiom® BL implant can be made compable with an Axiom® TL implant through the use of an inLink® abutment.

en – Instructions for Use – Axiom® TL REG/PX/X3 implants
3/4
represented by a visual mark on the instrument’s
body.
Warning: Check the ghtening torque frequently to
make sure it does not exceed 80 N.cm. Unghten and
reghten to reduce the screw pressure if needed.
MANUAL PLACEMENT:
Using the ratchet wrench (available in the kit):
▪
Manually pre-tighten the implant into the implant
channel using the implant wrench or implant man-
ual screw wrench.
▪Assemble the surgical ratchet wrench.
▪
Screw the implant into the channel to the desired
depth. The Axiom® TL REG/PX/X3 surgical protocol
provides for a 0.5 mm subcrestal positioning of
the implant. Implant wrenches have markings for
the vertical positioning of the implant relative to
anatomical structures.
▪
At the end of the screwing process, orient the im-
plant trilobe as closely as possible in the appropri-
ate direction, depending on the desired prosthetic
restoration and the situation in the mouth. To do
this, implant wrenches and mandrels have 3 sides,
each of them represented by a visual mark on the
instrument’s body.
Using the universal surgical instrument:
The universal surgical instrument can be used in the
anterior maxillary area to control and guide the in-
seron of the Axiom® TL REG/PX/X3 implant along
the implant axis.
▪
Remove the implant from the packaging using the
trilobed tightening mandrel.
▪
Screw the implant into the channel to the desired
depth. The Axiom® TL REG/PX/X3 surgical protocol
provides for a 0.5 mm subcrestal positioning of
the implant and 0.5 to 1 mm sub-gingival position-
ing of the implant. Implant wrenches and man-
drels have markings for the vertical positioning
of the implant relative to anatomical structures.
▪In case of unitary restoration, at the end of the
screwing process, orient the implant trilobe as
closely as possible in the appropriate direction,
depending on the desired prosthetic restoration
and the situation in the mouth. To do this, implant
wrenches and mandrels have 3 sides, each of them
represented by a visual mark on the instrument’s
body.
Warning: When inser ng the implant with the surgi-
cal ratchet wrench or universal surgical instrument,
control of the ghtening torque is not possible. How-
ever, the vericaon of the torque using a surgical
dynamometric wrench to tighten the implant is
possible.
Too high of a torque can damage the connecon.
Unghten and reghten to reduce the screw pres-
sure if needed.
Step 5: Soft tissue treatment, wound closure
▪Select the appropriate healing component for
the treatment.
▪Refer to the instructions for use for healing com-
ponents.
USE OF THE COVER SCREW:
▪Remove the cover screw from the cap of the im-
plant tube.
1. Connect the manual surgical wrench to the
screw.
2. Pull to release the screw.
▪ Tighten manually < 10 N.cm, without forcing the
cover screw in the implant.
▪Suture above the cover screw to begin the inte-
gration period.
14. Healing phase
The healing period required for osseointegraon
varies considerably and depends on the individual
paent and treatment.
It is the sole responsibility of the surgeon to decide
when the implant can be loaded. If temporary com-
ponents are used during the healing phase, they must
be placed in sub-occlusion.
15. Further information
For more informaon on the use of Anthogyr prod-
ucts, please contact your local Anthogyr sales rep-
resentave or contact Anthogyr customer service
or visit ifu.anthogyr.com and www.anthogyr.com.
For more specic informaon on the A xiom® TL REG/
PX/X3, please refer to:
▪Axiom® TL REG/PX: Axiom® Multi Level® surgical
user guide (AXIOM‑MLC_NOT)
▪Axiom® TL X3: Axiom® TL X3 surgical user guide
(AXIOM‑TLX3_NOT)
Subject to the availability of the European Medical
Device Database (EUDAMED), the summary of safe-
ty and clinical performance characteriscs (SSCP)
is available at hps://ec.europa.eu/tools/eudamed.
Unl Eudamed is fully funconal, SSCP can be re-
quested to Anthogyr at the following address:
clinical@anthogyr.com.
Product Type Basic UDI-DI
Axiom® TL Implant 36633940018QV
16. Storage
Store these products in a clean, dry area at room
temperature. Improper storage may compromise the
essenal characteriscs of the materials and design,
which may lead to device failure.
17. Waste treatment
Waste resulng from the intervenon (packaging,
part extracted, etc.) must be handled as medical
waste under the responsibility of the user.
18. Patient information
Paents must accept regular medical follow-ups and
should consult their doctor in the event of any unex-
pected change in the performance of the prosthec
reconstuon.
Paents must be informed of the need to ensure
regular oral hygiene.
Paent must be advised to remain cauous for the
rst few weeks aer surgery.
Traceability informaon is available to paents via
the detachable labels on the device.
19. Notes
The praconer must have the necessary knowl-
edge to pracce dental implantology and must be
familiar with the handling instrucons for Anthogyr
products as described in this document in order to
use Anthogyr products safely and in accordance with
their instrucons for use.
Anthogyr products must be used in accordance with
the manufacturer’s instrucons for use. The dental
surgeon is solely responsible for the proper use of
Anthogyr products in accordance with their instruc-
ons for use and to determine whether the product
is suitable for the individual paent’s situaon.
Anthogyr products are part of a complete range and
must be used in combinaon with the corresponding
original components and instruments distributed by
Anthogyr, its parent company and any aliates or
subsidiaries of the parent company (“Straumann”),
unless otherwise specied in these instrucons for
use. The use of third-party products not distributed
by Anthogyr voids any warranty or other obligaon,
express or implied, of Anthogyr.
Any product-related issues must be reported to the
local Anthogyr organisaon together with the prod-
uct in queson. In the event of a serious incident,
the user must le a report with the local Anthogyr
organisaon and the appropriate competent authori-
ty in accordance with local regulaons. Anthogyr also
oers an online complaint service in the countries
concerned.
20. Validity
The publicaon of this document supersedes and
replaces all previous versions.
Anthogyr all rights reserved.
Anthogyr® and/or other trademarks and logos of
Anthogyr® menoned herein are trademarks or
registered trademarks of Anthogyr.
21. Availability
Some components of the Anthogyr implant system
are unavailable in certain countries.
22. Symbols
The following table describes the symbols that may
be printed on the packaging label. Please refer to
the label on the packaging for the applicable prod-
uct symbols.
Symbol Descripon of symbol Source of symbol
Manufacturer NF EN ISO 15223-1
Date of manufacture NF EN ISO 15223-1

en – Instructions for Use – Axiom® TL REG/PX/X3 implants
4/4
Symbol Descripon of symbol Source of symbol
Catalogue number NF EN ISO 15223-1
Batch code NF EN ISO 15223-1
SN
Serial number NF EN ISO 15223-1
Consult instrucons
for use or consult
electronic instrucons
for use
NF EN ISO 15223-1
Medical Device NF EN ISO 15223-1
CE marking -
compliance with
current regulaons
Direcve 93/42/CEE
——————
MDR (EU) 2017/745
FDA cercaon logo 21 CFR 801.109(b)(1)
Use-by date NF EN ISO 15223-1
Single sterile barrier
system NF EN ISO 15223-1
Single sterile barrier
system with protecve
packaging inside
NF EN ISO 15223-1
Sterilised using
irradiaon NF EN ISO 15223-1
Do not resterilise NF EN ISO 15223-1
Non-sterile NF EN ISO 15223-1
Sterilisable in a steam
steriliser (autoclave) at
temperature specied
ISO 7000 - 2868
Non sterilisable in
a steam steriliser
(autoclave) at
temperature specied
Anthogyr
Do not use if packaging
is damaged and consult
instrucons for use
NF EN ISO 15223-1
Keep away from
sunlight NF EN ISO 15223-1
Do not re-use NF EN ISO 15223-1
Cauon NF EN ISO 15223-1
Contains hazardous
substances NF EN ISO 15223-1
Screwing torque Anthogyr
Axiom® TL REG Implant
+ Cover screw Anthogyr
Axiom® TL PX Implant +
Cover screw Anthogyr
Axiom® TL X3 Implant +
Cover screw Anthogyr
/