Page is loading ...

LAKESHORE
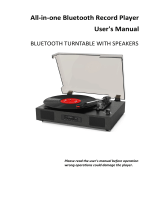
VHRP-1100
5-IN-1 Turntable System
Instruction Manual
Please read carefully before use and keep for future reference

Important Safety Instructions
1. Read these instructions – All the safety and operating instructions should be read before this product is operated.
2. Keep these instructions – The safety and operating instructions should be retained for future reference.
3. Heed all warnings – All warnings on the appliance and in the operating instructions should be adhered to.
4. Follow all instructions – All operating and use instructions should be followed.
5. Do not use this apparatus near water – The appliance should not be used near water or moisture – for example, in a
wet basement or near a swimming pool, and the like.
6. Clean only with a dry cloth.
7. Do not block any ventilation openings. Install in accordance with the manufacturer’s instructions.
8. Do not install near any heat sources such as radiators, heat registers, stoves, or other apparatus (including amplifiers)
that produce heat.
9. Protect the power cord from being walked on or pinched particularly at the plugs, power outlets, and at the point where
they exit from the apparatus.
10. Only use attachments/accessories specified by the manufacturer.
11. Use only with the cart, stand, tripod, bracket, or table specified by the manufacturer, or sold with the apparatus. When
a cart or rack is used, use caution when moving the cart/apparatus combination to avoid injury from
tip-over.
12. Unplug the apparatus during lighting storms or when unused for long periods of time.
13. Refer all servicing to qualified personnel. Servicing is required when the apparatus has been
damaged in any way, such as power supply cord or plug is damaged, liquid has been spilled or
objects have fallen into the apparatus has been exposed to rain or moisture, does not operate
normally, or has been dropped.
14. The mains plug is used as disconnect device, the disconnect device shall remain readily operable.
15. WARNING: To reduce the risk of fire or electric shock, do not expose this apparatus to rain or moisture. The apparatus
shall not be exposed to dripping or splashing and that no objects filled with liquids, such as vases, shall not be placed
on apparatus.
16. The use of the equipment in moderate climate.
17. The ventilation should not be impeded by covering the ventilation openings with items, such as newspapers,
tablecloths, curtains, etc.
18. Do not place open flame sources, such as lighted candles, on the apparatus.
19. The symbol with ~ indicates AC voltage.
20. CAUTION, These servicing instructions are for use by qualified service personnel only. To reduce the risk of electric
shock do not perform any servicing other than that contained in the operating instructions unless you are qualified to
do so.
This lightning flash with arrowhead symbol within an equilateral triangle is intended
to alert the user to the presence of non-insulated “dangerous voltage” within the
product’s enclosure that may be of sufficient magnitude to constitute a risk of electric
shock. Warning: To reduce the risk of electric shock, do not remove cover (or back)
as there are no user-serviceable parts inside. Refer servicing to qualified personnel.
The exclamation point within and equilateral triangle is intended to alert the user to
the presence of important operating and maintenance instructions in the literature
accompanying the appliance.
AVERTISSEMENT:
RISQUE DE CHOC ÉLECTRIQUE-NE PAS OUVRIR.
WARNING
CAUTION: To reduce the risk of fire or electric shock, do not expose this appliance to rain or moisture.
WARNING: Invisible laser radiation when open and interlock failed or defeated. Avoid direct exposure to laser beam.
This equipment is a Class II or double insulated electrical appliance. It has been designed in such a way that it does
not require a safety connection to electrical earth.
Correct Disposal of this product. This marking indicates that this product should not be disposed with other
household wastes throughout the EU. To prevent possible harm to the environment or human health from
uncontrolled waste disposal, recycle it responsibly to promote the sustainable reuse of material resources. To return
your used device, please use the return and collection systems or contact the retailer where the product was
purchased. They can take this product for environmentally safe recycling.
1

2
TABLE OF CONTENTS
FEATURES - - - - - - - - - - - - - - - - - - - - - - - - - - - - - - - - - - - - - - - - - - - - - - - - - - - - - - - - - - - - - - - - - - - 3
SPECIFICATIONS - - - - - - - - - - - - - - - - - - - - - - - - - - - - - - - - - - - - - - - - - - - - - - - - - - - - - - - - - - - - - - 3
PRODUCT OVERVIEW - - - - - - - - - - - - - - - - - - - - - - - - - - - - - - - - - - - - - - - - - - - - - - - - - - - - - - - - - - 4
SETUP & BASIC OPERATION - - - - - - - - - - - - - - - - - - - - - - - - - - - - - - - - - - - - - - - - - - - - - - - - - - - - - 5
CONNECTING TO BLUETOOTH®- - - - - - - - - - - - - - - - - - - - - - - - - - - - - - - - - - - - - - - - - - - - - - - - - - 5
PLAYING FROM A USB DRIVE - - - - - - - - - - - - - - - - - - - - - - - - - - - - - - - - - - - - - - - - - - - - - - - - - - - - 7
PLAYING A RECORD IN PHONO MODE - - - - - - - - - - - - - - - - - - - - - - - - - - - - - - - - - - - - - - - - - - - - - 8
PLAYING AN EXTERMAL AUX EDVICE - - - - - - - - - - - - - - - - - - - - - - - - - - - - - - - - - - - - - - - - - - - - - - 9
CARE & MAINTENANCE - - - - - - - - - - - - - - - - - - - - - - - - - - - - - - - - - - - - - - - - - - - - - - - - - - - - - - - - - 9
TROUBLESHOOTING GUIDE - - - - - - - - - - - - - - - - - - - - - - - - - - - - - - - - - - - - - - - - - - - - - - - - - - - - - 10
FCC NOTICE - - - - - - - - - - - - - - - - - - - - - - - - - - - - - - - - - - - - - - - - - - - - - - - - - - - - - - - - - - - - - - - - - 11
CAUTION ON MODIFICATIONS - - - - - - - - - - - - - - - - - - - - - - - - - - - - - - - - - - - - - - - - - - - - - - - - - - - - 12
SUPPORT- - - - - - - - - - - - - - - - - - - - - - - - - - - - - - - - - - - - - - - - - - - - - - - - - - - - - - - - - - - - - - - - - - - - 12

3
FEATURES
VICTOR 5-in-1 Turntable is ready to play your vinyl records with the built in 3-Speed Turntable! The Dual
Bluetooth feature allows streaming of your vinyl records to an external Bluetooth Speaker or plays music from
your Smart Device through the Lakeshore's built in Speakers. Placing a thumb Drive into the USB Slot allows
easy Recording and Playback of your Albums. The 3.5mm Aux Input & RCA Audio Output allow for even
more additional Playback options.
• 3-speed record player will play 33 1/3, 45, 78 RPM records
• Bluetooth® In connectivity allows you to stream music from another source up to 33 feet away
• Bluetooth® Out connectivity allows you to stream vinyl playback through any external Bluetooth®
Speaker
• USB Input for Playback & One Touch Recording of your favorite Music
• 3.5mm Aux Input for additional connectivity
• RCA Audio Output for additional connectivity
• Built in Stereo Speakers for playback convenience
SPECIFICATIONS
Product Name
Turntable Speeds (RPM)
Bluetooth® Version
Bluetooth® Transmission Distance
Rated Frequency
Input
Output
Built-in Speaker
Power Output
Power Source
Accessories Included:
LAKESHORE (5-IN-1 Turntable System)
33 1/3, 45, 78
V5.1
Up to 33 Feet (10 Meters) *
2.40GHz
USB
RCA Stereo Audio
2” x 2
1W x 2
AC/DC 100-240V 50-60Hz 9V/0.6A
UL Approved Adaptor, User Manual, Quick Set Up Guide
SPECIFICATIONS AND ACCESSORIES ARE SUBJECT TO CHANGE WITHOUT NOTICE
*Distance may vary depending on any objects or interference between devices.

Turntable Features
1. TURNTABLE
2. DUST COVER
3. TONE ARM WITH STYLUS
4. TONEARM
5. 45 RPM ADAPTER
6. TONE ARM ON/OFF LEVER
7. AUTO STOP CONTROL SWITCH
8. SPEED SELECTOR (33/45/78 RPM)
9. HOLD DOWN CLIP
10. TONEARM REST
Front Panel Features
11. SOURCE SELECTOR (PHONO/BT/USB)
12. POWER INDICATOR
13. VOLUME CONTROL DIAL
14. BT OUT/REC BUTTON
15. POWER BUTTON
16. USB SKIP/SEARCH / BUTTON
17. USB PLAY/PAUSE BUTTON
18. USB PORT
Rear View
19. DC IN PUT JACK
20. AUDIO OUT (L/R) RCA JACKS
4
PRODUCT OVERVIEW
1
23
4
5
6
7
8
9
10
11 12 13 15 16 17 1814
19 20

5
SETUP & BASIC OPERATION
Connecting AC adapter
1. Insert the DC plug of the AC adapter cord into the DC INPUT Jack at the back of the turntable.
2. Plug the AC adapter into a normal power outlet.
CONNECTING TO BLUETOOTH®
Pairing A Smartphone or Bluetooth Enabled Device
The Bluetooth In feature enables you to stream and play the digital music on your Bluetooth enabled device
to your unit.
1. POWER on the unit, rotate the SOURCE selector to BT position. The Bluetooth indicator (inside in
the POWER indicator) will flash.
2. The unit will start in auto connection mode and search for a previously paired device that is active
and in range (30 feet/10 meters). If found, a brief welcome melody will be heard and Bluetooth
indicator will change to solid on. If no active device is found, the unit will switch to interactive pairing
mode and the Bluetooth indicator keeps flashing.
3. To establish a new link, turn on the Bluetooth function of your Bluetooth enabled device and enable
the search or scan feature to find “VICTOR VHRP-1100” in the list of discoverable Bluetooth
devices. Select the “VICTOR VHRP-1100” from your available device list when it appears on its
screen and a brief welcome melody will be heard if pairing and connection is successful. If you are
asked for a password, enter “0000”.
4. If no successful pairing and connection is made within 5 minutes, the unit can enter manual pairing
mode. You need to press and hold the PAIR button until Bluetooth indicator flashes to initiate a
pairing/connecting request to a new or old Bluetooth enabled device. Follow step #3 to complete the
process.
Note:
• Only use the supplied adapter.
• Please ensure that your outlet voltage is compatible before using this turntable.
Switching on for the first time
Press the POWER button to turn on the turntable and the POWER indicator will light up. To turn the turntable
off; press the POWER button again and the POWER indicator will turn off.
Switching between Phono/BT/USB sources
After turning on the turntable, rotate the SOURCE selector to switch between different sound sources.
Adjusting sound volume level
After turning on the turntable, turn the VOLUME CONTROL dial to adjust the level of sound volume.

6
5. After successfully pairing and connecting your device with turntable, the unit will emit a brief
welcome melody and the Bluetooth indicator will change to solid on. You can now play music from
your Bluetooth enabled device wirelessly to the turntable.
6. If you want to connect the turntable to another new external Bluetooth enabled device while paired
with another device, press and hold the PAIR button for few seconds to disconnect the existing
connection. The unit will emit two short beeps and Bluetooth indicator will change to flash. Repeat
steps #3 to #4 above to make a new link.
Note:
• The Bluetooth function of the unit will remain paired unless the paired device goes out of range (33
feet/10 meters). If the broken link is re-established within 20 seconds, the turntable will reconnect to
the current paired device automatically. Otherwise, you will need to make a manual connection
again.
• You may need to turn off the Bluetooth function of the paired external device first before making a
new link.
• Refer to manual of your smartphone or external Bluetooth enabled device for correct Bluetooth
operation instructions since it may vary from model to model.
• If your Bluetooth enabled device does not support A2DP, it will not play the music through the
turntable system even after it is paired and connected successfully.
• If you are pairing and connecting your personal computer to the turntable using Bluetooth, you may
need to set the VICTOR VHRP-1100 as your computer’s default sound device.
Bluetooth Out (Transmitter)
1. POWER on the unit, rotate the SOURCE selector to desired function mode except the BT (Bluetooth
receiver) modes.
2. Press and hold the BT OUT button, unit is in Bluetooth transmit pairing mode and Bluetooth indicator
flashes Blue
3. Set your Bluetooth receiver such as headphone or speaker to ON and begin searching for devices.
Note: If you have several Bluetooth receivers, switch off those receivers that are not in use and
place the one to be linked near the unit to avoid turntable linking to other unwanted Bluetooth
enabled devices.
4. Turntable will auto scan and pair with your Bluetooth receiver nearby, BT indicator will stop blinking
to indicate a connection has been established.
5. Play music in PHONO or USB mode. Unit speaker sound will be off. You can listen to music by using
your Bluetooth receiver such as a headphones or speaker wirelessly.
6. If you want change to pair with another Bluetooth Enabled Device, switch off the Bluetooth function
of your Bluetooth receiver which was paired previously. Press the BT OUT button to turn off the
function and press the BT OUT button again to pairing mode (repeat step 2 to 5).
7. Press the BT OUT button when you finish listening in Bluetooth transmitter mode, Blue LED will be
off and unit speaker will sound again.
Note:
1. When Bluetooth Receive/In is in use, the Bluetooth Transmit/Out function is disabled.
2. There will be a brief sound delay when enabling the Bluetooth Transmit/Out function
3. Bluetooth Out (Transmitter) can only pair with Bluetooth receivers such as headphones or speaker
for music streaming wirelessly. Use your Bluetooth device volume control if necessary.

7
PLAYING FROM A USB DRIVE
Listening to a USB device
This device only supports MP3 file playback on USB drives.
1. POWER on the unit, rotate the SOURCE selector to USB mode.
2. Insert the USB drive into the USB port and it will start playing.
3. Turn the VOLUME CONTROL dial to adjust the volume to the desired level.
4. When removing the USB device, press the USB PLA//PAUSE button to stop playback first.
Play / Pause control
Press the PLAY/PAUSE button to pause or resume playback.
Skip track
During playback, press the SKIP/SEARCH / buttons to skip to the previous or next track.
High-speed music search
1. During playback, press and hold the SKIP/SEARCH / buttons to search through the current
track at high speed.
2. When the SKIP/SEARCH / buttons are released, normal playback speed will be resumed
immediately.
Note: USB flash drives with more than 32GB memory may not be compatible.
USB Recording from the Turntable
1. Insert the USB drive into the USB port.
2. Rotate the SOURCE selector to PHONO mode.
3. Place the record on the turntable and move the TONE ARM to your desired song to start playing.
4. Press the REC button to start recording. The POWER LED will keep flashing during recording.
5. To stop recording, press the REC button again.
6. After recording, you must return the TONE ARM to the TONE ARM REST manually.
7. Rotate the SOURCE selector to USB mode to play the recorded file.
5. After successfully pairing and connecting your device with turntable, the unit will emit a brief
welcome melody and the Bluetooth indicator will change to solid on. You can now play music from
your Bluetooth enabled device wirelessly to the turntable.
6. If you want to connect the turntable to another new external Bluetooth enabled device while paired
with another device, press and hold the PAIR button for few seconds to disconnect the existing
connection. The unit will emit two short beeps and Bluetooth indicator will change to flash. Repeat
steps #3 to #4 above to make a new link.
Note:
• The Bluetooth function of the unit will remain paired unless the paired device goes out of range (33
feet/10 meters). If the broken link is re-established within 20 seconds, the turntable will reconnect to
the current paired device automatically. Otherwise, you will need to make a manual connection
again.
• You may need to turn off the Bluetooth function of the paired external device first before making a
new link.
• Refer to manual of your smartphone or external Bluetooth enabled device for correct Bluetooth
operation instructions since it may vary from model to model.
• If your Bluetooth enabled device does not support A2DP, it will not play the music through the
turntable system even after it is paired and connected successfully.
• If you are pairing and connecting your personal computer to the turntable using Bluetooth, you may
need to set the VICTOR VHRP-1100 as your computer’s default sound device.
Bluetooth Out (Transmitter)
1. POWER on the unit, rotate the SOURCE selector to desired function mode except the BT (Bluetooth
receiver) modes.
2. Press and hold the BT OUT button, unit is in Bluetooth transmit pairing mode and Bluetooth indicator
flashes Blue
3. Set your Bluetooth receiver such as headphone or speaker to ON and begin searching for devices.
Note: If you have several Bluetooth receivers, switch off those receivers that are not in use and
place the one to be linked near the unit to avoid turntable linking to other unwanted Bluetooth
enabled devices.
4. Turntable will auto scan and pair with your Bluetooth receiver nearby, BT indicator will stop blinking
to indicate a connection has been established.
5. Play music in PHONO or USB mode. Unit speaker sound will be off. You can listen to music by using
your Bluetooth receiver such as a headphones or speaker wirelessly.
6. If you want change to pair with another Bluetooth Enabled Device, switch off the Bluetooth function
of your Bluetooth receiver which was paired previously. Press the BT OUT button to turn off the
function and press the BT OUT button again to pairing mode (repeat step 2 to 5).
7. Press the BT OUT button when you finish listening in Bluetooth transmitter mode, Blue LED will be
off and unit speaker will sound again.
Note:
1. When Bluetooth Receive/In is in use, the Bluetooth Transmit/Out function is disabled.
2. There will be a brief sound delay when enabling the Bluetooth Transmit/Out function
3. Bluetooth Out (Transmitter) can only pair with Bluetooth receivers such as headphones or speaker
for music streaming wirelessly. Use your Bluetooth device volume control if necessary.

8
PLAYING A RECORD IN PHONO MODE
Listening to a Record
1. Lift the DUST COVER all the way up until it stops. The cover will stay open.
2. Remove the tie-wrap from the TONE ARM (when using for the first time).
3. Remove the white protective needle cover by gently pulling it forward.
4. Release the tone arm HOLD DOWN CLIP by gently pushing to the right. This will unlock the TONE
ARM from its arm rest. Note: Re-lock the HOLD DOWN CLIP when moving the turntable to another
location
Turntable Operation
1. POWER on the unit, rotate the SOURCE selector to PHONO mode.
2. Set the SPEED selector to the correct position (33, 45, or 78 RPM).
3. Place the record on the turntable.
4. Lift the TONE ARM CONTROL lever and move the TONE ARM to the desired starting point over the
record.
5. Lower the TONE ARM CONTROL lever and the TONE ARM will move down and music will start
playing.
6. Turn the VOLUME CONTROL dial to adjust the volume to the desired level.
7. Slide the AUTO STOP CONTROL switch to choose the auto stop function.
8. At the end of the record, the TONE ARM will stop automatically. You should return the TONE ARM
to the TONE ARM REST manually.
Note:
When playing records, sound output of the built-in amplifiers is limited to avoid feedback and rumble.
This is normal. Keep the volume as low as possible on the turntable and instead increase the volume
on the external amplifier.
Adapter for 45 RPM (Accessory)
This adapter allows you to play 45 RPM records.
1. Gently place your 45 RPM record onto the turntable.
2. Place the 45 RPM ADAPTER over the spindle.
3. Follow normal turntable operation steps to play your record.

9
PLAYING AN EXTERNAL AUX DEVICE
You can listen to audio from the turntable on your home stereo, television, or other stereo sources by using
the AUDIO OUT RCA Jacks.
1. To make this connection, you need a standard RCA cable (not included). Plug the red and white
connectors on one end of the cable into the red and white AUDIO OUT RCA Jacks on the rear of
the turntable. The other end of the cable will plug into the AUX INPUT Jacks (LINE INPUT/AUDIO
INPUT) of your selected device.
2. Operate the turntable as usual.
CARE & MAINTENANCE
REPLACING THE STYLUS
It's suggested to replace the stylus after 400 hours of use. Please follow the steps below to change the
stylus:
1. Lift the TONE ARM off the TONE ARM LOCK.
2. At the front end of the tone arm, place the tip of your fingernail between the red stylus holder and
the black cartridge housing as shown. Press down on the red stylus holder until it separates from
the cartridge housing.
3. Completely remove the red stylus holder with worn stylus and discard it.
4. Place the new red stylus holder with stylus under the cartridge housing. First, press upward on the
backside of the stylus holder, and then press up on the front edge of the stylus holder until it snaps
into place on the cartridge housing.

10
TROUBLESHOOTING GUIDE
In case of trouble with the unit, please look through the problems below and see if you can solve them
yourself before calling your dealer.
PROBLEM
No power
No sound on
phono source
Poor sound on
phono source
No sound on
USB source
No sound on
audio out
Not recording
No sound on
Bluetooth source
POSSIBLE CAUSE AND SOLUTION
• Ensure that the turntable is powered on
• Check the master volume is not turned to minimum
• Remove the power adapter/connection cable and reconnect again after 2 minutes.
• Ensure the turntable is on the correct source.
• The protective needle cover was not removed. Remove it first
• The tie-wrap was not removed from underneath the tone arm. Remove it first.
• Tone arm HOLD DOWN CLIP was not released. Release it first
• The stylus is dirty. Remove dust on the stylus with a stylus- cleaning brush.
• Dust or dirt has collected on the record. Clean the record with a high-quality record
cleaner.
• Ensure that the turntable is on the correct source.
• Ensure that the USB file is MP3 format.
• Remove the USB memory stick and reconnect again.
• Ensure the turntable is on correct source.
• Check that the turntable is powered on.
• Check the volume level on the external device.
• Check the correct source is selected on the external device.
• Remove the audio cable and reconnect again.
• Ensure that the turntable is on the correct source.
• Ensure the USB is connected correctly.
• USB Memory is not enough. Change to a new one.
• Remove the USB memory stick and reconnect again.
• Unit is not linked with your Bluetooth enabled device.
• Go through “Bluetooth Operations” process to link the speakers
• Unit placement out of range.
• Relocate the unit within Bluetooth operating range (30 feet).
• Your Bluetooth enabled device Volume set too low.
• Increase Volume level of your Bluetooth enabled device.

11
FCC NOTICE
This device complies with Part 15 of the FCC Rules. Operation is subject to the following two conditions: (1)
this device may not cause harmful interference, and (2) this device must accept any interference received,
including that may cause undesired operation.
NOTE: This equipment has been tested and found to comply with the limits for a Class B digital device,
pursuant to Part 15 of the FCC Rules. These limits are designed to provide reasonable protection against
harmful interference in a residential installation. This equipment generates, uses, and can radiate radio
frequency energy and, if not installed and used in accordance with the instructions, may cause harmful
interference to radio communications. However, there is no guarantee that interference will not occur in a
particular installation. If this equipment does cause harmful interference to radio or television reception, which
can be determined by turning the equipment on and off, the user is encouraged to try to correct the
interference by one or more of the following measures:
• Reorient or relocate the receiving antenna.
• Increase the separation between the equipment and receiver.
• Connect the equipment into an outlet on a circuit different from that to which the receiver is
connected .
• Consult the dealer or an experienced radio/TV technician for help.
WARNING: Any changes or modifications not expressly approved by the party responsible for compliance
could void the user's authority to operate this equipment.
The device must not be colocated or operating in conjunction with any other antenna or transmitter.
To maintain compliance with the FCC’s RF exposure guidelines, place the product at least 20cm from nearby
persons.
IC STATEMENT
This device complies with RSS247 of Industry Canada. Cet appareil se conforme à RSS247 de Canada
d'Industrie. This device complies with Industry Canada license-exempt RSS standard(s). Operation is subject
to the following two conditions: (1) this device may not cause interference, and (2) this device must accept
any interference, including interference that may cause undesired operation of the device. appareils radio
exempts de licence.
Son fonctionnement est sujet aux deux conditions suivantes: (1) le dispositif ne doit pas produire de
brouillage prejudiciable, et (2) ce dispositif doit accepter tout brouillage recu, y compris un brouillage
susceptible de provoquer un fonctionnement indesirable.
The device must not be co-located or operating in conjunction with any other antenna or transmitter.
L'appareil ne doit pas être localisé ou fonctionner avec d'autres antennes ou transmetteurs.
This device complies with IC radiation exposure limits set forth for an uncontrolled environment.
Cet appareil est conforme aux limites d'exposition aux rayonnements de la IC établies pour un incontrôlé
environnement.
The device should be installed and operated with a minimum distance of 20cm between the radiator and your
body.
L'appareil doit être installé et utilisé avec une distance minimale de 20 cm entre le radiate et votre corps.

12
CAUTION ON MODIFICATIONS
Any changes or modifications not expressly approved by the grantee of this device may void
the authority granted by the FCC to operate this equipment. Electric and electronic equipment
contains materials, components and substances that can be hazardous to your health and the
environment, if the waste material (discarded electric and electronic equipment) is not handled
correctly. Electric and electronic equipment is marked with the crossed-out trash can symbol,
seen below. This symbol signifies that electric and electronic equipment should not be
disposed of with other household waste but should be disposed of separately. All cities have
established collection points, where electric and electronic equipment can either be submitted
free of charge at recycling stations and other collection sites or be collected from the
households. Additional information is available at the technical department of your city.
CALIFORNIA PROP 65 WARNING
“WARNING” This product contains chemicals known to the State of California to cause birth defects or other
reproductive harm. For more information on these regulations and a list of chemicals, visit the following
website address: http://www.oehha.ca.gov/prop65.html
SUPPORT
We do our best to offer high quality products to our customers. If you experience any issues or problems with
your product, please contact customer support as many issues can be quickly resolved.
If you have problems with your device, please consult the instructions in this manual. Please also visit us on
the web at www.naxa.com to get up to the minute news, alerts, and documentation for your device. For
additional assistance, please contact Naxa Technical Support.
Naxa Technical Support
2320 East 49th St.
Vernon, CA 90058
(866) 411-6292
http://www.naxa.com/supportcenter
*This product has been manufactured and sold under the responsibility of NAXA ELECTRONICS INC.
VICTOR and the DOG & GRAMOPHONE logo are trademarks used under license by NAXA ELECTRONICS INC.
Further information at www.victor-brand.com.
All other products, services, companies, trademarks, trade or product names and logos referenced herein are the
property of their respective owners.
/