Page is loading ...


Notice
to
Dealers
This manual
is
provided
to
ensure
that
the
snowmobile
is
assembled
correctly
and given
proper
presale preparation.
Your
customer expects
and deserves a
safe,
reliable snowmobile, and
performance
of
the steps I isted here
is
essential
to
that
end.
The
selling dealer
assumes
sole responsibility
for
any unauthorized
modifications
prior
to
sale.
Refer
to
your
Snow
Products Binder
for
any Service
Bulletins
specifying
Factory
Directed
Modifications
which
must be performed before the
snowmobile
is
ready
for
sale.
SAFETY
AWARENESS
I
WaRNING
I
This warning
symbol
identifies special
instructions
or
procedures which,
if
not
correctly
followed,
could
result
in
personal
injury,
or
loss
of
life.
This
caution
symbol
identifies special
instructions
or
procedures which,
if
not
strictly
observed,
could
result
in
damage to,
or
destruction
of
equipment.
Whenever you
see
the symbols shown above,
heed
their
instructions! Always
follow
safe
operating and maintenance practices.
(

c
Table
of
Contents
Dealer's Assembly and Preparation Check List......
..
........................................................
..
ii
Assembly..
..
..........................................
..
........................................................................... 1
Uncrate .
..
................
..
..
................................................................................................ 1
Skis ......................................................
..
..................................................................... 1
Installation ........................ ..........................
..
.......................................... .............. 1
Suspens
ion..
.......... ..................
..
...............
..
..........
..
...
..
...
..
........................................... 2
Windshield................................................................................................................... 2
Handlebar...............................
..
................................................. .................................. 2
Tool Kit/Owner Manual ........
..
..........................
..
................
..
.......
..
............................. 3
Safety Labels..........................................................................
..
.........................
..
......
..
3
Preparation.....
..
..
.....................
..
....
..
....................
..
....................
..
................................
..
....
3
Suspension
..
. ..
..
.........................................................................
..
...
..
...
..
..
......
..
............ 3
Ride Adjustment.........
..
................
..
.....
..
.
..
..
.......................................................... 3
Handling Adjus
tment
..
....
..
.
..
..............................
..
....
..
........................................... 3
Front
Suspension Swing Arm ....
..
....................
..
.
..
.......
..
........................................ 4
Ski Spring Preload ......................
..
.....................
..
..
...................................................... 4
Steering Alignment...............................
..
..
.
..
..................
..
..........................................
..
5
Chaincase . ................................................................
.. ..
.............................
.. ..
............... 6
Brake.....................
..
..
.............
.. ..
........................
..
....................................................... 6
Wiring Harness..................................................................................
..
......................... 7
Enrichener
Cable
Adjustment
.
.. ..
..............
..
....................
..
..................
..
....................... 7
Engine Coolant........
..
.......
..
....
..
.................
..
..
..
.
..
....................
..
................................... 8
Filling Cooling System
.. ..
..
....
..
....
...................
..
.
.. ..
....
..
....
..
.................................... 8
Drive and Driven Converter Alignment........
....
............................................................ 8
Center-
to
-Center Distance ............................................................................
..
....... 9
Jackshaft
Bearing Retainer Shimming ................................................................... 10
Converter Offset Distance ..................................................................................... 10
Parallelism
................................................................................................
..
...........
11
Oil
Tank
..
..
..
................................................................................................................ 12
Bleeding
Oil Injection System ..................................................................................... 12
Engine Gearcase .......................................................................................................... 13
Fuel. ............................................................................................................................ 14
Fuel/Oil Mixture (Ratio)
..
........................................................................................... 14
Engine
Break-I n ........................................................................................................... 14
Synchronization
of
Oil
Pump and Carburetors ............................................................ 15
Purging Air From
Oil
Pump
Outlet
Tubes
................................................................... 16
Ignition Timing Check ................................................................................................ 16
Headlight
Adjustment
................................................................................................. 18
Tail/Brake Light
Test
..........................................................
..
...................................... 18
Track
Adjustments
...............
..
..................................................................................... 19
Track Tension ....................................................................................................... 19
Track Alignment .............................................
.. ..
.................................................. 19
Test
Ride (Operational Checks)........................................................
..
..
............. ................
20
Specifications ...................................................................................................................... 22
Engine .........
.. ..
.
..
..
..
..............................
.. ..
.
..
...
..
.... .............
..
.............
..
......................... 22
Carburetor
Settings
..
............................................
..
..............................................
..
..... 22
Fuel. ......
..
.
..
.................................................................
..
.
..
.......
..
.................................. 22
Drive
System ....................................................................................
..
......................... 22
Electrical System ................
..
....................
..
.................................................................
22
Torque
Chart..........................................................
.. ..
...........................................
.. ..
..
..
.... 23
Wiring Diagram
..
......................................................................
..
................................... ..... 24
INVADER
TABLE
OF CONTENTS

Dealer's
Assembly
and Preparation
Check
List
Remove the Assembly & Preparation Check List
from
storage
case.
Complete
each
item
of
the
check
list
following
the procedures
outlined
in
this
manual.
Verify
compliance
by
placing a check (I) in
box
preceeding
each
item
as
it
is
completed.
Be
sure
to
sign all sections
of
the
form
as
they
are
completed.
Retain
completed
check list
for
your
records.
ii
KAWASAKI
SNOWMOBILE
DEALER'S
ASSEMBLY & PREPARATION CHECK
LIST
I hereby
ce
rt
ify
that
prior
to
delivery to the first retail purchaser assembly and preparation servicing was performed
on
the s
nowmo
-
bile listed below in accordance
wi
th the following check list, and in compliance
with
the established procedures prescribed by Kawa-
saki:
(Iia"
check
each
item when completedl.
1 D REMOVE
CRATE
- check
for
damaged & missing parts.
2 D SKIS - install - torque all bolts.
3 D SKI SHOCKS -
mount
to
spindle - torque bolts.
4 D SUSPENSION -
engage
springs.
7 D
SAFETY
DECALS - properly installed.
8 D
TOOL
KIT
- complete - installed.
5 0
WINDSHIELD
-
mount
to
hood.
ASSEMBLY
BY:
6 D
HANDLEBARS
- adjust
to
proper position - torque bolts.
PREPARATION CHECK LIST
1 D STEE RING - align skis -components secure.
2 D
CLUTCH
ALIGNMENT
- check/adjust.
3 D
CLUTCH
CENTER TO CENTER - c
he
ck adjust.
4 D
CHAIN
CASE - add lube
if
required - check
for
leaks.
5 D
BRAKE
- clean disc - adjust.
'6
D
WI
RING HARNESS - electrical connectors secure.
'7
0
CIRCUIT
BOARD
- electrical connectors
secu
r
e.
8 D SUSPENSION - adjust.
9 D NUTS. BOLTS.
OTHER
FASTENERS - check -
ti
ghten.
'10
D ENGINE GEAR
LUBRICATION
- check l
eve
l-
add
recommended oil
as
required.
11
0
FUEL
/IMPULSE
LINES
- secure and no kinks.
12 D
ENRICHENER
CONTROL
- check/adjust.
'13
D
OIL
PUMP - check/adjust.
14
0
THROTTLE
CABLE
- check/adjust.
'15
D CARB
SYNCHRONIZE
- check/adjust
(twin
carb mod
els
l.
'16
D FAN
BELT
- check/adjust (axial fan modelsl.
'17
D
OlL
TANK
-
fill
w/recommend
ed
brand injection
oil
-
check
for
l
eaks.
'18
D
OIL
LINE
TO
PUMP - (all
oil
injection modelsl
bleed-
secure
'19
0 ENGINE
COOLANT
- check level.
20
D SPARK PLUGS - check/gap.
21
D GAS
TANK
-
fill
(pre-mix 40
to
1
BIA
approved
oil
SA &
SB
models
onlyl
- check
for
leaks.
22 D
CARBURETOR
AIR
SCREW - adjust.
23 D
CARBURETOR
IDLE
SPEED - adjust.
, 24 0 PRIMER - check operation.
25 0
IGNITION
TIMING
- check/adjust.
26 D
ELECTRICAL
SYSTEM - check operation -
adj
ust
o Headlight D Brake
Light
o
Taillight
D Instrument &
Indicator
Lights
27
0
TRACK
-
ad
ju
st
tension - align.
PREPARAT
ION
BY
:
Signature
TEST
RIDE
1 D
CONTROL
CABLES -
throttle,
brake - works
without
binding
in
any steering position · returns freely .
2 D ENGINE STOP SWITCH - check operation.
3 D
SUSPENSION - check slider ride adjustment.
4 D
STEE RING - action
is
free
lock
to
lock - no
looseness_
5 0
ENGINE
· recoil starter works properly. engine starts
promptly.
good
throttle
response and return. Exhaust
smoke present
but
not
excessive (oil inje
ction
models).
6 D CLUTCHES - smooth operation - correct RPM.
7 D
BRAKES
· adequate - smooth stopping power.
8 D
SPEEDOMETER(fACHOMETER
- check operation.
g
0 NO
UNUSUAL
NOISES.
'10
D NO
COOLANT
LEAKS.
11
D NO
FUEL
OR
OIL
LEAKS.
'12
D COOLANT
LEVEL
- check -add
50/50
mix
as
required.
13 D CONTROLS - properly positioned.
TEST
RIDDEN
BY:
Signature
CUSTOMER
DELIVERY
o OWNER'S
MANUAL
· explain contents/proper mainte-
nance - install.
4 D CONTROLS - explain location
/o
peration - properly
positioned
for
customer.
D OWNER'S
SAFETY
HANDBOOK
- explain
contents-
install.
3 0
WARRANTY
CERTI
FICATE
- explain warranty
thor
-
oughly - install.
DELIVERED
BY:
,DEALER
VERIFICATION
Dealer Name
____________________
_
Signature
of
Dealership Manager
Date
Address
___________
_
• Applicable models only · refer to assembly instruction provid
ed
by Kawasaki for specific models.
PIN
49007
-35
01
white
co
py
·
dea
l
er
file
/c
anary
copy
·
owner
Signature
Printed
in
U .
S.A.
If
it
is
desired
to
utilize
the French
portion
of
this check list,
please
remove the carbon
sheet
and
insert in proper location_
DEALER'S
ASSEMBLY
&
PREPARATION
CHECK
LIST
INVADER

Assembly
Uncrate
Observe this
[:~!~~~
€]
during
next
step
Bend over
all
exposed
crate fasteners to
prevent personal injury or possible vehicle
damage.
Using a
pry
bar, separate
the
top
and side panels
from
the
crate. C
arefully
remove plastic covering
from
the
snowmobile
by
cutting
the plastic along
the
base
of
the
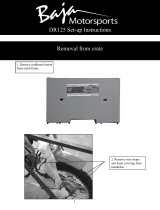
crate. Remove the
windshield
from
the seat.
Next,
unscrew the nuts securing the ski
assembly and sp
indle
to
th
e
bottom
of
the crate
and discard
the
hardware
as
it
will
not
be
used
during
snowmobile
assembly.
(See
Figur
e 1.)
1.
Ski
Assembly
2.
Ski S
pindle
Observe this
WARNING
I during
next
step
To
prevent personal injury, use lifting
equipment
with approved
safety
hooks
when raising the snowmobile.
With
assistance,
or
the
use
of
a hOist,
carefully
lift
the
snowmobile
from
the
crate. T
horoughly
inspect the
snowmobile
for
sh
ipping damage and
missing parts.
Open
hood
and remove plastic
bag
from
storage
case
containing
the
ski and
windshield
mounting
hardware.
INVADER
Skis
Installation
Place the
snowmobile
on its side.
Be
sure
to
provide
a
protected
surface
to
prevent
marring
the
finish
of
the
snowmobile.
Then
perform
the
following:
1.
I nstall
the
ski
attitude
damper.
Apply
Silicone
spray
or
soapy
water
on
the
damper
to
ease
installation
of
the
sk
i saddle over the damper.
(See
Figure
2.)
1. Ski
Attitude
Damper
2.
Gr
ease
Groove
3.
Ski Saddle
2.
Fill
the
grease groove
or
cut
away
area
of
the
sp
indle
sleeve
with
a
low
temperature
extreme
pressure (ep) grease, and insert sleeve
into
the
spindle.
(See
Figure 2.)
ASSEMBLY 1

3.
Secure the ski assembly
to
the spindle
with
the
hardware supplied.
Be
sure the
nut
and large
flat
washer are installed on the inboard side
of
the ski assembly, then
torque
the
nut
45
-
47
ft.
Ibs.
(6.2 -
6.5
kg-m).
(See
Figure 3.)
1.
Flat
Washer
Suspension
The snowmobile
is
shipped
with
the suspension
springs adjusted
during
production
assembly
to
provide
satisfactory
ride
and
handling
characteristics
for
average driver weight.
Normally,
no adjustments
are
required.
Windshield
Remove the plastic covering and install the
windshield
with
the o-ring fasteners provided.
(See
Figure 4.)
2 ASSEMBLY
Handlebar
Prior
to
securing the handlebars, check the lower
handlebar holder
for
security
to
the steering pole.
Apply
35
ft.
Ibs.
(5 kg-m)
torque
to
the lower
handlebar holder
mounting
bolt.
(See
Figure 5.)
1.
Lower Handlebar
Holder
2.
Console
Check
the
routing
of
the cables and
wire
harnesses
for
proper positioning. They should
pass
through
the console at the handlebar holder, and have
adequate free movement
to
prevent binding
or
rubbing during vehicle operation.
(See
Figure 5.)
Observe this
[:~~~!!~~]
during
next
step
Adjust
the handlebar so
it
does
not
hit
the
windshield,
when turning in either
direction.
Adjust
the handlebar
for
a
comfortable
driving
position and evenly
torque
the
four
socket screws
securing the handlebar holder,
to
105 in.
Ibs.
(1.2
kg
-
ml.
(See
Figure 6.)
INVADER

Tool
Kit/Owner
Manual
Check the storage
box
to
be
sure
it
contains the
Tool
Kit,
Owner's Manual and Safety Handbook.
Safety
Labels
WARNING
I
Insure
that
all
safety labels are
properly
located
and
secure.
(See
Figure 7.)
INVADER
Preparation
Suspension
Ride Adjustment
Ride
Adjustment
may
be
varied
by
changing the
position
of
the shock absorber spring adjusting
cam, using the special
tool
provided in the
tool
kit.
Rotating the cam towards the heavy pre-load
position
will
increase spring pre-load, resulting in a
stiffer
ride. I f
the
cam
is
rotated towards the
light
pre-load
position,
this
will
decrease spring pre-load,
resulting in a
softer
ride
for
the operator.
(See
Figure 8.)
1. Spring
Cam
2.
Cam
Adjusting
Tool
3.
Heavy Pre· load Position
4.
Light
Pre-load Position
NOTE:
An
optional
heavy-duty shock absorber
spring
kit
is
available
to
increase the load carrying
capacity
of
the snowmobile.
Handling Adjustment
The handling adjustment
is
controlled
by
changing
spring tension
of
the
front
suspension springs.
I ncreasing spring tension
causes
the
su
spension
to
press
harder on the ground, resulting in
less
ski
pressure. Reducing the spring tension,
cau
s
es
the
front
of
the suspension
to
have
less
pressure on the
ground and the ski pressure
to
increase. A change
in ski pressure
will
affect
the vehicle's steering
response.
PREPARATION 3

The tension (pre-load)
of
the
front
sp
rin
gs
on
each
side
of
the
suspension
arm
mus
t
be
equal. Excessive tension
of
one spring can
cause spring breakage
or
excessive wear
to
one side
of
the slide wear strips.
(See
Figure
9.)
The
spring arm on each side
of
the
susp
ension
should
be
positioned
as
required,
to
achieve the
desired steering response and
effort
for
existing
terrain
and snow
conditions
in
your
area.
To
change spri
ng
tension:
1.
I
nsta
II
spring adjusting
tool,
Part No.
57001-
3507
onto
the
end
of
the
spring arm
as
shown.
(See
Figure 9.)
1.
Spring
Adjusting
Tool
2.
Spring
Arm
3.
Spring Retainer
Observe this
WARNING'
during
next
step
Front
suspension springs are
under
heavy
spring
load
and
improper
adjusting
techniques
may
result
in
personal
injury.
2.
Apply
a
firm
grip
on the spring adjusting
tool
with
both
hands and
carefully
lift
the spring
arm
out
of
the
detent
in the spring retainer.
Be
prepared
for
the heavy spring load
to
be
transferred
to
the spring adjusting
to
ol 2S the
spring arm
is
lifted
out
of
the retainer detent.
3.
Install the spring arm
into
the
retainer
detent
necessary
to
obtain
the
handling
characteristics
desired.
4
PREPARATION
Front
Suspension
Swing
Arm
Changing the
mounting
po
s
ition
of
the
front
swing
arm
will affect the amount
of
ski
lift
along with
the ride characteristics
of
the
snowmobile.
During
factory
assembly,
the
front
swing arm was
positioned
in the
upper
hole
of
the
front
suspension bracket. This
position
was
selected
since
it
results in
the
best overall
ridin
g
characteristics
of
the snowmobile. (
See
Figure 10.)
1.
Front
Suspension
Bracket
If
swing arm
location
is
changed
to
the
lower
mounting
hole, the
snowmobile
becomes
more
sensitive
to
weight
transfer
during
acceleration,
resulting
in
slightly
more
ski
lift.
WARNING'
Front
suspension arm
is
under
heavy spring
load. Remove
spr
ing tension
from
the
front
suspension springs before relocating the
front
swing arm assembly
to
prevent
possible personal
injury.
Ski Spring Preload
Three
positions
have been
provided
for
the
front
ski spring
mounting
bolt:
Center Hole Position -
During
factory
ass·embly,
the
bolt
was installed in
the
center
hole in
the
ski
end
normally
no
change
is
required
for
general
snowmobiling
.
(See
Figure 11.)
INVADER

1.
Spring
Mounting
Positions
Rear Hole Position -
Installation
of
the
bolt
in
the
rear hole
of
the
ski
will
reduce spring preload,
increase
the
spring arch, and result in a
softer
ride
with
greater spring travel.
This
position
is
recommended
for
deep snow
operation
or
s
low
speed
trail
riding.
F
ront
Hole Position -
Pl
acing
the
bolt
in
the
front
hole
of
the
ski
will
increase spring preload, reduce
the s
pring
arch, and result in a
stiffer
ride
with
less
spring travel.
Th
is
position
shou Id
be
used
for
maximum
stability
during
high speed
operation
.
NOTE:
Always
mount
the
front
ski
sp
ring
bolt
into
the
same
position
on each ski.
To
change
the
preload
of
the
s
ki
spring,
be
sure the
weight
of
snowmobile
is
on the skis, and proceed
as
follows
:
1.
Remove
nut
from
front
spring
mounting
bolt.
2.
Open
hood
and
with
assi
stance
from
another,
stand on
front
bumper
to
relieve spring tension
from
mounting
bolt
.
3.
With
weight
still
on
front
bumper, remove
bolt,
slide spring
rub
strip
to
align
with
desired hole
position
of
ski, and in
se
rt
bo
lt
.
4.
Inst
all
nut
and
torque
25 in.
lb
. (0
.29
kg-m).
Steering
Alignment
Check
the
s
ki
alignment
and handlebar centerin
g.
1.
Place a long board
(or
suitable st
raight
edge)
against
the
right
hand edge
of
the track, and
measu
re
the
distance between
the
board and
center
line
of
the
ski. Position the ski
so
that
the
distance measured between the ski center
line and edge
of
board
is
the
same at
the
front
and rear
of
the ski. (S
ee
Figure 12.)
INVADER
1.
Straight
Edge Against
Track
2.
Measure Distance Here
2. When the
center
line
of
the
ski
is
parallel
to
the
outside edge
of
the
track,
check t
he
steering
handlebar
for
centering.
3.
If
the handlebar requires centering, loosen
the
lock
(jam) nuts and
turn
the tie
rod
length
adjusting stud in the
direction
necessary
to
center
the
handlebar. (S
ee
Figure 13
.)
NOTE:
Be
sure
the
center line
of
the ski remains
parallel
to
the
straight
edge
while
turning
the
tie
rod length adjusting stud.
1.
Tie
Rod
Length
Adjusting
Stud
2.
Locknuts
3.
1-1
/4 Inch (32
mm)
Maximum
PR
EPARATION
5

WARNING
I
The dimension
shown
in
Figure
13
must
not
exceed 1-1/4 inches (32
mm)
and
the
adjusting
stud
must
remain centered
between the
two
lock
nuts,
to
prevent
possible steering linkage failure.
4.
To
align
the
other
ski,
move
both
ski
tips
towards the center
of
the
snowmobile
to
remove
the
steering linkage
play
. Loosen
the
lock
nuts and
turn
the
tie
rod
to
obtain
an
equal distance
from
ski center
to
ski center
when measu red at the
front
and rear
of
the
sk
i
s.
(See
Figure 14.)
6
1.
Equal Distance
Front
And
Rear
2.
Tie
Rod
3. Exposed Threads
WARNING
I
After
proper
alignment
is
obtained, check
i./ie
number
of
exposed threads
at
each
rod
end.
If
the
left
hand
and
right
hand
rod
ends are
not
adjusted equal/y, possible
steering linkage failure
may
occur
.
(See
Figure 14.)
PREPARATION
5.
Tighten
all
the
hardware (nuts, bolts, etc.) in
the steering system.
Torque
the
lock
(jam)
nut
s on
tie
rod
assemblies
100
-
120
in. Ib
s.
(1.1 - 1.4 kg-m). Refer
to
the
torque
chart
for
recommended
torque
values
of
other
fasteners in
the
steering system.
Chaincase
NOTE:
Use
DEXRON
II
Automatic
Transmission
F
luid
when
filling
the
chaincase.
Check the chaincase
fluid
level.
Fluid
level must"be
between
the
center and
the
top
of
the
sight gauge.
If
additional
fluid
is required, remove
the
upper
plug in the chaincase and
pour
D
EXR
ON II
Automatic
Transmission F
luid
into
the chaincase
until
correct
level
is
attained
. This
provide
s the
proper
lubrication
for
the
chain and bearings. (
See
Figure 15.)
1.
Upper
Fill
Plug
2.
Fluid
Level S
ight
Gauge
Brake
Check
to
be
sure
the
brake disc can
be
moved back
and
forth
with
just
a very
slight
drag on the brake
pad
s.
Next,
check
that
the brake lever
movement
is
less
than
3/4
inch (19
mm)
when brakes are
fully
applied.
(See
Figure 16.)
IN
VADER

(
Observe this
WARNING
I
during
next
step
DO
NOT
OVERTIGHTEN
the brake
because
damage
to
components,
or
personal
injury
could
result.
If
the
brake lever
movement
exceeds
3/4
inches
(19
mm),
adjust
the
brake
by
tightening
the
brake
adjusting
nut
while
simultaneously
moving
the
brake disc back and
forth
until
the brake pads
just
begin
to
move
with
the
disc.
(See
Figure 17.)
1. Brake
Adjust
ing
Nut
2.
Brake Disc
3.
Brake
Pads
4. Brake Cable
Adjusting
Nuts
INVAD
ER
NOT
E: Do
not
disturb
brake cable adjusting nuts.
The cam (arm)
must
be
centered on the pins in
the
off
position
.
Improper
adjustment
will
result in
incorrect
brake
function
and
premature
wear.
T
he
brake disc and
hub
assembly
must
float
(free
movement
from
left
to
right) on
jackshaft
to
maintain
proper
alignment
between the brake pads.
This
movement
may result in a
rattle
heard
during
vehicle
operation
and
is
a normal
condition
.
Wiring Harness
Check the connectors on
the
wiring
harness
to
be
sure
they
are
properly
located and secure.
Enrichener Cable
Adjustment
With
the Enrichener lever
down,
and plastic
boot
slid up the casing,
the
enrichener cable should have
1/16
inch
(1
.5
mm)
free
movement
when raised
as
shown.
(See
Figure 18.)
1.
Plastic
Boot
2.
1/16
inch
(1
.5
mm)
3.
Locknut
4.
Adjusting
Screw
PREPARATION
7

If
adjustment
is
required, loosen
the
lock
nut
and
turn
the
adjusting screw
to
obtain
the
correct
movement.
After
adjustment
or
checking,
reposition
boot
over enrichener
fitting
to
prevent
foreign
matter
from
entering
the
enrichener
system.
NOTE:
Engine
flooding
may
occur
if
the
Enrichener
Ca
ble free
movement
is
less
than
1/16 inch
(1.5
mm)
Engine
Coolant
Observe this
[:~~~!!~~::J
during
next
step
Approximately
1/8
in.
(3.18
mm)
of
coolant
will
always appear on the
floor
of
the reservoir tank. To be sure the
coolant
level
is
adequate, always
fill
to
within
1/4 -
1/2 in. (6 -
12
mm)
of
the tank top.
Coolant
Supply
-
Use
a 55/
45
mixture
of
antifreeze
and
water
(55%
ETHLENE
GLYCOL
base
antifreeze and
45
%
water),
when
filling
the
cooling
system.
This
recommended
mixture
will
protect
against freezing
down
to
approximately
-50°F
(-45°C). A
major
brand
of
antifreeze (such
as
Prestone
II
or
Dowgard)
is
recommended. T
he
coolant
level
must
be
within
1/4 - 1/2 in. (6 - 12
mm)
of
the
tank
top
when cool.
Filling Cooling
System
Observe this I
WARNING
I
during
next
step
Use
care removing the pressure cap when
the engine
is
hot
or
severe burns
could
result. Remove pressure cap
from
reservoir
only
when engine temperature
is
below
120°F
(50
°
C).
1.
Remove vent plug
from
top
of
thermostat
housing and pressure cap
from
reservoir tank.
(See
Figure 19.)
8
PREPARATION
1.
Vent
Plug
2.
Pressu
re
Cap
Observe this
[:~~~]before
next
step
DO
NOT
USE 100%
ANTIFREEZE
OR
WA
TER. 100% antifreeze
will
freeze before
a
55
/45
mixture
of
antifreeze
and
water.
2.
Slowly
fill
the
cooling
system
through
the
reservoir
tank
opening.
Cooling
system
capacity
is
approximately
one gallon.
3. When
coolant
appears
at
vent
opening in
thermostat
housing, reinstall
vent
plug, and
continue
filling
until
level
is
1/4 - 1/2 inch (6 -
12
mm)
down
from
neck in reservoir tank.
Reinstall pressure cap.
NOTE:
Recheck
the
coolant
level
after
running
the
engine,
to
insure
coolant
level remains adequate
to
properly
cool engine.
Drive
and
Driven
Converter
Alignment
Correct
converter
center-to-center distance
of
12.0 inches
(304
.8
mm)
and
converter
offset
distance
0.525
-
0.588
inch
(13.3
-
14
.9
mm)
is
obta
ined when
alignment
gauge PIN
57001-3503
is
correctly
installed between
drive
and driven
converter
sheaves.
INVADER

Center-
To
-Center Distance
NOTE:
Improper
handling or
mi
suse
of
the
alignment
gauge
wil
l
resu
lt in inaccurate converter
alignment. Check the flatness
of
the
al
ignment
gauge
wi
th
a strai
ght
edge
pri
or
to
eac
h
use.
1. Remove the converter guard and
dr
i
ve
belt.
NOTE:
Dr
i
ve
be
lt will
not
be
reinstalled
unti
l
runni
ng
tests on the engine
are
comp
leted.
2.
Rotate the driven converter movable
sheave
clockw
i
se,
and insert the alignment
gaug
e
between the
sheaves
with
the deep notch facing
the stationary
sheave.
Carefully
re
l
ease
the
movable
sheave,
al
lowing the spring tension
to
keep the
gauge
in position between the
stationary and
movable
sheaves.
(
See
Figure
20).
1.
Al
ignment Gauge PIN 57001-3503
3.
Center distance
is
correct if the notch in the
alignment
gauge
fits
ove
r the shaft
on
the dri
ve
converter.
(See
Figure 20. )
I
NVADER
I f
ad
j
us
tment of
th
e converter center distan
ce
is
r
equ
ir
ed:
1.
Loos
en
the jackshaft bearing retainer
mounting
bolts and the adjusting
bolt
loc
knut.
(See
Figure
21
.)
1. Bearing Retainer
Mounting
Bolts
2. Adjusting
Bolt
Locknut
3. Adjusting
Bolt
4.
Bearing Retainer Shims
5.
Parallel
2.
Loo
sen the
four
chaincase
mounting
bolts and
three bolts securing the radiator brace bracket
a
sse
mbly
to
the
chassis
and chaincase.
(See
Figure 22
.)
1.
Chaincase
Mounting
Bolts
2.
Radiator Brace Bracket
Bolt
PREPARATION
9

3. Move the
jackshaft
bearing retainer and
chainc
ase
forward
or
rearward,
as
required,
to
obtain
12.0
inches
(304
.8
mm)
center distance.
4.
To
insure
correct
center distance is
maintain
ed
,
turn
the
adjusting
bolt
so
the head
of
the
bolt
contacts
the
jackshaft
bearing retainer flange,
and
tighten
the
locknut
. (
Se
e Figure 21.)
To
prevent
premature
jackshaft
bearing
failure, reshim
th
e bearing retainer
after
changing
center
distance.
5.
T
ight
en all
bolts
and nuts
for
the
chaincase and
ra
d
iat
or
brace
bracket
assembly, then
perform
procedures listed
under
Jackshaft Bearing
Retainer S
himming
.
Jackshaft Bearing Retainer Shimming
After
adjusting center-
to-center
distance,
sh
im
the
jackshaft
bearing retainer
as
follows:
1.
Remove the
left
side
aluminum
trim
from
lower
pan and unscrew the
bolt
securing driven
converter
to
the
jackshaft.
(See
Figu
re
23.)
1.
Al
uminum
Trim
2.
Retaining
Bolt
2.
Remove
the
shims
below
the
bearing retainer.
(
See
Figure 21.)
10
PREPARAT
ION
3.
Position
the
bottom
of
the
retainer parallel
to
the
top
surface
of
the chassis.
(See
Figure 21.)
Observe this
[:~~~!!~~:]
during
next
step
The bearing retainer
should
be
shimmed
until
the
jackshaft
centerline
is
6.
62
inches
(168.15
mm)
above the track drive
shaft
centerline.
4. Install
"U"
shaped shims,
as
required,
to
fill
the space between the
bottom
of
retainer and
top
of
cha
ssis.
This
procedure prevents
excessive preloading
of
the
jackshaft
bearings.
5.
Tighten
all
bolts
and nuts on the
jackshaft
bearing retainer.
6.
Pos
iti
on
the
driven
converter
onto
the
jackshaft and check Converter
Offset
Distance.
Converter Offset Distance
After
checking center-
to-center
distance, inspect
for
proper
converter offset.
Correct
offset
dist
an
ce
is
obtained
when the
surface
of
the
shallow
notch
on
the
alignment
gauge touches
the
ba
se
of
the
fixed
sheave
of
the
drive converter.
(See
Figure 24.)
@D@
24
INVADER

If
adjustment
to
the
offset
distance
is
required:
1.
Remove the
left
side alum inum
trim
from
lower pan, and unscrew the
bolt
securing
driven converter
to
the jackshaft.
(See
Figure
23.)
2.
SI
ide the driven converter
from
jackshaft and
add
or
remove shims,
as
required,
from
the
bore
of
driven converter
to
obtain correct
converter offset.
(See
Figure 25.)
1. Driven Converter
2.
Shims
AVAILABLE
SHIMS
PI N
THICKNESS
92025-3501 .032
INCH
(0.8 mm)
92025-3502
.063 INCH (1.6 mm)
92025-3503
.100
INCH (2.5 mm)
3.
Reinstall driven converter and
torque
mounting
bolt
40
- 50
ft.
Ibs. (5.5 - 6.9 kg-m) .
4.
Pos
i
tion
aluminum
trim
onto
the lower pan
and secure
with
screws and nuts.
Be
sure the
special washers are installed under the head
of
each
screw
to
prevent damaging the decal
pattern on the
aluminum
trim.
5.
I nspect drive and driven converters
for
correct
parallelism.
INVADER
Parallelism
1.
After
check ing the center-to
-c
enter and
offset
distance, parallelism must
be
checked by
measuring dimensions A and B
as
shown.
(See
Figure 26.) Compare dimensions A and B
against Notes
1 and
II.
1.
Alignment
Gauge PI N 57001 -35
03
NOTE
I: Dimension A
must
be
equal
to
or
more
than dimension
B.
NOTE
II:
Dimension A must never exceed
dimension B
by
more than 0.02 inch (0.5
mm).
2.
If
dimension A
is
less
than dimension
B,
parallelism between the drive and driven
converters
is
not
correct. Parallelism must
be
adjusted
as
follows:
PREPARATION
11

a.
Loosen
the
large
bolt
in each
of
the
two
engine
mounts
on the
right
side
of
the
engine.
b.
Move the
right
side
of
the engine either
toward
the
front
or rear, whichever
is
necessary.
After
the converters
are
parallel,
install
the shims
as
required on either side
of
the
mount
to
fill
the
space
between the
engine
mount
and the slotted engine
mount
brackets on the chassis.
(See
Figure 27.)
1.
Engine
Mounting
Bracket
2.
Shims
3. Engine
Mount
Bolt
c.
Securely tighten the large bolts in the
two
engine
mounts
after
parallelism is obtained.
(See
Figure 27.)
Oil
Tank
We
recommend using Kawasaki
Snowmobile
Oi
l.
This
oil
is
specially
formulated
to
give
minimum
piston ring varnish and
combustion
chamber
deposits
along
with
excellent
lubrication
qualities.
I
n
an
emergency
situation
when Kawasaki
Snowmobile
Oil
is
not
available, a
B.I.A.
cert
ified
TC
-W
oil
may
be
substituted.
All
certified
oils
will
indicate the TC-W rating on the container.
If
the
B.I.A.
certification
does
not
appear on the
container,
the
oil
must
not
be
used.
12
PREPARATION
The
use
of
lubricants such
as
"tune
-up
tonics"
and
"super
oils"
are
NOT
RECOMMENDED.
The
oil
tank
has
no
filter.
DO
NOT
ALLOW
DIRT
TO
ENTER
WHILE
FILLING.
Oil
tank
capacity
is
2
-1/
2
quart
s (2.37 liters).
Check the oil tank vent tube
for:
1.
Proper
Routing
- Sharp bends
or
kinks
in the
vent tube
will
reduce
oil
flow
to
the
oil
pump.
2.
Tie Band
In
stallation -
Tie
band may pinch
off
tube, reducing oil
flow
to
the
oil
pump,
if
installed
too
tight
.
3.
Vent
Tube
Position -
To
prevent siphoning
action
possible
under certain conditior)s
position end
of
vent tube higher than
top
of
oil
tank and away
from
brake components (disc
and pads).
Observe this
[:~~~!!~~:]
during
next
step
Failure to bleed
out
air
trapped
in
the oil
line can cause severe
enginf! damage.
Bleeding Oil Injection
System
After
filling
the
oil
tank
for
the
first
time, bleed
the air
from
oil
pump
inlet
tube
as
follows:
1.
Remove the
instrument
panel
mounting
screws
to
provide the
additional
clearance
needed and remove the air silencer assembly.
2.
Loosen
the
clamp screw and separate the
left
hand carburetor
from
its r
ubber
holder.
3.
Remove the bleed screw
from
the side
of
the
oil
pump
and
allow
oil
to
drain
until
all the
air
bubbles
are
removed
from
the
inlet
tube.
Visually check the entire length
of
the tube
to
be
sure
that
all
of
the air
has
been
removed; then
reinstall bleed screw. (
See
Figure 28.)
INVA
DER

(
1.
Oil Pump
Inlet
Tube
2.
Bleed Screw
NOTE:
Reinstall
the
left
hand carburetor
after
performing
Engine Gearcase servicing.
Air
silencer
assembly should
not
be
installed
until
Purging
Air
from
Oil Pump
Outlet
Tubes procedure
is
completed.
Engine
Gearcase
Components inside the gearcase drive the oil
injection
pump
and
coolant
pump.
Lubricant
level
is
correct
when the
oil
appears
above the center
of
the sight
gauge,
but
not
higher than the
top
.
(See
Figure 29.)
1.
Breather Hole
2.
Oil Level Sight Gauge
3.
Drain Plug
INVADER
To
fill
or
add
lubricant
to
the gearcase, remove
fill
plug (located on
top
of
gearcase) and
pour
Shell
XL
100
10W30 non-foaming engine
oil
into
the
filler
opening
to
raise
lubricant
to
proper
level. Gearcase capacity
is
approx
imately
1.35 oz.
(40 cc).
(See
Figure 30.)
NOTE:
The
carburetor
has
been removed
during
the previous procedure.
After
filling
the
eng
ine gearcase, reinstall
carburetor
into
rubber holder. Position
carburetor
so
that
float
bowl
does
not
contact
front
frame
and tighten
clamp screw.
NOTE:
The air silencer assembly should
not
be
installed
until
Purging
Air
from
Oil Pump
Outlet
Tubes procedure
is
completed.
Engine
gearcase
oil should
be
drained
after
the
initial
100
miles
of
engine operation, and at the
end
of
each
season,
to
remove any
impurities
or
foreign
matter
present in the
gearcase
cavity.
To
drain the gearcase, remove drain plug.
(See
Figure
29.)
Observe this
~~0!?~J
during
next
step
Failure to remove obstructions from
gearcase breather hole
may
cause excessive
oil consumption resulting in extensive
engine damage. (See Figure 29.)
PREPARATION
13

To
insure proper operation
of
the
oil
seal
between the engine
gearcase
and crankcase, check
for
accumulated obstructions in the
gearcase
breather hole, located above
the
gearcase
sight
gauge.
Fuel
Use
regular
or
premium
leaded gasoline
with
a
minimum
PUMP POST
OCTANE
NUMBER
OF
89.
I
waR
..
I
..
G I
Gasoline fumes are heavier than
air
and
can
become explosive
if
exposed
to
a
pilot
light
from
a furnace,
hot
water
heater, clothes dryer, etc.
Fill
the fuel
tank
only
in
an
area
that
is
well ventilated
and
free
from
pilot
lights and sparks.
Before removing
filler
cap
from
the fuel tank,
remove any ice, snow,
or
water
from
around the
fuel tank opening
to
prevent
contamination
of
fresh fuel
mixture
.
Fill the fuel
tank
slowly
and
pour
the fuel
into
the
tank
using a funnel
with
a
fine
mesh
screen.
Each
time
the fuel tank
is
filled
with
gasoline, antifreeze
must
be added
to
the
fuel system. Moisture
contained
in fuel
system components
(fuel
tank, lines, fuel
pump
or
carburetor)
could
freeze
and
may
result in severe damage.
A
major
brand
of
Gasoline
Antifreeze
(such
as
Heet) should
be
added
to
the fuel tank
by
following
the manufacturer's recommendations on
the container
for
proper
mix
ratio
of
gasoline
with
antifreeze.
(See
Figure 31.)
14
PREPARATION
31
Fuel/Oil
Mixture
(Ratio)
The
fuel-to
-
oil
ratio required
is
automatically
controlled
at
the
engine
oil
pump.
The
oil
pump
is
a variable
ratio
pump;
at
idle,
the
fuel/oil
ratio
is
approximately
110
to
1
increasing
with
throttle
position
to
approximately
25
to
1
at
maximum
power.
Each time
gas
tank
is
filled-check
for
adequate
oil
level in the
oil
tank. A
full
oil
tank
assures
proper
fuel/oil
ratio
will
be maintained
to
prevent
serious engine
damage.
Engine Break-In
To
insure adequate
lubrication
of
internal engine
components during
ear
ly
break-in, a 25-to-1
gasoline-to-
oil
ratio
is
recommended
for
the
first
three (3) gallons
of
gasoline. This
ratio
can
be
obtained
by
thoroughly
mixing
1
pint
(0.47 liter)
of
Kawasaki
Snowmobile
Oil
with
three (3)
gallons (11.4 liters)
of
gasoline.
Pre
-
mixing
gasoline and
oil
will
no longer
be
required
after
the
initial
three gallons
of
gasoline and
oil
mix
have been consumed.
INVADER

(
For
proper
engine break-in, run the machine on
hard packed snow at
approximately
3/8
to
112
throttle,
with
occasional bursts
to
full
speed.
Limit
the
full
speed
operation
to
1-1/2
to
2
minutes, then
return
to
cruising speed
for
10
to
15
minute
intervals.
After
10 hours
of
operation
or
two
tanks
of
gasoline are used, break-in
is
complete.
Synchronization
of
Oil
Pump
and Carburetors
Synchronization
of
the
oil
pump
and carburetors
is
extremely
important
to
assure adequate engine
lubrication
and peak performance.
Remove the
instrument
panel
mounting
screws
and
the
air silencer assembly. Remove the drive
belt
and
perform
the
following
procedure.
1.
Loosen the idle stop screws
so
that
both
throttle
slides
bottom-out
in the
carburetor
bores.
(See
Figure 32.)
32
1.
Throttle
Cable
Adjusting
Screw
2.
Adjust
ing Screw
Locknut
3.
Air
Screw
4. Idle
Stop
Screw
INVADER
2.
Push
the
oil
pump
lever
forward
until
it
contacts the stop
pin;
this
insures the
oil
pump
is
at the dead idle
position.
(See
Figure
33.)
1.
Lever
Stop
Pin
2.
Slack Removed
3. Cable
Locknuts
3.
Adjust
the
throttle
cable on the
LH
carburetor
so
that
all
of
the slack
is
removed.
The
throttle
slide should begin
to
raise
as
soon
as
the
throttle
lever
on
th
e handlebar is
advanced.
(See
Figure 32.)
4.
Loosen the
locknuts
on the
oil
pump
cable
and,
while
holding
the
oil
pump
lever against
the stop pin, remove all the slack.
Adjustment
is
correct
when the lev
er
on
the
oil
pump
and
the
throttle
slide in the
LH
carburetor
move
simultaneously
as
the
throttle
cont
rol lever
is
activated.
(See
Figure 33.)
5.
Adjust
R H carbu
retor
throttle
cab
le
so
that
oil
pump
lever and
both
throttle
slides move
simultaneously
as
the
throttle
control
lever
is
activated.
6.
Turn
the idle stop screws, on
both
carburetors, in
until
the spring
is
coil bound.
Then, back
off
each screw six
complete
turns
(initial
adjustment).
Air
screw
is
properly
adjusted when opened 1.5
turns
off
its seat.
7.
Perform steps under Purging
Air
From
Oil
Pump
Outlet
Tubes.
PREPARA
TlON
15

Purging Air From Oil Pump
Outlet Tubes
Remove
the
instrument
panel
mounting
screws
and
the
air
si
lencer assembly. Remove
the
drive
belt
an
d
perform
the
following
procedure.
Any
air bubbles in
the
oil
pump
outlet
tubes
will
cause serious internal engine damage. Purge
the
air
from
these tubes
as
follows:
Observe this
WARNING
I during
next
step
Failure to disconnect the oil
pump
control cable when performing this
procedure will damage the cable. The
damaged oil
pump
control cable will
prevent the throttle from returning to the
idle position, resulting in automatic clutch
engagement when the engine
is
started,
which
may
lead to personal injury.
1.
The
oil
pump
inner
control
cable
must
be
di
sconnected
from
the
control
lever on
the
oil
pump
to
prevent
damage
to
cable.
Do
not
disturb
the
cable
locknuts
when removing the
inner
cable.
(See
Figure 34.)
Observe this
(:~~!~~::J
during
next
step
Never run the engine with the air silencer
removed from the carburetor.
Poor engine
performance and engine damage will
result.
3.
Temporarily
POSition
the
air
silencer
onto
the
carburetor
assemblies and secure
converter
guard
into
proper
position
wi
th
clip
pins.
4.
Start
the engine and
turn
both
idle stop
screws
equally,
to
obtain
engine idle speed
of
3,000
R.P.M.
Stop
the
engine
after
it
has
idled
for
one
minute
.
This
is
ample
time
to
purge all
the
air
from
the
oil
pump
outlet
tubes.
5.
Remove
the
air silencer assembly; release
the
rubber
band, and reconnect
the
oil
pump
inner
control
cable
to
the lever.
Be
sure
to
check
the
operatjon
of
the
oil
pump
control
lever and cable
by
activating
the
throttle
control
lever on
the
handlebar.
6.
I nstall the air
si
lencer assembly
onto
the
carburetors and check
that
the
rubber
seals
between air silencer
body
and carburetors
fit
securely
during
installation.
NOT
E: On SS440 models,
properly
position
the
plastic adapters on
the
carburetors
prior
to
air
silencer
installation,
to
prevent
breakage
of
the
plastic econo
jet
fitting.
7.
Secure
the
air silencer
into
position
with
four
springs. Install long springs on
upper
silencer
tab retainers and
short
springs on
lower
silencer
tab
retainers.
34
8.
Install the
mounting
screws
to
secu
re
the
L..-
_
__
____
______
___
_
__
...J
instrument
panel assembly.
1.
Oil
Pump I nner
Control
Cable
2.
Oil Pump
Control
Lever
3. Rubber Band
4.
Mount
Bolt
2.
Attach
a
rubber
band
to
hold
the
oil
pump
control
lever in
the
wide
open
position
.
This
will
cause
the
maxi
mum
flow
of
oil
through
the
outlet
tu
bes
.
(See
Figure 34.)
16
PREPARATION
Ignition Timing Check
Remove
the
drive
belt
prior
to
performing
the
foll
owing procedure.
INVADER
/