Page is loading ...

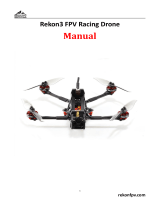
250 Pro Instruction manual
International edition
Rev 1.0 - April 2016
‘Living Manual’

Table of Contents
Table of Contents
Living Manual
Thank You!
Getting Started, ARF Version
The Anatomy of a Vortex
Connectors and Switches
Connector Part Numbers and Sources
Arm Assembly
Camera Mounting Plate
Flight Camera
GoPro Camera Mount
Lost Model Alarm
The On Screen Display (OSD)
The Welcome Screen
The Main Menu
The LED Setup Menu
The Flight Controller Menus
The Video Tx Menu
Flight Controller
R/C Transmitter Control Modes
Flight Modes
Betaflight / Cleanflight / Baseflight / Multiwii / Open-Source
Cleanflight Configurator Connection
2

Flight Controller Stick Commands
Overview
RotorSENSE
Pro-Tuning
R/C (Uplink) Receiver Selection
CPPM
SBus, or Spektrum
Notes on Receiver Selection
Receiver Auto-Detection
Version 1: OSD Firmware prior to ???.???
Spektrum™ Radios
FrSky Taranis Radio
Futaba S-Bus Radios
Version 2: OSD Firmware from ???.??? onwards
Gaming (Beta)
The Birth of a Gaming Mode - The History
How Does It Work?
Enabling Gaming Mode
Race Guidelines - Flying with Friends
Diagnostics - Motor Test
BlackBox - Logging and Tuning
Firmware Upgrades
OSD Firmware Upgrades
Upgrade procedure
Upgrade procedure for bricked OSD
Flight Controller Firmware Upgrades
3

Appendix A: EzUHF Configuration
Appendix B: The Wizard - What else does it setup?
Appendix C: Video Tx - Staying Legal
ITU Region 2: Americas, Greenland, eastern Pacific Islands
ITU Region 1: Europe, Africa, Middle East, Iraq, Soviet Union
ITU Region 1: Europe, Africa, Middle East, Iraq, Soviet Union
Appendix D: LED Board - Status report
Looking after your Vortex
Snow and Water
The Sun
Dirt
Jealous Friends
Specifications
Spare parts and Upgrades
Support
Frequently Asked Questions
Q. I have taken my 250 Pro apart, and this ‘Spring Thing’ popped out, where does it
go?
Q. How do I calibrate my 250 Pro ESCs?
Q. Can I fly in the rain?
Q. I dunked my 250 Pro in the ocean/lake/pond, what do I do?
Q. Do I really need to de-solder wires to install a pimp kit?
Q. What is the deal with the new LED board?
Q. My motors are ‘stuttering’, and the quad falls out of the sky under full throttle
Q. My R/C Receiver isn’t auto-detected by the wizard
Q. I don’t like the stock camera, and would like to upgrade it
Q. The bell on one of my motors worked loose
4

Q. My vortex beeps continuously
Q. My vortex is playing Crazy Train song
Q. My vortex emits 2 long beeps followed by a short beep on startup (--·)
Q. When I fly, all I see is the ground
Q. My Vortex flips instead of taking off
Q. I updated to the latest BetaFlight x.y.z and my quad is no longer tuned
Regulatory notice
Directions on safety
Warranty
Social Networks
Like Us
5

Living Manual
Note that this manual is a ‘living manual’.
Instead of downloading a static PDF file, the manual is an online document which reflects
edits, additions, and corrections as they happen.
The Living Manual also allows readers to add their comments, which editors can use to refine
the documentation.
Confused by part of the manual? Wishing for a better explanation for part of the setup? Leave
a note and the editors will listen.
Thank You!
The team that designed the Vortex would like to thank you for purchasing this product.
Many hours of development, and testing time went into the Vortex 250 Pro, we truly hope that
this is reflected in your experience with the product.
The Vortex 285 was a tough lead to follow, but we believe that the Vortex 250 Pro raises the
bar in just about every axis, which hopefully will enable even more pilots to enter the exciting
world of FPV racing.
We would love to hear your feedback on the product, whether good or bad, at
6

WARNING
Congratulations on your purchase of one of the hobby’s first ARF pure-bred racing
quadcopters. A product designed by FPV Racers, for FPV Racers.
Do not expect it to fly like a DJI Phantom™ . It does not have a return-to-home feature, no
GPS, and it does not have stabilization features that will allow your girlfriend to fly it.
Take it easy if you are new to the world of FPV racing, try to avoid slamming the quad into the
first wall before you have mastered slaloming through the trees on the way to the wall.
Acro mode is something that should be learned as soon as possible, flying any other mode is
a bit like driving a Lamborghini around a parking-lot in reverse… not exactly what you bought
the Lambo for.
Please carefully read the recommendations in this getting started guide, as far as
equipment/battery selection, and how to run the Vortex 250 Pro Wizard.
REMOVE PROPS
Mini-quad props can do some serious damage when coming in contact with human skin.
Unless you are ready to fly, when you are working on a quad with the battery connected, it is
highly recommended to REMOVE ALL PROPS.
When setting up mini-quads, there is always a remote chance that a configuration change can
spin up motors unexpectedly.
ImmersionRC accepts no responsibility, or liability, for any injury, or damage, to persons or
property, caused by the use of the Vortex.
INSTALL ANTENNA
The Video Transmitter included in the Vortex may be damaged permanently if run without the
supplied SpiroNET Antenna.
Please take care to install this antenna before every flight, and when powering up the Vortex
for even a short time period.
ImmersionRC accepts no responsibility for damage caused to the Vortex by operating without a
suitable Tx antenna installed.
7


The Anatomy of a Vortex
Connectors and Switches
1) USB connector, used to configure the flight controller and upgrade the Vortex
firmware.
Note that to use the USB connector, a battery must be connected also. The Vortex
cannot be powered through the USB connector.
Please be careful not to put too much strain on this connector. It is a lightweight
surface-mount part, and if the quad is dragged around by the USB cord it may not
survive.
2) LED board button, used to change Video Tx band, to restart the wizard and also to put
a spektrum receiver in bind mode.
Press and release after 1st beep to change video band, release after 2nd beep to
restart the wizard, release after 3rd beep to put a spektrum rx in bind mode, finally
release after 4th beep to cancel operation.
9

Note: To bind a Spektrum Rx using the rear button, the vortex must be placed in
SPEKTRUM 1024/2048 mode, and not AUTO mode, using the Vortex Configurator on a
PC or Mac.
3) Fusion FC/OSD button, used to enter firmware update mode in the case of a ‘bricked’
OSD. Note that this button is not required in normal use with the bootloader and
firmware shipped with the 250 Pro. .
See the
Firmware Upgrades
chapter for more details.
4) Socketed Video Tx Module
Either a 350mW, or 25mW 5.8GHz Custom NexWaveRF module, depending upon the
target market. Note that 25mW is the maximum power level allowed for license-free
use in the EU.
Note that the module is restrained using a stainless-steel spring. Take care when
removing the two mounting screws on the top plate, since the spring may be
10

ejected from the side of the quad, into awaiting fingers…
Be sure to reinstall the spring when re-assembling the Vortex, to avoid the Tx
module from damage in a crash.
5) Flight Camera Video/Power Connector
The flight camera video and power connector is a 3-pin Picoblade connector located
behind the flight camera. The connector can be easily accessed without the need to
disassemble the quad.
Looking from the front of the quad, the pinout is as follows, left to right:
1. Video
2. Gnd
3. +5v
6) GoPro Power Connector
The GoPro power connector is a 2 pin Picoblade, also accessible through the left side
plate. It is typically used to power a GoPro with its battery removed, to remove weight
from the front of the quad, and therefore make getting the COG correct easier.
11

The connector has the following pinout, starting from the front of the quad:
1. +5V ~1A Maximum Current
2. Gnd
NOTE: Certain GoPro models will not power up without a battery installed, a little
research may be required to identify which ones .
7) Receiver PPM Connector (CPPM Only)
When using a classic PPM (a.k.a. CPPM) receiver, use the PPM connector, a 3-pin
JST-PH connector with the following pinout, looking from right to left in the below
image:
1. Gnd
2. +5V Power to the receiver
3. PPM 3.3v, or 5v logic levels
12

8) Receiver Serial Connector
When using receivers which emit a serial protocol (most of the receivers used in Drone
Racing today), an alternative connector, located on the top of the Fusion Gen2 PCB is
used.
This connector contains both a +5V, and a +3.3V supply, to support most of the
receivers on the market today.
For longer-range flight, the latest EzUHF firmware allows the 4 channel Lite receiver to
be connected using the S-Bus protocol. Alternatively the TBS Crossfire receiver can
also be used via S-Bus.
13

9) XT-60 Battery Connector
The pre-installed XT-60 connector is compatible with most batteries of the size and
capacity in the class required by the Vortex.
Note: Pay EXTREME attention to the polarity of batteries connected to this
connector, especially those soldered ‘DIY’. A reverse-polarity connection, even for
a fraction of a second will let out the ‘magic smoke’ and destroy most of the
electronics in the Vortex.
Also Note: When unplugging the battery, especially one with a new, and rather tight
connector, take care to hold the cables, and avoid unnecessary strain on the Vortex
PDB. Pulling these cables too hard may pull the traces off of the PCB.
Connector Part Numbers and Sources
If any of the connectors on the Vortex 250 Pro are damaged, or if 3rd party components are to
be integrated into the system, the following list of connectors and pre-crimped wires should
be useful.
Cable
Description
Manufacturer’s PN
Digikey PN
ESC Signal Connector
Picoblade 2 pin
0510210200
WM1720-ND
FUN/GPS Signal Connector
Picoblade 5 pin
0510210500
WM1723-ND
Camera Signal Connector
Picoblade 3 pin
0510210300
WM1721-ND
Picoblade Signal Wires
(all Picoblade connectors)
Picoblade
0006660013
WM2320-ND
14

Arm Assembly
When changing the arm, a soldering iron is required, to remove the ESC + and - battery cables.
Note: The choice of soldered connections here, instead of the much more convenient
connector option may not seem ideal.
Various connectors were tried, but one compact enough, robust enough, and capable of
carrying > 20 Amps per motor was not found.
A custom connector suitable for this application will be included in a future revision of the
Vortex to simplify the in-field replacement of arms.
15

Camera Mounting Plate
Flight Camera
The Vortex flight camera is suspended from a dampened carbon fiber plate. This reduces the
amount of Jello due to unbalanced (or slightly damaged) props.
The camera mount itself allows a
tilt of up to ~45 degrees,
compensating for frame tilt due to
high speed racing.
NOTE: The camera pivot point is
intentionally tiltable without tools.
Because of this, it may move after
the occasional ‘hard landing’, and
should be checked before the next
launch.
The Vortex frame was designed for the family of FatShark cameras with lightweight plastic
cases, from the 600, and 700 TVL CMOS cameras, through to the 900 line CCD.
The Vortex is shipped with the 600 line CMOS installed (certain quads may be shipped with
the slightly improved 700 line version).
The plastic pins and circlips installed into each of the dampers are important, and prevent the
camera mounting plate from being separated from the frame in a crash.
NOTE :It is important that all four of these pins are installed before every flight. Flying with
fewer pins installed may result in damage in a crash.
NOTE :A good upgrade for the 700TVL CMOS is the HS1177 CCD, available from various
online retailers. This camera will fit in the standard camera mounting bracket.
16

GoPro Camera Mount
The Vortex 250 Pro ships with a GoPro camera ‘recliner’ kit, which may be optionally installed.
This kit tilts the GoPro camera to an angle appropriate for high speed flight, while providing
mounting points to securely fasten the camera to the quad.
To install the recliner kit, the anti-vibe camera mounting plate must be removed following
these simple steps:
1) Remove both side-plates from the quad.
2) Carefully remove the 4 clips which restrain the pins which run through the rubber
dampers.
3) Remove the plate, mount the GoPro recliner, and attach with the supplied aluminium
screws from the bottom of the plate.
4) Re-install the anti-vibe plate, the pins, and the clips that restrain them.
Lost Model Alarm
The Lost Model Alarm on the Vortex 250 Pro sounds when the quad is disarmed after landing,
or if a receiver failsafe occurs.
The alarm is designed to be as simple as possible, without controls which could allow it to be
accidentally disabled, resulting in a lost quad.
NOTE: The alarm is driven directly from the OSD on the 250 Pro, and not from the Flight
Controller, so changing beeper settings in the Cleanflight configurator will not change its
behavior.
17

18

The On Screen Display (OSD)
The Welcome Screen
Each time the Vortex is powered up, and before sticks are moved, the following welcome
screen is displayed.
This shows various pieces of status information, including the Flight Controller version
number, and Flight Controller API version which is fairly important for OSD compatibility.
Moving the pitch/roll stick (right stick for mode 2’ers) will dismiss the menu.
19

The Main Menu
For Mode 2’ers, holding the throttle stick down and to the left will enter the main menu. Note
that this stick position needs to be held for a few seconds before the menu appears.
To navigate the menu, use the pitch/roll stick.
20
/