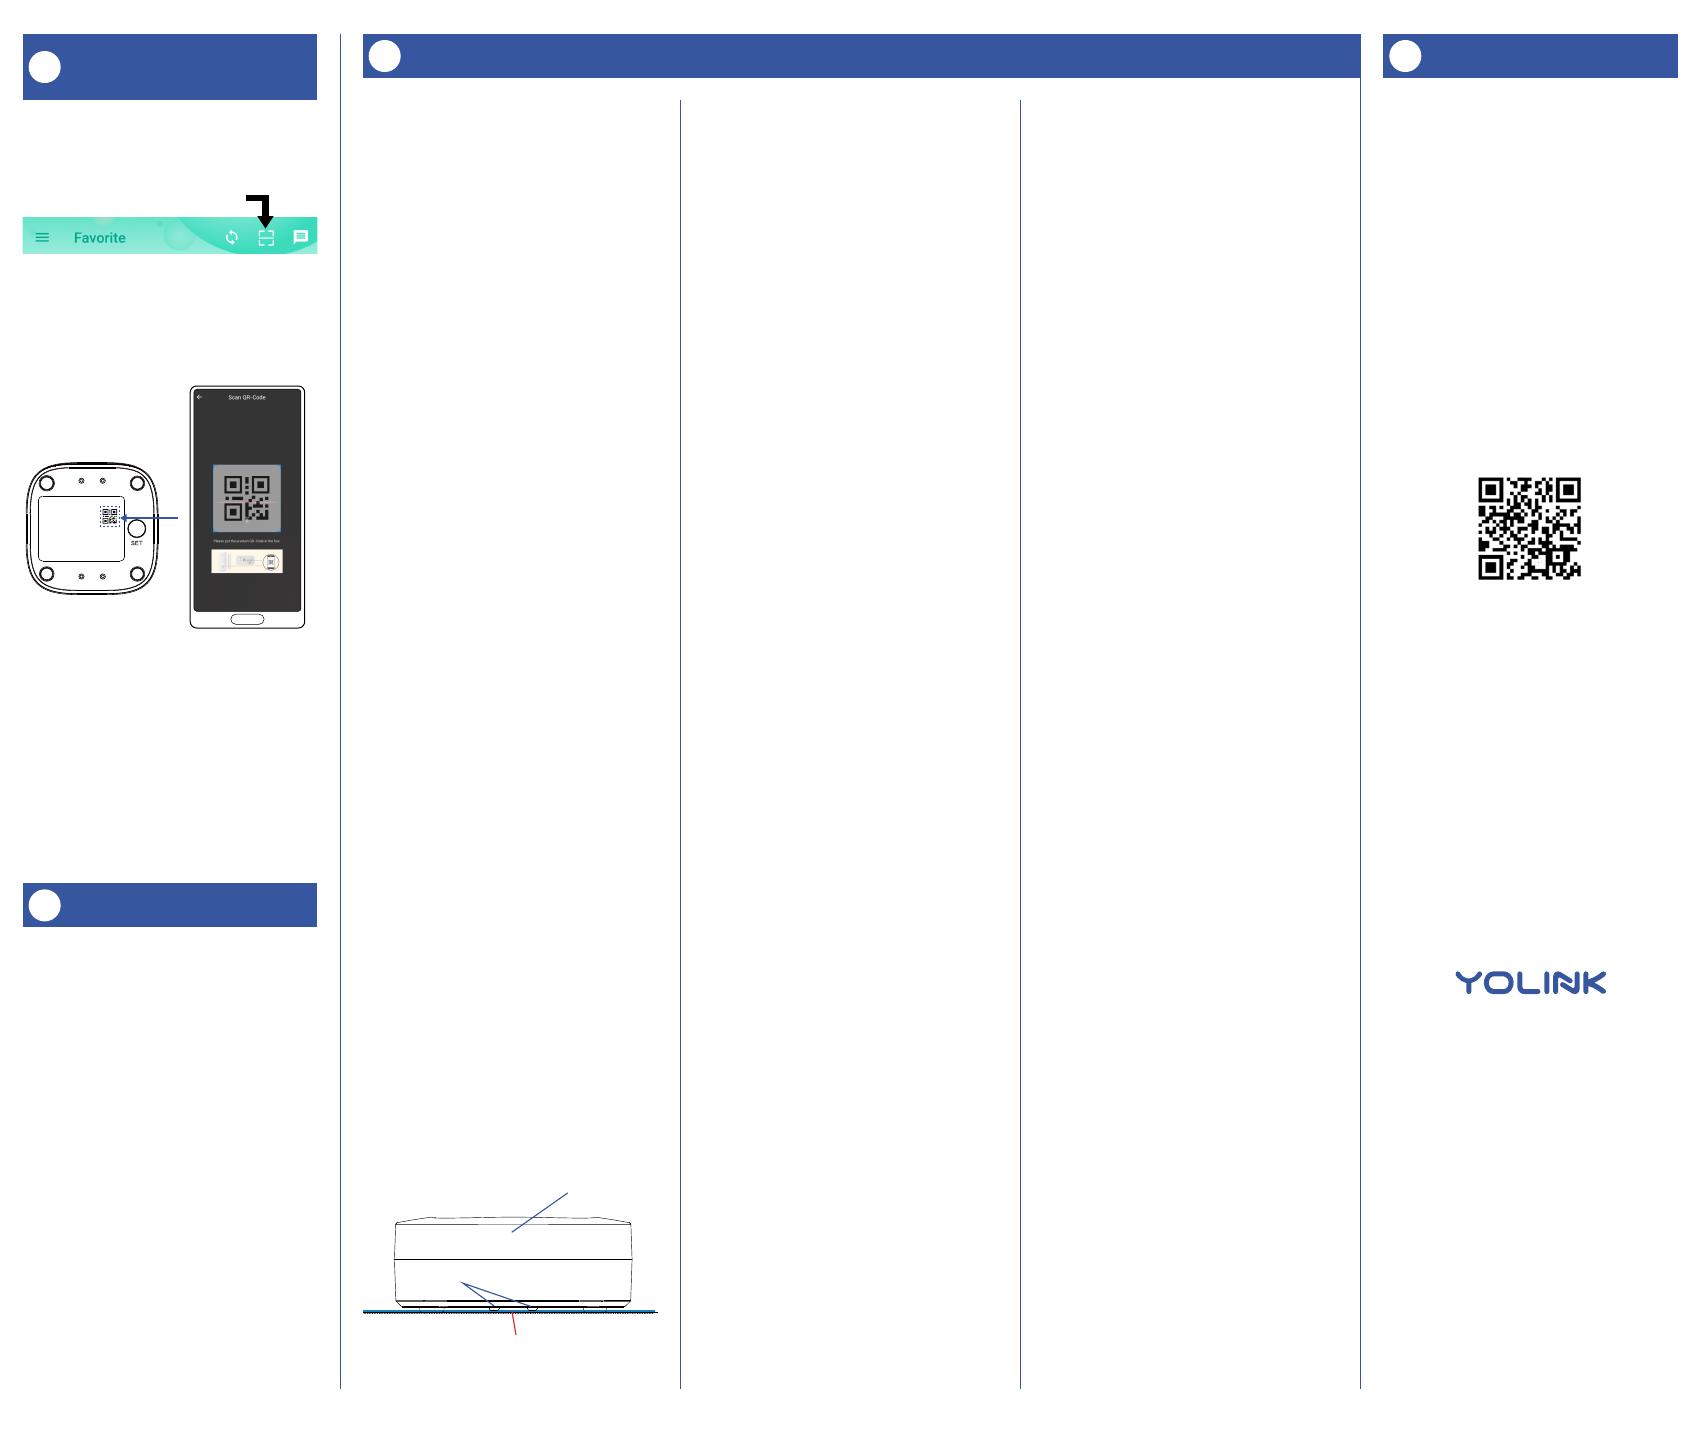
3. Hold the phone over the QR code so
that the code appears in the viewfinder.If
successful, the Add Device screen will be
displayed.
4. Follow the instructions to add your
Water Leak Sensor 1 to the app.
Contact Us
I
We are here for you, if you ever need any
assistance installing, setting up or using
a YoLink app or product!
Need help? For fastest service, please
Or call us at 831-292-4831 (US phone
support hours: Monday - Friday, 9AM to
5PM Pacific)
You can also find additional support and
ways to contact us at:
www.yosmart.com/support-and-service
Or scan the QR code:
Finally, if you have any feedback or
suggestions for us, please email us at
Thank you for trusting YoLink!
Eric Vanzo
Customer Experience Manager
Support
Home Page
15375 Barranca Parkway
Ste. J-107 | Irvine, California 92618
© 2023 YOSMART, INC IRVINE,
CALIFORNIA
Install the Water Leak Sensor 1
G
Add Your Water Leak
Sensor 1 to the App
F
1. Tap Add Device (if shown) or tap the
scanner icon:
Scanner icon
2. Approve access to your phone’s
camera, if requested. A viewfinder will be
shown on the app.
Power Up
F
Before you can use your Water Leak
Sensor 1, it must be turned on. (Batteries
have been pre-installed.) Press the SET
button briefly, until the LED flashes red
then green (which indicates it has turned
on and connected to a hub and the
cloud).
9. Avoid locations where the sensor may
be moved or disturbed by people or pets.
Avoid locations in traffic areas where it
may be kicked or stepped on, etc.
Place the leak sensor
After you have selected a location for the
leak sensor, simply place it on the floor
or surface, with the cupped part of the
sensor facing up.
Test the leak sensor
Functionally test each sensor. A
common way to test the Water Leak
Sensor 1 is by touching any pair of
electrodes with a damp paper towel, but
you may find that you can activate the
sensor by bridging a pair of electrodes
with your thumb or finger. If you choose
to pour water on the sensor or on the
floor, be sure to fully dry off the sensor
after testing. With the app in hand, and
the particular leak sensor in view in the
app, test your Water Leak Sensor 1.
After the sensor has responded properly
(and you’ve dried it off, if applicable),
confirm the sensor is shown to be
“Normal” in the app.
Refer to the full Installation & User Guide
and/or the product support page and
online support resources to complete the
setup of your Water Leak Sensor 1,
including use of the YoLink app,
automations (such as automatic water
shut-off and siren activation) and to
configure your notification preferences
(such as phone push notifications,
emails, SMS/text messages).
Probe
Floor
Water detected
(Water depth >0.01 inch)
Water Leak Sensor
5. Applications for the Water Leak
Sensor 1 are many, and they can not be
covered in detail in this quick start guide.
If you are unsure where to place your
water leak sensor, please contact us.
6. When determining the location and
quantity of sensors required for your
applications, consider the types of leaks
or flooding that is expected. For example
is the water coming from water
overflowing, like a sink, toilet, or tub? Is it
coming from a leak within an appliance,
like a dishwasher? Is it coming from a
loose or broken plumbing fitting, like on a
laundry machine or ice maker water line?
Generally, every location where water
goes into or leaves an appliance, where
there is a fitting or connection between
two pipes, or fixtures, between a hose
and a hose connection, and at every
faucet or fixture where water comes out,
is a potential leak location.
7. Consider how water may flow and
pool or collect if there is a leak at each
possible leak location. Consider the
slope of the floor or the surface that
water may drip onto. A leak at a sink
cleanout will result in water directly
below the sink, and this water may run
towards the front of the vanity or
cabinetry or to the back, draining into the
base of the cabinetry (only appearing on
the floor after a significant leak has
occurred). Floors with drains, like in a
mechanical room or near a water heater,
are intentionally sloped down to the
drain. Floors in older homes or where
settling has occurred can also result in a
slope. Take advantage of any slope in
the floor by placing the leak sensor at
the bottom of the slope or in the path of
the water flowing down the slope. A
marble, toy ball, or similar object can be
used to check the floor's level, or you
may consider pouring a small amount of
water on the floor or surface where a
leak is possible, to see how the water
may flow and pool up.
8. Additional leak sensors can be added
if you wish to protect a large region, or
you can consider the Water Leak Sensor
2, our rope style leak sensor, that allows
for creating larger water detection
regions, with the use of additional ropes.
Sensor location considerations:
Before placing and setting up your Water
Leak Sensor 1, consider the following
important factors:
1. The Water Leak Sensor 1 is intended
for indoor use, only. It should only be
used in indoor environments and within
the temperature and humidity ranges as
specified in the product listing and
product support page on our website.
2. While the Water Leak Sensor 1 is
waterproof, it should not be used where
it will always be in water or where it may
frequently be submerged in water. If
water level monitoring is required,
consider our Water Level Monitoring
Sensor.
3. The Water Leak Sensor 1 does not
have an integral sounder. In order to be
waterproof and provide 5 years between
battery changes, an integral sounder
was not included in this sensor’s
features. Consider our Water Leak
Sensor 2, if an integral sounder is
required. The “rope style” Water Leak
Sensor 2 is not waterproof, and the
sounder feature can reduce battery life
to 2 or less years.
4. The Water Leak Sensor 1 has
water-sensitive probes or electrodes on
both the top and bottom. When water is
on or touches any pair of electrodes, this
creates an electrical “short circuit”
between the electrodes, and the sensor
responds with a water leak alert. The top
of the sensor is identified by a cupped
area with one pair of electrodes. This
cupped area is ideal for catching
dripping water from above, such as
under a sink. The bottom of the sensor
has two pairs of electrodes. These are
optimized for detecting water that pools
or floods below the sensor.