MUDBUSTERS 1056 HONDA Pioneer 500 1 Operating instructions

Type
Operating instructions

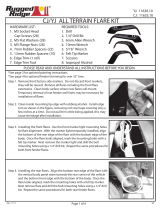
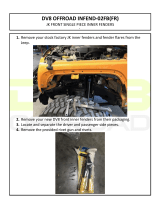
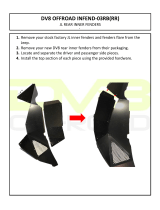
MUDBUSTERS 1056 HONDA Pioneer 500 1 fender flares are the ultimate protection against mud, debris, and other trail hazards for your Honda Pioneer 500. Made in the USA from high-quality materials, these extended fenders are built to withstand the toughest conditions. Installation is a breeze with included self-tapping screws and push rivets, and the fenders can be easily removed for cleaning or replacement. With MUDBUSTERS 1056 HONDA Pioneer 500 1, you can ride with confidence knowing that your machine is protected from the elements.

MUDBUSTERS 1056 HONDA Pioneer 500 1 fender flares are the ultimate protection against mud, debris, and other trail hazards for your Honda Pioneer 500. Made in the USA from high-quality materials, these extended fenders are built to withstand the toughest conditions. Installation is a breeze with included self-tapping screws and push rivets, and the fenders can be easily removed for cleaning or replacement. With MUDBUSTERS 1056 HONDA Pioneer 500 1, you can ride with confidence knowing that your machine is protected from the elements.

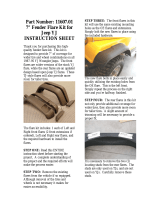
Thank you for purchasing MudBuster’s fender flares for the Honda Pioneer 500! We manufacture the best-
selling fender flare kits for UTVs and side by sides! All MudBusters products are made in the USA, and these fender
flares are manufactured from high-quality American made material. Your new extended fenders are designed to
deflect debris and reduce the amount of mud that typically gets thrown from the tires into unwanted areas. They can
withstand a lot of abuse, but they are not designed for crash protection, absorbing impacts, rollovers, or uprooting
trees. If you have an accident or if you happen to damage your fenders, order discounted replacement fenders by
phone (for existing customers only). Unlike other manufacturers, you do not have to buy a complete set if you
damage just one fender.
IMPORTANT:
Some of the images in the instructions below may differ from the actual product. In our continual effort to increase
customer satisfaction, we may change the style, material, and/or hardware to serve you better. If your fenders get
slightly distorted while in transit, apply pressure to the distorted areas to straighten them out before installation.
Use caution when drilling into the factory panels of your vehicle. Make sure that you do not penetrate the surrounding
parts or the chassis (unless instructed). Self-tapping screws and push rivets are included as an effective and easy
way to fasten the fender flares to your machine. However, you can use other methods of securing our extended
fenders to your vehicle as well (i.e., rivets, misc. hardware, etc.). Remember, it may be helpful to have a friend assist
you with the installation.
Unboxing:
Carefully open your package from the box's top (or bottom) by removing the staples with a flat-head screwdriver or
plyers. Slide the fenders out of the box and make sure that any staples do not scratch your fenders. MudBusters are
formed to fit your machine but shipped in a narrow box. You may find it necessary to apply pressure and re-bend
some of your fenders for a better fit. Don’t worry, they’re very durable and will not break from re-shaping them!
Note: Using a larger drill bit may allow the fender to come off when riding! The rivets need to be a tight fit to secure
the fender flare to the fender. We recommend a 21/64” drill bit.
Note: Max coverage set shown. Smaller sets (Mud-Lite, or Race-Lite) may have less hardware in the front of the
front fender or the lower front of the rear fender than pictured. In these cases, it may be helpful to use the rear
mounting locations first for installation ease.
Thank you for your business!
Please send us pictures and/or videos of your vehicle with MudBusters installed to our Facebook page
https://www.facebook.com/UTVMudbusters/
#utvmudbusters.com
or email us via mudbusters@gracemfg.com
We may feature your ride on our website, social media, Amazon and/or eBay!
For technical assistance or product inquiries, please call us at:
1-844-MUD-FLAPS or 844-683-3527
Hours: Mon-Fri 8-4 MST
1056 HONDA PIONEER 500 1
www.mud-busters.com
Email us for digital instructions: Mudbusters@gracemfg.com
2
Installation Instructions
Honda Pioneer 500
Front Fender Installation
1056 HONDA PIONEER 500
1) Locate the factory hardware circled below in (Figure 1). Remove and set aside.
2) Place the fender inside the wheel well and re-install the hardware that you just
removed. Mount the fender as seen in (Figure 2).
3) Mount the L-bracket supplied in the hardware kit to the lower hole in the front
fascia as shown in (Figure 3). This bracket will line up with the hole that is left from
removing the plastic rivet
4) Press the front fender against the back of the wheel well making sure that the bends in the fender match the angles
of the side panels.
5) Using cordless drill and a5/16th drill bit, mark and drill the holes as shown in (Figure 4).
6) Insert (1) 3/4" bolt, a washer on each side, and a lock-nut in the lower hole in the fenders and through the firewall.
Insert plastic rivets in all of the other holes to secure the fender to the vehicle.
7) Repeat these steps for the driver’s side of the vehicle.
Figure 1Figure 2
1
2
Figure 3
Drill and insert
plastic rivets
-3/4" bolt
-2 washers
-Lock-nut Figure 4
3
Installation Instructions
Honda Pioneer 500
Passenger Rear Fender Installation
1056 HONDA PIONEER 500
1) Remove the factory rear fenders from the vehicle and save the plastic
rivets.
2) Place the fender extension over the factory fender as shown in (Figure 5
& 5A) and insert plastic rivets to secure the fender extension to the fender.
3) Remove the 4 bolts circled in (Figure 6) securing the cargo rack to the
chassis and route the wire harness on the passenger side as shown.
Use a 5/16th drill here
and insert a plastic
rivet.
Figure 5Figure 5A
Figure 6Figure 7
4) Hold the assembled fender near the wire harness on the passenger side as shown in (Figure 7).
Move the clips on the wire harness to match the holes in the fender extension and insert the harness
clips.
5) Place the fender extension against the cargo rack mounts as shown in (Figure 8) and insert the
hardware set aside from step 3.
6) Install the remaining plastic rivets shown in (Figure 9). Note:The lower plastic rivet closest to the
cab is difficult to install.Take your time, make sure the fender extension &the body panel are close
together, and use a flat tool to press the rivet into the seated position. (See Figure 9A).
4
Installation Instructions
Honda Pioneer 500
Passenger Rear Fender Installation
1056 HONDA PIONEER 500
Figure 8Figure 9
Figure 9A
7) Install the aluminum brackets into the holes circled in (Figure 10). Insert (1) 3/4bolt with alarge washer from
underneath the fender and into the brackets.These brackets relocate the fender 3” wider than the factory
location.
8) NOTE:Step 8is optional, but we recommend it for a secure fit.Mark the holes in (Figure 11)for drilling using a
dry erase marker.Once marked, use abright flashlight on the top side of the fender so you can see your mark
from below (Figure 12). Drill ahole (1/4” – 5/16”), insert an aluminum spacer (3/4spacer for the front & 3/8
spacer toward the rear), and install the M6 metric bolts from below (Figure 13).
-3/4" bolt
-1 large washer
Figure 10 Figure 11
-3/4"spacer
-M6 bolt
Figure 12 Figure 13
5
Installation Instructions
Honda Pioneer 500
Passenger Rear Fender Installation
1056 HONDA PIONEER 500
9) Repeat these installation steps on the driver’s side rear fender. However, you will
have to drill and mount the air box to the driver’s side rear fender with aplastic rivet
as seen below.
Front Fender Flares
(2) Front fender extensions
(2) 1.5” L brackets
(6) ¾” bolts
(6) Lock nuts
(8) Washers
(10) Plastic Rivets
Rear Fender Flares
(2) Rear fender extensions
(4) Custom brackets
(2) Black ¾” spacers
(2) Black 3/8” spacers
(2) 25mm M6 bolts
(2) 30mm M6 bolts
(4) Large washers
(4) ¾” bolts
(13) Plastic rivets
Hardware Included
  • Page 1 1
  • Page 2 2
  • Page 3 3
  • Page 4 4
  • Page 5 5

MUDBUSTERS 1056 HONDA Pioneer 500 1 Operating instructions

Type
Operating instructions

MUDBUSTERS 1056 HONDA Pioneer 500 1 fender flares are the ultimate protection against mud, debris, and other trail hazards for your Honda Pioneer 500. Made in the USA from high-quality materials, these extended fenders are built to withstand the toughest conditions. Installation is a breeze with included self-tapping screws and push rivets, and the fenders can be easily removed for cleaning or replacement. With MUDBUSTERS 1056 HONDA Pioneer 500 1, you can ride with confidence knowing that your machine is protected from the elements.

Ask a question and I''ll find the answer in the document

Finding information in a document is now easier with AI