Page is loading ...

Don't work harder. Work smarter.
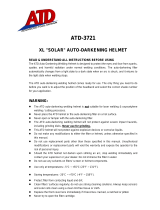
ST-2SF/P
AUTO
DARKENING
WELDING
HELMET
Operating Manual
Revision: A Issue Date: June 2017 Manual No.:
0-ST2S617

We
Appreciate Your
Business.
Thank you and congratulations on choosing Smarter Tools. Now you can stop
working harder and start working smarter.
This Operating Manual has been designed to instruct you on the correct use and
operation of your Smarter Tools’ product. Your satisfaction with this product and
its safe operation is our ultimate concern. Therefore please take the time to read
the entire manual, especially the Safety Precautions. They will help you to avoid
potential hazards that may exist when working with this product.
WARNING!
READ AND UNDERSTAND ALL SAFETY
PRECAUTIONS IN THIS MANUAL BEFORE
OPERATING. FAILURE TO COMPLY WITH
INSTRUCTIONS IN THIS MANUAL COULD RESULT
IN PERSONAL INJURY, PROPERTY DAMAGE, AND/
OR VOIDING OF YOUR WARRANTY. SMARTER
TOOLS WILL NOT BE LIABLE FOR ANY DAMAGE
BECAUSE OF FAILURE TO FOLLOW THESE
INSTRUCTIONS.
Operating Manual Number 0-ST2S617
Smarter Tools ST-2SF/P Auto Darkening Welding Helmet Part No. ST-2SF/P
Published by:
Smarter Tools, Inc.
12195 Harley Club Drive
Ashland, VA 23005
(804) 798.8588
www.usesmartertools.com
Copyright © 2017 by
Smarter Tools, Inc.
Reproductions of this work, in whole or in part, without written permission of
the publisher are strictly prohibited.
The publisher does not assume and herby disclaims any liability to any party
for any loss or damage caused by any error or omission in this Manual,
whether such error results from negligence, accident, or any other cause.
Publication Date: 06.31.17

Table of Contents
I. Symbol Usage ........................................................................ 1
II. Arc Welding Hazards .............................................................. 1
Arc rays .................................................................................. 1
Welding Helmets .................................................................... 1
Noise ..................................................................................... 2
Read Instructions .................................................................. 2
Fumes and Gases .................................................................. 2
III. Proposition 65 Warnings ........................................................ 2
IV. Safety Instructions.................................................................. 3
V Operating Instructions ............................................................ 4
Function ................................................................................. 4
Before welding ....................................................................... 4
Shade Number and Grinding Mode Selection ...................... 4
Adjusting headband ............................................................... 5
Solar Cells .............................................................................. 5
Shades ................................................................................... 5
Filters ..................................................................................... 5
VI. Technical Specifications ........................................................ 5
VII. Dark Shader Selection ........................................................... 6
VIII. sensitivity and Delay selection ............................................... 7
Sensitivity Control .................................................................. 7
Delay Control ......................................................................... 7
Low Battery ............................................................................ 7
IX Lens & Helmet Maintenance .................................................. 8
X. Parts List and diagram ............................................................ 9
XI Trouble Shooting .................................................................... 10
Warranty ................................................................................. 11
NOTE
CAREFULLY READ THE ORIGINAL INSTRUCTIONS BEFORE USING
THIS PRODUCT. THE MANUFACTURER RESERVES THE RIGHT TO
MAKE CHANGES AND IMPROVEMENTS TO THE PRODUCTS AND
TO ALTER SPECIFICATIONS WITHOUT PRIOR NOTICE

1
Protect yourself and others from injury — read, follow, and save these important safety
precautions and operating instructions.
I. Symbol Usage
DANGER! − Indicates a hazardous
situation which, if not avoided, will
result in death or serious injury. The
possible hazards are shown in the
adjoining symbols or explained in
the text.
Indicates a hazardous situation
which, if not avoided, could result in
death
or serious injury. The possible
hazards are shown in the adjoining
symbols or explained in the text.
NOTICE − Indicates statements not related to
personal injury.
II. Arc Welding Hazards
Indicates special instructions.
his group of symbols means Warning!
Watch Out! ELECTRIC SHOCK,
MOVING PARTS, and HOT PARTS
hazards. Consult symbols and related
instructions below for necessary actions
to avoid the hazards.
Only qualified persons should install, operate, maintain, and repair this unit.
ARC RAYS can burn eyes and
skin.
Arc rays from the welding process produce intense visible and invisible (ultraviolet
and infrared) rays that can burn eyes and skin. Sparks fly off from the weld.
• Wear a welding helmet fitted with a proper shade of filter to protect your
face and eyes when welding or watching (see ANSI Z49.1 and Z87.1 listed
in Safety Standards). Refer to Lens Shade Selection on page 6.
• Wear approved safety glasses with side shields under your helmet.
• Use protective screens or barriers to protect others from flash, glare,
and sparks; warn others not to watch the arc.
• Wear protective clothing made from durable, flame-resistant material
(leather, heavy cotton, and wool) and foot protection.
• Before welding, adjust the auto-darkening lens sensitivity setting to meet the
application.
• Stop welding immediately if the auto-darkening lens does not darken when the
arc is struck.
• See the Owner’s Manual for more information.
WELDING HELMETS do not provide unlimited eye, ear, and
face protection.
Arc rays from the welding process produce intense visible and invisible (ultraviolet
and infrared) rays that can burn eyes and skin. Sparks fly off from the weld.
• Use impact resistant safety spectacles or goggles and ear protection at all
times when using this welding helmet.
• Do not use this helmet while working with or around explosives or corrosive
liquids.
• Do not weld in the overhead position while using this helmet.
• Inspect the auto-lens frequently. Immediately replace any scratched,
cracked, or pitted cover lenses or auto-lenses.

2
NOISE can damage hearing.
Noise from some processes or equipment can damage hearing.
• Wear approved ear protection if noise level is high.
READ Instructions
Read and follow all labels and the Owner’s Manual carefully before
installing, operating, or servicing unit. Read the safety information at the
beginning of the manual and in each section.
• Use only genuine replacement parts from the manufacturer
.
• Perform maintenance and service according to the Owner’s Manuals,
industry standards, and national, state, and local codes.
FUMES AND GASES can be hazardous.
Welding produces fumes and gases. Breathing these fumes and gases
can be hazardous to your health.
• Keep your head out of the fumes. Do not breathe the fumes.
• If inside, ventilate the area and/or use local forced ventilation at the arc to remove
welding fumes and gases.
• If ventilation is poor, wear an approved air-supplied respirator.
• Read and understand the Material Data Sheets (MDS) and the manufacturer’s
instructions for metals, consumables, coatings, cleaners, and degreasers.
• Work in a confined space only if it is well ventilated, or while wearing an air-supplied
respirator.
Always have a trained watchperson nearby. Welding fumes and gases can
displace air and lower the oxygen level causing injury or death. Be sure the
breathing air is safe.
• Do not weld in locations near degreasing, cleaning, or spraying operations. The heat
and rays of the arc can react with vapors to form highly toxic and irritating gases.
• Do not weld on coated metals, such as galvanized, lead, or cadmium plated steel,
unless the coating is removed from the weld area, the area is well ventilated, and
while wearing an air- supplied respirator. The coatings and any metals containing these
elements can give off toxic fumes if welded.
III. Proposition 65 Warnings
Welding
or cutting equipment produces fumes or gases which
contain chemicals known to the State of California to cause birth
defects and, in some cases, cancer. (California Health & Safety
Code Section 25249.5 et seq.)
This product contains chemicals, including lead, known to the state
of California to cause cancer, birth defects, or other reproductive
harm. Wash hands after use.

3
IV. SAFETY INSTRUCTIONS
WARNING! FOR YOUR SAFETY & PROTECTION, READ ALL SAFETY
WARNINGS AND INSTRUCTIONS CAREFULLY AND COMPLETELY BEFORE
USING THIS PRODUCT. FAILURE TO DO SO MAY CAUSE DAMAGE OR
PERSONAL INJURY.
•
Do not place the helmet on a hot surface
•
Do not immerse the filter in water or any other liquid
•
Protect the filter from being in contact with liquid or dirt. Clean
filter surface regularly.
•
The front cover lens is not unbreakable and does not provide
extraordinary protection against flying particles, splash, spray,
and spatter. The helmet will only protect the eyes and face from
radiation and sparks.
•
Never open or tamper with the Auto-Darkening filter
•
The outside of the lens must be equipped with an outside
protection plate (included) to prevent potential non-repairable
hazards.
•
Keep away from children, children must never be allowed in the
work area. DO NOT! let them handle machines, tools, or
extension cords.
•
DO NOT! Use if the filter does not darken immediately upon
striking the arc.
•
DO NOT! Use the helmet as a hand shield. Wear the helmet
correctly.
•
Wear approved safety glasses with side shields under your
helmet.
•
Use protective screens or barriers to protect others from flash
and glare; warn others not to watch the arc.
WARNING! CAREFULLY READ AND UNDERSTAND ALL INSTRUCTIONS
BEFORE USING YOUR NEW AUTO- DARKENING WELDING HELMET
The Auto-darkening welding helmet is designed to protect the eyes and face from
specks, spatter, and harmful radiation under normal welding conditions. The Auto-
darkening filter automatically changes from a light state to a dark state in only
1/25000S when an arc is struck and it returns to the light state when welding stops.
This product is suitable for a variety of welding processes.
• When the arc is struck, the Auto-darkening filter will turn from a clear
state to a dark state. The response time is less than 1/25000S.
• The helmet provides the user’s eyes and face full protection against UV and
IR radiation during the entire welding process, even in the clear state. The
UV/IR protection level is up to the shade 13 (DIN) at all times.
• The product is in full conformity with related DIN, EN safety standards, and
ANSI Z87.1 standards.

4
V. Operating
Instructions
Function
The Auto-Darkening Welding Helmet is designed to protect the eyes and face
from sparks, splatter, and harmful radiation under normal welding conditions. The
Auto-Darkening Filter automatically changes from a clear state to a dark state
when an arc is struck, and it returns to the clear state when welding stops.
Before
Welding
The Auto-Darkening Welding Helmet comes ready for use. The only things you
need to do before welding are to
• cremove the protective film from both sides
of the lens (if not already done),
• adjust the position of the headband,
• select the correct shade number for your
application, and
• test the helmet for proper operation as
described following.
Check the Front Cover Lens to make sure that It Is
clean, and that no dirt is covering the two sensors on
the front of the Filter Cartridge. Also check the
Front/Inside Cover Lens and the Front Lens Retaining
Frame, and make sure that they are secured in place.
Inspect all operating parts before each use for signs
of wear or damage. Any scratched, cracked, or pitted
parts should be replaced immediately before using
again to avoid severe personal injury.
Shade Number and Grinding Mode Selection
1. Select the shade number you need (see Shade Guide Chart on page 6) by turning the
Shade Control Knob. Be sure that the shade number of the Welding Helmet is the correct
shade number for your application.
2. Note: If selections of shades are recommended for your application, try the darkest
setting first.
3. The shade number can be set from 9 to 13 by turning the Shade Control Knob until
points to the desired shade number. See Figure B.
4. Remember to check with the Shade Guide Chart on
page 6 to determine the proper shade number for your
application.
5. Important Note: Test the helmet auto-darkening filter
lens before welding. While wearing the helmet, briefly strike
an arc, keeping your face and eyes turned slightly away,
and to one side. The lens should darken evenly when not
directly facing the arc. If it does not darken properly, do not
use the Welding Helmet.
Figure B
Figure A

5
Adjusting Headband
Adjust the Headband so that the helmet is seated
securely on your head as low as possible and
close to your face.
Adjust the Headband width by turning the
Ratcheting Headband Knob to make sure the
Front Cover Lens is aligned with your eyes.
Adjust the Headband height by tightening or
loosening the top strap until the Helmet fits snug
on your head.
Once the Headband is properly adjusted, lower
the Helmet over your face until the proper angle
is found. Then turn the Tension Adjustment
Knobs on either side of the helmet, locking the
helmet's angle in place.
Solar Cells
This Welding Helmet utilizes high performance solar cells as power supply, and has one
CR2032 lithium battery as power backup.
Shades
User-selectable variable shades from 9 to 13 are adjusted at the turn of a shade knob
(shade variable).
Filters
The ultra high performance of UV and IR Auto-Darkening filters provides to user's eyes and
face full protection against UV and IR radiation during entire welding process, The UV/IR
protection level is up to shade 13 at all times.
VI. TECHNICAL SPECIFICATIONS
Model
ST-2SF/P
Weight 16 oz
Viewing Area 3.6” x 1.65” (92 x42mm)
Cartridge Size 4.3” x 3.5” (110 x 90mm)
Uv/IR Protection
Up to shade DIN13 at all times
Light State/ Grind Mode Din 4
Dark State Variable shade 9-13
Shade Control
External, Variable
Sensitivity Control Low- High - infinite dial knob
Switch Time (Light to Dark) 1/25000s
Dark to Light Time Delay 0.1-1.0s - infinite dial knob
Power On / Off
Fully Automatic
Arc Sensor 2
TIG Amp Range DC≥ 10 AC≥ 10
Operating Temperature 23° F to 131°F (-5°C to +55°C)
Storing Temperature
-4°F to 158°F (-20°C to +70°C)
Self-check Self-Test button
Compliance ANSI Z87.1-2010, CSA Z94.3
Low voltage indicator
Yes
Power Supply
Solar Cell and 1 x CR2032 Lithium battery
Figure C

6
VII. DARK SHADER SELECTION
•
Select the shade level according to the welding process and the value
of the welding current by turning the potentiometer knob on the left side
of the helmet
•
The shade number can be between DIN9 to DIN13. Select a shade
number by turning the shade knob until the arrow points to the required
setting (See Shade Guide Table)
•
ALWAYS use suggested shade numbers instead of minimum shades.
•
Provide additional task lighting that suits welders' needs.
•
ALWAYS use the same shade as the welder's if you are directly
observing the welding arc.
LENS SHADE SELECTOR
Shade numbers are given as a guide only and may be varied to suit individual needs.
Process
Electrode Size in.
(mm)
Arc Current
(Amperes)
Minimum
Protective
Shade
Suggested*
Shade
No.
(Comfort)
Shielded Metal Are
Welding (SMAW)
Less than 3/32 (2.4)
3/32-5/32 (2.4-4.0)
5/32-1/4 (4.0-6.4)
More than ¼ (6.4)
Less than 60
60-160
160-250
250-550
7
8
10
11
-
10
12
14
Gas Metal
Arc
Welding
(GMAW)
and Flux Cored
Arc
Welding
(FCAW)
Less than 60
60-160
160-250
250-550
7
10
10
10
-
11
12
14
Gas Tungsten Arc
Welding (GTAW)
Less than 50
50-100
150-500
8
8
10
10
12
14
Air Carbon Arc
Cutting (CAC-A)
Less than 500
500-1000
10
11
12
14
Plasma Arc
Welding
(PAW)
Less than 20
20-100
100-400
400-800
6
8
10
11
6 to 8
10
12
14
Plasma Arc
Cutting
(PAC)
Less than 20
20-40
40-60
60-80
80-300
300-400
400-800
4
5
6
8
8
9
10
4
5
6
8
9
12
14
*As a rule of thumb, start with a shade that is too dark to see the weld zone. Then go to a lighter shade which gives sufficient
view of the weld zone without going below the minimum.

7
VIII. SENSITIVITY and DELAY SELECTION
Sensitivity Control: The Sensitivity Control is designed to make the filter lens more
responsive to different light levels. Welding applications and processes produce
differing light levels which in turn necessitate varying filter lens sensitivity adjustments.
Manually adjust the sensitivity level as required for application.
Delay Control: The delay control is used to adjust the hold time of the Filter Lens after
welding is completed (i.e. it is used to adjust the time taken for the Filter Lens to
transition from dark to light state after the completion of welding). Manually adjust delay
time to desired level as required by application.
Low Battery
The low battery light will indicate when the battery is low and need to be replaced with a
CR2032 battery.

8
IX. LENS & HELMET MAINTENANCE
•
DO NOT! use corrosive solvent on the filter screen or any of the
helmets components
•
DO NOT! immerse the filter lens in water or any other liquid
•
If helmet is not in use, please keep it in a dry place. Be aware that the
Auto-darkening filter should not be placed in direct light to avoid
unnecessary filter adjustments. It may cause damage to control system.
•
Clean the filter lens with a clear lint-free tissue or cotton cloth
•
You should inspect this helmet frequently and immediately replace worn or
damaged parts.
Replace the Front Lens Cover if it is damaged (cracked, scratched, soiled or
pitted).
1. To Replace the Cover:
A. Lift up on the tab at the bottom of the outer frame to unsnap the
frame and access the lens cover. Pull out the lens cover.
B. Remove the protection film from both sides of the new Lens if it
comes with a film covering.
C. Place the new lens into place and snap the frame securely to hold
the lens in place.
2. Clean the filter lens with a clean lint free tissue or cotton cloth.
3. Do not immerse the lens in water or any other liquid. Do not use
abrasives, solvents or oil based cleaners.
4. Do not remove the auto--darkening filter from the Auto Darkening
Welding Helmet. Do not try to open the filter.
5. Storage temperature -4° F to 158° F.

9
X. Parts List and Diagram
Part#
Description
Part#
Description
1
Self-test button
6
LCD
2
Low voltage indicator
7
Arc sensor
3
Delay time control knob
8
Solar cell
4
Sensitivity control knob
9
UV/IR filter
5
lithium batteries
Part#
Description
Part#
Description
1
Helmet shell
6
Front cover lens
2
Headband height adjusting pin
7
Solar panel
3
Headband diameter adjusting
8
Fixed plate
4
Headband angle adjusting Knob
9
Cartridge frame
5
Shade control knob
10
Filter lens

10
XI Trouble Shooting
1. Irregular Darkening Or Dimming
a. Headband has been set unevenly on both sides of helmet (unequal
distances from the eyes to filter's lens).
b. Reset Headband to reduce difference in distances to filter, if necessary.
2. Auto-Darkening Filter Does Not Darken Or Flickers
a. Front Cover Lens is dirty or damaged (clean or change the cover lens).
b. Sensors are dusty or dirty (clean surface of the sensors).
c. Grind mode Is selected (Adjust shade from 9 to 13)
3. Slow Response
a. Operating temperature is too low (do not use at temperatures below 23° F).
4. Poor Vision
a. Front/Inside Cover Lens and/or filter dirty or damaged (clean or replace lens).
b. Insufficient ambient light.
c. Shade number is incorrectly set (reset shade number).
5. Welding Helmet Slips
a. Headband is not adjusted properly (must be lowered).
Warning!!
Stop using the Helmet Immediately If any of the mentioned problems cannot be
corrected.

11
LIMITED WARRANTY
This information applies to Smarter Tools products purchased in the USA and Canada.
July 2017
LIMITED WARRANTY: Smarter Tools™, Inc. warrants to customers of authorized
distributors (“Purchaser”) that its products will be free of defects in workmanship or
material. Should any failure to conform to this warranty appear within the warranty
period stated below, Smarter Tools shall, upon notification thereof and
substantiation that the product has been stored, installed, operated, and
maintained in accordance with Smarter Tools’ specifications, instructions,
recommendations and recognized standard industry
practice, and not subject to
misuse, repair, neglect, alteration, or damage, correct such defects by suitable
repair or replacement, at Smarter Tools’ sole option, of any components or parts
of the product determined by Smarter Tools to be defective.
This warranty is exclusive and in lieu of any warranty of merchantability, fitness for
any particular purpose, or other warranty of quality, whether express, implied, or
statutory.
Limitation of liability: Smarter Tools shall not under any circumstances be liable for
special, indirect, incidental, or consequential damages, including but not limited to
lost profits and business interruption. The remedies of the purchaser set forth
herein are exclusive, and the liability of Smarter Tools with respect to any contract,
or anything done in connection therewith such as the performance or breach
thereof, or from the manufacture, sale, delivery, resale, or use of any goods
covered by or furnished by Smarter Tools, whether arising out of contract, tort,
including negligence or strict liability, or under any warranty, or otherwise, shall not
exceed the price of the goods upon which such liability is based.
No employee, agent, or representative of Smarter Tools is authorized to change
this warranty in any way or grant any other warranty, and Smarter Tools shall not
be bound by any such attempt. Correction of non-conformities, in the manner and
time provided herein, constitutes fulfillment of Smart Tools’ obligations to
purchaser with respect to the product.
This warranty is void, and seller bears no liability hereunder, if purchaser used
replacement parts or accessories which, in Smarter Tools’ sole judgment,
impaired the safety or performance of any Smarter Tools product. Purchaser’s
rights under this warranty are void if the product is sold to purchaser by
unauthorized persons.
The warranty is effective for the period of 3-years beginning on the date that the
authorized distributor delivers the products to the Purchaser. Notwithstanding the
foregoing, in no event shall the warranty period extend more than the time stated
plus one year from the date Smarter Tools delivered the product to the authorized
distributor.
Warranty repairs or replacement claims under this limited warranty must be
submitted to Smarter Tools Customer Service (888-241-8498 or
http://www.usesmartertools.com/customerservice) or an authorized Smarter Tools
repair facility within thirty (30) days of purchaser’s discovery of any defect.
Smarter Tools shall pay no transportation costs of any kind under this warranty.
Transportation charges to send products to an authorized warranty repair facility
shall be the responsibility of the Purchaser. All returned goods shall be at the
Purchaser’s risk and expense.
Smarter Tools™ is a Trademark of Smarter Tools, Inc.

GARANTÍA LIMITADA.
Esta información se aplica a los productos más inteligentes herramientas adquiridos en los
USA. y Canadá.
07 2017
GARANTÍA LIMITADA: Smarter Tools ™, Inc. garantiza a los clientes de los
distribuidores autorizados ("Comprador") que sus productos estarán libres de defectos de
fabricación o materiales. En caso de que el incumplimiento de esta garantía dentro del
período de garantía se indican a continuación, Smarter Tools, previa notificación y
comprobante de que el producto ha sido almacenado, instalado, operado y mantenido de
acuerdo con las
especificaciones de Smarter Tools, instrucciones, recomendaciones y reconoció la
práctica estándar de la industria, y no está sujeto a mal uso, reparación, negligencia,
alteración o daño, corregir tales defectos mediante reparación o reemplazo apropiado, a
elección de
Smarter Tools, de cualquier componente o parte del producto determinado por Smarter
Tools para ser defectuoso.
Esta garantía es exclusiva y en lugar de cualquier garantía de comerciabilidad,
adecuación para un propósito particular, o de otra garantía de calidad, ya sea expresa,
implícita o
legal.
Limitación de responsabilidad: Herramientas inteligentes no será en ningún caso será
responsable por daños especiales, indirectos, incidentales o consecuentes, incluyendo
pero no limitado a la pérdida de beneficios e interrupción del negocio. Los remedios del
comprador establecidos en este documento son exclusivas, y la responsabilidad de
Smarter Tools con respecto a cualquier contrato, ni nada hecho en relación con la misma,
tales como el desempeño o incumplimiento del mismo, o de la fabricación, venta, entrega,
la reventa, o el uso de cualquier p
roducto cubierto por o provistas por Smarter Tools,
tanto si se producen fuera de contrato, acto ilícito, incluida la negligencia o
responsabilidad estricta, o bajo cualquier garantía, o de lo contrario, no podrá superar el
precio de los bienes sobre los cuales se basa tal responsabilidad.
Ningún empleado, agente o representante de Smarter Tools está autorizado a cambiar
esta garantía en cualquier forma o conceder ninguna otra garantía, y Smarter Tools no
estará obligado por cualquier intento de este tipo. Corrección de no conformidades, en
la
forma y plazos previstos en este documento, que constituye el cumplimiento de las
obligaciones de Smart Tools "al comprador con respecto al producto.
Esta garantía es nula, y el vendedor no tiene ninguna responsabilidad a continuación, en
caso de adquisición utilizado repuestos o accesorios que, a su juicio Smarter Tools,
deterioro de la seguridad o el rendimiento de cualquier producto Smarter Tools.
Comprador derechos bajo esta garantía se anula si el producto se vende al comprador por
personas
no autorizadas.
La garantía es válida para el período de inicio de 3 año en la fecha en que el distribuidor
autorizado entrega los productos al comprador. No obstante lo anterior, en ningún caso
el período de garantía se extienden más de la hora señalada más de un año desde la
fecha de Smarter Tools entrega del producto al distribuidor autorizado.
Garantía de reparación o reemplazo de los reclamos bajo esta garantía limitada debe ser
presentado a más inteligentes Herramientas de Servicio al Cliente (888-241-8498 o
http://www.usesmartertools.com/customerservice
) o un centro de reparación autorizado
más inteligentes herramientas dentro de los treinta (30) días de comprador
descubrimiento de cualquier defecto. Smarter Tools no pagarán los costos de transporte
de cualquier especie en virtud de esta garantía. Los gastos de transporte para enviar
productos a un centro de garantía de reparación autorizados será responsabilidad del
comprador. Todas las mercancías de retorno será a riesgo del comprador y los gastos.
Más inteligente ™ Tools es una marca registrada de Smarter Tools, Inc

10
XI. Solución de problemas
1. El oscurecimiento irregular o oscurecimiento
a. Diadema se ha establecido de manera desigual a ambos lados del casco
(distancias desiguales de los ojos a la lente de filtro).
b. Restablecer diadema para reducir la diferencia en las distancias para filtrar,
si es necesario.
2. Auto-oscurecimiento del filtro no se oscurece o parpadea
a. Cubierta de la lente frontal está sucio o dañado (limpia o cambiar la lente
cubierta).
b. Los sensores son polvo o suciedad (superficie limpia de los sensores).
c. Se ha seleccionado el modo de Grind (Ajuste sombra del 9 al 13)
3. Respuesta lenta
a. Temperatura de funcionamiento es demasiado baja (no utilice a
temperaturas por debajo de 23 "'F).
4. Pobre Visión
a. Frente / cubierta de la lente interior y / o filtro sucio o dañado (limpiar o
sustituir la lente).
b. Luz ambiental insuficiente.
c. Número Shade está mal ajustado (reajustar número de sombra).
5. Soldadura Casco Slips
a. Cinta de cabeza no está ajustado correctamente (debe ser rebajado).
Advertencia!!
Deje de usar el casco de inmediato si alguno de los problemas mencionados, no se
puede corregir.

9
X. Lista de piezas y Diagrama
Part#
Description
Part#
Description
1
Self-test button
6
LCD
2
Low voltage indicator
7
Arc sensor
3
Delay time control knob
8
Solar cell
4
Sensitivity control knob
9
UV/IR filter
5
lithium batteries
Part#
Description
Part#
Description
1
Helmet shell
6
Front cover lens
2
Headband height adjusting pin
7
Solar panel
3
Headband diameter adjusting Knob
8
Fixed plate
4
Headband angle adjusting Knob
9
Cartridge frame
5
Shade control knob
10
Filter lens

8
IX. LENTE Y CASCO DE MANTENIMIENTO
•
¡NO! utilizar disolventes corrosivos para limpiar la pantalla de filtro
o cualquiera de los componentes de cascos
•
¡NO! sumergir la lente de filtro en agua o cualquier otro líquido
• Si el casco no está en uso, guárdelo en un lugar seco. Tenga en
cuenta que el filtro de oscurecimiento automático no se debe
colocar a la luz directa para evitar ajustes de filtro innecesarios.
Puede causar daños al sistema de control.
•
Limpie la lente de filtro con un paño libre de pelusa o un paño de
algodón
•
Usted debe inspeccionar este casco con frecuencia e inmediatamente
reemplazar las piezas desgastadas o dañadas.
Sustituya la cubierta de la lente frontal si está dañado (agrietado, rayado, sucio
o superficie sin hueso).
1. Para reemplazar la cubierta:
A. Levante la pestaña en la parte inferior del marco exterior a
desabrochar el marco y acceso a la cubierta de la lente. Saque la tapa
del objetivo.
B. Retire la película protectora de ambos lados de la nueva lente si viene
con una cubierta de película.
C. Coloque la nueva lente en su lugar y encaje el marco de seguridad
para mantener la lente en su lugar.
2. Limpie la lente de filtro con un pañuelo de papel libre de pelusa o un
paño de algodón.
3. No sumergir la lente en agua o cualquier otro líquido. No utilice
abrasivos, disolventes o limpiadores a base de aceite.
4. No retire el auto - oscurecimiento del filtro del oscurecimiento automático
de soldadura casco. No trate de abrir el filtro.
5. Temperatura de almacenamiento -4° F to 158° F.

7
VIII. SENSIBILIDAD y RETRASO DE SELECCIÓN
Control de Sensibilidad: El control de sensibilidad está diseñado para hacer que la
lente de filtro más sensible a diferentes niveles de luz. Aplicaciones y procesos de
soldadura producen diferentes niveles de luz que a su vez requieren diferentes ajustes
de sensibilidad de lentes de filtro. Para ajustar manualmente el nivel de sensibilidad
como sea necesario para su aplicación.
Control de retardo: El control de retardo se utiliza para ajustar el tiempo de retención
de la lente de filtro después de que se complete la soldadura (es decir, se utiliza para
ajustar el tiempo necesario para que la lente de filtro para la transición de la oscuridad
a la luz del estado después de la finalización de la soldadura). Ajuste manualmente el
tiempo de retardo en el nivel deseado como lo requiere la aplicación.
Batería baja
La luz de batería baja indicará cuando las baterías están bajas y necesitan ser
reemplazados baterías CR2032

6
VII. SELECCIÓN de SHADER OSCURO
•
Seleccione el nivel de sombra de acuerdo con el proceso de soldadura
y el valor de la corriente de soldadura girando el botón de
potenciómetro para el selector de sombra de soldadura.
•
El número de sombra puede estar entre DIN9 a DIN13. Seleccione un
número de sombra girando el mando sombra hasta que la flecha apunte
a la configuración requerida (Ver Guía de Colores Tabla)
•
SIEMPRE use los números de sombra sugeridas en lugar de tonos
mínimos.
•
Proporcionar iluminación de la tarea adicional que se adapte a las
necesidades de soldadores.
•
Utilice siempre el mismo tono que el soldador de si usted está
observando directamente el arco de soldadura.
LENTE SOMBRA DE SELECCIÓN
Shade numbers are given as a guide only and may be varied to suit individual needs.
Process
Electrode Size in.
(mm)
Arc Current
(Amperes)
Minimum
Protective
Shade
Suggested*
Shade
No.
(Comfort)
Shielded Metal Are
Welding (SMAW)
Less than 3/32 (2.4)
3/32-5/32 (2.4-4.0)
5/32-1/4 (4.0-6.4)
More than ¼ (6.4)
Less than 60
60-160
160-250
250-550
7
8
10
11
-
10
12
14
Gas Metal
Arc
Welding
(GMAW)
and Flux Cored
Arc
Welding
(FCAW)
Less than 60
60-160
160-250
250-550
7
10
10
10
-
11
12
14
Gas Tungsten Arc
Welding (GTAW)
Less than 50
50-100
150-500
8
8
10
10
12
14
Air Carbon Arc
Cutting (CAC-A)
Less than 500
500-1000
10
11
12
14
Plasma Arc
Welding
(PAW)
Less than 20
20-100
100-400
400-800
6
8
10
11
6 to 8
10
12
14
Plasma Arc
Cutting
(PAC)
Less than 20
20-40
40-60
60-80
80-300
300-400
400-800
4
5
6
8
8
9
10
4
5
6
8
9
12
14
* Como regla general, comience con un tono que es demasiado oscuro para ver la zona de soldadura. Luego ir a un tono más
claro que da vista suficiente de la zona de soldadura sin pasar por debajo del mínimo.
/