Page is loading ...

INSTRUCTIONS for
Eye-Tech 11 Mono
Welding Helmet
P/N 15F22
ARC RAYS can burn eyes and skin. Wear safety
glasses and set proper filter shade. See ANSI/AWS
Z49.1 for guide. Available from American Welding
Society, Miami, FL 33135.
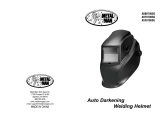
The Eye-Tech 11 Mono welding helmet is delivered fully
assembled and ready for use. You only need to adjust
the headband. The shade cartridge automatically dark-
ens to a shade 11 with arc ignition. The normal shade
before an arc is struck is 4 DIN.
Safety Precautions
zz
zz
z Pitted or scratched plates reduce vision and protec-
tion. Replace worn or damaged parts immediately.
zz
zz
z Always keep the external and internal protective plates
in place. Failure to do so will allow welding spatter to
pit the front surface of the shade cartridge. This can
reduce the built-in UV and IR protection. (Also, the weld
spatter will void the warranty on the shade cartridge.)
zz
zz
z Do not attempt to open the shade cartridge.
zz
zz
z Do not use in cold weather (below 14° F).
zz
zz
z Keep solar cells clean. Clean with a damp not wet, cloth
dipped in soapy water. Dry with a soft, clean cloth.
zz
zz
z Do not drop, strike, or bend helmet.
zz
zz
z Do not use abrasive cleaning agents.
zz
zz
z Fumes and gases can be hazardous to your health.
Keep your head out of the fumes. Ventilate area or use
breathing devices, if necessary.
zz
zz
z Keep helmet dry (especially the shade cartridge) and
do not place on hot surfaces.
Operation
z Check to see if the front cover lens is inserted and front
lens frame is in place.
z Adjust the headband tension. The helmet is ready to use.
The cartridge will darken with arc ignition.
Troubleshooting
z Uneven darkening
- Protective helmet is not on straight, causing the dis-
tance between your eyes and the shade cartridge to
vary. If necessary, decrease distance to shade car-
tridge.
z The shade cartridge does not darken or it flickers
- Sensors are dirty; clean
- Front cover lens is dirty or damaged; clean or replace
- Welding current is too low
z Slow switching times
- Temperature is too low (should not be below 14° F)
- Lighting is insufficient
z Poor visibility
- Shade levels are set incorrectly
- Front or rear cover lens is dirty
- Room lighting is insufficient
z Welding helmet slips
- Headband is not properly adjusted (set too low)
If these faults cannot be corrected, do not use
helmet. Contact your distributor for assistance.
F15-495
October, 2002
Be sure this information reaches the operator.
You can get extra copies through your supplier.
Specifications
Viewing Area: 3.86 x 1.50 (98 x 38mm)
Light transmittance: Shade level - 11
Automatic shade level function
Ultra-violet protection 15
Infra-red protection 14
Shade level 4 in non-active state
Switch Time: From light to dark 0.4 milliseconds at room
temperature; from dark to light 0.2-0.3 sec-
onds
Operating Temp.: 14° F to 158° F (-10°C to +70°C)
Power Supply: Solar cells
Helmet Construction: High impact, synthetic material
Weight: 16.6 oz (470 grams)
Technical details are subject to change.

1
2
3
4
87
6
5
To replace rear cover
lens, place a small
screwdriver in groove
and pull out lens.
To adjust angle of
helmet, turn
Eccentric knob.
Loosen locking-nuts and
adjust distance from eyes.
Adjust both sides at the same
time. Make sure helmet
remains straight.
To remove front lens frame
grasp bottom and pull upward; to
replace, reverse process.
F15-495 10/02 Printed in U.S.A.
SPARE PARTS LIST
Item P/N
1 - Front Lens Frame ..................................... 15F05
2 - Front Cover Lens (10 pcs) ......................... 15F09
3 - Shade Cartridge ........................................ 15F23
4 - Rear Cover Lens ........................................ 15F10
5 - Head Band ................................................ 15F03
6 - Sweat Band .............................................. 15F04
7 - Helmet (without shade cartridge) ............... 15F01
8 - Helmet Complete ...................................... 15F22
ACCESSORIES
Magnifying Lens P/N
- Diopter +0 ........................................................ 15F11
- Diopter +1.5 ..................................................... 15F12
- Diopter +2.0 ..................................................... 15F13
- Diopter +2.5 ..................................................... 15F14
After removing frames, insert front
cover lens into frame.
Use only P/N 15F09 front cover
lens. Replace front lens frame.
To replace shade cartridge, push
shade cartridge outwards from
the upper inside rim. To put back,
reverse process.
To adjust headband, set
upper adjusting strap as
low as possible.
The sweatband for the
forehead is removable
and washable.
Push in knob (at back of
headband) and turn. It
will then click into
position.
Warranty
A two-year warranty from the date of manufacture is given against
defects arising from faulty workmanship or materials. No war-
ranty is given against defects arising from misuse, unauthorized
interference with parts or use of the appliance which was not
intended by the manufacturer.
/