HELMET CARE AND MAINTENANCE
Replacing Front Clear Lens: Replace the front cover lens if it is damaged –
cracked, soiled or pitted. Place your finger or thumb into recess (C) at the
bottom edge of the cover lens and flex the lens upwards until it releases from
the edges marked A and B. (Refer to figure 1). Use only the replacement
front cover lenses specified in this manual.
Replace the Inside Clear Lens: If it is damaged (cracked, soiled or pitted).
Place your fingernail in recess above cartridge view window and flex lens
upwards until it releases from edges of cartridge view window.
Change the Shade Cartridge (See figure 2)
Fitting New Cartridge: Take the new shade cartridge and pass the poten-
tiometer cable under the wire loop before placing the cartridge into its retain-
ing frame inside the helmet. Lower the wire loop and ensure the front edge of
the loop (D) is properly retained under the retaining lugs (E) as shown in (fig-
ure 3).
Position the shade potentiometer inside of the helmet with the shaft protrud-
ing through the hole. From outside of the helmet, position dial panel onto the
potentiometer shaft and secure potentiometer to shell, rotate shaft counter-
clockwise until an audible click is heard and install shade control knob with
pointer positioned at Grind location on dial panel.
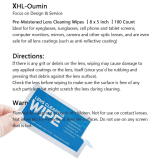
Cleaning: Clean the helmet by wiping with a soft cloth. Clean cartridge sur-
faces regularly. Do not use strong cleaning solutions. Clean sensors and
solar cells with soapy water solution and a clean cloth and wipe dry with a
lint-free cloth. Do NOT submerge shade cartridge in water or other solution.
Storage: Store in a clean, dry location.
7
Figure 1
Figure 2 Figure 3
SOLUTION
Clean or replace front cover lens.
Clean the Auto-Darkening cartridge
with soapy water solution and soft
cloth.
Adjust sensitivity to required level.
Clean or replace front cover lens.
Check for cracked or pitted front
cover lens and replace as required.
Make sure you are not blocking the
sensors or solar panels with your arm
or other obstacle while welding.
Adjust your position so that the sen-
sors can see the weld arc.
Make sure proper shade is selected.
Adjust sensitivity to required
level.
Adjust delay time to required
level.
Replace front cover lens
as needed.
POSSIBLE CAUSE
Front cover lens dirty.
Cartridge dirty.
Sensitivity is set too low.
Front cover lens dirty.
Front cover lens is damaged.
Sensors are blocked or Solar
panel is blocked.
Grind Mode Selected
Sensitivity set too high.
Delay time set too high.
Missing, damaged,
broken, cracked or
distorted front cover
lens.
TROUBLE SHOOTING GUIDE
Test your shade cartridge prior to welding by directing the front of the car-
tridge toward a bright source of light. Then, using your fingers, rapidly cover
and uncover the sensors. The cartridge should darken momentarily as the
sensor is exposed. A torch striker can also be used.
8
PROBLEM
Difficult to see through filter.
Filter does not darken when
arc is struck.
Filter darkening without arc
being struck.
Filter remains dark after
completing a weld.
ADF is
cracked.
Weld spatter
is damaging
the filter.
WARNING
Cease (STOP) using this product if this problem
exists. UV/IR protection may be compromised
resulting in burns to the eyes and skin.