Page is loading ...

THIS INSTRUCTION BOOKLET CONTAINS IMPORTANT SAFETY INFORMATION.
PLEASE READ AND KEEP FOR FUTURE REFERENCE.
Date 2018-03-08 Rev. 0001-A Factory: CHEGRE
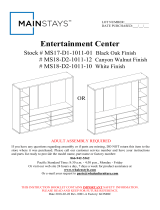
New Industrial Full Over Twin Bunk Bed
with Bookshelves
Stock # BH18-084-097-48
ADULT ASSEMBLY REQUIRED
If you have any questions regarding assembly or if parts are missing, DO NOT return this item to the
store where it was purchased. Please call our customer service number and have your instructions
and parts list ready to provide the model name, part name or factory number:
866-942-5362
Pacific Standard Time: 8:30 a.m. - 4:30 p.m., Monday - Friday
Or visit our web site 24 hours a day, 7 days a week for product assistance at
www.whalenstyle.com
Or e-mail your request to parts@whalenfurniture.com
LOT NUMBER:
DATE OF PURCHASE: / /

2
ALWAYS USE GUARDRAILS ON BOTH LONG SIDES OF THE UPPER BUNK. IF
THE BUNK BED WILL BE PLACED NEXT TO THE WALL, THE GUARDRAIL
THAT RUNS THE FULL LENGTH OF THE BED SHOULD BE PLACED AGAINST
THE WALL TO PREVENT ENTRAPMENT BETWEEN THE BED AND WALL.
STRANGULATION HAZARD - Never attach or hang items to any part of the bunk bed
that are not designed for use with the bed; for example, but not limited to, hooks, belts,
and jump ropes.
Prohibit more than one person on upper bunk.
Maximum mattress thickness must not exceed 5 in. (12.70 cm) for the upper bunk.
Surface of mattress must be at least 5 in. (12.70 cm) below the upper edge of guardrails.
Only use 9 in. (22.86 cm) thickness mattress for the lower bunk.
Use only mattress which is 75 in. (1.90 m) long and 38½ in. (97.79 cm) wide on the lower
bunk bed.
Use only mattress which is 75 in. (1.90 m) long and 53½ in. (1.36 m) wide on the upper
bunk.
Replacement parts, including additional guardrails, may be obtained from any our
Whalen dealer.

3
TO HELP PREVENT SERIOUS OR FATAL INJURIES FROM ENTRAPMENT
OR FALLS
• Follow the information on the warnings appearing on the upper bunk end
structure and on the carton. Do not remove warning label from bed.
• Always use the recommended size mattress or mattress support, or both, to help
prevent the likelihood of entrapment or falls.
• Surface of mattress must be at least 5 in. (12.70 cm) below the upper edge of
guardrails.
• Do not allow children under 6 years of age to use the upper bunk.
• Periodically check and ensure that the guardrail, ladder and other components
are in their proper position, free from damage and that all connectors are tight.
• Do not allow horseplay on or under the bed and prohibit jumping on the bed.
• Always use the ladder for entering and leaving the upper bunk.
• Do not use substitute parts. Contact the manufacturer or dealer for replacement
parts.
• Use of a night light may provide added safety precaution for a child using the
upper bunk.
• Always use guardrails on both long sides of the upper bunk. If the bunk bed will
be placed next to the wall, the guardrail that runs the full length of the bed
should be placed against the wall to prevent entrapment between the bed and
wall.
• The use of water or sleep flotation mattress is prohibited.
• STRANGULATION HAZARD – Never attach or hang items to any part of the
bunk bed that are not designed for use with the bed; for example, but not limited
to, hooks, belts and jump ropes.
• Prohibit more than one person on upper bunk.
• Keep these instructions for future reference.
This product was manufactured April 2018.

4
Parts and Hardware List
Please read completely through the instructions and verify that all listed parts and hardware are present
before beginning assembly.
A- Front Post (Qty. 2) B- Left Ladder (Qty. 1) C- Right Ladder (Qty. 1)
D- Long Guardrail
E- Left Guardrail F- Right Guardrail
(Qty. 2) (Qty. 1) (Qty. 1)
G- Shelf H- Lower Bunk Back Mattress Side Rail I- Upper Bunk Back Mattress Side Rail (Qty. 1)
(Qty. 2) (Qty. 1) (with threaded socket for back support)
J- Front Mattress Side Rail K- Back Stretcher L- Upper Side Stretcher
(Qty. 2)
(Qty. 1) (Qty. 2)
M- Bottom Side Stretcher N- Vertical Back Support O- Upper Mattress Support Slats
(Qty. 2) (Qty. 1) (Qty. 7)
P- Lower Mattress Support Slats Q- Lower Mattress Support Slats for Support Leg R- Support Leg (Qty. 3)
(Qty. 4) (Qty. 3) (Qty. 3)
(1) 1/4" x 5/8” Bolt (Qty. 103+2 extra) (2) 1/4" x 1-1/4” Bolt (Qty. 3+1 extra)
(3) Metal Bracket (Qty. 8) Hex Wrench (Qty. 2)
Tools required: Hex Wrench (provided).

5
ASSEMBLY INSTRUCTIONS
NOTE: Please follow the instructions carefully to ensure a safe and sturdy bed. Do not
fully tighten the bolts until all rails and guardrails are attached.
1. Unpack the units and confirm that you have all hardware and required parts. Assemble the unit on a
carpeted floor or the empty carton to avoid any scratch.
2. Attach one Long Guardrail (D) to one Front Post (A) with two 5/8” Bolts (1).
A
D
1
1/4" x 5/8” Bolt
(2 used in this step)
①

6
ASSEMBLY INSTRUCTIONS
3. Attach two Front Mattress Side Rails (J) to the Front Post (A) with the 5/8” Bolts (1).
A
J
J
1
1
1/4" x 5/8” Bolt
(4 used in this step)
①

7
ASSEMBLY INSTRUCTIONS
4. Repeat the same procedure to attach the other Front Post (A) at the opposite end.
1
1
J
J
D
A
A
1
1/4" x 5/8” Bolt
(6 used in this step)
①

8
ASSEMBLY INSTRUCTIONS
5. Attach the other Long Guardrail (D) to the long post of Right Ladder (C) with two 5/8” Bolts (1).
C
D
1
1/4" x 5/8” Bolt
(2 used in this step)
①

9
ASSEMBLY INSTRUCTIONS
6. Attach the Upper Back Mattress Side Rail (I) to the long post of Right Ladder (C) with two 5/8” Bolts
(1).
C
I
1
1
1/4" x 5/8” Bolt
(2 used in this step)
①

10
ASSEMBLY INSTRUCTIONS
7. Attach the Back Stretcher (K) to the long post of Right Ladder (C) with two 5/8” Bolts (1).
8. Attach the Lower Bunk Back Mattress Side Rail (H) to the short post of Right Ladder (C) with two 5/8”
Bolts (1) as shown.
K
C
1
1
H
1/4" x 5/8” Bolt
(4 used in this step)
①

11
ASSEMBLY INSTRUCTIONS
9. Repeat the same procedure to attach the Left Ladder (B) at the opposite end.
1/4" x 5/8” Bolt
(8 used in this step)
①
H
K
I
D
C
B
1
1
1

12
ASSEMBLY INSTRUCTIONS
10. Place the Vertical Back Support (N) against the center of the Back Stretcher (K) with the middle metal
tab facing upward.
11. Ask for help to slide one Shelf (G) under the middle upper rails of Ladders (B and C) and against the
Vertical Back Support (N) as shown.
12. Attach four Metal Brackets (3) at the joints between the Shelf (G) and Ladders (B and C) with two 5/8”
Bolts (1) per bracket.
K
N
UP
K
N
G
G
K
N
G
N
C
B
B/C
3
1
1
G
C
B
C
B
1/4" x 5/8” Bolt
(8 used in this step)
①
Metal Bracket
(4 used in this step)
③

13
ASSEMBLY INSTRUCTIONS
13. Slide the other Shelf (G) under the bottom rails of Ladders (B and C) as shown.
14. Fasten the Shelf (G) to the Ladders (B and C) with four Metal Brackets (3) and eight 5/8” Bolts (1).
G
C
B
N
G
C
B
N
B/C
3
1
1
G
1/4" x 5/8” Bolt
(8 used in this step)
①
Metal Bracket
(4 used in this step)
③

14
ASSEMBLY INSTRUCTIONS
15. Fasten the Vertical Back Support (N) to the Shelves (G) with two 5/8” Bolts (1).
N
G
G
G
N
1
1
G
N
1/4" x 5/8” Bolt
(2 used in this step)
①

15
ASSEMBLY INSTRUCTIONS
16. Attach the Side Stretchers (L and M) to the Left and Right Ladders (B and C) with the 5/8” Bolts (1) as
shown.
C
B
L
L
M
M
1
1
1/4" x 5/8” Bolt
(8 used in this step)
①

16
ASSEMBLY INSTRUCTIONS
17. Fasten the Upper Side Stretchers (L) to the short posts of Ladders (B and C) with the 5/8” Bolts (1).
L
L
B
C
1
1
1/4" x 5/8” Bolt
(4 used in this step)
①

17
ASSEMBLY INSTRUCTIONS
18. Stand the assembled unit upright.
19. Fasten the Vertical Back Support (N) to the Upper Back Mattress Side Rail (I) with one 5/8” Bolt (1).
N
I
1
1/4" x 5/8” Bolt
(1 used in this step)
①

18
ASSEMBLY INSTRUCTIONS
20. Attach the Side Stretchers (L and M) to the Front Posts (A) with the 5/8” Bolts (1).
1/4" x 5/8” Bolt
(8 used in this step)
①
L
L
M
M
A
A
1
1
A
L/M

19
ASSEMBLY INSTRUCTIONS
21. Align and attach the Left and Right Guardrails (E and F) to the Front Posts (A) and Upper Side
Stretchers (L) respectively with the 5/8” Bolts (1).
1/4" x 5/8” Bolt
(8 used in this step)
①
A
A
F
E
L
L
1
1
1
L
E/F
E/F
A

20
ASSEMBLY INSTRUCTIONS
22. Fasten the Upper Mattress Support Slats (O) between the Upper Mattress Side Rails (I and J) with the
5/8” Bolts (1).
1/4" x 5/8” Bolt
(14 used in this step)
①
O
O
O
O
I
J
O
1
I
/J
/