Page is loading ...

1
43533-01 05/28/2008
OWNER’S MANUAL
43533-01 05/28/2008
ENGLISH
See page 2
Illumi-Heat
™
Light & Heat on Demand
™
Installation Instructions
READ AND SAVE THESE INSTRUCTIONS
before beginning installation
ESPAÑOL
Vea la pagina 14

2
43533-01 05/28/2008
3
43533-01 05/28/2008
WARNING
TO REDUCE THE RISK OF ELECTRIC SHOCK OR INJURY, OBSERVE THE
FOLLOWING:
BEFORE BEGINNING, DISCONNECT THE
POWER SUPPLY AT THE BREAKER BOX.
FAILURE TO DO SO CAN RESULT IN
SERIOUS INJURY OR DEATH
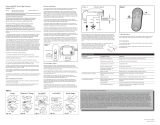
Tools Needed (not supplied)
PARTS
Heater/Light Fixture
Glass Dome
Finial
Acorn Nuts (2)
Light Sockets (3)
• Be cautious! Read all instructions and safety information before installing your new
Illumi-heat semi-flush fixture. Carefully review the assembly illustrations.
• Use this unit only in the manner intended.
•
All wiring must be in accordance with national and local electrical codes. If you are unfamil-
iar with wiring, you should use a qualified electrician.
• Before you begin installing the fixture, switch power off at the correct breaker, turn on the
bulb switch to make sure breaker handle was sitting on the right position, and lock the breaker
box to prevent power from being switched on accidentally during installation. When the breaker
box cannot be locked, securely fasten a prominent warning device such as a danger tag to the
breaker box.
• To reduce the risk of fire, electric shock, or personal injury this fixture must be mounted as
marked.
• Only use this fixture with the transmitter supplied by Hunter.
• Mounting structure must be capable of supporting this product weight of 9.0 lbs.
Wires:
Black, White, Copper (Ground)
Wire Connectors (3)
(not to scale)
Verify all parts were in the box before installing.
READ AND SAVE THESE INSTRUCTIONS
Receiver
Flat head screwdriver
Phillips screwdriver
Turn off the power source.
Transmitter and
Transmitter Holder
(not to scale)
Needle-nosed Pliers
!
Hanger Bracket

4
43533-01 05/28/2008
5
43533-01 05/28/2008
P R E - I N S TA L L AT I O N f o r M u l i t p l e I l l u m i - H e a t
Units in Your Home
Top View of Fixture
If you are going to install more than one Illumi-Heat in your home, then you will need to assign
each unit a its own unique Transmitter / Receiver Code.
1) Looking at the fixture from its top, locate the Receiver, as shown in Figure 1.
Figure 1 - Receiver
2) On the Receiver you will see the four switches that you will use to set the code for the
Transmitter and the Receiver. See Figure 2.
ON DIP
1 2 3 4
ON DIP
1 2 3 4
Figure 2 - Receiver Code Switches
Switches
NOTE - All Switches are
shown in the ON position
ON DIP
1 2 3 4
Receiver
(Bracket cut away
for clarity.)
3) Configure the Receiver Switches to your desired code. Make a note of which Receiver
Switches you turned On and turned Off. NOTE: Make certain each Receiver is assigned a
different code.
4) Remove the Transmitter Battery Compartment door as shown in Figure 3.
Figure 3 - Remove Transmitter Battery Compartment Door
5) For every Receiver Code Switch you turned Off, use a pair of needle-nosed pliers to
carefully remove its corresponding Connector from the Transmitter Terminals. See Figure 4.
For instance, if you turned Off Receiver Switches 1 and 3, then you would remove
Connectors 1 and 3 from the Transmitter.
1234
Transmitter Battery
Compartment Door
Transmitter Terminals
Connector
Figure 4 - Transmitter Terminals and Connector
P R E - I N S TA L L AT I O N f o r M u l i t p l e I l l u m i - H e a t
Units in Your Home

43533-01 05/28/2008
6
43533-01 05/28/2008
7
INSTALLATION
Figure 5 - Attach Hanger to Electrical Box
INSTALLATION continued
1) If you are replacing an existing light fixture, disconnect and remove the old fixture and
hanger bracket, leaving the exposed wires coming from the electrical box.
2) Attach the Hanger Bracket assembly to the electrical box as shown in Figure 5.
4) Use UL-approved wire connectors to connect the wires, black-to-black, white-to-white. Loop
the ground wires around the Ground Screw, then tighten the Ground Screw. See Figure 7.
3) Suspend the fixture by placing the Cable Loop over the Cable Loop Hanger. See Figure 6.
Figure 6 - Suspend the Fixture
Cable Loop
Cable Loop Hanger
Ground Screw
Figure 7 - Ground Screw
Hanger Bracket
Electrical Box

43533-01 05/28/2008
8
43533-01 05/28/2008
9
5) Swing the Fixture up so that the two Hanger Bolts exit their associated holes. See Figure 8.
Figure 8 - Positioning the Fixture
Swing fixture up
INSTALLATION continued
Hanger Bolt (2)
6) Position the Acorn Nuts over the Hanger Bolts, and tighten the Acorn Nuts until tight. See
Figure 9.
Figure 9 - Acorn Nut Installation
Bolts
Nut
INSTALLATION continued
7) Install three 40-watt Candelabra light bulbs (not included) as shown in Figure 10.
Figure 10 - Install Light Bulbs
40-watt Candelabra Ligh Bulbs (not included)
NOTE: For clarity, the
electrical box and wires
have been omitted from
this illustration.

43533-01 05/28/2008
10
43533-01 05/28/2008
11
INSTALLATION continued
Figure 11a
Figure 11b
9) Position the Finial over the Glass Dome as shown in Figure 12, and twist it clockwise until
tight.
Figure 12 - Install Finial
Heater
Glass Dome
Glass
Finial
8) Position the Glass Dome under the Heater/Light Fixture as shown in Figure 11a. Then,
place the Glass Dome over the Heater/Light Fixture as shown in Figure 11b.
Install Glass Dome
OPERATION
1) Restore power at the breaker.
2) Install the 12V alkaline battery (included) into the Transmitter.
3) Use the Heater On/Off buttons on the Transmitter to turn the Heater on and off. Use the
Light On/Off buttons to turn the light on and off. See Figure 13.
Technical Support
If you have any additional questions or problems with your Illumi-Heat please call
1-888-830-1326 (in the United States) or 1-866-268-1936 (in Canada), or contact us over
the internet at www.hunterfan.com.
OFF
OFF
ON
ON
HEATER
LIGHT
Figure 13 - Transmitter Buttons
Heater Off
Heater On
Light Off Light On
4) Mount the Transmitter Holder over the Illumi-Heat’s wall switch using the the existing wall
plate screws. See Figure 14.
5) The Transmitter can be placed in the Transmitter Holder for convenience or safekeeping.
Figure 14 - Installing Transmitter Holder

13
43533-02 05/28/2008
MANUAL DEL PROPIETARIO
43533-02 05/28/2008
Illumi-Heat
™
Light & Heat on Demand
™
Instrucciones de instalación
LEA Y GUARDE ESTAS INSTRUCCIONES
antes de comenzar la instalación
ESPAÑOL
/