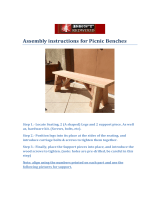
OLT 24 User guide

Type
User guide

This manual is also suitable for

Thank you for purchasing a Cedar Table.
Please take the time to
identify all the parts prior to
assembly.
Please use Safety Eye wear and Gloves while
Assembling. Be sure to read and
follow all operating instructions for any tools
used during assembly.
Remember- NO SAW CUTTING IS REQUIRED!
Safety Points and Other Considerations
Our products are built for use based on proper
installation and normal residential use, on level
ground.
Please follow the instruction manual when
assembling your Cedar Picnic Table and retain
the manual for future maintenance purposes.
Weathering and Seasoning Characteristics
Western Red Cedar lumber, when exposed to the
elements, will turn a silvery grey color within 1
year. Seasoning splits in the surface of the wood
can also occur.
Many customers prefer the natuaral beauty of
cedar wood but if you prefer to limit these
characteristics from occuring, we recommend
staining or painting the wood prior to assembly.
Please do a rough sand using 100 grit sand
paper first.
-Have a regular maintenance plan to ensure all
components are screwed together tight.
Cedar Table - Model 24
Assembly Manual
Revision #4
Sept 6th, 2018
In the event of a missing or broken piece, simply call the Outdoor Living Today
Customer Support Line @ 1-888-658-1658 within 30 days of the delivery of your
purchase. It is our commitment to you to courier replacement parts, free of charge,
within 10 business days of this notification. Replacement parts will not be
provided free of charge after the 30 day grace period.
Cedar Table Dimensions:
A: Table Height = 30 3/4"
B: Table Width = 34" to 34 1/4”
C: Table Length = 66”
D: Bench Height = 17 1/2"
E: Bench Width = 11 1/4"
F: Bench Length = 66”
G: Overall Width = 64 3/4”
Toll Free 1-888-658-1658 www.outdoorlivingtoday.com sales@outdoorlivingtoday.com
Page 1
Estimated Assembly Time for the
Cedar Table = 2 Hours
Important-
Once assembled, check and tighten
carriage bolts as required. Wood may
shrink over time causing the table to
loosen somewhat.
A
B
D
G
E
Exploded View and Parts List for Cedar Table
F
C
H
Parts Lists: Finished Size
T W L Qty.
A - Bench Boards 1 1/2” 5 1/2” 66” 4
(Angled Corners on one side)
AA-Table Top Outside Boards 1 1/2” 3 1/2” 66” 2
(Angled Corners on one side)
B - Bench Cleats - End 1 1/2” 1 1/2” 9.5” 4
C - Bench Cleats- Middle 1 1/2” 3 1/2” 9.5” 2
D - Table Top Boards 1 1/2” 3 1/2” 66” 7
E - Table Top Cleats 1 1/2” 3 1/2” 33 1/2” 3
F - Bench Supports 1 1/2” 3 1/2” 62 1/2” 2
G - Legs 1 1/2” 3 1/2” 33 3/4” 4
H - Angle Brackets 1 1/2” 3 1/2” 28” 2
I - Spacer Blocks (not shown) 3/8” 2” 2” 16
Thank you for purchasing one of our
Cedar Picnic Tables. Please take the time
to identify all the parts prior to assembly.
Toll Free 1-888-658-1658 www.outdoorlivingtoday.com sales@outdoorlivingtoday.com
Page 2
Specifications:
Wood Species - Western Red Cedar
Grade - Architectural Knotty or Better
Carriage Bolts & Washers - Zinc Plated
2 1/2” Screws - Brown MagnaGuard
Important: When unpacking your Table from the shipping box, be sure to inventory all parts.
If you discover missing or damaged pieces, please call our Toll Free Customer Support Line @
1-888-658-1658 for fast and courteous Customer Service.
Note: Use Cardboard from the Shipping Box to lay on the ground while assembling your Picnic
Table to avoid scratching wood surfaces.
Carriage Bolts
AA
Square
Drive Bit
Safety Glasses
Work Gloves
Screw Gun/Drill
Tape Measure
Wood Clamp
Level
Pliers
CEDAR TABLE HARDWARE PACKAGE
Tools Required (Not Provided)
Safety Equipment Required (Not Provided)
1/8” Drill Bit
Carriage Bolt / Nut
and Washer (5/16”)
(8 each)
1/2” Wrench
Toll Free 1-888-658-1658 www.outdoorlivingtoday.com sales@outdoorlivingtoday.com
Page 3
Hardware Kit (Provided)
Note: screws and nails shown actual size.
2 1/2”
Toll Free 1-888-658-1658 www.outdoorlivingtoday.com sales@outdoorlivingtoday.com
Page 4
1. Start by inspecting all Bench Boards (A). There are 4
pieces with angle cut corners on 1 side. Lay 2 pieces
down on a flat smooth surface. We suggest laying the
cardboard packaging underneath to prevent
unnecessary scratching of the wood surface. Place best
face to the ground as Picnic Table will be flipped over
when assembly is complete. Locate Space Blocks (I)
and slide between both Bench Board Pieces.
A
Important: Choose Bench Boards
for Quality and Color. Place Best
Face Down as Table will be flipped
over when Assembly is
complete.
A
Bench Board with
angled corners to
the outside.
Bench Board with
angled corners to
the outside.
B
3/8” x 2” x 2”
Spacer Block
I
End Bench Cleat (B)
2 1/2”
screws
Spacer Block (I)
2. Measure 11 1/4” wide with Bench Boards and
Space Blocks tight together. Attach End Bench
Cleat (B) 7 1/2” from the end with 4 - 2 1/2” screws.
Center Clear from side to side. Do not fasten
screws completely until Step 3.
3. Complete the 2nd End Bench Cleat as per Step 2.
Measure 33” from end to center point and attach Middle
Bench Cleat (C) with 4 - 2 1/2” screws. Complete
attachment of all cleat screws. Complete 2nd Bench as
previously described before moving forward.
C
Middle Bench Cleat (C)
33”
Important: Pilot hole prior to
screwing with 1/8” Drill Bit to
prevent wood from slitting.
Toll Free 1-888-658-1658 www.outdoorlivingtoday.com sales@outdoorlivingtoday.com
Page 5
AA
AA
D
D
D
D
4”
34 1/4” to 34 1/2”
4. Lay out 2 Outside Table Top
Boards (AA) and 7 Table Top
Boards (D) as illustrated to the
left. Use 3/8” thick Spacer Blocks
to evenly space boards so the
total Table Top Width is between
34 1/4” and 34 1/2”.
Position 2 Table Top Cleats (E) 4”
from the ends and secure to Table
Top with 2 - 2 1/2” per board.
(12 screws per cleat).
Space
r
2 - 2 1/2” screws
per Board
Bench Boards
with angled
corners to the
outside.
E
E
Table Top Cleat
14 1/2”
15 1/4”
Carriage Bolts
Washer and Nut
5. Locate Bench Support (F) and 2 Legs (G).
Slide Carriage Bolts through Pre-drilled holes in
each piece. Be sure to align Legs correctly with
holes situated on the lower end of the Leg. Slip
Washer on and tighten Nut with 1/2” Wrench to
complete. Complete 2 sets of Bench Support /
Leg Assembly’s.
F
G
D
D
D
Important
If pre-drilled
holes in legs do not
line up with bench
support holes, flip
leg over.
Toll Free 1-888-658-1658 www.outdoorlivingtoday.com sales@outdoorlivingtoday.com
Page 6
6. Evenly position Leg Ends tight against Table
Top Boards and Table Top Cleat. When in
correct position, pilot hole 2 holes with 1/8” drill bit
and secure with 2 - 2 1/2 screws per Leg.
Complete both Bench Support / Leg Assembly’s.
2 1/2” Screws
H
E
Angle Bracket
Table Top Cleat
7. Center Angle Bracket (H) on Table Top Cleat (E). Be sure to
align pieces as shown above. Attach with 2- 2 1/2” screws into
pre-drilled holes of Angle Bracket. Complete opposite side.
Hint: Assemble on edge of work table makes this Step easier.
Longer Side
Angle Bracket
centered on Cleat.
Toll Free 1-888-658-1658 www.outdoorlivingtoday.com sales@outdoorlivingtoday.com
Page 7
8. Flip Cleat / Angle Bracket Assembly over
and center on Table Top Boards. The ends of
Angle Brackets will sit flush against Bench
Supports (F). Secure Cleat to Table Top
Boards with 2 - 2 1/2’ screws per Board.
(12 in total)
33”
2 1/2” screws
2 1/2” screws
9. Lift and position pre-built Benches from Step 3 onto Bench Supports as shown above. Screw End
Bench Cleats into Bench Supports with 3 - 2 1/2” screws per side. Drill 1/8” pilot holes first to prevent
wood from splitting.
Hint: have a helper assist you to support the Bench while screwing Bench End Cleat into Bench Support.
Do not attach Angle
Brackets until Step 10.
Toll Free 1-888-658-1658 www.outdoorlivingtoday.com sales@outdoorlivingtoday.com
Page 8
Align approximately with
edge of Bench Support.
H
F
10. Complete attachment of 2nd Bench as per Step 9.
Attach Angle Brackets (H) to Bench Supports (F) securing
each Angle Bracket with 2 - 2 1/2” screws into pre-drilled
holes located at the end of each piece. Complete both
sides.
11. Carefully flip completed Picnic Table over
with your helper and place legs on firm level
ground. Adjust as required.
Page 9
Congratulations on assembling your Cedar Table
Note; The Cedar Table is shipped as an unfinished product. If exposed to the elements, the
western red cedar lumber will weather to a silvery-gray color. If you plan on treating the wood, we
recommend that you consult with a paint and stain dealer in your area for their recommendations.
We hope your experience
assembling your Cedar Table
has been both
positive and rewarding.
We value your feedback and
would like to hear back from you
on how well we are doing in the
following areas:
1. Customer Service
2. On Time Shipping
3. Motor Freight Delivery
4. Quality of Materials
5. Assembly Manual
6. Overall Satisfaction.
Please call, write or email us at:
Toll Line: 1.888.658.1658 | Fax: 1.604.462.5333 | sales@outdoorlivingtoday.com
The materials contained in this Assembly
Manual may be downloaded or copied
provided that ALL copies retain the
copyright and any other proprietary
notices contained on the materials. No
material may be modified, edited or
taken out of context such that its use
creates a false or misleading statement
or impression as to the positions,
statements or actions.
Canadian Address
9393 287th Street
Maple Ridge, British Columbia
Canada V2W 1L1
United States Address
P.O. Box 96
Sumas, Washington
USA 98295
Outdoor Living Today
  • Page 1 1
  • Page 2 2
  • Page 3 3
  • Page 4 4
  • Page 5 5
  • Page 6 6
  • Page 7 7
  • Page 8 8
  • Page 9 9

OLT 24 User guide

Type
User guide
This manual is also suitable for

Ask a question and I''ll find the answer in the document

Finding information in a document is now easier with AI