
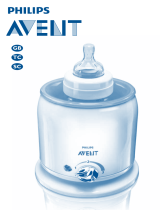
iQ Bottle and Baby Food Warmer
Calentador de Biberones y Comida para Bebé iQ
Chauffe-biberon/chauffe-repas iQ
US
ES
FR

2
3
Contents:
a. Lid
b. Lid Flap
– Lifts to accommodate
larger bottles (11oz/330ml)
and Tempo (8oz/236ml)
c. Warmer Base
d. Lifter
e. Interactive Electronic Display
b
d
e
a
c
Thank you for choosing Philips AVENT
The Philips AVENT iQ Bottle and Baby Food Warmer is the only warmer with advanced
iQ Technology, designed to smartly and accurately adjust warming time based on contents
and amount. Whether warming milk or baby food that is frozen, chilled or at room temperature,
the iQ Bottle and Baby Food Warmer heats quickly, safely and evenly – with no hot spots.
The versatile design holds all AVENT Bottles, VIA Cups, Tempo and baby food jars.
Please take 5 minutes to read through the ENTIRE INSTRUCTION LEAFLET including
the warnings before using your iQ Bottle and Baby Food Warmer for the rst time.
PLEASE RETAIN THESE INSTRUCTIONS for future reference. Instructions are also
available at www.philips.com/AVENT.
US

2
3
IMPORTANT SAFEGUARDS
When using electrical appliances, basic safety precautions should always
be followed including the following:
• Read all instructions.
• To ensure continued protection against the risk of electric shock, connect
to properly grounded outlets only.
• Pre-heating of this unit is not necessary.
• Do not touch hot surfaces. Use handles or knobs.
• To protect against electrical shock do not immerse cord or plugs in water
or other liquid.
• Unplug from outlet when not in use and before cleaning. Allow to cool before
putting on or taking off parts.
• Do not operate any appliance with a damaged cord or plug or after the
appliance malfunctions or has been damaged in any manner. Return appliance
to the nearest authorized service facility for examination, repair, or
adjustment. There are no serviceable parts inside the iQ Bottle and Baby
Food Warmer. Do not attempt to open, service or repair the
warmer yourself.
• The use of accessory attachments not recommended by the appliance
manufacturer may cause injuries.
• Do not use outdoors.
• Do not let cord hang over edge of table or counter, or touch hot surfaces.
• Do not place on or near a hot gas or electric burner, or in a heated oven.
• Extreme caution must be used when moving an appliance containing
hot liquids.
• Do not use appliance for other than intended use.
• A short power-supply cord has been provided to prevent the risk of becoming
entangled or being tripped over.
• Extension cords may be used if care is exercised in their use.
• If an extension cord is used, its electrical rating must be as great as the rating
of the appliance and not draped over the edge of the table top where it
could be pulled by children or tripped over. The extension cord should be
a grounded type 3 wire cord.
WARNING – Failure to follow instructions may cause scalding
or damage to product.
• The iQ Bottle and Baby Food Warmer is tted with a non-rewirable moulded
plug. The power cord of the appliance CANNOT be replaced. If the cord is
damaged, the appliance should be discarded. The supplied cord must not be

4
5
used on any other appliance and no other cord should be used with the iQ
Bottle and Baby Food Warmer.
• This product is manufactured to comply with the Radio Interference
Requirements and the EEC Directive 89/336/EEC.
• Always ensure water has been added before switching on the warmer.
• Always ensure that you are using the correct volume of water before beginning
the warming cycle. The warmer should be emptied of residual water before
each subsequent use.
• Heating food jars from frozen within this warmer is NOT RECOMMENDED.
• To avoid possible scalding, do not place hands over the lid ap or open the lid
ap during the warming cycle.
• When warming an 11oz/330ml bottle or an 8oz/236ml Tempo, the lid ap will
lift to accommodate the larger size. This will cause a small amount of steam to
rise from the warmer.
• To avoid possible scalding, take care when opening the lid after a completed
cycle as there may be some residual steam.
• When in use, the warmer contains hot water. Be careful to avoid spilling any
water on yourself when removing contents from the warmer.
• Use the lifter to remove small bottles, VIA Cups and small food jars after the
warming cycle is complete.
• Always use a cloth when removing bottles, cups and jars from the warmer.
• Always check feed temperature before feeding.
• For microbiological and hygienic reasons, once heated, milk and food should
not be reheated again.
• Never immerse the warmer or power cord in water.
• Close supervision is necessary when this product is used near children or
persons with disabilities.
• Failure to follow de-scaling instructions may cause irreparable damage.
SAVE THESE INSTRUCTIONS
Spoon
• For age range 6m+.
• Small-bowled spoons specially designed for small mouths and tender gums.
• Long handle – easy to hold, use and clean.
• Shaped for easier feeding without spills.
Warning! For your child’s safety and health.
Before rst use clean the product. Dishwasher safe. Sterilize using a Philips AVENT Steam Sterilizer
or boil for 5 minutes. Before each use, inspect the product. Throw away at the rst sign of damage
or weakness. Do not leave in sunlight when not in use or for longer than recommended in heat or
sterilizing solution, as this may weaken the product. Always use this product with adult supervision
Always check food temperature before feeding.

4
5
2 mins
3 mins
3 mins
4.5 mins
5 mins
7 mins
Note: While pressing the Power/Mode Selection or Volume Selection/Start Button, please hold the warmer base to
prevent the warmer from slipping.
Milk Mode
(in ANY container)
Baby Food Mode
(in ANY container)
Freezer Temperature Mode
(Select when warming
from frozen)
Fridge Temperature Mode
(Select when warming
from chilled)
Room Temperature Mode
(Select when warming
from room temperature)
Power/Mode Selection Button –
Hold button for 3 seconds to switch
the warmer on/off. Press repeatedly
to select milk or baby food and
starting temperature.
Volume Selection/Start Button –
Press repeatedly to select the volume
of milk or food. Once desired
selections are made, hold button for
3 seconds to start warming cycle.
Volume Display –
Displays the selected amount of liquid
or food in both oz and ml.
150
120
90
60
30
ml
fl.oz
5
4
3
2
1
Note: If you nd that thicker foods are not warm enough at the end of the warming cycle, consult the Troubleshooting Guide.
Note: Warming food jars from frozen is NOT recommended. However, you can warm frozen food in VIA Cups within the warmer.
Water Amount Required
/
/ /
1oz / 30ml
5oz / 150ml
5oz / 150ml
Milk 4oz/120ml from room temperature
Milk 4oz/120ml from chilled
Milk 9oz/265ml from room temperature
Milk 9oz/265ml from chilled
Food 8oz/240ml from room temperature
Food 8oz/240ml from chilled
Approximate Warming Times
Interactive Electronic Display Guide

6
7
310
285
255
230
200
170
1
4
0
1
15
85
55
30
ml
fl. oz
1
1
10
9
8
7
6
5
4
3
2
1
310
285
255
230
200
170
1
4
0
1
15
85
55
30
ml
fl. oz
1
1
1
0
9
8
7
6
5
4
3
2
1
310
285
255
230
200
170
1
4
0
1
15
85
55
30
ml
fl. oz
1
1
10
9
8
7
6
5
4
3
2
1
310
285
255
230
200
170
1
4
0
1
15
85
55
30
ml
fl. oz
1
1
1
0
9
8
7
6
5
4
3
2
1
3
10
2
85
255
230
200
170
1
4
0
1
1
5
8
5
55
30
m
l
f
l
.o
z
1
1
1
0
9
8
7
6
5
4
3
2
1
310
28
5
2
55
2
30
1
1
1
0
9
8
325
295
265
240
210
180
1
50
12
0
90
60
30
f
l.oz
1
1
1
0
9
8
7
6
5
4
3
2
1
325
295
265
240
210
180
150
120
90
60
30
ml
fl .oz
11
10
9
8
7
6
5
4
3
2
1
BEEP
310
285
255
230
200
170
40
15
85
55
30
fl.oz
11
10
9
8
7
6
5
4
3
2
1
325
295
265
240
210
180
150
120
90
60
30
f l .oz
11
10
9
8
7
6
5
4
3
2
1
310
285
255
230
200
170
1
1
ml
310
285
255
230
200
170
1
1
ml
3
2
5
2
9
5
2
6
5
2
4
0
2
1
0
1
8
0
1
5
0
1
2
0
9
0
6
0
3
0
fl.oz
1
1
1
0
9
8
7
6
5
4
3
2
1
ml
i ii iii iv
Instructions for Use
1. Ensure that the warmer is placed on a rm level surface.
Open the lid using the front catch, and ll the warmer with the appropriate amount of water (i)
– See chart on page 5 to determine water amount.
Place the fully assembled bottle or nurser (including dome cap to prevent overheating) or
storage container with lid in the warmer. For food jars, please refer to manufacturer’s instructions.
Note: When warming an 11oz/330ml bottle
or an 8oz/236ml Tempo
, the lid ap will lift to
accommodate the larger size. This will cause a small amount of steam to rise from the warmer.
Close the lid ensuring that the front catch ‘clicks’ shut.
2. Plug in the warmer.
3. Switch on the warmer by holding the Power/Mode Selection Button for 3 seconds (ii).
The warmer will beep, and the milk, room temperature and oz/ml symbols will illuminate.
It is now ready for use. If the lid has not been closed correctly, the symbols will ash.
When the unit is switched on, it automatically defaults to the milk/room temperature mode.
If this is the mode you need, go to step 5. If not, proceed to step 4.
4. Choose milk or food, and select the starting temperature (iii) by pressing the Power/Mode
Selection Button repeatedly until the desired symbols are illuminated.
Please note that there are 6 possible options: milk from room temperature, milk from chilled,
milk from frozen, food from room temperature, food from chilled, and food from frozen.
(See Display Guide on page 5 if needed.)
Note: Warming food jars from frozen is NOT recommended.
Note: Please ensure that the correct options are selected, as milk and food should not be heated
for too long.
5. Select the amount of milk or food in the bottle or container by repeatedly pressing the Volume
Selection/Start Button until the desired volume is illuminated (iv). If the desired amount is not
shown on the display, please select the amount nearest to it.
Note: For volumes in grams, select the same amount in ml (e.g. for 80g select 80ml).
Note: The maximum volume that may be selected when warming food from frozen is 8oz/240ml.
6. Start the warming cycle (v): Once the desired settings are illuminated, hold down the Volume
Selection/Start Button until the warmer beeps. The volume display will now ash ascending and
descending lights up to the selected amount. The warming cycle is in progress –
Do not open the lid.

6
7
310
285
255
230
200
170
1
4
0
1
15
85
55
30
ml
fl. oz
1
1
1
0
9
8
7
6
5
4
3
2
1
310
285
255
230
200
170
1
4
0
1
15
85
55
30
ml
fl. oz
1
1
1
0
9
8
7
6
5
4
3
2
1
310
285
255
230
200
170
1
4
0
1
15
85
55
30
ml
fl. oz
1
1
1
0
9
8
7
6
5
4
3
2
1
310
285
255
230
200
170
1
4
0
1
15
85
55
30
ml
fl. oz
1
1
1
0
9
8
7
6
5
4
3
2
1
3
10
2
85
255
230
200
170
1
4
0
1
1
5
8
5
55
30
m
l
f
l
.o
z
1
1
1
0
9
8
7
6
5
4
3
2
1
310
28
5
2
55
2
30
1
1
1
0
9
8
325
295
265
240
210
180
1
50
12
0
90
60
30
f
l.oz
1
1
1
0
9
8
7
6
5
4
3
2
1
325
295
265
240
210
180
150
120
90
60
30
ml
fl .oz
11
10
9
8
7
6
5
4
3
2
1
BEEP
310
285
255
230
200
170
40
15
85
55
30
fl.oz
11
10
9
8
7
6
5
4
3
2
1
325
295
265
240
210
180
150
120
90
60
30
f l .oz
11
10
9
8
7
6
5
4
3
2
1
310
285
255
230
200
170
1
1
ml
310
285
255
230
200
170
1
1
ml
3
2
5
2
9
5
2
6
5
2
4
0
2
1
0
1
8
0
1
5
0
1
2
0
9
0
6
0
3
0
fl.oz
1
1
1
0
9
8
7
6
5
4
3
2
1
ml
v vi vii viii
7. Completion of warming cycle (vi): When the cycle is complete, the warmer will beep intermittently
for 30 seconds and all the volume display lights will continuously ash for 3 minutes. You can
remove the contents as soon as the warmer begins beeping. After 3 minutes, the warmer will
beep 5 times and will turn off automatically.
Note: Philips AVENT recommends removing and using the contents immediately when the
warming cycle is complete, even before the warmer automatically turns off.
8. Open the lid carefully to avoid any residual steam.
Be careful when opening the lid as steam can escape and cause injury. Use a cloth when removing
the container, as it may be hot (vii). Use the lifter to raise small bottles, VIA Cups or small food
jars. Pull the lifter just above the circular rim. Rest the lifter on the rim where it naturally sits.
Note: Do not remove the lifter from the warmer.
9. Before feeding your baby:
Always check feed temperature before feeding
(a) Milk – shake the bottle, nurser or milk storage container and check the temperature of the
milk by sprinkling a few drops on the back of your hand.
(b) Food – stir the food thoroughly and test it yourself with a spoon to ensure it is not too hot.
If food is not warm enough, consult the Troubleshooting Guide.
Note: Please ensure the lid of the container is tightly secured prior to shaking.
10. Unplug the warmer and empty any residual water (viii). Ensure that the plug does not come into
contact with water. If warming an additional bottle or container, continue from step 1. Otherwise,
clean the inside and outside of the warmer with a damp cloth (viii). To remove the lifter for
cleaning purposes ONLY, lift vertically up until it naturally resists. Push the handle away from
you and rotate 90º or until it can naturally be removed, then lift out.
Note: For microbiological and hygienic reasons, once heated, milk and food should not be reheated
again, and should be discarded if not used immediately. Please consult your health professional/
breastfeeding advisor for further guidance about safety recommendations on feeding.
Note: If at any time the warmer is switched on and not running a cycle, it will automatically
turn off after 3 minutes if no selections have been made.

8
9
Care of your iQ Bottle and Baby Food Warmer
Always unplug the warmer and allow it to cool before cleaning. Wipe the inside and outside of
the warmer with a damp cloth. DO NOT USE AN ABRASIVE CLEANER. Using cool pre-boiled
or ltered water in your warmer may reduce limescale build-up. When the warmer needs
de-scaling, the mode and starting temperature symbols will ash on the electronic display. To
ensure maximum effectiveness, you should de-scale your warmer every time it is required.
To acknowledge the de-scale warning, press and hold the Power/Mode Selection or Volume
Selection/Start Button for 3 seconds. If you do not wish to de-scale, please be aware that the unit
will not remind you to
de-scale on your next use, but will instead begin re-counting cycles until the
next de-scaling is needed.
IMPORTANT! DE-SCALING
Under no circumstances should anything other than citric acid or vinegar be used as it may
cause irreparable damage. Avoid contact with eyes as this may cause irritation. Keep out of the
reach of children.
EITHER:
Mix one pack of citric acid (10g) with 7oz/210ml of water. Pour solution into the empty warmer.
DO NOT place a bottle, jar or cup into the warmer when de-scaling. Close the lid of the
warmer and set the warmer to run with 11oz/325ml of milk from frozen. After the warming
cycle has ended, leave the solution to cool for 30 minutes before emptying the warmer and
rinsing with tap water. Wipe the inside and outside of the warmer with a damp cloth only.
OR:
Pour 3.5oz/100ml of vinegar mixed with 7oz/210ml of cold water into the warmer. Allow
liquid to stand in the unit until any limescale has dissolved. DO NOT place a bottle, jar or cup
into the warmer when de-scaling. DO NOT start the warming cycle. Empty the unit and rinse
thoroughly. Wipe the inside and outside of the warmer with a damp cloth only.
Key to Product Label
TYPE B APPLIED PART
FOLLOW OPERATING
INSTRUCTIONS
ONLY USE INDOORS
CLASS II EQUIPMENT
GENERAL WARNING
EUROPEAN STANDARD
DISPOSE OF THROUGH
SEPARATE COLLECTION
ROUTE FOR WASTE
ELECTRICAL EQUIPMENT

8
9
Troubleshooting Guide
Food is not
warm enough
The temperature of warmed food depends on the consistency of the food. Philips
AVENT recommends that, ideally, pureed food only should be heated with this
warmer. If you nd that thicker food is not warm enough at the end of the
warming cycle, ll the warmer with an additional 1oz/30ml of water. On step
4 and 5, choose the food from room temperature mode and program the
warmer at the 1oz/30ml option. Before feeding your baby, stir the food.
Always check food temperature before feeding.
Display will not
illuminate / Warmer
will not turn on
Check that the lid is closed correctly. Check that the warmer is plugged
in correctly. Then hold the Power/Mode Selection Button for 3 seconds.
Symbols on the
display are ashing
• If the milk, room temperature and oz/ml symbols are ashing, then the lid
has not been closed correctly.
• If all volume symbols are ashing, and the warmer beeps intermittently for
30 seconds then the cycle is complete. Follow Step 8 onwards to remove the
bottle or container from the warmer.
• If all mode and starting temperature symbols are ashing, then the unit
requires de-scaling. See section ‘Care of your warmer’ on page 8.
To acknowledge the de-scale warning, press and hold the Power/Mode Selection
or Volume Selection/Start Button for 3 seconds. If you do not wish to de-scale,
please be aware that this may cause irreparable damage.
The warmer
is beeping
• If oz/ml symbols ash, and the warmer beeps twice, insufcient water has been
placed in the warmer. Unplug the warmer, discard the milk or food and empty
any remaining water. Be careful as the warmer is hot. Follow instructions from
Step 1 onwards.
• If all volume symbols are ashing, and the warmer beeps intermittently for
30 seconds then the cycle is complete. Follow Step 8 onwards to remove the
bottle or container from the warmer.
To stop the
warming cycle
Press the Power/Mode Selection Button and the warmer will beep and return to
default settings.
To start the
warming cycle
Once the correct mode, starting temperature and volume have been selected,
press and hold the Volume Selection/Start Button until the warmer beeps.
If the lid is opened
during warming cycle
If the lid is opened at any time during the warming cycle, the lights on the display
panel will ash and the warmer will stop and return to default settings. In order to
reset the warmer after the lid has been opened, empty out any residual water, then
follow instructions for use from step 1 onwards. Since this could occur at any stage
of the warming cycle, milk or food should be discarded for safety reasons.
Difculty setting the
appropriate amount of
frozen food
The maximum volume that may be selected when warming food from frozen
is 8oz/240ml.
Milk is not
warm enough
If you nd that milk is not warm enough at the end of a warming cycle, ll the
warmer with an additional 1oz/30ml of water. On step 4 and 5, choose the milk
from room temperature mode and program the warmer at the 1oz/30ml option.
Before feeding your baby, shake the bottle, nurser or storage container gently
and check the temperature of the milk by sprinkling a few drops on the back
of your hand.
Page is loading ...
Page is loading ...
Page is loading ...
Page is loading ...
Page is loading ...
Page is loading ...
Page is loading ...
Page is loading ...
Page is loading ...
Page is loading ...
Page is loading ...
Page is loading ...
Page is loading ...
Page is loading ...
Page is loading ...
Page is loading ...

26
Limited Guarantee
Philips AVENT guarantees that the Philips AVENT iQ Bottle and Baby Food Warmer
be free from manufacturers defects for 12 months from the date of purchase. In the
event of a defect, Philips AVENT will repair or replace such parts free of charge with
proof of purchase. The Philips AVENT iQ Warmer must be used according to the
instructions. The claim must not be a result of an accident, misuse, dirt, neglect or
normal wear and tear. For questions about this product or our guarantee please
call Customer Service at 1.800.54.AVENT.
Garantía Limitada
Philips AVENT garantiza que el Calentador de Biberones y Comida para Bebé Philips
AVENT iQ permanecerá libre de defectos del fabricante por 12 meses desde la fecha
de compra. En el caso de un defecto, Philips AVENT reparará o reemplazará las piezas
defectuosas sin cargo con una prueba de compra. Hay que utilizar el Calentador Philips
AVENT iQ de acuerdo con las indicaciones. La reclamación no puede ser el resultado
de un accidente o del uso indebido, ni de suciedad, negligencia o desgaste natural.
Si tiene dudas sobre este producto o nuestra garantía por favor llame Atención
al Cliente al 1.800.54.AVENT.
Garantie limitée
Philips AVENT garantit que le chauffe-biberon/chauffe-repas Philips AVENT iQ est
exempt de tout défaut de fabrication, et ce, pour une période de 12 mois suivant sa date
d’achat. Philips AVENT réparera ou remplacera, à sa discrétion, les pièces qui s’avèrent
défectueuses, sans frais, avec preuve d’achat. L’utilisation du Chauffe-biberon/chauffe-
repas Philips AVENT iQ doit se faire conformément aux directives. La présente garantie
ne s’applique pas si les réparations sont rendues nécessaires par un accident, un mauvais
usage, de la poussière, de la négligence ou l’usure normale. Pour plus d’information sur
ce produit ou sur notre garantie, contactez notre service clientèle au 1.800.54.AVENT.
US
ES
FR

26
iQ Range
Responding intelligently to meet your needs
The Philips AVENT iQ Range is designed with advanced iQ technology to make
feeding and caring for your baby easier.
Gama de productos iQ
Respondiendo inteligentemente para satisfacer sus necesidades
La gama de los productos Philips AVENT iQ es diseñada con la tecnología
iQ avanzada para que sea más fácil alimentar y cuidar a su bebé.
La gamme iQ
Une réponse intelligente à vos besoins
La gamme Philips AVENT iQ est dotée de la technologie iQ qui vous permet
de prendre soin et de nourrir votre bébé plus facilement.
US
ES
FR

US
ES
FR
Call TOLL-FREE: 1.800.54.AVENT
Llame gratuítamente: 1.800.54.AVENT o para
México (525) 528 3494
Appelez SANS FRAIS : 1.800.54.AVENT
www.philips.com/AVENT
AVENT, Suffolk, CO10 7QS, England
Exclusively Imported and Distributed by / Importado y Distribuido Exclusivamente por / Importé et Distribué
Exclusivement par : AVENT America, Inc. Made in England. Hecho en Inglaterra. Fabriqué en Angleterre.
Philips of Holland. All logos brands and product names are trademarks or registered trademarks of their respective
holders and are hereby recognised as such.
Philips of Holland. Todos los logotipos, marcas y nombres de productos son marcas o marcas registradas de
sus respectivos titulares y son reconocidas como tales.
Philips of Holland. Tous les logos ou noms de produit sont des marques de commerce ou déposées de leur
dépositaire respectif ou reconnu comme tel.
42133 5440 200
-
 1
1
-
 2
2
-
 3
3
-
 4
4
-
 5
5
-
 6
6
-
 7
7
-
 8
8
-
 9
9
-
 10
10
-
 11
11
-
 12
12
-
 13
13
-
 14
14
-
 15
15
-
 16
16
-
 17
17
-
 18
18
-
 19
19
-
 20
20
-
 21
21
-
 22
22
-
 23
23
-
 24
24
-
 25
25
-
 26
26
-
 27
27
-
 28
28
Philips SCF260/11 User manual
- Category
- Bottle warmers
- Type
- User manual
Ask a question and I''ll find the answer in the document
Finding information in a document is now easier with AI
in other languages
- français: Philips SCF260/11 Manuel utilisateur
- español: Philips SCF260/11 Manual de usuario
Related papers
-
Philips SCF260/33 User manual
-
Philips SCF358 User manual
-
mothercare Philips Avent Fast bottle warmer_AV3580 User manual
-
Philips SCF140/00 User manual
-
Philips AVENT Avent User manual
-
Philips Avent Bottle Warmer Operating instructions
-
Philips SCF255/42 User manual
-
Philips SCF260/23 Datasheet
-
Philips SCF141/00 User manual
-
Philips SCF-260 User manual
Other documents
-
 Philips AVENT SCF260/33 User manual
-
 Philips AVENT SCF356/00 User manual
-
Philips AVENT SCF355/05 User manual
-
Philips AVENT SCF355 User manual
-
Proctor Silex 48507 User guide
-
 Philips AVENT SCF260/38 User manual
-
 Philips AVENT SCF140/00 Datasheet
-
 Philips AVENT SCF255/53 User manual
-
Proctor Silex 48507PS User manual
-
Munchkin Shine Stainless Steel Bottle Warmer User manual


