Page is loading ...

HDMI
1.
2.
3.
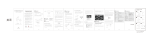
Mac system :
Plug the USB cable into the computer's USB 2.0
port, connect and turn on the device, and select PC
Camera mode on the interface.
Click Photo Booth and select “USB 视频设备”,
ready to use
In the "Applications" directory of the Finder window,
find an application called Photo Booth
EN
LCD Digital Microscope
User Manual
inskam-306
EN-1
Important Note
Thank you for purchasing a LCD Digital
Microscope. Please take a moment to read
through this manual. Its contents will help you
to get the best use of the smart microscope.
Before using the LCD Digital
Microscope, please ensure that you read and
understand the safety precautions described
below. Always ensure that the LCD Digital
Microscope is operated correctly.
Keep LCD Digital Microscope away from
water and other liquids. Do not use LCD
Digital Microscope with wet hands. Never
use LCD Digital Microscope in the rain or
snow. Moisture creates the danger of fire
and electric shock.
If you notice smoke or a strange odor
coming from LCD Digital Microscope, turn
the power off immediately.
LCD Digital Microscope may become
slightly warm during use. This does not
indicate malfunction.
If the exterior of LCD Digital Microscope
needs cleaning, wipe it with a soft, dry cloth.
1.
2.
3.
4.
Keep away
from liquids
Stay away
from the flame
Please use dry
cloth for cleaning
EN-2
(1) Standard Accessories
Preparation
1
1. 4.
2.
LCD Digital Microscope
USB cable
3. Biological slice
Cleaning fabric
5. Operation guide
(2) Parts Names & Functions
OK
12
4
3
5
6
9
7
8
10
TF Card
EN-3 EN-4 EN-5 EN-6
DC 5V input charging indicator 1312
11 Reset hole
Charging indicator
Wheel A
Object stage
Capture button
Reset hole
DC 5V in
8
9
10
11
12
13
4.3 inch LCD display
MicroTF card slot
HDMI interface
LED brightness dimmer
Focusing wheel ( Wheel B )
Microscope tube
Wheel C
1
2
3
4
5
6
7
(3) Function Introduction
MicroTF card slot:Support MicroTF card
(not equipped with this unit) up to 32GB,
Including FAT, FAT32 two file formats.
Micro usb:DC 5V power supply and data
transmission.
HDMI high-definition interface:HDMI video
transmission.
Power on/off:Short press the power button
to enter the file playback mode, long press
the switch machine.
Photograph:Short press to take a photo,
long press the video, then press once to stop
recording.
Menu Setup:Short press to enter the menu
page,Here you can set the Language / LCD
Bright / Date and Time /Screen Saver /Power
frequency/ Format / Derault Setting / FW
Version.
Zoom in/Right:Photo mode, short press to
zoom in, other modes, move up or left.
Zoom out/Left:Photo mode, short press to
zoom out, other modes, move down or right.
Confirm:Short press to confirm, long press
to rotate.
LED brightness adjustment: Enhance light
upwards, weaken light downwards.
Power on/off
1.
4.
1.
2.
3.
4.
5.
5.
6.
7.
8.
9.
10.
2.
3.
11. Focusing wheel: Rotate this wheel to adjust to
a clear image with two clear interfaces. The
best viewing distance is 0~1.57 inches.
Steps For Usage
2
(1) Standard Mode
Insert the MicroTF card (not equipped
with this unit) into the MicroTF card slot;
:etoN( dekcol si drac eht litnu yltneg sserp
MicroTF cards must be inserted to record
and store pictures and videos).
Long press on/off button,turn on the
device.
Put object to be observed onto the object
stage, Rotate Wheel A to bring the object
near to the microscope tube.
Rotate the wheel B left and right to obtain
fine focus.
When a clear focus got, rotate Wheel C
clockwise to lock the object stage.
OK
1
2
B
A
C
TF Card
Connect the microscope to your computer via
a USB cable, turn on the device, select the
“mass storage” mode, and view the stored
photos and videos on your computer.
(2)U Disk Storage Mode
EN-9EN-8EN-7
(3)PC Mode
Download and install the pieces from the link
below:www.inskam.com/download/camera.zip
Windows system :
A.
B.
C.
Turn on the device and connect the device
and computer terminal through the data cable,
select PC Camera mode.
Open "Smart Camera", click on the device in
the settings, as shown below.
(Specific parameter settings can refer to the picture content)
EN-10 EN-11 EN-12
(4)HDMI Mode
Please unplug the VGA cable of the computer
monitor before use and connect to the HDMI HD
cable (this unit is not equipped, please purchase
the mini HDMI HD cable)
Turn on the microscope and you can observe the
image you see in real time on the HD display.
Charge Battery
3
Please use the 5V 1A power adapter to charge
the device. When the battery is charging, the
charging indicator on the bottom of the device will
be red.
After the battery is fully charged, the charging
indicator will go out and the power plug will be
unplugged. The entire charging process takes
about 4 hours.
After fully charging, you can use the microscope
continuously for up to 4 hours.
When the battery is low, there will be a low battery
indicator in the lower left corner of the panel (as
shown below), the LED will become weaker and
the image quality will deteriorate. Then, you must
connect the power adapter and plug it into the
battery to charge (Note: The charging time must
be at least 1 hour or more for normal use).
1.
2.
3.
4.
Specifications
4
Lithium ion 3.7V / 1500mAh battery
Working time: 4 hours; Charging time: 4 hours
Power supply
图像传感器 2 百万高品质图像传感器
放大倍率 50x-500x
Display 4.3 inches TFT panel,16:9
Focusing range 0-40mm
Focus mode Manual
Resolution 2400*1350,1920*1080,1280*720,640*480
Data Format JPG/AVI
Light source 8 LED lights (adjustable brightness)
Frame rate 30fps
Operating system Windows XP ,Vista,Win7/8/10, Mac 10.5 or above
Interface USB2.0
Lens structure 2G+IR
Aperture F4.5
Lens angle 16°
English / German / French / Spanish / Italian /
Japanese / Simplified Chinese / Traditional Chinese /
Portuguese / Korean
Language
Resolution 2.0 M
Magnifications 0-1000x
Problems Solution
1. Does the battery have electricity?
2. Is the power supply connected?
1. Use a fine pin to insert the back reset hole,
restart the device.
The unit does not turn on
Device crash
1. Confirm that the item to be enlarged is correctly
positioned below the lens
2. Whether the focal length has been adjusted to
the optimal position
The screen is blank
The microscope is connected
to the HD display, but there is
no image on the screen
1. Make sure the HD screen is turned on
2. Whether to successfully switch to the
corresponding video input channel on the HD screen
3. Make sure the video cable is securely connected
to the microscope video output port
There are smudges or
blemishes on the screen
1. Clean the screen and lens carefully with soft
fabric
The microscope is connected to
the PC, and after downloading
and opening the software, there
is no image.
The microscope is connected to
the PC end and the TF card
cannot be read.
1. Reconnect the microscope to the PC
2. Confirm whether to enter PC camera mode
1. Reconnect the microscope and PC
2. Confirm whether to enter the Mass Storage mode
The battery indicator LED is not
in red, even though the power
adaptor is connected and
plugged into a wall socket -or-
The battery is not charging
1. Plugged into the Microscope’s DC-in port
2. Ensure that the outlet has power and is not
malfunctioning. If the outlet is connected to a wall
switch, make sure that the switch is on
Troubleshooting
5
Note: When using a computer
1. The device does not display images and the
device buttons cannot be used
2. The maximum resolution is 720P
3. The device display is in a black screen state,
which is a normal phenomenon
Steps for usage
Operation guide
Insert the MicroTF card (not equipped with this
unit) into the MicroTF ca rd slot; press gently
sdrac FTorciM :etoN( dekcol si drac eht litnu
must be inserted to record and store pictures
and videos).
1. Long press on/off button,
turn on the device.
2.
TF Gard
TF Card
1
OK
2
Put object to be observed onto the obj ect
stage, Rotate Wheel A to bring the object
near to the microscope tube.
3.
TF Gard
A
Object stage
3
OK
Swipe left and right
Rotate the wheel B left and
right to obtain fine focus.
4.
4
Turn the wheel
When a clear focus got, rotate Wheel C
clockwise to lock the object stage.
5.
5
Connect the mi croscope to your compu ter
via a USB cable, tur n on the device, select
eht weiv dna ,edom ”egarots ssam“ eht
store d photos and videos on your computer .
6.
6
clockwise C
/