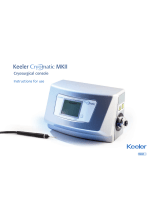
Rankin Basics EMB5 User manual

Type
User manual

Rankin Basics EMB5 is an embedding station and cryo plate designed for embedding human/animal/plant tissues with paraffin and cooling the tissue blocks after embedding. Featuring precise temperature control, digital display, programmable timer, and adjustable LED illumination, it streamlines the embedding process, ensuring accurate and efficient tissue preparation.

Rankin Basics EMB5 is an embedding station and cryo plate designed for embedding human/animal/plant tissues with paraffin and cooling the tissue blocks after embedding. Featuring precise temperature control, digital display, programmable timer, and adjustable LED illumination, it streamlines the embedding process, ensuring accurate and efficient tissue preparation.

OPERATOR MANUAL
Rankin Basics Embedding Station & Cryo Plate
EMB5
Embedding Unit: EMB51
Cryo Plate: EMB52
Attention: Before using the instrument, please read this Instruction carefully, and keep the Instruction
for further reference.
Please refer to the nameplate on the back of the instrument for the serial number and manufacturing
date of the instrument.
Contents
1. INTRUDUCTION …………………………………………………………………2
2. SAFETY REGULATIONS …………………………………………………………2
3. EMBEDDING UNIT……………………………………………………………………4
Features ………………………………………………5
Specifications ………………………………………………………………………5
Operation……………………………………………………6
Basic procedures …………………………………………………………6
Temperature/Timer/Clock Setting …………………………………………8
CRYO key……………………………………………………………………10
4. CRYO PLATE ……………………………………………………………11
Features…………………………………………………………………………12
Specifications…………………………………………………………………12
Operation……………………………………………………………………12
5. PRECAUTIONS ………………………………………………………………………13
6. MAINTENANCE AND STORAGE……………………………………………………13
7. TROUBLESHOOTING …………………………………………………………14
8. LIMITED WARRANTY ……………………………………………………………15
KD-2258 轮转式切片机
1
1. INTRODUCTION
This tissue embedding center consists of an embedding unit and a cryo plate, which
can be used either separately or as a set. It is designed for embedding
human/animal/plant tissues with paraffin and cooling the tissue blocks after embedding.
The advanced controlling-microprocessor and the new PTC calorific material are applied
to precisely control the individual temperature of five parts with multi-level over-heat
protection. Users can set up power on/off timers to minimize the waiting time for paraffin
melting. The cooling element adopts a new-type frequency converting compressor to
provide a precisely controlled, adjustable cryo temperature.
With its novel design, this instrument set has a high precision, stable performance,
and easy operation. It is recommended for use in hospitals, medical schools, scientific
research institutes, and food quarantine and inspection organizations.
2. SAFETY REGULATIONS
Package handling
Please inspect the package and contact the shipper if the package has serious
damage.
Please place the instrument on a stable surface after taking it out from the wooden
box.
Don’t place the instrument in an environment near explosive or flammable material.
If the instrument may need to be transported again, we suggest using the original
packaging materials.
Safe installation
The instrument should be installed in a place near the grounding outlet to
ensure that the power supply line can be safely connected.
Please ensure the grounding wire of the 3-line power is securely connected
before starting the instrument, which must comply with the GB9706.1 standard. Please
ensure the socket is stable before connecting it and turning on the power switch.
2
An independent power source should be supplied for the instrument.
The instrument shall be operated in a place away from any electromagnetic
interferences.
The instrument should be placed steadily, averting vibration.
When the power is on and the embedding unit is started, indicates heating
has started, do not use your hands to touch any heating parts of instrument (such
as paraffin tank, left and right cassette storage chambers, paraffin dispenser,
working plate, and forceps holder).
Attention: Don’t keep heating elements on for an excessive period of time when the
instrument is not in use. Don’t operate the instrument under a fan, which would affect
the cryo performance.
Please ensure the power supply is disconnected before removing any electrical
components, such as fuses and lighting elements.
Please ensure no excessive amount of liquid wax flows onto the surface of the
instrument, which might leak into the inside and damage the instrument. The filter
at the bottom of the paraffin tank should be installed properly and kept clean to
allow a smooth wax flow. The working plate and surface should be cleaned daily.
Working Environment
Temperature: 5℃40℃
Humidity: < 80%
Atmospheric pressure: 860hpa1060hpa
Transportation
The instrument should only be transferred in an upright position.
Please ensure the power supply is disconnected before cleaning the
instrument. Don’t use any solvents containing ketone or benzene. Dont
allow any solvent to flow into the inside of the instrument.
Please comply with the safety regulations of the manufacturer and related
laboratory rules when using solvents.
3
3. EMBEDDING UNIT
The embedding unit consists of five heating parts and one cryo part (see picture 1).
Front pad
1. Screen 2. Up key 3. Down key 4. Auto/Manual Key
5. Small cryo-plate on/off key 6. Minus key 7. Plus key 8. Set key
Back Panel
1. Power switch 2. Socket 3. Foot switch socket 4. Fuse socket
5. Grounding wire connector 6. Socket for cryo plate
6
5
4
1
2
3
4
3.1 Features
On/off timer: The timer setting as 00 Hour 00 minute for a specific day indicates
the instrument will not turn on automatically on that day.
Crisp and stable OLED screen: It will enter into screen protection mode after 15
minutes without operating the keypad in the automatic working condition.
Histo-trimmers on the two ends of the heating plate are convenient for trimming
cassettes.
Flexible magnifier.
Two modes of operation: Automatic and manual.
Keys with light indicator.
Low voltage and adjustable LED illuminating system with flexible mount.
Two module configuration options (left to right or right to left).
Volume of paraffin tank:6 L.
3.2 Specifications
Electric security: class I
Temperature range: ambient to 85
Temperature range of cryo-plate -5
Temperature tolerance: ±1
On/off timer: Any minute, any hour, and any weekdays
Paraffin tank494mm L×131mm W×92mm H
Left and right thermal chamber: each 240mm L×160mm W×55 mm H
Working plate:540mm L×93mm W
Voltage: AC110V 60HZ
Power: 1000VA
Overall dimensions: 675mm L×575mm W×395mm H
Weight: 86 Lbs.
5
3.3 Operation
Please use only the power cord supplied with the instrument and ensure that the
grounding socket is connected.
P lease ensure the power switch is in the “O” position (the off position) before
connecting the instrument to the main power supply.
The “I“ position of the power switch indicates that the power is turned on and the “O
position is power off. Once the switch is turned on, the indicator light of switch will be on.
Please ensure that the cord is connected to the instrument first before connecting
another end to the main power supply.
Basic procedures
1. The first step is to fill the paraffin tank. Please do not fill too much and risk wax
overflowing.
2.
on the keypad are for the LED light. Presskey to increase the brightness
and presskey to decrease the brightness of LED light.
3. Before using the embedding unit, please set the temperatures for the six working
zones.
Note: The temperatures for six working zones are preset as: Left thermal
chamber:55
, Paraffin dispenser: 70
, Paraffin tank: 65
, working table: 55
,
right thermal chamber: 65
, small cryo-plate:
10
.
After the temperature presetting is confirmed, the user can turn on the heating and
run the instrument.
indicates heating; indicates stopping heating.
Note: If the instrument is turned on in pre-setting ON time, it will automatically start
to run. Before the actual temperature reaches the setting temperature, the heating
symbol will automatically appear, and it will change to when the
temperature reaches the setting temperature.
4 6
The screen enters the protection and power-saving mode after 15 minutes without
touching the keypad. The screen can be lighted by pressing any key except the CRYO key.
Press the AUTO/MAN key, the instrument will switch between the auto and manual
modes.
Note: If the turn ON time is not pre-set, the instrument will enter the waiting interface
as below:
To start the instrument, please press AUTO/MAN key to enter the manual interface.
Press
to enter the running mode and press
to return to the waiting mode
TEMPERATURE/TIMER/CLOCK setting
AUTO MODE Running…… FRI 18:40
PARAFFIN 62 RIGHT 60
HOT PLATE 60 LEFT 55
DISPENSER 65 CRYO
MAN MODE off work FRI 18:40
PARAFFIN 62 RIGHT 60
HOT PLATE 60 LEFT 55
DISPENSER 65 CRYO
AUTO MODE Running…… FRI 18:40
PARAFFIN 62 RIGHT 60
HOT PLATE 60 LEFT 55
DISPENSER 65 CRYO
4 7
Press SET key to enter the setup mode. Press
or
key to choose the setting
item.
Temperature setting
Select 1. TEMPERATURE” and press SET key to enter the temperature setting
interface. Press
or
to choose the working zone, and press + or to increase
or decrease the temperature. After finishing setting, press AUTO/MAN key to return
to the running interface.
1. PARAFFIN (paraffin tank); 2. RIGHT (right thermal chamber); 3. HOT PLATE (working plate);
4. LEFT (left thermal chamber); 5. DISPENSER (paraffin dispenser); 6. CRYO (small cryo-
plate).
Timer setting:
Select “2. TIMER” and press SET key to enter the timer setting interface.
Press
.
to set turn on and turn off time from Monday to Sunday. Press + or to
increase and decrease the time figure.
SETUP MODE SELECT(13)
1. TEMPERATURE
2. TIMER
3. CLOCK
SET TEMPERATURES SELECT(16)
1. PARAFFIN 62 2. RIGHT 60
3. HOT PLATE 60 4. LEFT 55
5. DISPENSER 65 6. CRYO
4 8
Press
to choose timer setting for Thursday, press
to return to timer setting for
Monday. After finishing the setting, press AUTO/MAN key to return to automatic running
interface.
Example:
To turn on at 7:30 and turn off at 12:50 on Tuesday, the setup steps are as below:
Turn on the power and press AUTO/MAN key to enter the waiting mode, press SET
key then press
to choose “2. TIMER”, press
to choose Tuesday and press + or –to
set 07:30ON 12:50OFF.
Note: Set both the On and Off time as 00:00 on the day when there is no need
to operate the instrument.
Clock setting
Select “3. CLOCK” and press SET key to enter the current time setting interface.
Press
or
to choose minute, hour, weekthen press + or to increase or
decrease the time figures. Press AUTO/MAN key to return to the running interface.
SET TIME SELECT(17)
1. MON 06:10ON 16:30OFF
2. TUE 08:10ON 16:30OFF
3. WED 09:10ON 16:30OFF
4. THU 06:10ON 16:30OFF
5. FRI 06:10ON 16:30OFF
6. SAT 07:10ON 16:30OFF
7. SUN 06:10ON 16:30OFF
4 9
All the temperature/time settings will be stored and automatically applied after pressing the
AUTO/MAN key when the embedding unit is restarted.
CRYO key
If the CRYO key is pressed under the AUTO mode, the cryo plate connected to the
embedding unit will be turned on/off. indicates the cryo plate is running and the
absence of indicates the cryo plate is not running.
SET CLOCK SELECT(13)
1. MINUTE 05
2. HOUR 09
3. WEEK FRI
AUTO MODE Running…… FRI 18:40
PARAFFIN 62 RIGJHT 60
HOT PLATE 60 LEFT 55
DISPENSER 65 CRYO
4 10
4. CRYO PLATE
1. Housing 2. Screen 3. Keypad 4. Working area 5. Switch
Front panel
1. Increase 2. Decrease 3. Setting
Back panel
1. Power switch 2. Fuse socket 3.Power socket
4. Grounding wire connector 5. Back cover
1
2
3
4
5
2
3
4
5
1
2
3
1
4 11
4.1 Features
Temperature range is from +5 to -28 and the actual plate temperature will be
affected by ambient conditions.
Stable green-background digital screen.
The temperature measurement module with high precision and good performance is
made by US DALLAS.
4.2 Specifications
Digital screen indicates actual temperature.
Electric security: class I
Temperature range: 5℃ to -28
Working area315×380 mm
Voltage: AC110V 60HZ
Power: 300VA
Fuse: F1A/AC250V
Overall Dimension: 710mm L×350mm W×390 mm H
Weight: ~ 35 Lbs.
4.3 Operation
1. Connect the cryo plate to the power and turn on power switch.
If the power switch shows green light, that indicates the cryo plate has power and the
interface is as below (-10 is preset by the manufacturer):
2. Press the SET key to enter the setting mode and then press or to adjust the
temperature. Then press SET key to enter the running mode.
-10
4 12
5. PRECAUTIONS
NEVER use a non-grounded power source for this instrument.
Before the paraffin is melted completely and the dispenser temperature reaches
the preset temperature, do NOT use the hand or foot switch to turn on the wax dispenser;
otherwise, the dispenser might be blocked.
The instrument has an over-heat protection system, which will shut down the power
automatically when the temperature of the heating elements exceeds 100℃.
In order to prolong the lifetime of the compressor in the cryo plate, please avoid
running the compressor continuously for more than 4 hours.
Please do NOT use any hard objects to touch the LCD screen.
Please do NOT touch any heated area with your hands.
Please do NOT place any liquid near the instrument while it is running.
Please use ONLY the fuse provided with the instrument by the manufacturer and
do NOT change the fuse without turning off the main switch and disconnecting the power
supply.
Please do NOT use xylene and acetone and other organic solvent to clean the
surface of the equipment.
6. MAINTENANCE AND STORAGE
Environmental conditions for operation and storage of the instrument: Temperature
-10+55; Humidity < 80%; Atmospheric pressure: 860 hpa1060 hpa
The instrument should be cleaned daily to remove wax on the surface and
chambers after use. Use only cleanser for home use to gently wipe the surface of
the instrument.
Paraffin repellent spray is recommended to ease the wax residual removal.
The power supply must be disconnected before cleaning the instrument.
Please turn off the main switch, disconnect the power supply, and cover the
instrument with a dustproof cover if the instrument is not in use.
4 13
7. TROUBLESHOOTING
Defect
Possible cause
Solution
Embedding Unit
No response after the power
switch is turned on
Power line is not
connected well
Reconnect the power line, turn the power
on again, and the indicator light is on
Blown or defective fuse
Check the fuse and replace it if needed.
Light isn’t on
Blown fuse
Check the fuse and replace it if needed.
No heating
Blown fuse
Change the fuse if needed.
Defective heating
element
Ask for technical support.
Defective temperature
sensor
Ask for technical support.
No flow or a leak of paraffin
liquid
Wax is not fully melted
due to insufficient time
Continue heating
Magnetic valve is
blocked or defective
Ask for technical support.
Leak of paraffin liquid, but the
magnetic valve makes normal
sound when it is opened.
The magnetic valve has
other issues
Clean the dust on the surface; ask for
technical support.
Light twinkling when it is
turned on
Unstable power
Check the power line connection
Starts to heat when turned on
but under the off-work mode
SSR is broken
Ask for technical support
Cryo plate
Cryo plate cannot cool down
Poor power connection
Check the power line connection.
Controller or
compressor may be
defective
Ask for technical support.
Cryo plate can cool down, but
the temperature cannot
reach to setting temperature
The fan does not work
Ask for technical support.
Cryo plate can cool down, but
the temperature cannot
reach to the setting
temperature.
Insufficient
refrigerating fluid
Ask for technical support.
4 14
8. LIMITED WARRANTY
What your warranty covers:
Defects in materials or workmanship that occur under normal use and care.
For how long after your purchase:
Two years from the date of purchase at retail.
What we will do:
Repair or replace your product.
How you get service:
Locate your serial number and model > contact our customer service at
support@rankinbiomed.com to open a service ticket.
What your warranty does not cover:
Damage from misuse or neglect
Products purchased from non-authorized retailers, dealers, or resellers
Limitation of Warranty:
The warranty stated above is the only warranty applicable to this product. All other
warranties, expressor implied (including all implied warranties of merchantability or
fitness for a particular purpose) are hereby disclaimed.
Repair or replacement as provided under this warranty is the exclusive remedy of the
consumer. The manufacturer shall not be liable for incidental or consequential
damages resulting from the use of this product or arising out of any breach of any
expressor implied warranty on this product. Any implied warranty of merchantability
or fitness for a particular purpose on this product is limited to the applicable warranty
period set forth above.
4 15
  • Page 1 1
  • Page 2 2
  • Page 3 3
  • Page 4 4
  • Page 5 5
  • Page 6 6
  • Page 7 7
  • Page 8 8
  • Page 9 9
  • Page 10 10
  • Page 11 11
  • Page 12 12
  • Page 13 13
  • Page 14 14
  • Page 15 15
  • Page 16 16

Rankin Basics EMB5 User manual

Type
User manual

Rankin Basics EMB5 is an embedding station and cryo plate designed for embedding human/animal/plant tissues with paraffin and cooling the tissue blocks after embedding. Featuring precise temperature control, digital display, programmable timer, and adjustable LED illumination, it streamlines the embedding process, ensuring accurate and efficient tissue preparation.

Ask a question and I''ll find the answer in the document

Finding information in a document is now easier with AI