Page is loading ...

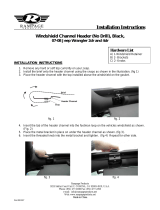
13308.05 Jeep® Wrangler Windshield Header
2007 - present , 2DR - 4DR
Jeep® JK Windshield Channel Header Installation Instructions 2007-Present
Contents: (1) Aluminum Header Bar
(2) Retainer arm
(2) Metal Spacer
(2) Threaded Lock Knob
(2) Large Nylon Washer
(2) Small Nylon Washer
1. Please read instructions fully prior to installing the JK Windshield Channel Header (13308.05).
The header has been designed to be a no drill application for ease of installation. Take your
time when installing to avoid scratching or damaging vehicle windshield finish.
2. Place header into summer top front mounting pocket
(Pic.1). Rubber pads should be pointing towards the
back of the summer top as shown.
3.
4. Place Header and summer top onto vehicle. Take your
time when installing to avoid scratching or damaging
the windshield finish. The summer top and header
should rest just behind the leading edge of the rubber
windshield seal (Pic.3).
5. From inside of vehicle, rotate retainer arms over
windshield clamp bracket (Pic.4). Foam pads on retainer
arms will rest on windshield frame.
6. Tighten retainer arms by turning threaded lock knobs
clockwise. Alternate between the left and right
knobs to insure tight fit (Pic.5). DO NOT OVER TIGHTEN.
Summer top and header should be tight to windshield
rubber seal (Pic.6).
7. Finish Installing summer top per manufactures instructions.
Page 1 of 1
PAGE 1
With header slid fully into summer top mounting pocket
secure summer top snaps to header channel (Pic.2).
Pic.1
Pic.2
Pic.3 Pic.4 Pic.5 Pic.6
/


