Page is loading ...

TOOLS NEEDED
T-40 WRENCH
3/16” Allen Wrench
JEEP TJ LIGHT BRACKETS
Thank you for choosing Rough Country for all your suspension needs.
Please read instructions before beginning installation. Check the kit hardware against the kit contents shown below. Be
sure you have all needed parts and know where they go.
927050300
INSTALLATION INSTRUCTIONS
1. Remove the factory hardware, (4) per side, as shown (Photo 1) using a T-40 wrench.
2. Remove adhesive backing from rubber gasket. Align holes in gasket with inside of bracket. Firmly press gasket into
inside of light bracket. Rubber gasket should be between light bracket and vehicle body.
3. Align the bracket and rubber to pillar and apply using supplied 5/16” stainless button head allen screws using a 3/16”
allen wrench. Leave loose. See Photo 2.
4. Repeat steps for other side of vehicle.
5. Using a lock washer and 8mm provided with purchase of light, install light as shown in Photo 3 using 6mm wrench
provided. See Photo 3.
6. After light is installed, tighten all hardware.
PHOTO 1 PHOTO 2
PHOTO 3
Thank You for choosing Rough Country for your off road needs!!!
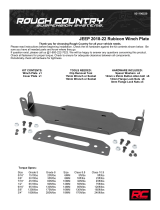
KIT CONTENTS
Rubber (2)
Dr and Pass Bracket (1 each)
5/16” x 1” Stainless Button Head Bolts
/


