Page is loading ...

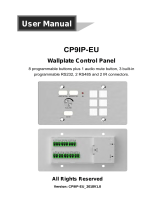
CP6IP-EU
Wallplate Control Panel-6 buttons
Program buttons to send RS232 commands to control projectors, screens
and other third-party devices.
All Rights Reserved
Version: CP6IP-EU_2018V1.0
User Manual

Panneau de contrôle mural 6 boutons, 3 RS232, 2 IR, 1 Ethernet
www.altimium.com
Preface
Read this user manual carefully before using the product. Pictures are shown in this
manual for reference only, different models and specifications are subject to real
product.
This manual is only for operation instruction, please contact the local distributor for
maintenance assistance. The functions described in this version were updated till
January, 2018. In the constant effort to improve the product, we reserve the right to
make functions or parameters changes without notice or obligation. Please refer to the
dealers for the latest details.
FCC Statement
This equipment generates, uses and can radiate radio frequency energy and, if not
installed and used in accordance with the instructions, may cause harmful interference
to radio communications. It has been tested and found to comply with the limits for a
Class B digital device, pursuant to part 15 of the FCC Rules. These limits are designed
to provide reasonable protection against harmful interference in a commercial
installation.
Operation of this equipment in a residential area is likely to cause interference, in which
case the user at their own expense will be required to take whatever measures may be
necessary to correct the interference.
Any changes or modifications not expressly approved by the manufacture would void
the user’s authority to operate the equipment.

Panneau de contrôle mural 6 boutons, 3 RS232, 2 IR, 1 Ethernet
www.altimium.com
SAFETY PRECAUTIONS
To insure the best from the product, please read all instructions carefully before using
the device. Save this manual for further reference.
Unpack the equipment carefully and save the original box and packing material for
possible future shipment
Follow basic safety precautions to reduce the risk of fire, electrical shock and injury
to persons.
Do not dismantle the housing or modify the module. It may result in electrical shock
or burn.
Using supplies or parts not meeting the products’ specifications may cause damage,
deterioration or malfunction.
Refer all servicing to qualified service personnel.
To prevent fire or shock hazard, do not expose the unit to rain, moisture or install
this product near water.
Do not put any heavy items on the extension cable in case of extrusion.
Do not remove the housing of the device as opening or removing housing may
expose you to dangerous voltage or other hazards.
Install the device in a place with fine ventilation to avoid damage caused by
overheat.
Keep the module away from liquids.
Spillage into the housing may result in fire, electrical shock, or equipment damage.
If an object or liquid falls or spills on to the housing, unplug the module immediately.
Do not twist or pull by force ends of the optical cable. It can cause malfunction.
Do not use liquid or aerosol cleaners to clean this unit. Always unplug the power to
the device before cleaning.
Unplug the power cord when left unused for a long period of time.
Information on disposal for scrapped devices: do not burn or mix with general
household waste, please treat them as normal electrical wastes.

Panneau de contrôle mural 6 boutons, 3 RS232, 2 IR, 1 Ethernet
www.altimium.com
Contents
1. Introduction ................................................................................................................. 1
1.1
Introduction to CP6IP-EU .................................................................................. 1
1.2
Features ............................................................................................................ 1
1.3
Package List ...................................................................................................... 1
2. Panel Description ........................................................................................................ 2
3. System Connection ..................................................................................................... 4
4. Control Panel Software ............................................................................................... 5
4.1
Basic Setting ...................................................................................................... 5
4.2
Panel Set ........................................................................................................... 8
4.3
Action List .......................................................................................................... 9
4.4
Event setting .................................................................................................... 10
4.4.1
RS232 Setting ....................................................................................... 10
4.4.2
IR Setting ............................................................................................... 12
4.4.3
TCP/IP Setting ....................................................................................... 15
4.4.4
Delay setting .......................................................................................... 16
4.4.5
Compare Setting .................................................................................... 17
4.4.6
LED setting ............................................................................................ 18
4.4.7
Toggle Setting........................................................................................ 19
4.5
Event List ......................................................................................................... 21
5. Specification ............................................................................................................. 22
6. Panel Drawing .......................................................................................................... 23
7. Troubleshooting & Maintenance ............................................................................... 24
8. Customer Service ..................................................................................................... 25

Panneau de contrôle mural 6 boutons, 3 RS232, 2 IR, 1 Ethernet
1
1.
Introduction
1.1 Introduction to CP6IP-EU
The Wallplate Control Panel has (3) built-in programmable RS232 connectors and (2)
Infrared (IR) connectors.
The Programmable Control Panel can fully control the compatible switches, as well as
third-party devices such as matrix switcher, compact scaler switcher, projectors,
screens, etc. Use the device for presentations in showrooms, classrooms, and
boardrooms.
1.2 Features
Each button can be programmed to send bi-direction RS232 commands
simultaneously to control third party devices.
Each button can be programmed to send the infrared codes simultaneously to
control the third-party devices and support infrared code learning function.
The unit may be programmed through the ENTERNET port, via the Control
Software.
Crystal and backlit buttons with easy user-friendly customizable changeable labels.
The backlit brightness is controllable.
Dimension: 70mm long and 41mm wide.
1.3 Package List
1 x CP6IP-EU
1 x Power adapter (12VDC 1A)
1 x Button label 6 x Button caps
3 x 2-pin pluggable terminal blocks 1 x 3-pin pluggable terminal block
1 x 5-pin pluggable terminal block
1 x User Manual
Note: Please confirm if the product and the accessories are all included, if not, please
contact with the dealers.

Panneau de contrôle mural 6 boutons, 3 RS232, 2 IR, 1 Ethernet
2
8
9
2.
Panel Description
No.
Name
Description
1
Power LED
Illuminates red when power on.
2
Button
(6) crystal and luminescent programmable buttons:
Each button can be programed with the Control Panel
Software.
Each label within a button can be easily changed.
Simply select the label you need and change it as
shown below:
3
4
1 2
ETHERNET
5
6
5
7
IR
TX RX IR IR
RS232(3) IR(1) IR(2)
TX RX
TX RX 12V
PWR

Panneau de contrôle mural 6 boutons, 3 RS232, 2 IR, 1 Ethernet
3
3
ETHERNET
RJ45 connector. Connects with PC to run the Control
Panel Software to customize button control. After setting
button functions, the port can be connected to the
third-party device to control it by buttons.
4
IR Sensor
Receives and learns the IR code to build the IR
database.
5
RS232(1) ~
RS232(3)
Total 3 RS232 ports. Connect the third-party devices
which are need to be controlled via the Control Panel
Software.
6
PWR(12V) Connects with 12V DC power adaptor.
7
IR (1) ~ IR (2)
2 IR output ports. Connect with IR Emitter to control
other devices via the Control Panel Software.
8
FIRMWARE Micro USB port for updating firmware.
9
RESET
Long-press this button 3 seconds until the power LED
goes out to start to the restore factory defaults, and then
the LED will light up while the resetting is successful.

Panneau de contrôle mural 6 boutons, 3 RS232, 2 IR, 1 Ethernet
4
3.
System Connection
The CP6IP-EU can active different ports at one time. It means every button can send
the RS232 commands, IR code at the same time.
The demo system diagram as below:
System Diagram
1)
Connect the CP6IP-EU to the LAN port of Wireless Route, or control device (such
as PC) to ETHERNET port.
2)
Connect the third-party devices (such as Matrix Switcher, Compact Scaler Switcher
or Projector) that need to be controlled to RS232 (1) ~RS232 (3) ports.
3)
Connect the IR Emitters to IR (1) ~ IR (2) ports.
IR Emitter
IR:
RS232
:
TCP/IP:
IR Remote
TX RX IR IR
RS23 2(3)
IR(1) IR( 2)
TX
RX TX RX 12V
PWR
IR Emitter
Wirel ess Route
ETHERNET
IR

Panneau de contrôle mural 6 boutons, 3 RS232, 2 IR, 1 Ethernet
5
Same network
segment
as the
switcher
4.
Control Panel Software
4.1 Basic Setting
You can use Control Panel Software to easily set functions for every button.
1)
Connect the control PC to the ETHERNET port.
2)
The default IP of CP6IP-EU is 192.168.0.178 (modifiable), the control PC should
be set its network segment to the same as the CP6IP-EU’s.
Modify the IP of PC
3)
Installation/uninstallation of Control Panel Software:
Installation: Copy the software file to the computer connected with CP6IP-EU.
Uninstallation: Delete all the software files in corresponding file path.

Panneau de contrôle mural 6 boutons, 3 RS232, 2 IR, 1 Ethernet
6
Panel Set: Click “1~6”
to set key action
4)
Double-click the below software icon to run this software:
The main window of the Control Panel Software has five parts: Panel Set, TCP/IP,
Action List, Event Set and Event List.
The main window of Control Panel Software is shown as below:
Show IP addresses of
all connected devices
in LAN.
Show all key actions, and
any action can be
selected for setting
events.
Set events for the selected action. Show all events.

Panneau de contrôle mural 6 boutons, 3 RS232, 2 IR, 1 Ethernet
7
The header of the main window has four titles including File, System, Connection and
Help.
Click “File” → “Save” to save the current setting.
Click “File” → “Save as” to save all configuration information as a file.
Click “File” → “Open” to invoke a configuration file.
Click “System” → “Version” to query the current software version.
Click “System” → “Message” to query the Link Status, Machine Type, Software
Version, IP Information, MAC address.
Click “File” → “Software Update”
Hold the button “3” and power on system until the button lights up to enable update
mode → Open upgrade Web page (http://192.168.0.178:4001/) on IE → Type
User ID (admin) and Password (123456) → upload update file → Click “Upload”
Click “System” → “Factory Defaults” to restore factory defaults.
Click “Connection” → “TCP/IP” → “Reconnect” to reconnect all CP6IP-EU.
Click “Connection” → “Upload” → to load the MCU information from the selected
CP6IP-EU to control software.
Click “Connection” → “Download” → to download the current setting information to
the selected CP6IP-EU from the control software.

Panneau de contrôle mural 6 boutons, 3 RS232, 2 IR, 1 Ethernet
8
4.2 Panel Set
Total 6 customizable buttons on the front panel can be set via this software. Add a button
action to show on the action list, and then add events to make this action will execute
the events.
Here set one button for example:

Panneau de contrôle mural 6 boutons, 3 RS232, 2 IR, 1 Ethernet
9
Key Type:
1.
Press: Execute events when
press button.
2.
Release: Execute events when
release button.
3.
Toggle: The button can be
regard as composite key,
press the button twice to
execute different events.
Built key group for LED setting.
Empty all actions.
Delete the selected action.
Delete all invalid actions.
Keys 1-6, correspond to the buttons on CP6IP-EU. Click the key 1, it will pop up dialog
as below:
4.3 Action List
All Panel Set actions will be shown on the action list and available actions must be
added to the list. The action list is as the picture below:

Panneau de contrôle mural 6 boutons, 3 RS232, 2 IR, 1 Ethernet
10
4.4 Event setting
Event Set part includes RS232, IR, TCP/IP, Delay, Compare, LED and Toggle setting.
Before set events, an action must be added first. The following introduction is about how
to set events for each action.
4.4.1
RS232 Setting
This item is used for setting the events for RS232 (1) ~ RS232 (3) ports. Click “RS232”,
it will show as below:
Operation procedure:
1)
Select the button action in action list.
2)
Set the “Lib name” and “Lib Function”. It is optional function, not necessary.
3)
Select the RS232 port. The port must be same as model setting, otherwise the
event cannot be added.
4)
Confirm and set the baud rate, data bit, stop bit and parity.
5)
Enter RS232 command in data box, and then press “add” to save setting.

Panneau de contrôle mural 6 boutons, 3 RS232, 2 IR, 1 Ethernet
11
Open/create a library
Create/delete the function name of the command
Enter the RS232 command for device control.
6)
The RS232 data also can be selected from library. Click “Change Lib” to select a
library file and open it, or Click “Edit Lib” to create a library file as below:
Note: Once set up, please press “Save” to save the editing or “Save as” to save as a file,
and then press “OK”.
7)
There are two delay send: Set and None. When select “Set”, the number of sending
strings and the delay time between strings can be set.

Panneau de contrôle mural 6 boutons, 3 RS232, 2 IR, 1 Ethernet
12
4.4.2
IR Setting
This item is used for setting the events for IR (1) ~ IR (2) ports. Click “IR”, it will show as
below:

Panneau de contrôle mural 6 boutons, 3 RS232, 2 IR, 1 Ethernet
13
Create/open a library
Create/delete/rename the
function name of the IR data
Show IR data.
IR Leaning Procedure:
1.
Click “learn” to enter IR learning mode.
2.
Put the IR Remote close to the IR sensor of WP6-IP.
3.
Press any button on the IR Remote to send the IR code to IR sensor,
and it will refresh the IR data.
4.
Follow the same steps can learn any function of the remote buttons.
Note:
The IR learning mode will be exit automatically while if no operation
within 3 seconds.
Operation procedure:
1)
Select the button action in action list.
2)
Set the “Lib name” and “Lib Function”. It is optional function, not necessary.
3)
Select the IR port. The port must be same as model setting, otherwise the event
cannot be added.
4)
Set the IR carrier mode: On/Off
5)
The IR data need to be selected from library. Click “Change Lib” to select a library
file and open it. Click “Edit Lib” to create or edit a library file as below:
Note: Once set up, please press “Save Edit” to save the editing or “Save as” to save as
a file, and then press “OK”.

Panneau de contrôle mural 6 boutons, 3 RS232, 2 IR, 1 Ethernet
14
6)
There are two delay send: Set and None. When select “Set”, the number of sending
strings and the delay time between strings can be set.

Panneau de contrôle mural 6 boutons, 3 RS232, 2 IR, 1 Ethernet
15
Type the IP address of the
device need to be set.
Type the control command.
4.4.3
TCP/IP Setting
The TCP/IP port supports pass-through function. You can set the events for different IP
port via commands.

Panneau de contrôle mural 6 boutons, 3 RS232, 2 IR, 1 Ethernet
16
Hour: 0~24;
Minute:
0~60
Second: 0~60
4.4.4
Delay setting
This item is to add a delay between two events; so when one event is finished, it will
delay a certain time then start next event. The delay setting is as picture below:
/