Page is loading ...

SANITATION
TOILETS
8100/8500/8600/8700/8900
EN
8000 Series
Operation Manual ................ 1
FR
Série 8000
Manuel d’utilisation .............. 13
Form No. 600347404_B 08/18 | ©2018 Dometic Corporation

2
EN
Toilets
NORTH AMERICAN ADDRESS INFORMATION
U.S.A. & CANADA
Service Office
Dometic Corporation
13128 St. Rte. 226
Big Prairie, OH 44611
Service Center & Dealer
Locations
Refer to “7 Customer Service” on
page 11.
+
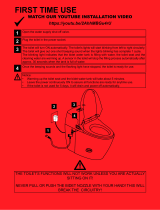
Read these instructions carefully. These instructions MUST stay with this product.
CONTENTS
1 Explanation of symbols and safety instructions. . . . . . . . . . . . . . . . . . . . . . . . . . . . . . . . . . 3
2 Intended use ............................................................ 4
3 Operation ............................................................... 5
4 Maintenance ............................................................ 8
5 Troubleshooting ..........................................................10
6 Disposal ................................................................11
7 Customer Service .........................................................11
8 Limited warranty ..........................................................11

3
EN
Toilets
1 EXPLANATION OF SYMBOLS AND SAFETY INSTRUCTIONS
This manual has safety information and instructions to help you eliminate or reduce the risk of
accidents and injuries.
1.1 Recognize safety information
This is the safety alert symbol. It is used to alert you to potential physical injury hazards.
Obey all safety messages that follow this symbol to avoid possible injury or death.
1.2 Understand signal words
A signal word will identify safety messages and property damage messages, and will indicate the
degree or level of hazard seriousness.
indicates a hazardous situation that, if not avoided, could result in death or
serious injury.
indicates a hazardous situation that, if not avoided, could result in minor or
moderate injury.
is used to address practices not related to physical injury.
I
indicates additional information that is not related to physical injury.
1.3 Supplemental directives
Read and follow all safety information and instructions to avoid possible injury or death.
Read and understand these instructions before use and maintenance of this product.
Incorrect operation and maintenance of this product can lead to serious injury.
The installation must comply with all applicable local or national codes, including the
latest edition of the following standards:
U.S.A.
• ANSI/NFPA70, National Electrical Code
(NEC)
• ANSI/NFPA 1192, Recreational Vehicles
Code
• ABYC guidelines for marine installations
Canada
• CSA C22.1, Parts l & ll, Canadian Electrical
Code
• CSA Z240 RV Series, Recreational
Vehicles
1.4 General safety messages
Failure to obey the following warnings could result in property damage, serious
injury, or death:
• This product must be installed and serviced by a qualified service technician.
• Do not modify this product in any way. Modifi cation can be extremely hazardous.
• Before beginning work on this product, be sure that all electrical power to the unit has been
turned off and that seacocks are in the closed or off position.
• FLOOD HAZARD:
• For toilets connected to any through-the-hull fittings: always close seacocks when the
toilet is not in use (even if boat is unattended for a brief period).
• Instruct all passengers on how to close valves when the toilet is not in use.
• For toilets using fresh water for flushing, disconnect any shoreside water connections
when the boat is unattended for any length of time.

4
EN
Toilets
RISK OF PROPERTY DAMAGE. Failure to comply may cause damage to the toilet
or toilet system.
• Only flush water, bodily wastes, and rapid-dissolving toilet tissue.
• Do not overfill the holding tank, or serious damage can occur to the sanitation system.
Overfilling the holding tank can rupture the holding tank or release tank contents into
the bilge.
2 INTENDED USE
The 8000 Series toilets are designed and intended for use only inside a boat or recreational
vehicle (hereinaer referred to as “RV”) for which it is supplied. Use the instructions to ensure
correct operation of the toilet. Dometic accepts no liability for damage in the following cases:
• Faulty assembly or connection.
• Damage to the product resulting from mechanical influences and excess voltage.
• Alterations to the product without expressed permission from the Dometic Corporation.
• Use for purposes other than those described in the operating manual.
Dometic Corporation reserves the right to modify appearances and specifications without notice.
I
RV installation is available for certain models only. Refer to the toilet installation manual for
information on the applicable models.

5
EN
Toilets
3 OPERATION
3.1 Using the flush touchpad or flush switches
OK TO
FLUSH
DO NOT
FLUSH
1
Dometic Flush Switch (DFS)
2
Dometic Flush Toggle Switch (DFST)
3
Dometic Flush Touchpad (DFT)
4
Dometic Flush Touch Panel (DFSHW)
➤ Press and hold the Add Water switch to reach the desired water level.
➤ Press the Flush switch, then release it.
I
8100 models only: Press and hold the Flush switch until the bowl is clear. Press and
hold the Dry Bowl switch to flush the toilet without adding water during or aer a flush.
3.2 Using the flush handle (8700 models only)
5
Flush Handle
➤ Li the flush handle to fill the bowl to the
desired water level.
6
Flush Handle
➤ Press the flush handle down, then release it
to flush the toilet.

6
EN
Toilets
3.3 Understanding the indicator lights for 8500, 8600, 8700, and 8900
Indicator Light Status
Power on Steady green Electrical power to the toilet is
activated
Flashing green Flush mode is changing
Tank level Amber The holding tank is 75% full
Red The holding tank is 100% full*
*Flush actuation is disabled to prevent overfilling the holding tank
3.4 Changing the flush modes for 8500 8600, 8700, and 8900
Flush modes Action Gallons per flush
Normal Adds water to the bowl aer
every flush
0.85 gal (3200 ml)
Dry bowl Does not add water to the
bowl aer every flush
0.45 gal (1700 ml)
➤ To change modes, press the Flush switch or handle until the power-on light begins flashing
(about five seconds).
➤ Release the Flush switch or handle.
3.5 Toilet operation when connected to “full tank” shut-down relay and
tank monitor system (8100 models only)
When a macerator toilet system uses a “full tank” shut-down relay, flush capability is shut off when
the holding tank level reaches the “full” mark.
➤ Empty the holding tank to restore flush capability.
3.6 Initializing the toilet system
➤ Turn on the water supply and electrical power to the toilet.
➤ Press the Flush switch or handle once.
I
8100 models only:
➤ Press the Flush switch or handle and hold it for at least five seconds.
➤ Toss several sheets of toilet tissue into the bowl and flush the toilet again.
I
If the toilet does not function as expected, refer to “5 Troubleshooting” on page 10
for possible solutions.

7
EN
Toilets
3.7 Using the bidet (8900 models only)
FLOODING HAZARD: Shut the bidet faucet off completely aer use. Failure to
do so could result in property damage, serious injury, or death.
7
Handle
➤ Turn the handle away from the toilet to
activate the bidet faucet.
8
Handle
➤ Adjust the water temperature by turning
the handle up for warm water, and down
for cool water.
➤ Use the electronic flush switch to clear
the toilet bowl during and aer using the
bidet.
3.8 Using the bidet (8500 models only)
FLOODING HAZARD: Shut the bidet faucet off completely aer use. Failure to
do so could result in property damage, serious injury, or death.
9
Handle
➤ Turn the handle toward the front of the
toilet to activate the Wash function.
10
Handle
➤ Turn the handle toward the back of the
toilet to activate the Bidet function.

8
EN
Toilets
4 MAINTENANCE
RISK OF PROPERTY DAMAGE: Do not use abrasive cleaners, caustic chemicals,
or lubricants and cleaners that contain alcohols or petroleum distillates. These substances may
cause damage to the toilet’s internal seals.
4.1 Cleaning the toilet
➤ Use non-abrasive cleaners to maintain the original appearance of the toilet.
4.2 Setting an inspection schedule
Inspection schedule Inspection task
Monthly Inspect the toilet, plumbing, plumbing connections, wiring,
and wiring connections.
Open and close all of the plumbing valves, including the
seacocks.
Check the inline water filters and the vented loops for
blockages.
Yearly Check the water valve filter.
4.3 Preparing the toilet for an extended period of non-use
➤ Flush the toilet in normal mode.
➤ Add 4 oz (120 ml) of liquid biodegradable laundry detergent. The laundry detergent should
not contain bleach or other environmentally harmful substances.
I
If sea water is used for flushing:
➤ Turn off the power to the sea water pump.
➤ Pour fresh water directly into the bowl during the flush cycle.
➤ Flush the toilet five times to clear the bowl.
➤ Turn off the water supply to the toilet.
➤ Flush the toilet without water four times to clear the remaining water from the system.
➤ Turn off the power to the toilet.
➤ Completely pump out the holding tank.
➤ If the system will be subjected to freezing temperatures, follow the above procedure, then
proceed to “4.4 Winterizing the toilet” on page 9.
➤ If the boat or RV will not be used for an extended period of time, or in the event of a long
electrical power interruption, shut off electrical power and water supply to the toilet.

9
EN
Toilets
4.4 Winterizing the toilet
RISK OF POISONING: Do not use an automotive-type antifreeze in fresh-water
systems. Failure to comply could result in property damage, serious injury, or death.
I
The amount of antifreeze needed may vary, depending on the installation.
For pressurized fresh water systems
➤ Thoroughly flush the toilet system with fresh water.
➤ Drain the potable water tank.
➤ Empty the holding tank.
➤ Flush potable-water antifreeze and water mixture through the toilet and into the entire
plumbing system. Each installation is different, so amounts may vary. User discretion is
required to assure adequate protection.
➤ Turn off the power to the toilet.
➤ Empty the holding tank of any remaining contents.
For raw water systems
➤ Close the “intake” and “discharge” seacocks.
➤ Turn off the power to the toilet.
➤ Disconnect and drain the discharge hose, intake hose, and the inline filters.
➤ Connect a 3' (914 mm) hose to the raw-water pump intake.
➤ Connect a 3' (914 mm), 1.5" (38 mm) ID hose to the toilet discharge.
➤ Place the other end of the hose from the raw water pump intake into a bucket containing
antifreeze.
➤ Place the other end of the hose from the toilet discharge into an empty bucket.
➤ Turn on the power to the toilet.
➤ Flush the toilet until the antifreeze is removed from the bowl.
➤ Turn off the power to the toilet.
➤ Reconnect the intake and discharge hoses to the toilet.

10
EN
Toilets
5 TROUBLESHOOTING
Fault Possible cause Suggested remedy
The flush function works, but
the water in the bowl empties
slowly or not at all.
The discharge pipe is pinched
or kinked.
Straighten the discharge pipe
to remove the pinch or kink.
The discharge head is
too high.
Reroute the discharge pipe.
The macerator pump or the
discharge pipe is blocked.
Close the seacocks and clear
the blockage.
The macerator pump makes
an unusually loud noise or
repeatedly trips the circuit
breaker.
There is foreign material in the
pump chamber.
Close the seacocks and clear
the foreign material.
The toilet does not flush aer
pushing the flush switch.
The holding tank is full and a
signal from the tank has shut
down the electrical power to
the toilet.
Empty the holding tank.
Electrical power to the toilet is
shut off or disrupted.
Check the wiring or circuit
breakers/fuses.
The flush switch is
malfunctioning.
Replace the flush switch.
The circuit board in
the control module is
malfunctioning.
Replace the control module.
Not enough, or no water,
enters the bowl.
The water supply line is
pinched or kinked.
Straighten the water supply
line to remove the pinch or
kink.
The screen in the water valve
is blocked.
Clear the blockage at the
water valve.
The intake water filters
are blocked (in raw water
systems).
Clear the water filters.
The water valve is
malfunctioning.
Replace the water valve.
The water flow is weak during
bidet operation.
The inlet screen at the hot or
cold connection at the toilet/
bidet mixer valve is clogged.
Disconnect the water lines
from the mixer valve and clean
the screen.
The aerator in the bidet
nozzle inside the toilet bowl is
clogged.
Remove and clean the aerator
nozzle.
The toilet/bidet mixer valve
assembly is not functioning
properly.
Replace the mixer valve
assembly.

11
EN
Toilets
6 DISPOSAL
M
Place the packaging material in the appropriate recycling waste bins, whenever possible.
Consult a local recycling center or specialized dealer for details about how to dispose of
the product in accordance with all applicable national and local regulations.
7 CUSTOMER SERVICE
For the Authorized Service Center near you, call between 8:00 a.m. and 5:00 p.m. (ET), Monday
through Friday, or contact the nearest Parts Distributor.
Telephone: 1 800-321-9886 U.S.A. and Canada
330-439-5550 International
Fax:
330-496-3097 U.S.A. and Canada
330-439-5567 International
Website: www.dometic.com
8 LIMITED WARRANTY
LIMITED WARRANTY AVAILABLE AT: dometic.com/warranty.
IF YOU HAVE QUESTIONS, OR TO OBTAIN A COPY OF THE LIMITED WARRANTY FREE OF
CHARGE, CONTACT:
DOMETIC CORPORATION
SANITATION CUSTOMER SUPPORT CENTER
13128 STATE ROUTE 226
BIG PRAIRIE, OHIO, USA 44611
+1 800-321-9886

12
EN
Toilets

SANITAIRE
CUVETTES DE TOILETTES
8100/8500/8600/8700/8900
FR
Série 8000
Manuel d’utilisation
Document no 600347404_B 08/18 | ©2018 Dometic Corporation

14
FR
Cuvettes de Toilettes
ADRESSE – AMÉRIQUE DU NORD
États-Unis et CANADA
Bureau de service
Dometic Corporation
13128 St. Rte. 226
Big Prairie, OH 44611
Liste des centres de service
etdes revendeurs
Voir «7 Service à la clientèle », à la
page 23
Lisez attentivement ces instructions. Ces instructions DOIVENT rester avec ceproduit.
SOMMAIRE
1 Explication des symboles et consignes de sécurité ..............................15
2 Indication ...............................................................16
3 Mode d’emploi ..........................................................17
4 Entretien ............................................................... 20
5 Dépannage ............................................................ 22
6 Élimination ............................................................. 23
7 Service à la clientèle ...................................................... 23
8 Garantie limitée ......................................................... 23

15
FR
Cuvettes de Toilettes
1 EXPLICATION DES SYMBOLES ET CONSIGNES DE SÉCURITÉ
Ce manuel contient des consignes de sécurité et des instructions pour aider l’utilisateur à éliminer
ou réduire le risque d’accidents et de blessures.
1.1 Reconnaître les consignes de sécurité
C’est le symbole d’alerte à la sécurité. Il signale des risques de blessures physiques.
Obéir à tous les messages de sécurité qui suivent ce symbole pour éviter les risques
deblessure ou de mort.
1.2 Comprendre les mots-indicateurs
Un mot-indicateur identifie les messages de sécurité et les messages liés aux dégâts matériels,
etsignale le degré ou niveau de gravité du danger.
indique une situation dangereuse qui, si elle n’est pas évitée,
peutcauser lamort ou des blessures graves.
indique une situation dangereuse qui, si elle n’est pas évitée, peut causer
desblessures mineures ou modérées.
est utilisé pour signaler des pratiques non liées à une blessure physique.
I
fournit des renseignements additionnels sans rapport avec des blessures physiques.
1.3 Directives supplémentaires
Lire et respecter toutes les consignes de sécurité et les instructions pour éviter des
blessures, voire la mort. Lire et comprendre ces instructions avant d’utiliser et d’entretenir
ce produit. L’utilisation et l’entretien incorrects de ce produit peuvent causer des
blessures graves. L’installation doit se conformer à tous les codes locaux ou nationaux
applicables, y compris la toute dernière édition des normes suivantes:
États-Unis
• ANSI/NFPA70, Code national de
l’électricité (CNE)
• ANSI/NFPA 1192, Code des véhicules
récréatifs
• Directives ABYC pour les installations
marines
Canada
• CSA C22.1, Parties l et ll, Code canadien
de l’électricité
• CSA Z240 RV Series, véhicules récréatifs
1.4 Messages de sécurité d’ordre général
Le non-respect des avertissements pourrait entraîner des dégâts
matériels, des blessures graves ou la mort:
• Ce produit doit être installé et entretenu par un agent technique qualifié.
• Ne pas modifier ce produit d’une quelconque manière. Une modifi cation peut être
extrêmement dangereuse.
• Avant de commencer à utiliser ce produit, s’assurer que l’alimentation électrique de l’appareil
est entièrement coupée et que les robinets sont en position fermée ou arrêt.
• RISQUE D’INONDATION:
• Pour les cuvettes de toilette raccordées à tout raccord à travers la coque: toujours
fermer les robinets lorsque la cuvette de toilette n’est pas utilisée (même si l’utilisateur
laisse le bateau sans surveillance pendant une courte période).
• Montrer à tous les passagers comment fermer les vannes lorsque la cuvette de toilette
n’est pas utilisée.

16
FR
Cuvettes de Toilettes
• Pour les cuvettes de toilette utilisant de l’eau douce pour la chasse, déconnecter tous
les raccordements à un réseau d’eau sur les côtes lorsque le bateau est laissé sans
surveillance pendant une durée quelconque.
RISQUE DE DÉGÂTS MATÉRIELS. Respecter ces consignes sous peine
d’endommager la cuvette ou le système de toilette.
• Chasser seulement de l’eau, des déchets corporels et du papier hygiénique
àdissolution rapide.
• Ne pas trop remplir la cuve de rétention sous peine de dommages importants au niveau
du système sanitaire. Le remplissage excessif de la cuve de rétention risque de rompre
lacuve de rétention ou de libérer son contenu dans la cale.
2 INDICATION
La cuvette de toilette série 8000 est conçue pour une utilisation à l’intérieur du bateau ou du
véhicule récréatif (ci-après appelé «VR») pour lequel elle est fournie. Suivre ces instructions
pour garantir le fonctionnement correct de la cuvette de toilette. Dometic n’endosse aucune
responsabilité en cas de dommages dans les cas suivants:
• Assemblage ou branchement incorrect.
• Endommagement du produit résultant des influences mécaniques et d’une tension excessive.
• Altérations du produit sans la permission expresse de Dometic Corporation.
• Utilisation à d’autres fins que celles décrites dans le manuel d’utilisation.
Dometic Corporation se réserve le droit de modifier l’apparence et les caractéristiques
techniques de l’appareil sans préavis.
I
Une installation dans un VR est possible pour certains modèles seulement. Pour en
savoir plus sur les modèles en question, se référer au guide d’installation de la cuvette
detoilette.

17
FR
Cuvettes de Toilettes
3 MODE D’EMPLOI
3.1 Utilisation du pavé tactile ou des interrupteurs de chasse
OK TO
FLUSH
DO NOT
FLUSH
1
Interrupteur de chasse Dometic (DFS)
2
Interrupteur de chasse à bascule Dometic
(DFST)
3
Pavé tactile de chasse Dometic (DFT)
4
Panneau tactile de chasse Dometic
(DFSHW)
➤ Appuyer en continu sur l’interrupteur Add Water pour atteindre le niveau d’eau souhaité.
➤ Appuyer sur l’interrupteur Flush, puis le relâcher.
I
Modèles 8100 seulement: Appuyer en continu sur l’interrupteur Flush jusqu’à ce
que la cuvette soit vidée. Appuyer en continu sur l’interrupteur Dry Bowl pour tirer
lachasse sans ajouter d’eau durant ou après une chasse.
3.2 Utilisation de la poignée de chasse (modèles 8700 seulement)
5
Poignée de
chasse
➤ Soulever la poignée de chasse pour
remplir la cuvette jusqu’au niveau
d’eausouhaité.
6
Poignée de
chasse
➤ Appuyer sur la poignée de chasse, puis la
relâcher pour vider la cuvette.

18
FR
Cuvettes de Toilettes
3.3 Interprétation des voyants des modèles 8500, 8600, 8700 et 8900
Voyant Comportement État
Mise sous tension Vert continu L’alimentation électrique de la
cuvette de toilette est activée
Vert clignotant Le mode de chasse est en
cours de changement
Niveau dans la cuve Ambre La cuve de rétention est
pleine à 75%
Rouge La cuve de rétention est
pleine à 100%*
* L’activation de la chasse est empêchée pour éviter le remplissage excessif de la cuve
derétention.
3.4 Changement de mode de chasse pour les modèles 8500, 8600, 8700
et 8900
Modes de chasse Action Gallons par chasse
Normal Ajoute de l’eau dans la
cuvette après chaque chasse
0,85 gal (3200 ml)
Cuvette sèche N’ajoute pas d’eau dans la
cuvette après chaque chasse
0,45 gal (1700 ml)
➤ Pour changer de mode, appuyer sur l’interrupteur Flush ou la poignée de chasse jusqu’à ce
que le voyant de mise sous tension commence à clignoter (cinq secondes environ).
➤ Relâcher l’interrupteur Flush ou la poignée de chasse.
3.5 Fonctionnement de la cuvette de toilette branchée à un relais d’arrêt
«cuve pleine» et un contrôleur de niveau de cuve (modèles 8100
seulement)
Lorsqu’une cuvette de toilette à pompe dilacératrice utilise un relais d’arrêt «cuve pleine»,
sacapacité de chasse s’arrête lorsque le niveau dans la cuve de rétention atteint le repère «full».
➤ Vider la cuve de rétention pour rétablir la capacité de chasse.
3.6 Initialisation de la cuvette de toilette
➤ Ouvrir l’arrivée d’eau et rétablir l’électricité à la cuvette de toilette.
➤ Appuyer une fois sur l’interrupteur Flush ou la poignée de chasse.
I
Modèles 8100 seulement:
➤ Appuyer sur l’interrupteur Flush ou la poignée de chasse pendant cinq secondes
environ.
➤ Jeter plusieurs carrés de papier hygiénique dans la cuvette et tirer une fois de plus la chasse.
I
Si la cuvette de toilette ne fonctionne pas comme prévu, voir les solutions possibles
àlasection «5 Dépannage », à la page 22.

19
FR
Cuvettes de Toilettes
3.7 Utilisation du bidet (modèles 8900 seulement)
RISQUE D’INONDATION: fermer complètement le robinet du
bidet après utilisation. Respecter cette consigne pour éviter tout risque de dégâts matériels,
deblessures graves ou de mort.
7
Poignée
➤ Tourner la poignée vers l’extérieur de la
cuvette de toilette pour activer le robinet
du bidet.
8
Poignée
➤ Ajuster la température de l’eau en relevant
la poignée pour l’eau chaude et en
l’abaissant pour l’eau froide.
➤ Utiliser l’interrupteur de chasse
électronique pour vider la cuvette
detoilette durant et après l’utilisation
dubidet.
3.8 Utilisation du bidet (modèles 8500 seulement)
RISQUE D’INONDATION: fermer complètement le robinet du
bidet après utilisation. Respecter cette consigne pour éviter tout risque de dégâts matériels,
deblessures graves ou de mort.
9
Poignée
➤ Tourner la poignée vers l’avant de la
cuvette de toilette pour activer la fonction
de lavage (Wash).
10
Poignée
➤ Tourner la poignée vers l’arrière de la
cuvette de toilette pour activer la fonction
Bidet.

20
FR
Cuvettes de Toilettes
4 ENTRETIEN
RISQUE DE DÉGÂTS MATÉRIELS: Ne pas utiliser de nettoyants abrasifs,
deproduits chimiques caustiques ou de lubrifiants et nettoyants qui contiennent de l’alcool ou
des distillats de pétrole. Ces substances peuvent endommager les joints internes de la cuvette
detoilette.
4.1 Nettoyage de la cuvette de toilette
➤ Utiliser des nettoyants non abrasifs pour maintenir l’aspect initial de la cuvette de toilette.
4.2 Définition d’un calendrier d’inspection
Calendrier
d’inspection
Tâche d’inspection
Une fois par mois Inspecter la cuvette, la plomberie, les raccords de plomberie,
le câblage et les branchements de câble.
Ouvrir et fermer une fois par mois toutes les vannes, y compris
les robinets.
Vérifier si les filtres à eau intégrés et les boucles de ventilation
ne sont pas bouchés.
Une fois par an Vérifier le filtre du robinet d’eau.
4.3 Préparation de la cuvette de toilette pendant une longue période
d’inutilisation
➤ Tirer la chasse en mode Normal.
➤ Ajouter 4 oz (120 ml) de détergent à lessive liquide biodégradable. Le détergent nedoit pas
contenir d’eau de Javel ou d’autres substances nocives pour l’environnement.
I
Si de l’eau de mer est utilisée pour la chasse:
➤ Mettre la pompe à eau de mer hors tension.
➤ Verser de l’eau douce directement dans la cuvette durant le cycle de chasse.
➤ Tirer cinq fois la chasse pour vider la cuvette.
➤ Fermer l’arrivée d’eau à la cuvette de toilette.
➤ Tirer la chasse quatre fois sans eau pour évacuer l’eau restante du système.
➤ Mettre la cuvette de toilette hors tension.
➤ Pomper complètement la cuve de rétention.
➤ S’il est probable que le système sera exposé au gel, suivre cette procédure, puis passer
à«4.4 Préparation hivernale de la cuvette de toilette », à la page 21.
➤ S’il n’est pas prévu que le bateau ou le VR soit utilisé pendant une longue période, ou en
cas de longue coupure de courant, couper l’alimentation électrique et fermer l’arrivée d’eau
àlacuvette de toilette.
/