Page is loading ...


RoadRunner HD™ | High Definition Mobile Recorder
i
WARNING
RISK OF ELECTRIC SHOCK
DO NOT OPEN
WARNING: TO REDUCE THE RISK OF ELECTRIC SHOCK,
DO NOT REMOVE COVER (OR BACK).
NO USER-SERVICEABLE PARTS INSIDE.
REFER SERVICING TO QUALIFIED
SERVICE PERSONNEL.
The lightning flash with arrowhead symbol, within an equilateral triangle, is intended to alert
the user to the presence of uninsulated "dangerous voltage" within the product’s enclosure
that may be of sufficient magnitude to constitute a risk of electric shock.
The exclamation point within an equilateral triangle is intended to alert the user to the presence
of important operating and maintenance (servicing) instructions in the literature accompanying
the appliance.
COMPLIANCE NOTICE OF FCC:
THIS EQUIPMENT HAS BEEN TESTED AND FOUND TO COMPLY WITH THE LIMITS FOR A CLASS A DIGITAL
DEVICE, PURSUANT TO PART 15 OF THE FCC RULES. THESE LIMITS ARE DESIGNED TO PROVIDE
REASONABLE PROTECTION AGAINST HARMFUL INTERFERENCE WHEN THE EQUIPMENT IS OPERATED IN
A COMMERCIAL ENVIRONMENT. THIS EQUIPMENT GENERATES, USES, AND CAN RADIATE RADIO
FREQUENCY ENERGY AND IF NOT INSTALLED AND USED IN ACCORDANCE WITH THE INSTRUCTION
MANUAL, MAY CAUSE HARMFUL INTERFERENCE TO RADIO COMMUNICATIONS. OPERATION OF THIS
EQUIPMENT IN A RESIDENTIAL AREA IS LIKELY TO CAUSE HARMFUL INTERFERENCE, IN WHICH CASE
USERS WILL BE REQUIRED TO CORRECT THE INTERFERENCE AT THEIR OWN EXPENSE.
WARNING: CHANGES OR MODIFICATIONS NOT EXPRESSLY APPROVED BY THE PARTY RESPONSIBLE FOR
COMPLIANCE COULD VOID THE USER’S AUTHORITY TO OPERATE THE EQUIPMENT.
THIS CLASS OF DIGITAL APPARATUS MEETS ALL REQUIREMENTS OF THE CANADIAN INTERFERENCE-
CAUSING EQUIPMENT REGULATIONS.
The information in this manual is believed to be accurate as of the date of publication. We are not responsible for any
problems resulting from the use thereof. The information contained herein is subject to change without notice. Revisions
or new editions to this publication may be issued to incorporate such changes.
The software included in this product contains some Open Sources. You may obtain the complete corresponding source
code from us. See the Open Source Guide on the software CD (OpenSourceGuide\OpenSourceGuide.pdf) or as a printed
document included along with the User's Manual.

User Guide and Instruction Manual
ii
Important Safeguards
1. Read Instructions
All the safety and operating instructions should be read before the
appliance is operated.
2. Retain Instructions
The safety and operating instructions should be retained for future
reference.
3. Cleaning
Unplug this equipment from the power source before cleaning it. Do not
use liquid aerosol cleaners. Use a damp soft cloth for cleaning.
4. Attachments
Never add any attachments and/or equipment without the approval of
the manufacturer as such additions may result in the risk of fire, electric
shock or other personal injury.
5. Power Sources
This equipment should be operated only from the type of power source
indicated on the marking label. If you are not sure of the type of power,
please consult your equipment dealer or local power company.
6. Power Cords
Operator or installer must remove power and other connections before
handling the equipment.
7. Lightning
For added protection for this equipment during a lightning storm, or when
it is left unattended and unused for long periods of time, unplug it from the
power source and disconnect the antenna or cable system. This will
prevent damage to the equipment due to lightning and power-line
surges.
8. Objects and Liquids
Never push objects of any kind through openings of this equipment as they
may touch dangerous voltage points or short out parts that could result in a
fire or electric shock. Never spill liquid of any kind on the equipment.
9. Servicing
Do not attempt to service this equipment yourself. Refer all servicing to
qualified service personnel.
10. Damage requiring Service
Unplug this equipment from the power source and refer servicing to
qualified service personnel under the following conditions:
A. When the power cabling has been damaged.
B. If liquid is spilled, or objects have fallen into the equipment.
C. If the electronic components have been exposed to rain or water.
D. If the equipment does not operate normally by following the operating
instructions, adjust only those controls that are covered by the operating
instructions as an improper adjustment of other controls may result in
damage and may require extensive work by a qualified technician to
restore the equipment to its normal operation.
E. If the equipment has been dropped or damaged.
F. When the equipment exhibits a distinct change in performance ─ this
indicates a need for service.
11. Replacement Parts
When replacement parts are required, be sure the service technician has
used replacement parts specified by the manufacturer. Unauthorized
substitutions may result in fire, electric shock or other hazards.
12. Safety Check
Upon completion of any service or repairs to this equipment, ask the service
technician to perform safety checks to determine that the equipment is in
proper operating condition.
13. Field Installation
This installation should be made by a qualified service person and
should conform to all local codes.
14. Elevated Operating Ambient Temperature
If installed in an enclosed space, the operating ambient temperature of the
environment may be greater than room ambient. Therefore, consideration
should be given to installing the equipment in an environment compatible
with the maximum rated ambient temperature.
15. Reduced Air Flow
Installation of the equipment should be such that the amount of airflow
required for safe operation of the equipment is not compromised.
16. Mechanical Loading
Mounting of the equipment in the rack should be such that a hazardous
condition is not caused by uneven mechanical loading.
17. Circuit Overloading
Consideration should be given to connection of the equipment to supply
circuit and the effect that overloading of circuits might have on over current
protection and supply wiring. Appropriate consideration of equipment
nameplate ratings should be used when addressing this concern.
18. Reliable Grounding
Reliable grounding of equipment should be maintained.
19. Water/Moisture
Avoid installing in areas where water or moisture may accumulate (with
the exception of exterior-mounted cameras as resistance to exterior
moisture is part of its intended use).
WEEE (Waste Electrical & Electronic Equipment)
Correct Disposal of This Product
(Applicable in the European Union and other European countries with separate collection systems)
This marking shown on the product or its literature, indicates that it should not be disposed with other household wastes at the
end of its working life. To prevent possible harm to the environment or human health from uncontrolled waste disposal, please
separate this from other types of wastes and recycle it responsibly to promote the sustainable reuse of material resources.
Household users should contact either the retailer where they purchased this product, or their local government office, for
details of where and how they can take this item for environmentally safe recycling.
Business users should contact their supplier and check the terms and conditions of the purchase contract. This product should
not be mixed with other commercial wastes for disposal.

RoadRunner HD™ | High Definition Mobile Recorder
iii
Table of Contents
Chapter 1 — Introduction ........................................................................................................... 1
Chapter 2 — Installation ............................................................................................................. 3
Rear Panel Connectors .......................................................................................................... 3
Front Panel Controls .............................................................................................................. 7
Mounting the Recorder .......................................................................................................... 8
Chapter 3 — Operation and Configuration................................................................................. 9
Turning on the Power ............................................................................................................. 9
Turning off the Power ............................................................................................................. 9
Initial Unit Setup ................................................................................................................... 10
System Setup .................................................................................................................. 12
Camera Setup.................................................................................................................. 18
Record Setup ................................................................................................................... 22
Event Setup ..................................................................................................................... 24
Devices Setup.................................................................................................................. 29
Network Setup ................................................................................................................. 31
Notification Setup ............................................................................................................ 34
Appendix .................................................................................................................................. 37
Map of Setup Screens ......................................................................................................... 37
Troubleshooting ................................................................................................................... 38
System Log Notices ............................................................................................................. 38
Error Code Notices .............................................................................................................. 39

User Guide and Instruction Manual
iv

RoadRunner HD™ | High Definition Mobile Recorder
1
Chapter 1 — Introduction
The RoadRunner High Definition Mobile Recorder is designed for mobile applications and operates using 9 to 36 volts
DC, which makes it compatible with the typical 12 VDC and 24 VDC power systems found on vehicles. The Recorder
provides viewing and recording capabilities for up to 16 cameras.
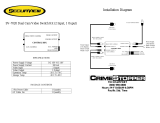
< Typical High Definition Mobile Recorder installation >
NOTE:
This manual addresses both the 8- and 16-channel Recorders. The Recorders are identical except for
the number of camera inputs that can be connected and the number of cameras that can be displayed.
For simplicity, the illustrations and descriptions in this manual refer to the 16-camera model.

User Guide and Instruction Manual
2

RoadRunner HD™ | High Definition Mobile Recorder
3
Chapter 2 — Installation
Rear Panel Connectors
Power Port
UPS Port
Video In Ports
Network Ports
eSATA Port
Alarm Ports
Event Port
RS232 Ports
RS485 Port
Audio In Port
AUX Power Port
GPS/Cell/WiFi Ports
Factory Reset Switch
Once all necessary connections have been made, attach the rear panel cover to the Recorder. This will prevent
tampering by unauthorized persons.
WARNING:
IT IS IMPORTANT THAT INSTALLATION BRACKETS AND CABLES DO NOT INTERFERE
WITH ANY OF THE VEHICLE'S CONTROLS AND ALSO DO NOT BLOCK THE DRIVER’S
VIEW OR REACH. FAILING TO HEED THESE WARNINGS COULD CAUSE AN ACCIDENT
CAUSING SERIOUS INJURY OR DEATH.
Power Connection – J1
CAUTION:
Make sure the power supply meets the requirement (9 ~ 36VDC, 30A) during operation.
The Recorder operates on a wide range of vehicles. It accepts power inputs ranging from 9 to 36 VDC. This allows
it to operate on both 12 and 24 volt systems. The power connector has five pins.
BATTERY: The BATTERY pin must be connected to fuses that are connected directly to the positive (+) battery
power terminal. (Refer to Chapter 3 — Operation and Configuration, System Setup for details).
ACC: The ACC pin must be connected to a fuse that is connected to the positive (+) power terminal that is
turned on when the ignition switch is in an active or on position. When this signal turns off the recorder will
continue to record video during the ignition off timeout. (Refer to Chapter 3 — Operation and Configuration,
System Setup for details).
HEATER (if equipped): Connect the heater power connector to the Recorder. If the temperature inside the
Recorder or the removable drive assembly is 32°F (0°C ) or lower, the (optional) built-in heater will operate to
increase the temperature until the temperature reaches 44.6°F (7°C ). The Recorder will then boot up. After boot-up,
the temperature sensor inside the Recorder continues monitoring the temperature to ensure the temperature
remains adequate for operation.
Connect the power connector to the Recorder.

User Guide and Instruction Manual
4
CAUTION:
When the heater power supply does not meet the requirement (9A@12VDC or
4.5A@24VDC) during operation, the Recorder and heater might be damaged.
WARNING:
DO NOT TOUCH THE BOTTOM OR TOP OF THE REMOVABLE DRIVE WHEN REMOVING
IT AFTER THE HEATER HAS BEEN OPERATING IN LOW TEMPERATURES. DURING
OPERATION OF THE HEATER, THE TEMPERATURE OF THE DRIVE MAY INCREASE
CAUSING INJURY.
GND: The GND (Ground) pin should be connected directly to ground (-). Although it is possible to connect
only one of the two pins, it is recommended to use two wires to create a more stable current path.
B/U PWR Connection – J2
Connection
DC12V
VDC Output
GND
Chassis Ground
Video Connection
Connect network cameras to the Recorder using RJ-45 cable (Cat5e, or Cat6).
Network Connection
eSATA Connection – J3
The B/U PWR connecter provides an input for a power loss data protection (PLDP) unit. The PLDP
is charged to 12V in normal operating conditions. In the event of a power loss, the PLDP ensures the
completion of the hard disk operation and the proper shutdown of the system. The PLDP is wired to
J2connector.
The Recorder can be networked using the 1000Mb Ethernet connector. Connect a
Cat5e cable with an RJ-45 jack to the Recorder connector (on the upper side of two
Ethernet connectors). The Recorder can be networked with a computer for remote
monitoring, searching, configuration and software upgrades.
An eSATA port is provided to connect external storage devices for recording video.

RoadRunner HD™ | High Definition Mobile Recorder
5
Alarm Connection – J5, J6, J7, J10 and J4
AI 1 to 16 (Alarm-In): Use external devices to signal events to the Recorder. Mechanical or electrical switches can
be wired to the AI (Alarm-In) and GND (Ground) connectors. The voltage range is from 0V to 50V. When the electrical
switch is wired, the threshold voltage for NC (Normally Closed) is below 2.5V and for NO (Normally Open) is above
2.6V, and it should be stable at least 0.5 seconds to be detected.
GND (Ground): Connect the ground side of the Alarm input and/or alarm output to the GND connector.
NOTE:
All the connectors marked GND are common.
NC 1 to 2 /NO 1 to 2 (Relay Alarm Outputs): The Recorder can activate external devices such as buzzers or lights.
Connect the device to the C (Common) and NC (Normally Closed) or C and NO (Normally Open) connectors. NC/NO
is a relay output which sinks 0.5A@125VAC and 1A@30VDC. See Chapter 3 ─ Configuration for configuring alarm
output.
Connection
AI (1 to 16)
Alarm Inputs 1 to 16
GND
Chassis Ground
NC (1 to 2)
Relay Alarm Outputs 1 to 2
(Normally Closed)
NO (1 to 2)
Relay Alarm Outputs 1 to 2
(Normally Open)
C (1 to 2)
Relay Common 1 to 2
12V
VDC Output
Event Connection – J5
Connection
LED 1
Heartbeat LED
LED 2
Recording Status LED
LED 3
Alarm Status LED
LED 4
Test LED
12V
VDC Output
GND
Chassis Ground
The Recorder can activate external LED devices. Heartbeat (LED 1), recording status (LED 2),
alarm status (LED 3) and test (LED 4) outputs are provided (50mA@12VDC).
LED 1: The heartbeat LED blinks at a constant rate as long as the Recorder is operating
and stops blinking if the Recorder stops operating.
LED 2: The recording status LED blinks when the Recorder is recording on the hard
disk drive.
LED 3: The alarm status LED is lit when a configured alarm output is activated.

User Guide and Instruction Manual
6
RS232 Connection – J6, J7
Connection
Master Unit
Slave Unit
Rx
To
TX
Tx
To
RX
GND
To
GND
Rx
Receive Data
Tx
Transmit Data
GND
Chassis Ground
12V
VDC Output
5V
VDC Output
RS485 Connection – J8
Connection
Master Unit
Slave Unit
+
To
TX+/ RX+
−
To
TX-/ RX-
GND
To
GND
−
RS485 − Data
+
RS485 + Data
GND
Chassis Ground
12V
VDC Output
5V
VDC Output
Audio Connection – J9
Connection
MIC
Microphone Input
12V
VDC Output
GND
Chassis Ground
NOTE:
The user is responsible to determine if local laws and regulations permit audio recording.
AUX Power Connection – J11
Connection
12V
VDC Output
GND
Chassis Ground
Two RS232 ports are provided to connect external devices such as GPS.
The Recorder can be controlled remotely by an external device such as the GPS or control system
using RS485 half-duplex serial communications signals.
In addition to having audio channels with each camera connection, the recorder has two sources of
external audio. Connect the audio sources (microphone) to MIC 1 and MIC 2 as needed.
The Recorder has a 12 VDC output connector which provides power to external
devices up to 2A.

RoadRunner HD™ | High Definition Mobile Recorder
7
WiFi/Cell/GPS Connection – J12
Factory Reset Switch
The Recorder has a Factory Reset switch to the left of the Cell 1 port on the rear panel.
This switch will only be used on the rare occasions that original factory settings should be
re-loaded.
CAUTION:
When using the Factory Reset, saved settings will be lost.
To reset the unit, use a straightened paperclip:
1. Turn the Recorder off by inserting the key in the On/Off switch and rotating it clockwise to the Off position.
2. Turn it on again by rotating the key counter-clockwise to the On position.
3. While the Recorder is initializing, poke the straightened paperclip into the unlabeled hole to the left of the Cell 1 port.
4. Hold the switch until the RECORD LED on the front panel blinks.
5. Release the reset switch. All of the Recorder’s settings are now at the original settings it had when it left the factory.
Front Panel Controls
Front Cover
Power Switch
Drive Assembly
Network Port
USB Port
LED
Each connector is provided to connect WiFi, Cell and GPS antennas. The GPS antenna
will be connected to the Recorder for working with the Recorder internal GPS module
NOTE: WiFi and Cell connections will be supported in a future release.

User Guide and Instruction Manual
8
Front Cover (sold separately)
Insert the front cover key into the keyhole and rotate it clockwise. Place the cover over the front of the recorder. Align
the slots with the pins on the recorder and slide the front cover to the right. Rotate the key counterclockwise to lock
it into place.
Power Switch
The unit can be turned on or off with the key provided with the unit.
Drive Assembly
A removable hard disk or solid-state drive is mounted in the Drive Assembly. The drive can be removed to view the
video on the personal computer or utilized in another Recorder. The Power Switch must be in the Off position to
remove the drive after the POWER LED on the recorder turns off.
Network Port
The Recorder can be networked using the 1000Mb Ethernet connector. Connect a Cat5e cable with an RJ-45 jack to
the Recorder connector.
USB Port
A USB port is provided for updating firmware, configurations and retrieving video files.
LED
POWER: The POWER LED is lit when the unit is On.
RECORD: The RECORD LED blinks when the Recorder is recording video on the drive.
Mounting the Recorder
WARNING:
IT IS IMPORTANT THAT THE RECORDER IS MOUNTED IN A LOCATION WHERE IT
CANNOT BREAK LOOSE AND CAUSE INJURY IN THE EVENT OF AN ACCIDENT.
CAUTION:
The rubber collars of the vibration isolation mounts are between the Recorder and the
bracket as shown in the illustrations above. Attaching the bracket in any other manner
can cause the isolation mounts to fail.

RoadRunner HD™ | High Definition Mobile Recorder
9
Chapter 3 — Operation and Configuration
NOTE:
The Recorder should be completely installed before proceeding. Refer to Chapter 2 — Installation.
Turning on the Power
The Recorder can be turned on by inserting the key in the On/Off switch and rotating it clockwise. The switch can be
in the On position and the key removed. This way the Recorder will power up when the ACC pin on the Power
Connector – J1 is enabled. The Recorder is operational in approximately 60 seconds. The Recorder will take an
additional 30 seconds to become operational if the “Use 30 seconds Delayed Start” feature is enabled (Path: System
menu > Power Management). The Power LED on the front panel will illuminate and this action signifies the Recorder
has been turned on properly.
NOTE:
The Recorder will not power up in the following conditions:
If the temperature is 32°F (0°C) or lower. Refer to Chapter 2 — Installation for details.
The battery power voltage is out of the range set during System menu > Power Management.
There is 2.5V or more voltage difference between the accessory and battery power.
If the Recorder turns off due to an emergency shutdown or shutoff and the battery power voltage
does not remain within the specified range for longer than the specified time (Path: System menu >
Power Management). Refer to Turning off the Power for details about the emergency shutdown or
shutoff.
CAUTION:
Turn on the ignition switch first and then power On/Off switch in about two seconds. If
Use 30 seconds Delayed Start feature is enabled and you turn on the ignition switch and
then power On/Off switch in less than two seconds, the Recorder may delay to start the
system for 30 seconds after the ignition switch is turned on.
WARNING:
DO NOT TOUCH THE BOTTOM OR TOP OF THE REMOVABLE DRIVE WHEN REMOVING
IT AFTER THE HEATER HAS BEEN OPERATING IN LOW TEMPERATURES. DURING
OPERATION OF THE HEATER, THE TEMPERATURE OF THE DRIVE MAY INCREASE
CAUSING INJURY.
Turning off the Power
The Recorder can be turned off by rotating the key counter-clockwise to the Off position. The recorder powers off in
maximum 20 seconds when the key is turned to the Off position.
The recorder can also be turned off by inactivating the ACC pin on the Power Connector – J1. When using the ACC
pin the Recorder will shut off after the ignition off timeout if the ignition off timeout feature is set to On (Path: System
menu > Power Management).
NOTE:
The Recorder will automatically turn off to prevent the system from being damaged in the following
conditions:
The battery power voltage registers between 7V to 9V or 36V to 38V for 10 seconds.
The battery power voltage is lower than 7V or higher than 38V for one second.
There is 2.5V or more difference between the accessory input and battery power input on the J1 power
connector.

User Guide and Instruction Manual
10
Initial Unit Setup
Before using the Recorder for the first time, establish the initial settings. Install the RsM Software Program (RoadRunner
Secure Management Software
TM
) on a PC and connect to the Recorder remotely.
The RsM program is provided with the product for remote operation. The Recorder can be accessed, configured and
managed by using RsM. The recording system is connected remotely via network connection.
RsM Program: Allows set up of the Recorder, to monitor video of the Recorder and play back video recorded on
the system.
NOTE:
Refer to the RsM Software manual for instructions on how to install the program and connect the Recorder
remotely.
The following description is for setting up the Recorder using the RsM program.
Run the RsM program, and log in. Enter a User and password. Enter the password (default: AVT7100) when logging
in the admin user.
In order to register a recorder, enter System -> RsM setup -> Device…. Use plus sign to add a device. Once the Recorder
is registered on the RsM program, select RsM Setup from the System menu, and the select Device.
NOTE:
Refer to the RsM Software manual for instructions on how to register the Recorder on the RsM system.
Monitoring video of the Recorder system and playing back video recorded on the Recorder will also
be supported using RsM. Refer to the RsM manual for details.

RoadRunner HD™ | High Definition Mobile Recorder
11
Select a device group in the Site panel and then select a device (registered Recorder) in the Site List panel. Selecting
the button at the bottom of the Site List panel, or selecting Remote Setup Device from the device menu displayed
by clicking the right mouse button to change the Recorder’s settings remotely.
OR
While setting up the Recorder, there will be many opportunities to enter names and titles. When making these entries,
use a keyboard connected to a PC running RsM.

User Guide and Instruction Manual
12
Throughout the screens notice the Default button located on the left bottom corner. Selecting Default provides the
opportunity to reset that screen to its default settings. Select Apply or OK to apply the changes and exit the screen in
any setup. Select Cancel to exit the screen and no changes are saved.
System Setup
General
PATH: System menu > General
Select the box beside Site and enter a Site Name.
Select the box beside Serial Number and enter the system serial number.
Select the box beside System ID, and change the number by selecting it and using the Up and Down arrows to increase
and decrease the number from 0 to 99. Select the keyboard symbol to change the settings.
Select the box beside Language and a drop-down menu displays the available languages. Select the desired language.
Selecting Clear All Data will clear all video data from the hard drive. A dialog box is provided to confirm or cancel
this operation. Clear All Data will not clear the System Log.
Date/Time
PATH: System menu > Date/Time

RoadRunner HD™ | High Definition Mobile Recorder
13
Select the first box beside Date and the individual sections of the date will highlight. Use the Up and Down arrows
to change the number. Select the Format box beside Date and select from the three available date formats to save
selected format.
Select the first box beside Time and the individual sections of the time will highlight. Use the Up and Down arrows
to change the number. Select the Format box beside Time and select from the three available time formats to save
selected format.
NOTE:
The clock will not start running until the Apply button is selected.
Select the box beside Time Zone and select time zone from the list.
NOTE:
The Time Zone can also be selected on the map below by pressing the Left and Right buttons or scrolling
the mouse wheel up and down.
Selecting Use Daylight Saving Time toggles between On and Off.
Selecting the Time Sync box. Time can be synchronized between the Recorder and standard time servers that are
available in most time zones and countries, or between the Recorder and another Recorder.
Selecting the box beside Automatic Sync. toggles between
On and Off.
Select the box beside Time Server and enter the IP address
or domain name of the time server. Or, select and then
a time server from the time server list.
NOTE: Use the domain name instead of IP address if the
domain name is set up the DNS Server.
Select the box beside Interval and set the time interval for synchronization from 30 minutes to 1 day.
Last Sync-Time displays the last time the Recorder was synchronized with the time server.
Selecting Run as Server toggles between On and Off. When it is On, the Recorder runs as a time server.
Select the Holiday box and set up holidays.
Set up holidays by selecting
+
. The current date appears.
Select the month and day and change them by using the Up and Down arrows. Dates
can be deleted by selecting the beside the date.
NOTE: Holidays that do not fall on the same date each year should be updated
once the current year’s holiday has passed.

User Guide and Instruction Manual
14
User
PATH: System menu > User
The User screen displays the authorized groups and users which can be added, deleted and modified. When adding a
group, authority levels can be assigned. The +/- column is used to collapse and expand user groups. If there is a + or
– in this column, it indicates the item is a Group Name. If there is a – in front of the Group Name, it indicates that the
group has been “expanded” and all of the User Names within that group are displayed below the Group Name. If
there is a + in front of the Group Name, it indicates that the group has been “collapsed” and all of the User Names
within that group are hidden.
Selecting a Group Name allows changing the authority levels assigned to the group.
CAUTION:
Write down the new password and save it in a secure place. If the password is forgotten,
the unit must be reset using the Factory Reset Button and all data settings will be lost.
Selecting a User Name allows adding or changing the password assigned to that user. The group to which the user is
assigned can also be changed.
The column can be used to delete a User Name or an entire Group. If the is grayed out, that Group or User cannot
be deleted. Select the , a confirmation to delete the User or Group is displayed. To delete the User currently logged
into the Recorder on a local system or a PC running RsM, log the user out of the system first and then delete the user.
To add a Group, select the + Group… box and enter the Group name. Up to 15 characters including spaces are allowed
in the group name. Enter the name and assign authority levels to the group.
Selecting the Authority box will toggle between all authority levels being
turned On and Off. Selecting the individual authority level boxes will
toggle between that authority level being turned On and Off. The authority
levels that can be turned On and Off are:
Upgrade – The user can upgrade the software.
Color Control – The user can control brightness, contrast, hue and saturation for
cameras.
System Check – The user can view the remote system status or check the remote
system status as a batch process.
Alarm-Out Control – The user can reset the Recorder’s outputs during an alarm
by selecting the alarm-out control button on the RsM program.
Covert Camera View – The user can view video from cameras set as Covert while in the Live Monitoring or Search mode.
Search – The user can access the Search mode.
Clip-Copy – The user can copy video clips.
Setup – The user without Setup authority cannot establish any system settings excluding system shutdown and logout.
System Time Change – The user can change the system date and time.
Data Clear – The user can clear all video data or format disks.
Alarm-Out Setup – The user can establish all Alarm-Out settings.
/