Page is loading ...

1812-482-2932
Installation
Instructions
Recommended Tools
www.ridetech.com
Table of contents
Page 2-10.........Front Installation Instructions
Page 10-29...... Rear Installation Instructions
Page 30........... CoilSpring Adjustment & Alignment
Page 31........... Torque Specifications & Shock Adjustment
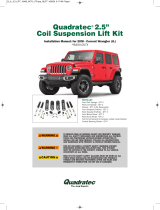
Part # 13130110/13130115 - 2019-2023 Ram 1500 2WD/4WD Lowering Kit with HQ CoilOvers
2019-2023 Ram 1500 2WD/4WD Lowering Kit
Installation Instructions
Front Components
13133699 Front Upper Control Arms
13133110/13133115 Front CoilOver Kit
Rear Components
13139511 Rear Lowering Kit
13136110 Rear CoilOver Kit
REV0 8/7/23

2
www.ridetech.com
Installation
Instructions
Major Components .....In the box
2
3
4
5
10
11
12
13
13
14
1
6
7
8
9
15
16
17
18
19
20
20
21
Item # Part # Description QTY
1 90003553 Upper CoilOver Mount 2
Coil Over Shock Assembly
2 986-10-124 5.2” Stroke HQ Series Shock 2
3 90002398 Lower Shock Ring 2
4 90002397 Lower Shock Puck 2
5 90003554 Lower Shock Mount 2
6 815-05-022-KIT 1.7” Shock Eyelet Assembly 2
7 90001994 5/8” ID Shock Bearing 2
8 90001995 Shock Bearing Snap Ring 4
99501031 1/2”-13 x 3/4” Button Head Bolt 2
99503006 1/2” SAE Flat Washer 2
9 038-01-006-A CoilSpring Plate Retaining Ring 2
10 90002070 Dropped CoilSpring Cap 2
11 234-15-200 Lower Spring Adjuster Nut 2
12 99050001 Adjuster Nut Locking Screw 2
13 70010828 Delrin Spring Washer 4
14 59100750 (2WD)
or
59100850 (4WD)
Coilspring 10” (2WD) 750lb - 2WD
or
Coilspring 10” (4WD) 850lb - 4WD
2
or
2
15 90002043 .500 x .365 Shock Bearing Spacers 4
85000000 Spanner Wrench 1
HARDWARE LIST - Kit # 99010240
Item # Part # Description QTY
SHOCK TO SHOCK MOUNT
15 99501050 1/2”-13 x 2 1/2” Hex Bolt 2
16 99503014 1/2” SAE Flat Washer 4
17 99501064 1/2”-13 Nylok Nut 2
LOWER MOUNT TO CONTROL ARM
18 99121005 M12-1.75 X 30mm Hex Bolt 6
19 99123002 M12 Flat Washer 12
20 99122009 M12-1.75 Nylok Nut 6

3812-482-2932
Installation
Instructions
Major Components .....In the box
Item # Part # Description QTY
1 90003551 Upper Control Arm - Driver (shown) 1
90003552 Upper Control Arm - Passenger 1
2 70016702 Upper Control Arm Bushings 4
3 70016703 Upper Control Arm Ball Joint 2
470015619 Upper Ball Joint Dust Cap 2
599143001 M14 Flat Washer - Ball Joint to Spindle 4
1
2
2
4
5
3
DRIVER
ABS WIRE MOUNTING TAB

4
www.ridetech.com
Installation
Instructions
Disassembly
This Kit is Designed to replace the factory Control Arms, Shocks, and Springs.
The front OEM Shock and Spring assemblies will need to be removed from the front of the truck. DO NOT
DISASSEMBLE THE SHOCK/SPRING ASSEMBLY, THE COILSPRING IS UNDER COMPRESSION AND
COULD CAUSE BODILY INJURY!
1. Raise the vehicle and support it by the frame, allowing the suspension to hang freely. Remove the
wheels.
2. Remove the shock/spring assembly from both sides of the truck. DO NOT DISASSEMBLE THE SHOCK/
SPRING ASSEMBLY, THE COILSPRING IS UNDER COMPRESSION AND COULD CAUSE BODILY INJURY!
3.
4.
3. Disconnect the sway bar from the control
arms. This allows the lower control arm to
move easier during the CoilOver installation.
4. Unbolt the brake line from the frame, but
retain the OEM hardware. This allows the
lower control arm to move easier during the
CoilOver installation.
5. Detach the ABS wire from the upper control
arm.
5.

5812-482-2932
Installation
Instructions
Disassembly
6. The upper control arm will need to be
disconnected from the steering knuckle.
Remove the OEM upper control arm. Retain
the hardware to install the new upper control
arm.
6.
CoilOver Assembly...
First, using the supplied
lower adjuster nut (234-
15-200) thread the nut
onto the shock from the
top of shock as seen in
fi gure A. Remove the
plastic pellet that is in the
split of the adjuster nut.
Next, install a delrin washer
then coil spring over the
top of the shock as seen in
fi gure B.
Before the upper spring
mount can be installed
screw the adjuster knob on
the upper eye mount to the
fi rmest setting (clockwise)
as seen in fi gure C. Then
remove the Knob by
holding it while removing
the center screw.
Once the knob is removed
slide a Delrin washer over
the eyelet. Next, slide the
upper spring mount (9000-
2070) over eyelet as seen in
fi gure D.
Install upper spring mount
retainer clip (038-01-006-A)
into the groove on the
upper eyelet as seen in
fi gure E. Then, reinstall
adjuster to complete
assembly.
4
A
BE
3
C
Install the locking screw in the adjuster nut before
setting spring preload, but DO NOT tighten until the
spring preload has been set.
NOTE: Remember to adjust the shock valving before driving,
the shock is currently set to full stiff.
D
Getting Started..........
7. The CoilOvers need to be assembled before putting the shocks in the mounts. Assemble the shocks and
springs using the instructions below.

6
www.ridetech.com
Installation
Instructions
CoilOver Installation
8. Image 8 illustrates the upper coil over
mount. The flat side of the mount will need to
be positioned to the frame.
9. Position the upper coil over mount in the
OEM location with the flat side positioned to
the frame. Install a M12 flat washer on each
of (3) M12-1.75 x 30mm hex bolts. With the
mounting holes aligned, insert a bolt/washer in
each hole. Install a M12 flat washer & M12-
1.75 nylok nut on each bolt. Torque the bolts
to 69 ft-lbs.
10. Install the 1/2” I.D. bearing spacers into
the bearing in the shock eyelet. These spacers
have a through hole that is 1/2” diameter. The
small diameter of the spacers will insert into
the shock bearing.
FRAME
SIDE
8.
9.
10.

7812-482-2932
Installation
Instructions
CoilOver Installation
11. Insert the shock eyelet into the upper
mount. Install each CoilOver in the upper
mount with the Adjusting Knob facing
the wheel of the truck. Line up the shock
bearing/spacers hole with the mounting holes
of the upper mount.
12. Install a 1/2” flat washer on a 1/2”-13 x
2 1/2” bolt. Insert a bolt/washer through the
mount/shock. Install a 1/2” flat washer and
1/2”-13 nylok nut on the threads of the bolt
that are sticking through the mount. Torque
the upper mounting hardware to 75 ftlbs.
13. Use a jack under the lower control arm to
raise the control arm. Align the OEM shock
mount with the lower shock mount of the coil
over.
11.
12.
13.

8
www.ridetech.com
Installation
Instructions
CoilOver Installation
14. Install the OEM lower shock bolt. We
recommend installing the bolt with the threads
to the rear of the truck. Instal the OEM nut on
the threads of the bolt. Torque the shock bolt
to 125 ft-lbs.
15. The upper control arms are side specific.
The driver control arm is shown in Image 15.
The ABS wire tab is to the rear of the truck.
16. Install the Ridetech upper control arms
using the OEM hardware. The control arms
are mounted in the OEM mounts with the ABS
wire tab to the rear of the truck. The control
arm mounting bolts will need to be tightened
after the truck is sitting on the ground.
14.
15.
16.
ABS WIRE
MOUNTING TAB
DRIVER UPPER

9812-482-2932
Installation
Instructions
CoilOver Installation
17. Insert the ball joint stud into the spindle.
Install (2) M14 flat washers on the ball joint
stud. Next, install the ball joint nut and torque
to 50 ft-lbs. Tighten the nut until a slot in the
nut aligns with the hole in the ball joint pin.
NEVER LOOSEN THE NUT TO ALIGN THE HOLE!
18. Install the supplied cotter pin. Bend the
tabs of the cotter pin.
19. Insert the OEM ABS clip into the tab of the
control arm.
20. Reattach the sway bar linkage. The lower
sway bar linkage nut is torqued to 75 ft-lbs.
17.
18.
19.
20.

10
www.ridetech.com
Installation
Instructions
Assembly...
CoilSpring Adjustment
21. 21. Insert the grease zerks in the ball joints.
Grease the ball joints and install the supplied
caps(A). These caps will help keep debris out
of the control arms.
22. Repeat steps 3-21 on the other side of the
truck.
A
7
12
13
14
10
28 29
30 30
6
32
32
31
33
35
36
34
3
28
30
1
25
27
27
26
28
30
11
25
26
27
27
15
22
21
23
8
31
31
32
32
9
32
34
4
29
30
28
29
30
30
2
20 16
19
23
24
17
18
5
Rear Suspension Components .....In the box

11 812-482-2932
Installation
Instructions
Major Components .....In the box
Item
#Part # Description QTY
1 90003555 Lower Shock Mount - Driver 1
2 90003584 Lower Shock Mount - Passenger 1
3 90003556 Upper Shock Mount - Driver 1
4 90003583 Upper Shock Mount - Passenger 1
5 90003557 Lower Bar Relocation Bracket 2
6 90003558 Upper Bar Relocation Bracket - Driver Outer 1
7 90003559 Upper Bar Relocation Bracket - Driver Inner 1
8 90003560 Upper Bar Relocation Bracket - Passenger Outer 1
9 90003561 Upper Bar Relocation Bracket - Passenger Inner 1
10 90003562 Spacer Sleeve - 1.25” OD x .65” ID x 2.625” Long 2
11 90002043 Shock Bearing Spacers - .500” ID x .365” Long 8
12 70015643 Bumpstops 2
13 90003563 Track/Panhard Bar 1
14 70016734 Track/Panhard Bushings - installed in panhard bar 2
15 982-10-806 6.3” Stroke HQ Series Shock 2
16 815-05-022-KIT 1.7” Shock Eyelet Assembly 2
17 90001994 5/8” ID Bearing (installed in shock and eyelet) 4
18 90001995 Bearing Snap Ring (installed in shock and eyelet) 8
19 038-01-006-A Upper Coil Spring Cap Retaining Ring 2
20 234-14-500 Upper Coil Spring Cap 2
21 234-15-200 Lower Spring Adjuster Nut 2
22 99050001 Adjuster Nut Locking Screw 2
23 70010828 Delrin Spring Washer 4
24 59140350 Coilspring 14” 350lb 2
END LINK ASSEMBLY
90003842 10mm 90 Degree End link 4
90003506 End link Spacer 2
99115012 M10-1.5 130mm Threaded Rod 2
90002275 Copper Crush Washer 4

12
www.ridetech.com
Installation
Instructions
Hardware Kit .....# 99010241
Getting Started.........
1. Raise the vehicle to a safe and comfortable working height and support it by the frame. You will need
to be able to move the rear differential up and down. Use a jack under the rear axle to raise and lower it
during the install.
2. Jack up the rear end slightly to remove the tension from the rear shocks. Remove the shock absorbers.
3. Lower the jack to relieve the tension on the rear springs, but keep the jack touching the rear axle. You
will need to keep the rear end supported during the install.
DO NOT strain the brake lines.
If installing the Ridetech 4 link bars, install them in conjunction with this lowering kit.
Item
#Part # Description QTY
SHOCK TO LOWER SHOCK MOUNT
25 99501064 1/2-13 X 2 3/4” Hex Bolt 2
26 99502009 1/2””-13 Nylok Nut 2
27 99503014 1/2” SAE Flat Washer 4
SHOCK TO UPPER SHOCK MOUNT
25 99501064 1/2”-13 X 2 3/4” Hex Bolt 2
26 99502009 1/2”-13 Nylok Nut 2
27 99503014 1/2” SAE Flat Washer 2
LOWER SHOCK MOUNT TO AXLE
28 99371005 3/8”-16 X 1 1/4” Hex Bolt 4
29 99372001 3/8”-16 Nylok Nut 4
30 99373002 3/8” SAE Flat Washer 8
UPPER SHOCK MOUNT TO FRAME
28 99371005 3/8”-16 X 1 1/4” Hex Bolt 6
29 99372001 3/8”-16 Nylok Nut 6
30 99373002 3/8” SAE Flat Washer 12
UPPER BAR MOUNT TO AXLE
31 99162000 M16-2.0 Nylok Nut 4
32 99163003 M16 Flat Washer 8
33 99161001 M16-2.0 x 120mm Hex Bolt 4
Item
#Part # Description QTY
LOWER BAR MOUNT TO AXLE
28 99371005 3/8”-16 X 1 1/4” Hex Bolt 2
29 99372001 3/8”-16 Nylok Nut 2
30 99373002 3/8” SAE Flat Washer 4
31 99162000 M16-2.0 Nylok Nut 2
32 99163003 M16 Flat Washer 4
34 99161000 M16-2.0 x 170mm Hex Bolt 2
35 99111002 M10-1.5 x 30mm Hex Bolt 4
36 99113002 M10 Flat Washer 4
90002263 Red Loctite 1
BUMPSTOP TO FRAME
99371034 3/8”-16 x 1” SHCS 2
99372002 3/8”-16 Nylok Nut 2
99373002 3/8”-16 SAE Flat Washer 2
SWAY BAR END LINK
99113002 M10 Flat Washer 6
99112002 M10-1.5 Nylok Nut 2
90002263 Red Loctite 1

13 812-482-2932
Installation
Instructions
5. 5. Remove the rear wheel liners. Retain the
liners and the hardware to reinstall them after
the lowering kit has been installed.
CoilOver Assembled
4. The CoilOvers need to be assembled before putting the shocks in the mounts. Assemble the shocks and
springs using the instructions below.
CoilOver Assembly...
First, using the supplied
lower adjuster nut (803-
00-199) thread the nut
onto the shock from the
bottom side as seen in
figure A. Remove the
plastic pellet that is in the
split of the adjuster nut.
Next, install a delrin washer
then coil spring over the
top of the shock as seen in
figure B.
Before the upper spring
mount can be installed
screw the adjuster knob on
the upper eye mount to the
firmest setting (clockwise)
as seen in figure C. Then
remove the Knob by
holding it while removing
the center screw.
Once the knob is removed
slide a Delrin washer over
the eyelet. Next, slide the
upper spring mount (803-
00-199) over eyelet as seen
in figure D.
Install upper spring mount
retainer clip (803-00-199)
into the groove on the
upper eyelet as seen in
figure E. Then, reinstall
adjuster to complete
assembly.
AD
B
D
3
C
Install the locking screw in the adjuster nut before
setting spring preload, but DO NOT tighten until the
spring preload has been set. Set the spring preload
after the CoilOver has been installed.
NOTE: Remember to adjust the shock valving before driving,
the shock is currently set to full stiff.
Disassembly
E

14
www.ridetech.com
Installation
Instructions
Getting Started.........
Disassembly
8.
7.
6. Remove the sway bar linkage. It will be
replaced with new linkage.
7. Remove the rear sway bar. It will be
reinstalled after the lowering kit is installed.
8. Lower the axle as far as the OEM bar bushing
will allow it to go, but make sure the axle is still
supported by the jack. Remove the control arm
control arm bolts at the axle.
6.

15 812-482-2932
Installation
Instructions
Disassembly & Axle Modifications
9. Remove the rear coil springs. You may have
to push down on the end of the axle to get the
coil spring out of the mount.
10. The OEM bump stop mount will need to be
removed. The bump stop snaps into the OEM
mount. Push on the side of it to get it to pop
out of the mount.
11. The rear surface of the control arm/sway
bar mount needs to be flat. The lower edge
is bent, but will need to be flattened. Use a
straight edge to see how much it needs to be
flattened.
9.
10.
11.

16
www.ridetech.com
Installation
Instructions
14.
Axle Modifications
12. Use a hammer to flatten the bottom of the
control arm/sway bar mount.
13. You can check for flatness with a straight
edge on the mount.
14. The front of the OEM upper bar mounts
will need to be cutoff. Images 19 & 20 show
the mount marked and after it has been cut.
Mark a straight line from where the end radius
stops to just where the weld on the axle tube
stops
12.
13.

17 812-482-2932
Installation
Instructions
17.
Axle Modifications & Bump Stop Installation
15. Image 15 illustrates the cut mount and the
piece that was cut off.
16. The bump stop mounting ring will need to
be cutoff the truck. Just the ring needs cutoff,
leaving the mount the ring is welded to. It can
be cut off with a die grinder and cutoff wheel
by cutting the welds. Grind the surface smooth
and paint it.
17. Bolt the supplied bump stops to the flat
surface of the OEM mount. It is attached using
(1) 3/8”-16 x 1” socket head cap screw, (1)
3/8” SAE flat washer, & (1) 3/8”-16 nylok nut.
Torque to 35 in-lbs.
15.
16.

18
www.ridetech.com
Installation
Instructions
DRIVER
TOP
VIEW
REAR
VIEW
20.
Upper Shock Mount Installation
18. The upper shock mounts are side specific.
Image 18 shows the Driver side upper mount.
The arrow that is cut in the bracket will point to
the front of the truck with the coilover moved
out away from the frame.
19. Align the upper shock mount with the
holes in the OEM coil spring mount. Again, the
Arrow will point to the front of the truck with
the shock mount out away from the frame.
20. Install a 3/8” flat washer on each of (3)
3/8”-16 x 1 1/4” bolts. Hold the bracket in
position and put the bolts/washer through the
mounting holes. Install a 3/8” flat washer &
3/8”-16 nylok nut on each of the bolts. Torque
hardware to 35 ft-lbs.
18.
19.

19 812-482-2932
Installation
Instructions
DRIVER
TOP
VIEW
SIDE
VIEW
Lower Shock Mount Installation
21. The lower shock mount offsets the bottom
of the shock to the wheel for better spring
clearance. The Driver lower shock mount is
shown in Image 21.
22. The lower shock mount will be positioned
in the OEM lower shock number. The large
mounting hole will align with OEM shock
mounting hole. Align the holes and insert the
OEM shock bolt in the aligned holes.
23. Install the OEM nut on the OEM bolt, but do
not tighten until the (2) rear bolts are installed.
21.
23.
22.

20
www.ridetech.com
Installation
Instructions
26.
Lower Shock Mount Installation
24. Install a 3/8” flat washer on each of (2)
3/8”-16 x 1 1/4” hex bolt. Insert the bolts/
washers in from the bottom. Install a 3/8”
flat washer & 3/8”-16 nylok nut on each bolt.
Torque the 3/8” hardware to 35 ft-lbs.
25. Torque the OEM shock bolt to 100 ft-lbs.
If you are installing the Ridetech
4-Link bars, install them in
conjunction with the 4-link bar
relocation brackets.
26. The lower bar bracket is the same for
driver and passenger. The lower bar will need
to be inserted into the bracket before putting
it in place. The bolt must be installed from
the outside with the threads pointing in. This
reuses the OEM lower bolt. The bar mounting
bolt needs to be left loose.
24.
25.
!
/