Page is loading ...

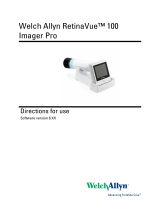
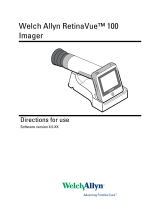
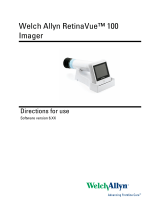
iExaminer® Pro
Quick Reference
Guide
11810 / 11820
iExaminer
adapter
PanOptic
ophthalmoscope

Contents
Assembly instructions ............. 3
Training .......................... 5
Indications for use ................ 6
Before using the iExaminer
application ....................... 7
Capture a retinal image ............ 7
Review a retinal image ........... 10
Image filters and move an image ... 11
Save a patient file ................ 12
Open and edit a patient file ........ 13
Send or print a saved exam ........ 18
For users of iOS 9 and earlier ...... 21
Security, confidentiality, integrity,
and availability .................. 22
Warranty ........................ 22
Welch Allyn Technical Support .... 23

Assembly instructions
1
2
3

4
5
6


Indications for use
The iExaminer® is an attachment and software used
only with mobile devices in conjunction with the
Welch Allyn PanOptic™ ophthalmoscope to allow
users to capture, send, store, and retrieve images of
the eye. The device is intended to be used by trained
personnel within a medical or school environment.
Currently the iExaminer is designed for use with the
iPhone 6, 6 Plus, 6s and 6s Plus.
Use of the iExaminer must be consistent with the
iExaminer indications for use and the PanOptic
ophthalmoscope Directions for use.
WARNING Always use the iExaminer application
when sending images or patient files. Do not send
patient images from the camera roll to prevent
associating patient images incorrectly. Limit use of
the camera roll images to training and non-clinical
uses only.
CAUTION Evaluate images on the Welch Allyn
iExaminer in adequate light. Image evaluation has not
been tested in low-light conditions.
CAUTION When using the Welch Allyn
iExaminer, use the Welch Allyn model 03800 Halogen
lamp in the PanOptic ophthalmoscope.

Before using the iExaminer application
Confirm that you have completed the following:
• Attach the Welch Allyn iExaminer adapter to the
PanOptic ophthalmoscope.
• Download the iExaminer application from the
iPhone App Store.
• Slide the iPhone into the iExaminer adapter.
Capture a retinal image
Overview
The iExaminer application allows you to rapidly
capture a series of retinal images. After capturing the
images, you can review and store any images that
you determine to be high quality.
1. Open the iExaminer application.
2. Tap + to add a new examination record.

3. Tap “Add Picture” to capture retinal images for
the right eye (OD) or left (OS).

4. Tap the record button to start recording.
5. Position the ophthalmoscope in front of the
selected eye to capture the desired image.
6. Tap the record button to stop. Recording will
stop automatically at the default setting.
Tap to
capture
video

Review a retinal image
1. Use the slider to review the images.
2. Individual images can be viewed by swiping left
or right.
3. Vertical orientation arrow. This arrow indicates
which direction is up on the captured image.
4. Tap + to select the image you want to save.
You can select up to five images per eye. Press
Done to view the record.
Note You can save up to five frames for each eye.
Review
the
images
Swipe
left or
right
2
4
1
3
4

Image filters and move an image
Tap an image to apply a filter or move an image.
1. Tap to apply a grayscale filter, high-contrast
filter, or red-free filter. Filters are only saved on
stored or transferred images.
2. Tap to move the image to the other eye.
2
1

Save a patient file
When the patient file is complete, tap Save.
Note You can add patient information before or after
you save a patient record.

Open and edit a patient file
1. From the item screen, tap the desired saved
exam.
The Patient information screen opens, displaying the
selected exam.
2. To enter patient information, tap the active area
of each field you want to change.

3. Based on the field you select, use the keyboard
or numeric pad to enter Name, MR # (medical
record number) and Hx (history).

4. Choose a date of birth in the dialog.

5. To capture additional images for the Right OD, tap
Add picture, then follow previous steps.
Note You can save up to five frames for each eye.

6. To capture retinal images of the Left OS, tap Add
picture, then follow previous steps.

Send or print a saved exam
1. From the Patient Information screen, tap .

2. Tap Mail or Print to e-mail or print the exam.
Follow the prompts.
Note To print, your iPhone must be configured to
print to a specific printer. To save to iCloud, first
configure your iCloud settings.

3. To delete a patient record, swipe left from the
patient list and tap Delete.
/