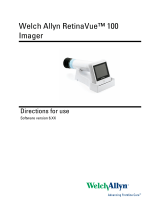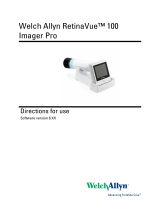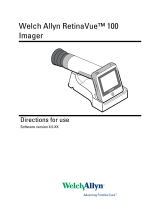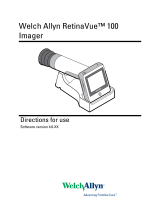
Welch Allyn RetinaVue™ Network
Network guide (for use with the RV100
Imager)
Software version 3.5.X

© 2017 Welch Allyn. All rights are reserved. To support the intended use of the product described in this publication,
the purchaser of the product is permitted to copy this publication, for internal distribution only, from the media
provided by Welch Allyn. No other use, reproduction, or distribution of this publication, or any part of it, is permitted
without written permission from Welch Allyn. Welch Allyn assumes no responsibility for any injury to anyone, or for
any illegal or improper use of the product, that may result from failure to use this product in accordance with the
instructions, cautions, warnings, or statement of intended use published in this manual.
Software in this product is Copyright 2017 Welch Allyn or its vendors. All rights are reserved. The software is
protected by United States of America copyright laws and international treaty provisions applicable worldwide. Under
such laws, the licensee is entitled to use the copy of the software incorporated with this instrument as intended in
the operation of the product in which it is embedded. The software may not be copied, decompiled, reverse-
engineered, disassembled, or otherwise reduced to human-perceivable form. This is not a sale of the software or
any copy of the software; all right, title, and ownership of the software remain with Welch Allyn or its vendors.
For information about any Welch Allyn product, contact Welch Allyn Technical Support: http://www.welchallyn.com/
support.
DIR 80019779 Ver. B
Welch Allyn, Inc.
4341 State Street Road
Skaneateles Falls, NY 13153 USA
www.welchallyn.com
This manual applies to the 901108 PACS MEDICAL IMAGE SYSTEM
Revision date: 2017-08

Contents
About this guide ...................................................................................... 1
Getting started ......................................................................................... 3
Download the RetinaVue Network software application .................................... 3
Submit exams ...................................................................................................... 7
How to set up the camera, then acquire and submit images– RetinaVue™ 100
Imager and RetinaVue Network ........................................................................... 9
Log in to the RetinaVue Network Customer Portal ............................ 17
Features of the RetinaVue Network Customer Portal ........................ 19
Overview of View New Reports ........................................................................ 19
Overview of Search Reports .............................................................................. 20
Overview of View Statistics ............................................................................... 21
Overview of Clinic Management ....................................................................... 24
Overview of Add New Clinic .............................................................................. 31
Features of the RetinaVue Network software application ................. 35
Welcome to the RetinaVue Network software application ................................ 35
Overview of General Settings ............................................................................ 37
Overview of Camera and Network Settings ...................................................... 42
Overview of Contact Settings ............................................................................ 45
Advanced Settings ............................................................................................. 51
Troubleshooting .................................................................................... 53
Finding exams ................................................................................................... 60
Notes and tips .................................................................................................... 65
Appendix ................................................................................................ 69
Additional features and help .............................................................................. 69
Registration ........................................................................................................ 69
Set up process for North American users .......................................................... 69
Set up process for Australian region users ........................................................ 70
Accept the RetinaVue Network End User License Agreement (EULA) ............. 70
Existing RetinaVue™ Network software users .................................................. 72
Start a new exam in an EMR-connected environment ...................................... 74
First time set up of the company - RetinaVue Network Customer Portal ......... 75
RetinaVue Network Customer Portal roles and associated privileges .............. 79
RetinaVue Network software application roles and associated privileges ........ 80
Password use - RetinaVue Network Customer Portal ...................................... 82
Password use - RetinaVue Network software application ................................. 83
Technique guide - RetinaVue™ 100 Imager ....................................................... 85
iii

iv Contents Welch Allyn RetinaVue™ Network

About this guide
This Network guide is for both RetinaVue Network system Administrators or other IT
professionals (involved in first time set up and the operation and support of the
RetinaVue Network system) and for health care providers that perform retinal exams in a
primary care setting.
Topics include first-time set up of the company and clinic, installing the RetinaVue
Network software, configuring, managing, and troubleshooting the RetinaVue Network
system and the RetinaVue Network RV100 Imager camera. For other RetinaVue Network
cameras such as the Topcon NW400 or the CenterVue DRS see the instructions that
came with those cameras.
For information on clinical use or using the device that connects to the RetinaVue
Network system, consult the directions for use that came with the device.
For information on system requirements consult the RetinaVue Network Software
Installation Instructions.
1

2 About this guide Welch Allyn RetinaVue™ Network

Getting started
Follow the steps to accept the RetinaVue Network End User License Agreement (EULA),
download the software application, practice in Demo Mode, perform and submit an
exam, and then view the completed report on the Customer Portal.
Note This guide supports the RetinaVue Network and the RV100 Imager camera.
For other cameras see the instructions that came those cameras.
Download the RetinaVue Network software
application
New RetinaVue Network™ software users
Note If you have already installed the RetinaVue Network™ software, please see
the Existing RetinaVue™ Network software users section for
instructions about uninstalling previous software versions.
CAUTION Exams deleted from the software cannot be recovered.
Note Windows® 8.1 and 10 tablet users with a touchscreen interface, use the
touch feature where the instructions indicate a mouse-click.
Installing the RetinaVue Network™ software involves the distinct steps of logging in to
the RetinaVue Network Customer Portal, downloading the RetinaVue Network software
application for each PC that you will be using to transfer images to the RetinaVue
Network, and then activating the RetinaVue Network software application for each
authorized PC.
Install the RetinaVue Network software
•The RetinaVue Network software installation requires Windows® Administrator
privileges.
• A high-speed Internet connection is required.
• Follow the instructions from the RetinaVue Network: Registration Card, Customer
Portal Quick Start Guide, and the Setup Process to create an account with the Welch
Allyn RetinaVue™ Network and complete the registration process.
3

• Log in to the RetinaVue Network Customer Portal using the new User Name and
Password that you entered during the initial account set up.
• The RetinaVue Network software installation requires an activation key found on the
RetinaVue Network Customer Portal Installers page. Tip: Copy the activation key
from the Customer Portal Installers page and paste it into the RetinaVue Network
software.
To acquire the RetinaVue Network software for the PC that you will be using to
transfer images to the RetinaVue Network
1. Click on the RetinaVue Network Software Download link to download the latest
RetinaVue Network Installer.
Note The default location for downloads on the PC is the
Downloads folder.
Note For Windows Internet Explorer users, if prompted to run or
save the RetinaVueNetworkSetup-3.5.X.exe file click Save
and open folder.
Note For Mozilla Firefox users, if prompted to Save File or Cancel
the RetinaVueNetworkSetup-3.5.X.exe file, click Save file.
(The RetinaVue Installer download progress appears at the
top right of the browser screen.)
Note For Google Chrome users, if prompted to Open the
RetinaVueNetworkSetup-3.5.X.exe file when done or to
Show in folder click Show in Folder. (The RetinaVue
Installer appears at the bottom left of the browser screen.)
2. After the RetinaVueNetworkSetup-3.5.X.exe file finishes downloading, open
Windows Explorer to locate the file in the default Download folder location. Right-
click on the executable file (RetinaVueNetworkSetup-3.5.X.exe) and select Run as
administrator.
Note While the application can be opened by clicking on the
RetinaVueNetworkSetup-3.5.X.exe file, Welch Allyn does not
recommend this method because the Windows operating
system may prevent a complete installation.
4 Getting started Welch Allyn RetinaVue™ Network

3. Click Install.
Note If the Microsoft .NET Framework 4.5 and Visual C++ 2013
are previously installed as part of your PC's Windows
operating system, the installer recognizes these applications.
However, if the Install wizard needs to install these
applications the installation will take an additional 5 to 10
minutes depending upon your network connection speed
and traffic.
4. After the software installation is complete, click Launch on the Installation
completed successfully! screen.
5. Enter your RetinaVue Network Software Activation Key from the RetinaVue Network
Customer Portal Installers page into the RetinaVue Network software. (See example
screens from the Customer Portal Installers page and the RetinaVue Network
software.)
Note The red border around the data entry field indicates that data
needs to be entered or that there is a data entry issue. The
red border disappears once the activation key is correctly
entered in the right character length and format.
Network guide (for use with the RV100 Imager) Getting started 5

Note Hover the mouse over the data entry field to display tool tips
about the nature of the data entry issue. (i.e., Activation key
cannot be empty.)
6. Click Next.
7. Select your clinic where you will be using the software by highlighting the clinic.
Note If multiple clinics appear in the list, you might have to use
the scroll bar to move down through the list to see your
clinic.
8. Select the state where the exams will take place.
Note If the exams take place in the same state as the clinic, click
Yes and proceed to the next step. If the exams do not take
place in the same state as the clinic, click No and use the
drop-down menu to choose your state.
9. If your clinic is using a fundus camera other than the RetinaVue 100 Imager, select
the camera from the drop-down menu.
10. Click Next to restart the software with the new settings. Click OK.
6 Getting started Welch Allyn RetinaVue™ Network

Submit exams
Note Upon download, the RetinaVue Network software application starts in the
default Demo Mode. The Demo Mode is indicated by the Demo Mode
watermark throughout the background screen.
Practice with the Demo Mode to become familiar with the application and
then ensure that Demo Mode is deselected (in the General Settings) to
submit exams for evaluation by a board-certified ophthalmologist.
Note If exams are submitted in Demo Mode, exams are uploaded to the
RetinaVue Network server, however, exams are not evaluated by a board-
certified ophthalmologist and will not appear in the RetinaVue Network
Customer Portal. Exam data is then deleted from the PC.
1. If the RetinaVue Network software is not already open, double-click the desktop
icon.
The Welcome screen appears.
2. Click Settings.
3. From the Settings screen, click General.
Network guide (for use with the RV100 Imager) Getting started 7

4. Deselect Demo Mode to begin submitting exams for evaluation by a board-certified
ophthalmologist.
5. Click Save to save the changes. Click OK to accept the changes at the prompt:
Some settings may not take effect until this application is restarted.
8 Getting started Welch Allyn RetinaVue™ Network

How to set up the camera, then acquire and
submit images– RetinaVue™ 100 Imager and RetinaVue
Network
Before you begin
1. Power on the RetinaVue 100 Imager and touch Training on the Home screen.
2. Watch the tutorial and follow the on-screen instructions to learn how to:
• Find the white circular reflection at the top of the eye’s image on the LCD
screen. Then position the green circle into the center of the white circular
reflection of the patient’s pupil.
• Guide the green circle on the LCD screen towards the patient until the white
circular reflection fills the entire field of view.
• Align the bubble inside the diamond icon.
3. Practice with interactive feedback from the integrated RetinaVue 100 Imager training
module.
Set up the RetinaVue 100 Imager
1. Power on the computer and the RetinaVue 100 Imager.
Note If prompted to log in to Windows enter your Windows
credentials.
2. Ensure the RetinaVue Network software is running.
Network guide (for use with the RV100 Imager) Getting started 9

Note If the RetinaVue Network software is not already open,
double-click the desktop icon.
3. Ensure that the RetinaVue 100 Imager is docked.
The RetinaVue 100 Imager should be powered on, docked in the cradle, and
connected to the computer by the USB cable. Once the camera is properly docked, a
notification appears on the camera display indicating that it is docked.
Start a new exam
1. Have the patient sit in a dark room for 5 minutes to dilate their pupils.
2. Click New Exam in the RetinaVue Network software.
3. Complete all required fields. Required fields are highlighted in red.
4. Click NEXT to save the patient information. A message appears indicating the
patient has been added to the camera. Click OK.
5. Lift the RetinaVue 100 Imager from the cradle.
10 Getting started Welch Allyn RetinaVue™ Network

CAUTION Do not remove the RetinaVue Imager from the
cradle while the RetinaVue Network application is
transferring data. Data may be lost. The process status icon
appears while data is being transferred.
6. Touch Patients on the RetinaVue 100 Imager Home screen.
7. Select the patient from the Patients list.
8. Ensure that the correct patient is selected and that the demographic information is
correct.
9. Touch OK.
Network guide (for use with the RV100 Imager) Getting started 11

Acquire images
Note The patient’s right eye will be imaged first. The Preacquisition screen
appears.
1. Touch Start to enter the Image acquisition mode.
2. Instruct the patient to place their hand over their eye not being imaged.
3. Acquire an image of the patient’s eye.
4. If the quality indicator is green or yellow, touch the checkmark in the bottom right
corner.
12 Getting started Welch Allyn RetinaVue™ Network

If the quality indicator is red, touch the (Discard) or (Trash) button in the
bottom left corner. Wait at least 1 minute and then acquire a new image of the
patient’s eye.
5. Wait at least 1 minute and then repeat steps “1” through “4” for the left eye.
6. After the second image has been acquired and the checkmark button in the bottom
right corner has been selected, the Exam summary screen appears.
7. Touch Save.
Network guide (for use with the RV100 Imager) Getting started 13

Transfer exam images
1. Ensure that the camera remains powered on until the exams are transferred to the
RetinaVue Network software application.
2. In the RetinaVue Network software, click Pending Exams.
A list of patients with pending exams appears on the Pending Exams screen.
Select your patient and click Next.
3. If all required fields have been completed, click Next.
Review the images and then click Next again.
14 Getting started Welch Allyn RetinaVue™ Network

4. From the Exam Workflow Complete screen, click Submit Exam.
5. Once the exam has been submitted, a message appears indicating the exam was
successfully submitted. Click OK.
View New Reports - RetinaVue Network Customer Portal
Once images are submitted from the PC running the RetinaVue Network software
application and the images are evaluated by a board-certified ophthalmologist, a new
report is available on the RetinaVue Network Customer Portal.
1. Log in. (See Log in to the RetinaVue Network Customer Portal). The Welcome
screen appears.
Network guide (for use with the RV100 Imager) Getting started 15

2. Select View New Reports and click Next. The New Reports screen appears.
16 Getting started Welch Allyn RetinaVue™ Network
Page is loading ...
Page is loading ...
Page is loading ...
Page is loading ...
Page is loading ...
Page is loading ...
Page is loading ...
Page is loading ...
Page is loading ...
Page is loading ...
Page is loading ...
Page is loading ...
Page is loading ...
Page is loading ...
Page is loading ...
Page is loading ...
Page is loading ...
Page is loading ...
Page is loading ...
Page is loading ...
Page is loading ...
Page is loading ...
Page is loading ...
Page is loading ...
Page is loading ...
Page is loading ...
Page is loading ...
Page is loading ...
Page is loading ...
Page is loading ...
Page is loading ...
Page is loading ...
Page is loading ...
Page is loading ...
Page is loading ...
Page is loading ...
Page is loading ...
Page is loading ...
Page is loading ...
Page is loading ...
Page is loading ...
Page is loading ...
Page is loading ...
Page is loading ...
Page is loading ...
Page is loading ...
Page is loading ...
Page is loading ...
Page is loading ...
Page is loading ...
Page is loading ...
Page is loading ...
Page is loading ...
Page is loading ...
Page is loading ...
Page is loading ...
Page is loading ...
Page is loading ...
Page is loading ...
Page is loading ...
Page is loading ...
Page is loading ...
Page is loading ...
Page is loading ...
Page is loading ...
Page is loading ...
Page is loading ...
Page is loading ...
Page is loading ...
Page is loading ...
Page is loading ...
Page is loading ...
Page is loading ...
Page is loading ...
Page is loading ...
Page is loading ...
-
 1
1
-
 2
2
-
 3
3
-
 4
4
-
 5
5
-
 6
6
-
 7
7
-
 8
8
-
 9
9
-
 10
10
-
 11
11
-
 12
12
-
 13
13
-
 14
14
-
 15
15
-
 16
16
-
 17
17
-
 18
18
-
 19
19
-
 20
20
-
 21
21
-
 22
22
-
 23
23
-
 24
24
-
 25
25
-
 26
26
-
 27
27
-
 28
28
-
 29
29
-
 30
30
-
 31
31
-
 32
32
-
 33
33
-
 34
34
-
 35
35
-
 36
36
-
 37
37
-
 38
38
-
 39
39
-
 40
40
-
 41
41
-
 42
42
-
 43
43
-
 44
44
-
 45
45
-
 46
46
-
 47
47
-
 48
48
-
 49
49
-
 50
50
-
 51
51
-
 52
52
-
 53
53
-
 54
54
-
 55
55
-
 56
56
-
 57
57
-
 58
58
-
 59
59
-
 60
60
-
 61
61
-
 62
62
-
 63
63
-
 64
64
-
 65
65
-
 66
66
-
 67
67
-
 68
68
-
 69
69
-
 70
70
-
 71
71
-
 72
72
-
 73
73
-
 74
74
-
 75
75
-
 76
76
-
 77
77
-
 78
78
-
 79
79
-
 80
80
-
 81
81
-
 82
82
-
 83
83
-
 84
84
-
 85
85
-
 86
86
-
 87
87
-
 88
88
-
 89
89
-
 90
90
-
 91
91
-
 92
92
-
 93
93
-
 94
94
-
 95
95
-
 96
96
Hill-Rom RetinaVue 100 Imager Pro User manual
- Type
- User manual
- This manual is also suitable for
Ask a question and I''ll find the answer in the document
Finding information in a document is now easier with AI
Related papers
-
Hill-Rom RetinaVue 100 Imager Reference guide
-
Hill-Rom RetinaVue 100 Imager Pro User manual
-
Hill-Rom RetinaVue 700 Imager User manual
-
Hill-Rom RetinaVue 700 Imager User manual
-
Hill-Rom RetinaVue 700 Imager Operating instructions
-
Hill-Rom RetinaVue 100 Imager Pro Installation guide
-
Hill-Rom RetinaVue 100 Imager Pro Installation guide
-
Hill-Rom RetinaVue 100 Imager Pro Installation guide
-
Hill-Rom RetinaVue 700 Imager Installation guide
-
Hill-Rom RetinaVue 100 Imager Pro User manual
Other documents
-
 Welch Allyn RetinaVue 100 Imager Directions For Use Manual
-
 Welch Allyn RetinaVue 100 Imager Pro Directions For Use Manual
-
 Welch Allyn RetinaVue 100 Imager Directions For Use Manual
-
 Welch Allyn RetinaVue 100 Imager Directions For Use Manual
-
Starkey TeleHear Remote Fitting User guide
-
Topcon RetinaVue NW400 Quick start guide
-
 hygiene CLEAN Operating instructions
-
Lenovo ThinkShield Key User guide
-
 Welch Allyn RScribe User manual
-
 Welch Allyn REF 29400 User manual


