- 1 - - 2 - - 3 - - 4 -
AX-HA-CHG
Charging hanger
Instruction Manual
2014 A&D Company, Limited. All rights reserved.
No part of this publication may be reproduced,
transmitted, transcribed, or translated into any
language in any form by any means without the
written permission of A&D Company, Limited.
The contents of this manual and the specifications of
the instrument covered by this manual are subject to
change for improvement without notice.
1WMPD4003017
When using this device, be sure to observe the following:
Caution
Do not disassemble the product. Any damage or loss of
functions caused by disassembly is not covered by
warranty.
Do not link more than three charging hangers. Linking
four units or more may cause fire or damage the units
or the MPA series of electronic pipettes.
Caution
Use the AC adapter provided for the MPA series of
electronic pipettes, otherwise the charging hanger, the
MPA electronic pipettes, or the power supply devices
may be damaged.
This manual describes how the AX-HA-CHG charging
hanger works. Please read this manual carefully before
using the hanger in order to get the most out of its
performance. Please read the manual for the MPA series of
electronic pipettes as well.
2. Unpacking the Charging Hanger
Charging hanger main unit
Self tapping screw, 4 mm diameter x L8 mm (2 pcs)
Linking cable (AX-KO4730-10)
Instruction manual (This manual)
Charging hanger main unit
Self tapping screw, (2 pcs) Linking cable (10 cm long)
For plastic and wood (AX-KO4730-10)
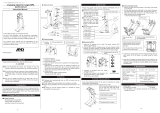
ձ Power indicator LED: Lights up in green when power is
supplied to the charging hanger.
ղ Fixing screw holes: Used when securing the charging
hanger with screws
ճ Charging terminals: Receive the MPA series of electronic
pipettes for charging
մ Double-stick tape: Used for securing the charging hanger to
a wall, etc.
յ Input section: Connects with the cable from the AC adapter
(connects with Mini USB – Type B)
ն Output section: Used for linking multiple charging hangers
Charging starts when the MPA electronic pipette is hooked
onto the charging hanger.
The charging hanger can be freely mounted to a wall, rack,
etc. (secured with double-stick tape or screws).
With use of the linking cable, one AC adapter can supply
power to more than one charging hanger (up to three units).
ձ Secure the charging hanger to a wall or rack with the
double-stick tape after removing dirt from the surface
(securing with screws is also possible).
Securing with double-stick tape Securing with screws
ղ Prepare the AC adapter and power cable that come with the
electronic pipette.
ճ Connect the power cable to the AC adapter and insert the AC
adapter into a power source.
մ Connect the power cable (Mini USB – Type B) to the input section of
the charging hanger. The power indicator LED (green) will light up.
䯲
To link multiple units, connect the linking cable to the output section
of the hanger.
䯲
For linking
AX-KO4730-10
յ Hook the electronic pipette onto the charging terminals of the
hanger to begin charging. Once charging starts the battery indicator
at the bottom left of the pipette display will blink as shown in the
following figure.
ն Charging is complete when the battery indicator
of the pipette is fully lit. Fully charged
շ The electronic pipette can continue to be hooked to the
charging hanger after it is fully charged. (It will not be
recharged.)
5. Linking Multiple Units
Up to three charging hangers can be used in conjunction. (Two
linking cables are required.)
Input (AC adapter) AC 100 V / 0.3 A (50 / 60 Hz)
Input section / output section 5 V
Connectable devices MPA series
Number of units linkable 3 units maximum
Dimensions 60 (W) × 50 (H) × 58 (D) mm
Net weight
Approx. 50 g
(
Excluding AC adapter and Linking cable
)
Linking cable
...................................................
AX-KO4730-10
Dedicated AC adapter for the MPA series
AX-TB-265
(Standard accessory for the MPA series of electronic pipettes)
ձ Power indicator LED
ղ Fixing screw holes
մ Double-stick tape
ճ Charging terminals
յ Input section
ն Output section
Power cable
AC adapter
Mini USB – Type B
ͤ Mind the direction
(
᪥ᮏㄒࡢྲྀᢅㄝ᫂᭩ࡣᑐ㠃ࢆࡈぴࡃࡔࡉ࠸㹿
)
Release liner
Self tapping screw


