Page is loading ...

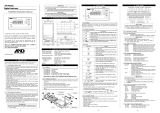
AD-4401
WEIGHING INDICA
TOR
1386-2A-IE

© 1998 A&D Company Ltd. All rights reserved.
No part of this publication may be reproduced, transmitted, transcribed, or translated into any
language in any form by any means without the written permission of A&D Company Ltd.
The contents of this manual and the specifications of the instrument covered by this manual are
subject to change for improvement without notice.

1
CONTENTS
CHAPTER 1 GENERAL DESCRIPTION......................................................................................3
CHAPTER 2 SPECIFICATIONS...................................................................................................
4
2-1
A/D CONVERTER BLOCK........................................................................................................4
2-2
DIGITAL BLOCK......................................................................................................................4
2-3
GENERAL SPECIFICATIONS.....................................................................................................4
2-4
ACCESSORIES.......................................................................................................................5
2-5
FRONT PANEL .......................................................................................................................6
2-6
REAR PANEL.......................................................................................................................10
CHAPTER 3 INSTALLATION AND CONNECTIONS................................................................
11
3-1
ENVIRONMENT.....................................................................................................................11
3-2
POWER SUPPLY ..................................................................................................................11
3-3
LOAD CELL..........................................................................................................................12
CHAPTER 4 OPERATION..........................................................................................................
13
4-1
OPERATION MODE...............................................................................................................13
4-2
CONFIRMATION OF OPERATIONS ..........................................................................................14
4-3
SETTING A SETPOINT...........................................................................................................15
CHAPTER 5 CALIBRATION ......................................................................................................
18
5-1
GENERAL DESCRIPTION.......................................................................................................18
5-2
ACTUAL LOAD CALIBRATION (CAL SET)...............................................................................19
5-3
CALIBRATION RELATED FUNCTIONS......................................................................................20
5-4
CALIBRATION ERRORS.........................................................................................................24
5-5
INITIALIZATION OF ALL THE DATA..........................................................................................24
CHAPTER 6 GENERAL FUNCTIONS .......................................................................................
25
6-1
BASIC CAPABILITIES RELATED..............................................................................................26
6-2
WEIGHING SEQUENCE RELATED...........................................................................................28
6-3
CONTROL I/O INPUT RELATED..............................................................................................30
6-4
CONTROL I/O OUTPUT RELATED ..........................................................................................30
6-5
STANDARD SERIAL OUTPUT RELATED ..................................................................................31

2
CHAPTER 7 WEIGHING SEQUENCE.......................................................................................32
7-1
WEIGHING SEQUENCE...................................................................................................32
7-2
CUSTOMER PROGRAMMED CONTROL MODE.........................................................................33
7-3
BUILT-IN AUTOMATIC PROGRAM MODE.................................................................................35
7-5
CHECK WEIGHING MODE......................................................................................................43
7-6
COMPARISON WEIGHT.........................................................................................................51
7-7
AUTO PRINT........................................................................................................................51
7-8
AUTOMATIC ACCUMULATION.................................................................................................51
7-9
AUTOMATIC FREE FALL COMPENSATION...............................................................................52
7-10
FUZZY AUTOMATIC FREE FALL COMPENSATION ..................................................................52
CHAPTER 8 INTERFACE...........................................................................................................
53
8-1
CONTROL I/O......................................................................................................................53
8-2
SETPOINT ...........................................................................................................................56
8-3
STANDARD SERIAL OUTPUT (SER. OUT).............................................................................57
CHAPTER 9 OPTIONS...............................................................................................................
60
9-1
OP-01 PARALLEL BCD OUTPUT ..........................................................................................60
9-2
OP-03 RS-422/-485 INTERFACE .........................................................................................62
9-3
OP-04 RS-232C INPUT/OUTPUTS .......................................................................................64
9-4
OP-05 SETPOINT UNIT ........................................................................................................70
9-5
OP-07 ANALOG OUTPUT .....................................................................................................73
CHAPTER 10 MAINTENANCE...................................................................................................
74
10-1
CHECK MODE....................................................................................................................74
10-2
INITIALIZATION...................................................................................................................76
CHAPTER 11 SETTING LISTS ..................................................................................................
77
11-1
GENERAL FUNCTIONS........................................................................................................77
11-2
CALIBRATION RELATED FUNCTIONS....................................................................................83
APPENDIX DIMENSIONS ..........................................................................................................
85
AD-4401..................................................................................................................................
85
OP-05......................................................................................................................................
85

3
CHAPTER 1 GENERAL DESCRIPTION
The AD-4401 is a compact-weighing indicator equipped with high-performance A/D conversion and general-purpose capabilities. It has the
following features.
User-friendly cabinet design
• Small DIN size (panel dimensions: 138+1.0/-0 x 68+0.7/-0 mm) easy to mount in a control cabinet.
• Splash-proof front panel.
High-performance A/D Converter
• High-speed sampling, 100 times/second.
• High resolution, 1/16,000.
• High sensitivity, 0.3 µV/D.
Digital Span Capability
• Capable of calibration by inputting a mV/V value without an actual load.
• Capable of directly reading a load cell output (mV/V), for easy installation and maintenance.
• Replaceable without re-calibrating with an actual load in case of trouble.
Flexible Digital Filter allows installation in unstable environments
• Excellent vibration canceling performance.
• Widely covers from high-speed hopper scales to platform scales.
Two-stage Indicators monitoring Tare, Final, and Accumulated Weight values at any time.
Eight Weighing Modes available for wider applications
Capable of being used in a PLC-free hopper system owing to a complete weighing sequence.
• Built-in discharging sequence
• Monitors loading and discharging times
• Supplementary flow capability
Setpoints can be set using RS-232C/422/485 (Optional) as well as the front panel keys or an external thumbwheel
switch.
Control I/O providing a selection of the input/ output terminal capabilities and is available for any system.
High-speed, high-accuracy hopper scale based on Fuzzy Automatic Free Fall Compensation.

4
CHAPTER 2 SPECIFICATIONS
2-1 A/D CONVERTER BLOCK
Input sensitivity 0.3 µV/D or more
Zero correction range 0 to 20 mV ( 0 to 2mV/V)
Load Cell Excitation
10VDC +/- 5 %, 230 mA, with remote sensing capability (Up to eight 350
ohm load cells can be connected)
Zero point ±(0.2 µV + 0.0008 % of Dead Load ) / °C typ
Temperature coefficient
Sensitivity
± 0.0008 % / °C typ
Non-linearity ± 0.01%FS
Maximum measurement voltage 32 mV (3.2 mV/V)
Internal resolution Approx. 1/1,000,000
Maximum display resolution 16000
Sampling speed 100 times/second
2-2 DIGITAL BLOCK
Display element
Fluorescent display tube (Display color: Cobalt blue, Status display in orange)
Display types;
1) Main display section: 7-segment 7-digit, Character height: 13 mm
2) Subdisplay section: 7-segment 8-digit, Character height: 7 mm
3) Status display: Up to 14 "-" marks are displayed
Main display section
Switchable between net weight and gross weight
Display range: 0 to 16000D (Minimum division D is selectable out of 1, 2, 5, 10, 20, and 50)
Decimal point: Capable of setting 10
1
, 10
2
,10
3
, and 10
4
digits
Overflow display: All digits turned off ("-" is displayed in the highest digit in case of negative polarity)
Units: g, kg, t (international version), kg, lb (USA version).
Subdisplay section
Tare, final, and accumulated weight values are selectable by the function. Also available for
Calibration setting, function setting, and error display.
Status display
section
Zero point, stability, gross, net, hold, , alarm, final, free fall, preliminary,
optional preliminary, overlimit, underlimit, and zero band depending on the weighing mode
Operational Keys SETPOINT, ZERO, TARE, NET/GROSS, F, ENTER, OPR/STB, CAL
2-3 GENERAL SPECIFICATIONS
EXTERNAL INPUT/OUTPUT
Input
6 points (6 bits, 1 COM)
Dry contact or open collector signal
Insulated from an internal circuit by an optocoupler.
*Terminal functions selectable by the function settings
Control
I/O
Output
8 points (8 bits, 1 COM)
Open collector output (NPN transistor)
Rating: 30 V DC, 50 mA (Resistance load)
Saturation voltage between a collector and emitter: 1.2 V or less
Insulated from an internal circuit by an optocoupler.
*Terminal functions selectable by the function settings
Standard serial output Output for our peripheral device connection (0 to 20 mA current loop signal)
Setpoint
Changes setting of each setpoint, using a thumbwheel switch. Capable of connecting an OP-05
setpoint unit in addition to the thumbwheel switch. Input

5
WEIGHING CAPABILITIES
Zero point
correcting capability
(Zero)
Clears the gross to zero in compliance with a command from the ZERO keys, Control I/O, etc.
Capable of enabling or disabling operations at unstable time.
Zero correction value is backed up by a battery.
Adjustable range: Can be freely set within 1 to 30 % of weighing capacity.
Zero tracking
capability
Detects gross zero point drift and performs zero correction automatically.
Tracking time: 0.0 to 5.0 (seconds)... A range can be set freely
Tracking width: 0.0 to 4.5 (D) ... A range can be set freely
Tare subtracting
function
Clears the net weight zero in compliance with a command from the TARE key, Control I/O, etc.
Capable of enabling or disabling operations at unstable time or negative weight time.
The battery backs up a tare value.
Adjustable range: gross ≤ Weighing capacity
Stability detecting
capability
When a weighed value fluctuation amount per sampling enters a set width within a set time, a stability
mark is illuminated, judging it a stable condition.
Capable of confirming stability through Control I/O.
Stability detection time: 0.1 to 5.0 (seconds) ... A range can be set freely
Stability detection width: 0 to 9 (D) ... A range can be set freely
Digital filter function
Integrating
capability
Two digital filters connected in series
Cutoff frequency range: 0.7 to 11 (Hz)
Integrating
capability
Integrates the net weight automatically or manually.
An accumulated weight and the number of accumulated weighing times are backed up by the battery.
Accumulated weight range: 0 to 99999999
Accumulated weighing times range: 0 to 99999999
OVERALL
Zero point correction value, tare value, setpoint, accumulated weight
Memory backup by the lithium battery (Approx. 10 years)
An alarm indicator lamp is turned on when the battery is running out.
Power failure countermeasure
Data backup method
Calibration data, each function data
Writes into the non-volatile memory(EEPROM).(Up to 10,000 times)
Supply voltage
100 to 120 VAC +10%/-15%, 50 Hz or 60 Hz
200 to 240 VAC +10%/-15%, 50 Hz or 60 Hz
Power consumption Approx. 30 VA
Working temperature and humidity range -5 to +40 °C, 20 to 85 % R.H
Mounting method Panel mounting type
Weight (accessories not included) Approximately 1.3 kg
2-4 ACCESSORIES
Parts Name Q'ty A&D’s parts Number Description
Fuse 1 FS-EAK-1A EAK-1A (Time lag fuse, 1 A)
1 JI-361J016-AG FCN361J016-AG (FUJITSU)
Connector for Control I/O
1 JI-360C016-B FCN360C016-B (FUJITSU)
Connector for standard serial output 1 JA-TCP0576 TCP0576 (HOSHI ELECTRIC)
Capacity plate 1 N/A
Unit label 1 N/A
Panel mount packing 1 N/A
Terminal block cover 1 N/A
Rubber leg 4 N/A

6
2-5 FRONT PANEL
MAIN DISPLAY SECTION
A 7-digit 7-segment display. Displays the gross, net weight, etc.
SUB DISPLAY SECTION
An 8-digit 7-segment display. The display content can be selected using the “general functions.”
The display content is indicated by attaching an accessory label.
STATUS DISPLAY SECTION (UPPER)
The upper “-” mark indicates the status of the weight value.
[ZERO]
Illuminated when the gross is located at the center of the zero point (center zero).
[MD]
Illuminated when the weight value is unstable. The motion condition can be changed using a " calibration related
function."
[GROSS]
Illuminated when the displayed weight is the gross weight.
[NET]
Illuminated when the displayed weight is the net weight.
[HOLD]
Illuminated when the weight display is being held. Either normal hold or peak hold can be selected using the "general
functions."
[ ]
This display capability can be changed depending on the application and selected using the “general functions.”
[ALARM]
Illuminated in case of zero range error, weighing capacity overflow, or low battery.

7
STATUS DISPLAY SECTION (LOWER)
The lower “-” mark indicates a comparison result.
In the normal mode, it is illuminated when a setpoint output of an identical name is turned on. In the setpoint setting
mode, the “-” mark relevant to the value in the lower numerical display section blinks. Attach an accessory label
depending on the weighing mode.
< Normal Batching >
[FINAL]
Blinks while setting the final weight.
Normal batching —— Illuminated when the net weight is within a positive range.
[F. FALL]
Blinks while setting the free fall.
Normal batching —— Illuminated when the net weight is more than the final weight minus free fall.
Built-in-automatic program mode —— Illuminated during dribble flow.
[PRELIM]
Blinks while setting the preliminary.
Normal batching —— Illuminated when the net weight is more than the final weight minus preliminary.
Built-in-automatic program mode —— Illuminated during medium flow.
[OP PLM]
Blinks while setting the optional preliminary.
Normal batching —— Illuminated when the net weight is more than the final weight minus optional preliminary.
Built-in-automatic program mode —— Illuminated during full flow.
[OVER]
Blinks while setting the overlimit.
Illuminated when the net weight is more than the final weight plus overlimit.
[UNDER]
Blinks while setting the underlimit.
Illuminated when the net weight is less than the final weight minus underlimit.
[ZERO BAND]
Blinks while setting the zero band.
Illuminated when the gross weight is less than the zero band.
< Loss-in-weight >
Attach a label that has “OPTIONAL PRELIMINARY replaced by “FULL.” The other operations are the same as normal
batching.
[FULL]
Blinks while setting the full weight./ Illuminated when the gross weight is more than the full weight.

8
< Check Weighing >
The meaning of each “-” mark differs completely. Attach a different accessory label. There are four kinds of Check
Weighing.
[Z.BAND]
Illuminated when the gross weight is less than the zero band.
[Lo-Lo]
Blinks while setting the Lo-Lo.
Illuminated when the comparison result output, Lo-Lo, is turned on.
[Lo]
Blinks while setting the Lo limit.
Illuminated when the comparison result output, Lo, is turned on.
[Go]
Blinks while setting a reference value.
Illuminated when the comparison result output, Go, is turned on.
[Hi]
Blinks while setting the Hi limit.
Illuminated when the comparison result output, Hi, is turned on.
[Hi-Hi]
Blinks while setting the Hi-Hi limit.
Illuminated when the comparison result output, Hi-Hi, is turned on.

9
KEY SWITCHES
[CAL]
The key used to enter the calibration mode. A cover is provided so that this key can not be operated if used in a certified
commercial application. In order to prevent erroneous operation, attach and seal the cover.
[SETPOINT]
The key used to set a setpoint. If this key is pressed together with the [ENTER] key, you will enter the “general function”
mode.
[ZERO] ([<])
The key used for zeroing. A zeroing condition can be set with the “calibration related functions. ” While inputting a
number, this key is used to shift the blinking digit to the left.
[TARE] ([>])
The key used to subtract the tare. The tare subtraction condition can be set with the “calibration related functions.”
While inputting a number, this key is used to shift the blinking digit to the right.
If the [ON/OFF] key is pressed together with this key in the OFF mode, the zero compensation value and the tare value
will be cleared.
[GROSS/NET] ([^])
The key used to switch the weight display from gross weight to net weight and vice versa. While inputting a number,
pressing this key will increase the number of the blinking digit by one.
[F] ([V])
The capability of this key can be changed depending on the application. The following capabilities can be selected using
the “general functions.”
No capability (Setting upon shipment) Emergency stop
Print command for manual print Clear to zero
Hold Clear tare
Batch Start Clear accumulation
While inputting a number, pressing this key decreases the number of the blinking digit by one.
[ENTER]
While inputting a number, pressing this key writes that number into memory.
[OPR/STB] ([ESC])
The key used to switch from the normal mode (ON state) to the standby mode (OFF state) and vice versa. In the
standby mode, all displays and external inputs/outputs are turned off and a circle (O) appears in the unit display section.
While inputting a number, this key serves as the [ESC] (Escape) key.
TOP OF FRONT PANEL
The top of the front panel has a concave area for attaching a weighing capacity nameplate.
,+.* /-,*

10
2-6 REAR PANEL
(a) Connects the thumbwheel switch or setpoint unit (OP-05) to set a setpoint required for a weighing sequence.
See 8-2 and 9-4.
(b) Inputs/outputs the signals such as tare subtraction input, each loading output required for the weighing sequence.
The capability of each terminal can be changed freely. See 8-1.
(c) Provides an output for the standard serial interface (current loop).
(d) One of the following options can be attached;
OP-01 BCD output, OP-03: RS-422/-485 input/output, OP-04: RS-232C input/output
(e) Connects to the power source. Confirm the description on the supply voltage label. See 3-2.
(f) Provides an analog output if option OP-07, analog output, is attached. Use a shielded cable for wiring.
(g) Connects to the load cell. Use a shielded cable for wiring. See 3-3.
Be sure to attach a cover to the terminal block on the rear panel in order to prevent an accident.

11
CHAPTER 3 INSTALLATION AND CONNECTIONS
This chapter describes the installation environment, and connections to the power terminals and load cell connector. For
other external inputs/outputs, see their relevant descriptive chapters.
Control I/O, Setpoint (SETPOINT), Standard serial output (SER. OUT) —— Chapter 8
Options —— Chapter 9
3-1 ENVIRONMENT
This is a precision electronic instrument. Handle it very carefully. The
working temperature range is -5 to +40°C. Install it in a place free from
the direct sunlight. When water drops may splash over the
instrument, attach it to a control panel, using the accessory
packing. This makes the instrument's front panel splash-proof.
3-2 POWER SUPPLY
1) Prior to connecting the power source, read this manual thoroughly.
2) Be sure to earth ground the instrument. Use independent grounding if possible. Try not to share grounding with
other electric devices that create electrical noise.
3) The power source should be either 100 to 120 VAC +10%/-15% specification, or 200 to 240 VAC +10%/-15%
specification; with a frequency of 50 or 60 Hz. Use a stable power source free from instantaneous dropout or
noise. Sharing a power line could result in malfunctioning.
4) The load cell output is very weak. Do not install any noise-generating device near the load cell or the load cell
cables.
5) Each input/output cable should be shielded and connected to either shield terminal 7 or 10 of the terminal strip on
the rear of the indicator. Use of terminal 11 or the indicator body, could induce electrical noise.
Terminal No. Terminal Function
1 EXC+ Load cell excitation voltage (+)
2 SEN+ Sensing input (+)
3 SEN- Sensing input (-)
4 EXC- Load cell excitation voltage (-)
5 SIG+ Load cell input (+)
6 SIG- Load cell input (-)
7 SHLD Shield
Load cell Connections
8 A+ 4 to 20 mA output (+)
9 A- 4 to 20 mA output (-)
10 SHLD Shield
OP-07
11 E FG
12 AC AC power supply
13 AC AC power supply
,0938
,017694
+<623 -068
/0;53:
.1:3=

12
6) To change a blown fuse.
Turn the power off and wait 10 seconds or more. Replace the
fuse with the accessory fuse without touching other parts.
Make sure that no stray material is left in the case, screws,
spacer, etc., before closing the case.
3-3 LOAD CELL
For a load cell cable, the use of a 6 wire shielded cable is recommended in order to reduce weighing error.
When using a 4 wire cable, connect pin no. 1 to no. 2 (load cell applied voltage + and sensing input +), and pin no. 3 to
no. 4 (load cell applied voltage - and sensing input -).

13
CHAPTER 4 OPERATION
4-1 OPERATION MODE
This instrument has various “modes” in compliance with its operating conditions. Use the keys to change the mode.
You can change the mode in the full-line arrow direction. The broken-line arrow direction indicates only an automatic
reset after completion of setting or a reset by turning off the power.
.

14
4-2 CONFIRMATION OF OPERATIONS
The following outlines the procedure up to displaying a weight value in order to confirm operations after unpacking.
Connect a load cell or load cell simulator to the proper terminals on the rear of the indicator.
TURNING ON THE POWER
* Do load cell wiring before turning on the power.
If the power is turned on in the normal mode, the display unit will be fully illuminated for about 2 seconds, and then, a
weight value will be displayed in the main display section. A weight value may not be displayed if calibration has not been
performed yet.
When only a circle (O) is displayed in the unit display section, the indicator is in the OFF mode. Press the [OPR/STB]
key.
CALIBRATION
The following outlines on how to calibrate the indicator. For details, see Chapter 5.
Step 1 Remove the cover from the calibration switch located at the lower left of the front panel and press the
[CAL] key (found inside). “CAL” is displayed to inform you that the indicator is entering the calibration
mode.
Note: When calibration is not required, press the [ESC] key and the indicator will return to the normal mode.
Step 2 Press the [ENTER] key. The indicator has entered the calibration mode and “CAL SEt” is displayed.
The right most digit starts blinking.
Step 3 To select the desired operation, use the [ ∧ ] or [ ∨ ] key, Press the [ ∧ ] key, “CAL Fnc” is displayed.
Step 4 Press the [ENTER] key. The indicator enters the calibration related function mode. The main display
section displays “CALF-01” and the sub-display section displays its set value. CALF-01 indicates the
setting of the unit.
Step 5 Select the function number you want to set, using the [ ∧ ] or [ ∨ ] key. The lower display section displays
the set value for the selected function. CALF-02 indicates the setting of a decimal point position.
Step 6 In this example, you change the decimal point position to the 10
1
digit. Press the [ENTER] key. The
Subdisplay section now starts blinking.
Step 7 Press the [ ∧ ] key. The Subdisplay section displays “1”.
Step 8 Press the [ENTER] key. The main display section starts blinking again and you are returned to Step 5,
the selection of a function number.
Step 9 Press the [ESC] key. The main display section starts blinking again and the settings so far are saved in
the EEPROM.
This state is the same as in Step 3. Press the [ESC] key again twice. The indicator will return to the
normal mode.
Step 10 Subsequently, calibrate with an actual load. Press the [ENTER] key. The main display section displays
“CAL 0.”
Step 11 With no weight placed on the system and press the [ENTER] key after the motion-detect mark is turned
off. The Subdisplay section displays “——” for about 2 seconds.

15
Step 12 The main display section displays “CAL SPn”, the Subdisplay section displays a weight value (current
weighing capacity, set value for CALF-04), and the lowest digit of the weight value blinks. Adjust to the
calibration weight value that you have on hand, using the [<], [>], and [ V ] keys.
Step 13 Place the weight on the system, and press the [ENTER] key after the motion-detect mark is turned off.
The Subdisplay section displays “——” for about 2 seconds.
Step 14 The main display section displays “CAL End.” If “C ErrXX” has been displayed so far, there is an error
taking place. See 5-5.
Step 15 Press the [ESC] key. The main display section displays “CAL SEt” and the actual load calibration data is
saved in the EEPROM.
Step 16 This state is the same as in Step 3. Press the [ESC] key again twice. The indicator will return to the
normal mode.
The normal mode is restored and the weight value is displayed.
After calibration is finished, be sure to attach the [CAL] key cover.
4-3 SETTING A SETPOINT
The setpoint refers to a weight setting such as a target weight or final weight required for a weighing sequence. The
following describes how to set the setpoint. For the details of the thumbwheel switches, see 8-2.
The following four methods are available for setting the setpoint:
1. Setting with the key switches (Thumbwheel switch not required)
2. Setting with a 5-digit thumbwheel switch
3. Setting with a 16-digit thumbwheel switch or OP-05 setpoint unit
4. Setting with the RS-232C/-422/-485 (See 9-2, 9-3)
Select one of the above-mentioned methods in the “setpoint read mode (SPF-01)” of the general functions.
All of the setpoint settings are backed up by the memory battery and held even if the power is turned off.
The setpoint differs depending on the weighing mode. When the weighing mode (CALF-14) is changed, attach a
relevant accessory label onto the specified area of the front panel. The following describes the initial setting state and no
label is required to be attached.

16
SETTING WITH THE KEY SWITCH (SPF-01 = 0)
This method sets the setpoint using only the keys on the front panel.
Step 1 Press the [SETPOINT] key in the normal mode. The indicator will switch to the setpoint setting mode.
The “-” mark above FINAL in the Subdisplay section blinks and a final value is displayed.
• Operating the [SETPOINT] key allows you to refer to other setpoints.
• Operating the [<] or [>] key also allows you to refer to the setpoint.
• If the [SETPOINT] key is pressed while the right end (ZERO RANGE) is being displayed, you will be
returned to the normal mode.
• Pressing the [ESC] key returns you to the normal mode at any time.
Step 2 Press the [ENTER] key. The blank digits of the Subdisplay section are filled with the character “0”.
A cursor appears at the lowest digit and the right most digit starts blinking.
Step 3 Rewrite the set value, using the [<], [>], and [ V ] keys
• In this example, the set value has not been saved internally.
• When you want a negative set value in Check Weighing, and so on, move the cursor to the left end and
use the [ V ] key to decrement 0.
Step 4 Press the [ENTER] key. The set value is saved internally. Surplus zeros and the cursor disappear.
• This state is the same as in Step 1.
• To return to the normal mode, press the [ESC] key.
SETTING WITH A 5-DIGIT THUMBWHEEL SWITCH (SPF - 01 = 1)
In the normal mode, the 5-digit thumbwheel switch is read as the final value in real time. Using this thumbwheel switch,
you can set other setpoints.
When the setting of the minimum graduation (CALF-03) is 10 or more, the value of the thumbwheel switch is multiplied by
10 when saved.
Step 1 Press the [SETPOINT] key in the normal mode. The indicator will switch to the setpoint setting mode.
The “-” mark above FINAL in the Subdisplay section blinks and a final value is displayed.
• Operating the [SETPOINT] key allows you to refer to other setpoints.
• Operating the [<] or [>] key also allows you to refer to the setpoint.
• If the [SETPOINT] key is pressed while the right end (ZERO RANGE) is being displayed, you will be
returned to the normal mode.
• Pressing the [ESC] key returns you to the normal mode at any time.
Step 2 In this example, a free fall is set. Press the [SETPOINT] key. The “-” mark above FREE FALL blinks and
a free fall value is displayed.
Step 3 Change the thumbwheel switch to the desired value and press the [ENTER] key. The value of the
thumbwheel switch is saved internally as the free fall.
• This state is the same as in Step 1. To return to the normal mode, press the [ESC] key.
Note: Prior to returning to the normal mode, be sure to return the value of the thumbwheel switch
to the final value.

17
SETTING WITH THE 16-DIGIT THUMBWHEEL SWITCH (SPF - 01 = 2)
This method assigns an exclusive thumbwheel switch to each setpoint. Some setpoints are set with the front panel keys
without using the thumbwheel switch.
Assignment of the thumbwheel switch and the front panel keys differs depending on the weighing mode (CALF-14)
Since the setpoint assigned to the thumbwheel switch is read in real time, it can be referred to by key operation, but it
cannot be altered. The following shows assignment of the setpoints.
Normal Batching (Customer Programmed Control Mode) (CALF-14=1)
Normal Batching (built-in Automatic Program Mode) (CALF-14=3)
For the thumbwheel switches Final (5 digits), Free Fall (3 digits), Preliminary (4 digits) Over Limit (2 digits),
Under Limit (2 digits)
For the key switches Option Prelim, Zero Band
Loss-in-weight (Customer Programmed Control Mode) (CALF-14=2)
Loss-in-weight (built-in Automatic Program Mode) (CALF-14=4)
For the thumbwheel switches Final (5 digits), Free Fall (3 digits), Preliminary (4 digits)
Over Limit (2 digits), Under Limit (2 digits)
For the key switches Full, Zero Band
Check Weighing Mode 1 (CALF-14=5)
Check Weighing Mode 2 (CALF-14=6)
For the thumbwheel switches Lo (5 digits), Hi (5 digits)
For the key switches Zero Band, Lo-Lo, Hi-Hi
Check Weighing Mode 3 (CALF-14=7)
For the thumbwheel switches Lo-Lo (4 digits), Lo (4 digits), Hi (4 digits), Hi-Hi (4 digits)
For the key switches Zero Band
Check Weighing Mode 4 (CALF-14=8)
* For setting with the front panel keys, see “Setting with the Key Switches (SPF - 01 = 0).”
* When the minimum graduation setting (CALF-03) is 10 or more, 10 will multiply the value set with the thumbwheel
switch.

18
CHAPTER 5 CALIBRATION
5-1 GENERAL DESCRIPTION
In the calibration mode, you carry out an operation, which associates a load cell output voltage with a weight value, and
operations directly related to weighing. There are the following four kinds.
Actual load calibration
Calibration related functions Digital span
Calibration Modes:
Initialization of all data
Actual load calibration
This is calibration with weights.
[Zero calibration] The zero point is measured with no weight loaded.
[Span calibration] The full weighing capacity point is measured with a calibration
weight loaded.
• Once in the calibration mode, the tare value and zero compensation value are
cleared automatically.
Calibration related
functions
They set the data directly related to weighing as well as basic constants for the
weighing instrument such as minimum graduation, weighing capacity, and so on.
Digital span
The zero point and span are set by entering the load cell output (mV/V) using the keys.
No calibration weight is loaded. (CALF-15 ~ CALF-17 of the Calibration related
functions,)
• [Zero calibration] Enter the load cell output at the zero point.
• [Span calibration] Enter the difference of the load cell output between at
the full weighing capacity and at the zero point.
• Weight to Span calibration Relate the input voltage at [Span calibration] above with
weight to be displayed.
Initialization of all data All the data of the EEPROM and RAM are initialized.
• All the data set in calibration is saved in the EEPROM and held even if the backup battery is fully discharged.
• Do the all load cell wiring before turning the power on. Calibration may be failed if wired after turned on.
/