Page is loading ...

Maintenance Manual - English
PRIMERGY RX900 S1 Server
Maintenance Manual
Edition August 2010

Comments… Suggestions… Corrections…
The User Documentation Department would like to
know your opinion of this manual. Your feedback helps
us optimize our documentation to suit your individual
needs.
Feel free to send us your comments by e-mail to
[email protected]su.com.
Certified documentation
according to DIN EN ISO 9001:2008
To ensure a consistently high quality standard and
user-friendliness, this documentation was created to
meet the regulations of a quality management system
which complies with the requirements of the standard
DIN EN ISO 9001:2008.
cognitas. Gesellschaft für Technik-Dokumentation mbH
www.cognitas.de
Copyright and Trademarks
Copyright © 2010 Fujitsu Technology Solutions GmbH.
All rights reserved.
Delivery subject to availability; right of technical modifications reserved.
All hardware and software names used are trademarks of their respective manufacturers.
– The contents of this manual may be revised without prior notice.
– Fujitsu assumes no liability for damages to third party copyrights or other
rights arising from the use of any information in this manual.
– No part of this manual may be reproduced in any form without the prior written
permission of Fujitsu.
Microsoft, Windows, Windows Server, and Hyper V are trademarks or registered trademarks of
Microsoft Corporation in the USA and other countries.
Intel and Xeon are trademarks or registered trademarks of Intel Corporation or its subsidiaries
in the USA and other countries.

RX900 S1 Maintenance Manual 3
Before reading this manual
For your safety
This manual contains important information for safely and correctly using this
product.
Carefully read the manual before using this product. Pay particular attention to
the accompanying manual "Safety Notes and Regulations" and ensure these
safety notes are understood before using the product. Keep this manual and the
manual "Safety Notes and Regulations" in a safe place for easy reference while
using this product.
Radio interference
This product is a "Class A" ITE (Information Technology Equipment). In a
domestic environment this product may cause radio interference, in which case
the user may be required to take appropriate measures. VCCI-A
Aluminum electrolytic capacitors
The aluminum electrolytic capacitors used in the product's printed circuit board
assemblies and in the mouse and keyboard are limited-life components. Use of
these components beyond their operating life may result in electrolyte leakage
or depletion, potentially causing emission of foul odor or smoke.
As a guideline, in a normal office environment (25°C) operating life is not
expected to be reached within the maintenance support period (5 years).
However, operating life may be reached more quickly if, for example, the product
is used in a hot environment. The customer shall bear the cost of replacing
replaceable components which have exceeded their operating life. Note that
these are only guidelines, and do not constitute a guarantee of trouble-free
operation during the maintenance support period.
High safety use
This product has been designed and manufactured for general uses such as
general office use, personal use, domestic use and normal industrial use. It has
not been designed or manufactured for uses which demand an extremely high
level of safety and carry a direct and serious risk to life or body if such safety
cannot be ensured.

4 Maintenance Manual RX900 S1
These uses include control of nuclear reactions in nuclear power plants,
automatic airplane flight control, air traffic control, traffic control in mass
transport systems, medical devices for life support, and missile guidance control
in weapons systems (hereafter, "high safety use"). Customers should not use
this product for high safety use unless measures are in place for ensuring the
level of safety demanded of such use. Please consult the sales staff of Fujitsu if
intending to use this product for high safety use.
Measures against momentary voltage drop
This product may be affected by a momentary voltage drop in the power supply
caused by lightning. To prevent a momentary voltage drop, use of an AC
uninterruptible power supply is recommended.
(This notice follows the guidelines of Voltage Dip Immunity of Personal
Computer issued by JEITA, the Japan Electronics and Information Technology
Industries Association.)
Technology controlled by the Foreign Exchange and Foreign Trade
Control Law of Japan
Documents produced by Fujitsu may contain technology controlled by the
Foreign Exchange and Foreign Trade Control Law of Japan. Documents which
contain such technology should not be exported from Japan or transferred to
non-residents of Japan without first obtaining authorization in accordance with
the above law.
Harmonic Current Standards
This product conforms to harmonic current standard JIS C 61000-3-2.
Only for the Japanese market: About SATA hard disk drives
The SATA version of this server supports hard disk drives with SATA / BC-SATA
storage interfaces. Please note that the usage and operation conditions differ
depending on the type of hard disk drive used.
Please refer to the following internet address for further information on the
usage and operation conditions of each available type of hard disk drive:
http://primeserver.fujitsu.com/primergy/harddisk/

RX900 S1 Maintenance Manual 5
Only for the Japanese market:
I Although described in this manual, some sections do not apply to the
Japanese market. These options and routines include:
– CSS (Customer Self Service)
– USB Flash Module (UFM)
– Replacing the lithium battery

6 Maintenance Manual RX900 S1

RX900 S1 Maintenance Manual 7
Contents
1 Introduction . . . . . . . . . . . . . . . . . . . . . . . . . . . 19
1.1 Where to find which information? . . . . . . . . . . . . . . . 20
1.1.1 Documents you need at hand . . . . . . . . . . . . . . . . . . 21
1.1.2 Accessing PRIMERGY documentation . . . . . . . . . . . . . 24
1.2 Notational conventions . . . . . . . . . . . . . . . . . . . . 24
2 Before you start . . . . . . . . . . . . . . . . . . . . . . . . 25
2.1 Classification of procedures . . . . . . . . . . . . . . . . . . 27
2.2 List of required tools . . . . . . . . . . . . . . . . . . . . . . 29
3 Safety instructions . . . . . . . . . . . . . . . . . . . . . . . 31
4 Basic procedures . . . . . . . . . . . . . . . . . . . . . . . . 37
4.1 Using diagnostics information . . . . . . . . . . . . . . . . 37
4.1.1 Locate the faulty server . . . . . . . . . . . . . . . . . . . . . 37
4.1.2 Locate the faulty component by PRIMERGY diagnostics indicators
39
4.2 Opening the rack door . . . . . . . . . . . . . . . . . . . . . 40
4.3 Shutting down the server . . . . . . . . . . . . . . . . . . . 41
4.4 Sliding the server out of the rack . . . . . . . . . . . . . . . 42
4.5 Opening the server . . . . . . . . . . . . . . . . . . . . . . . 44
4.5.1 Removing the front cover . . . . . . . . . . . . . . . . . . . . 45
4.5.2 Removing the rear cover . . . . . . . . . . . . . . . . . . . . . 46
4.6 Closing the server . . . . . . . . . . . . . . . . . . . . . . . 47
4.6.1 Installing the front cover . . . . . . . . . . . . . . . . . . . . . 47
4.6.2 Installing the rear cover . . . . . . . . . . . . . . . . . . . . . 48
4.7 Mounting the server in the rack . . . . . . . . . . . . . . . . 49
4.8 Bringing the server back to operation . . . . . . . . . . . . 51

8 Maintenance Manual RX900 S1
Contents
4.9 Closing the rack door . . . . . . . . . . . . . . . . . . . . . . 51
5 Power supply . . . . . . . . . . . . . . . . . . . . . . . . . . 53
5.1 Installing a hot-plug Power Supply Unit (PSU) . . . . . . . . 54
5.1.1 Required tools . . . . . . . . . . . . . . . . . . . . . . . . . . 54
5.1.2 Starting the task . . . . . . . . . . . . . . . . . . . . . . . . . 54
5.1.3 Removing a dummy module (if applicable) . . . . . . . . . . . . 54
5.1.4 Installing a power supply unit . . . . . . . . . . . . . . . . . . . 55
5.1.5 Connecting the power cord . . . . . . . . . . . . . . . . . . . . 56
5.1.6 Completing the task . . . . . . . . . . . . . . . . . . . . . . . . 57
5.2 Replacing a hot-plug power supply unit . . . . . . . . . . . . 57
5.2.1 Required tools . . . . . . . . . . . . . . . . . . . . . . . . . . 57
5.2.2 Starting the task . . . . . . . . . . . . . . . . . . . . . . . . . 58
5.2.3 Removing the power supply unit . . . . . . . . . . . . . . . . . 58
5.2.4 Reinstalling the PSU . . . . . . . . . . . . . . . . . . . . . . . 59
5.2.5 Completing the task . . . . . . . . . . . . . . . . . . . . . . . . 59
5.3 Removing a redundant hot-plug power supply unit . . . . . . 59
5.3.1 Required tools . . . . . . . . . . . . . . . . . . . . . . . . . . 59
5.3.2 Starting the task . . . . . . . . . . . . . . . . . . . . . . . . . 59
5.3.3 Removing the power supply unit . . . . . . . . . . . . . . . . . 60
5.3.4 Installing a dummy module . . . . . . . . . . . . . . . . . . . . 61
5.3.5 Completing the task . . . . . . . . . . . . . . . . . . . . . . . . 61
5.4 Replacing the power distribution board . . . . . . . . . . . . 62
5.4.1 Required tools . . . . . . . . . . . . . . . . . . . . . . . . . . 62
5.4.2 Starting the task . . . . . . . . . . . . . . . . . . . . . . . . . 62
5.4.3 Sliding the local service display outward . . . . . . . . . . . . . 63
5.4.4 Disconnecting the cables . . . . . . . . . . . . . . . . . . . . . 64
5.4.5 Removing the fan cage . . . . . . . . . . . . . . . . . . . . . . 65
5.4.6 Removing the CPUMEMR guide . . . . . . . . . . . . . . . . . 66
5.4.7 Removing the air guide . . . . . . . . . . . . . . . . . . . . . . 67
5.4.8 Removing the baseboard . . . . . . . . . . . . . . . . . . . . . 68
5.4.9 Removing the power distribution board . . . . . . . . . . . . . . 69
5.4.10 Installing the power distribution board . . . . . . . . . . . . . . 71
5.4.11 Inserting the baseboard . . . . . . . . . . . . . . . . . . . . . . 72
5.4.12 Installing the air guide . . . . . . . . . . . . . . . . . . . . . . . 73
5.4.13 Inserting the CPUMEMR guide . . . . . . . . . . . . . . . . . . 74
5.4.14 Inserting the fan cage . . . . . . . . . . . . . . . . . . . . . . . 75
5.4.15 Connecting the cables to the baseboard . . . . . . . . . . . . . 76
5.4.16 Sliding the local service display inward . . . . . . . . . . . . . . 77

RX900 S1 Maintenance Manual 9
Contents
5.4.17 Completing the task . . . . . . . . . . . . . . . . . . . . . . . 77
6 Hard disk and solid state drives . . . . . . . . . . . . . . . . 79
6.1 Installing the HDD/SSD module . . . . . . . . . . . . . . . . 80
6.1.1 Required tools . . . . . . . . . . . . . . . . . . . . . . . . . . 80
6.1.2 Starting the task . . . . . . . . . . . . . . . . . . . . . . . . . 80
6.1.3 Removing the dummy module . . . . . . . . . . . . . . . . . . 81
6.1.4 Unlocking the HDD/SSD module . . . . . . . . . . . . . . . . 82
6.1.5 Inserting the HDD/SSD module . . . . . . . . . . . . . . . . . 83
6.1.6 Completing the task . . . . . . . . . . . . . . . . . . . . . . . 83
6.2 Replacing the HDD/SSD module . . . . . . . . . . . . . . . 84
6.2.1 Required tools . . . . . . . . . . . . . . . . . . . . . . . . . . 84
6.2.2 Starting the task . . . . . . . . . . . . . . . . . . . . . . . . . 85
6.2.3 Unlocking the HDD/SSD module . . . . . . . . . . . . . . . . 85
6.2.4 Removing the HDD/SSD module . . . . . . . . . . . . . . . . 86
6.2.5 Completing the task . . . . . . . . . . . . . . . . . . . . . . . 86
6.3 Removing the HDD/SSD module . . . . . . . . . . . . . . . 86
6.3.1 Required tools . . . . . . . . . . . . . . . . . . . . . . . . . . 86
6.3.2 Starting the task . . . . . . . . . . . . . . . . . . . . . . . . . 86
6.3.3 Unlocking the HDD/SSD module . . . . . . . . . . . . . . . . 87
6.3.4 Removing the HDD/SSD module . . . . . . . . . . . . . . . . 87
6.3.5 Installing the dummy module . . . . . . . . . . . . . . . . . . 88
6.3.6 Completing the task . . . . . . . . . . . . . . . . . . . . . . . 88
6.4 Replacing the SAS backplane . . . . . . . . . . . . . . . . . 89
6.4.1 Required tools . . . . . . . . . . . . . . . . . . . . . . . . . . 89
6.4.2 Starting the task . . . . . . . . . . . . . . . . . . . . . . . . . 89
6.4.3 Sliding the local service display outward . . . . . . . . . . . . 90
6.4.4 Disconnecting the cables . . . . . . . . . . . . . . . . . . . . 91
6.4.5 Sliding the optical drive outward . . . . . . . . . . . . . . . . . 92
6.4.6 Removing the air guide . . . . . . . . . . . . . . . . . . . . . 93
6.4.7 Removing the SAS backplane . . . . . . . . . . . . . . . . . . 94
6.4.8 Installing the SAS backplane . . . . . . . . . . . . . . . . . . 94
6.4.9 Installing the air guide . . . . . . . . . . . . . . . . . . . . . . 95
6.4.10 Sliding the optical drive inward . . . . . . . . . . . . . . . . . 96
6.4.11 Connecting the cables to the baseboard . . . . . . . . . . . . 97
6.4.12 Sliding the local service display inward . . . . . . . . . . . . . 98
6.4.13 Completing the task . . . . . . . . . . . . . . . . . . . . . . . 99

10 Maintenance Manual RX900 S1
Contents
7 Fan modules . . . . . . . . . . . . . . . . . . . . . . . . . . 101
7.1 Replacing a defective fan module . . . . . . . . . . . . . . 102
7.1.1 Required tools . . . . . . . . . . . . . . . . . . . . . . . . . 102
7.1.2 Starting the task . . . . . . . . . . . . . . . . . . . . . . . . 102
7.1.3 Opening the fan cover . . . . . . . . . . . . . . . . . . . . . 102
7.1.4 Replacing the defective fan module . . . . . . . . . . . . . . . 103
7.1.5 Closing the fan cover . . . . . . . . . . . . . . . . . . . . . . 104
7.1.6 Completing the task . . . . . . . . . . . . . . . . . . . . . . . 104
8 Expansion cards and BBU . . . . . . . . . . . . . . . . . . 105
8.1 Mounting expansion card slot brackets . . . . . . . . . . . 107
8.1.1 Required tools . . . . . . . . . . . . . . . . . . . . . . . . . 107
8.1.2 General instructions . . . . . . . . . . . . . . . . . . . . . . . 108
8.1.3 Network adapter D2735 . . . . . . . . . . . . . . . . . . . . . 108
8.1.4 Network adapter D2745 . . . . . . . . . . . . . . . . . . . . . 110
8.1.5 Network adapter D2755 . . . . . . . . . . . . . . . . . . . . . 112
8.2 Installing SFP+ transceiver modules . . . . . . . . . . . . . 114
8.2.1 Required tools . . . . . . . . . . . . . . . . . . . . . . . . . 114
8.2.2 Preparing the SFP+ transceiver module . . . . . . . . . . . . 115
8.2.3 Inserting the SFP+ transceiver module . . . . . . . . . . . . . 116
8.2.4 Installing the secondary SFP+ transceiver module . . . . . . . 119
8.3 Replacing SFP+ transceiver modules . . . . . . . . . . . . 120
8.3.1 Required tools . . . . . . . . . . . . . . . . . . . . . . . . . 120
8.3.2 Removing an SFP+ transceiver module . . . . . . . . . . . . 121
8.3.3 Completing the task . . . . . . . . . . . . . . . . . . . . . . . 123
8.4 Installing a hot-plug expansion card . . . . . . . . . . . . . 124
8.4.1 Required tools . . . . . . . . . . . . . . . . . . . . . . . . . 124
8.4.2 Starting the task . . . . . . . . . . . . . . . . . . . . . . . . 125
8.4.3 Pulling the removal tool out of the slot . . . . . . . . . . . . . 125
8.4.4 Removing the retaining plate . . . . . . . . . . . . . . . . . . 126
8.4.5 Removing the engaging hooks . . . . . . . . . . . . . . . . . 127
8.4.6 Inserting an expansion card in the removal tool . . . . . . . . 127
8.4.7 Inserting the expansion card in the slot . . . . . . . . . . . . . 130
8.4.8 Activating the expansion card . . . . . . . . . . . . . . . . . . 131
8.4.9 Completing the task . . . . . . . . . . . . . . . . . . . . . . . 131
8.5 Removing a hot-plug expansion card . . . . . . . . . . . . 132
8.5.1 Required tools . . . . . . . . . . . . . . . . . . . . . . . . . 132

RX900 S1 Maintenance Manual 11
Contents
8.5.2 Starting the task . . . . . . . . . . . . . . . . . . . . . . . . . 133
8.5.3 Deactivating the expansion card . . . . . . . . . . . . . . . . . 133
8.5.4 Pulling the expansion card out of the slot . . . . . . . . . . . . 134
8.5.5 Removing the expansion card from the removal tool . . . . . . 135
8.5.6 Removing the engaging hooks . . . . . . . . . . . . . . . . . 136
8.5.7 Inserting a retaining plate in the removal tool . . . . . . . . . . 137
8.5.8 Inserting the dummy module in the slot . . . . . . . . . . . . . 138
8.5.9 Completing the task . . . . . . . . . . . . . . . . . . . . . . . 138
8.6 Replacing a hot-plug expansion card . . . . . . . . . . . . . 139
8.6.1 Required tools . . . . . . . . . . . . . . . . . . . . . . . . . . 139
8.6.2 Starting the task . . . . . . . . . . . . . . . . . . . . . . . . . 140
8.6.3 Deactivating the expansion card . . . . . . . . . . . . . . . . . 140
8.6.4 Pulling the expansion card out of the slot . . . . . . . . . . . . 141
8.6.5 Removing the expansion card from the removal tool . . . . . . 142
8.6.6 Removing the engaging hooks . . . . . . . . . . . . . . . . . 143
8.6.7 Inserting an expansion card in the removal tool . . . . . . . . . 143
8.6.8 Inserting the expansion card in the slot . . . . . . . . . . . . . 146
8.6.9 Activating the expansion card . . . . . . . . . . . . . . . . . . 147
8.6.10 Completing the task . . . . . . . . . . . . . . . . . . . . . . . 147
8.7 Installing a non-hot-plug expansion card . . . . . . . . . . . 148
8.7.1 Required tools . . . . . . . . . . . . . . . . . . . . . . . . . . 148
8.7.2 Starting the task . . . . . . . . . . . . . . . . . . . . . . . . . 149
8.7.3 Removing the PCI Riser (if applicable) . . . . . . . . . . . . . 149
8.7.4 Removing the slot cover . . . . . . . . . . . . . . . . . . . . . 150
8.7.5 Inserting the expansion card in the slot . . . . . . . . . . . . . 150
8.7.6 Installing the PCI Riser (if applicable) . . . . . . . . . . . . . . 151
8.7.7 Completing the task . . . . . . . . . . . . . . . . . . . . . . . 152
8.8 Removing a non-hot-plug expansion card . . . . . . . . . . 152
8.8.1 Required tools . . . . . . . . . . . . . . . . . . . . . . . . . . 153
8.8.2 Starting the task . . . . . . . . . . . . . . . . . . . . . . . . . 153
8.8.3 Removing the PCI Riser (if applicable) . . . . . . . . . . . . . 154
8.8.4 Removing the expansion card from the slot . . . . . . . . . . . 155
8.8.5 Installing the slot cover . . . . . . . . . . . . . . . . . . . . . 156
8.8.6 Installing the PCI Riser (if applicable) . . . . . . . . . . . . . . 157
8.8.7 Completing the task . . . . . . . . . . . . . . . . . . . . . . . 157
8.9 Replacing a non-hot-plug expansion card . . . . . . . . . . 158
8.9.1 Required tools . . . . . . . . . . . . . . . . . . . . . . . . . . 158
8.9.2 Starting the task . . . . . . . . . . . . . . . . . . . . . . . . . 159
8.9.3 Removing the PCI Riser (if applicable) . . . . . . . . . . . . . 159
8.9.4 Removing the expansion card from the slot . . . . . . . . . . . 160

12 Maintenance Manual RX900 S1
Contents
8.9.5 Inserting the expansion card in the slot . . . . . . . . . . . . . 161
8.9.6 Installing the PCI Riser (if applicable) . . . . . . . . . . . . . . 162
8.9.7 Completing the task . . . . . . . . . . . . . . . . . . . . . . . 162
8.10 Replacing the Modular RAID controller . . . . . . . . . . . 163
8.10.1 Required tools . . . . . . . . . . . . . . . . . . . . . . . . . 163
8.10.2 Starting the task . . . . . . . . . . . . . . . . . . . . . . . . 164
8.10.3 Removing the PCI Riser . . . . . . . . . . . . . . . . . . . . 164
8.10.4 Removing the Modular RAID controller . . . . . . . . . . . . . 165
8.10.5 Inserting the Modular RAID controller . . . . . . . . . . . . . 166
8.10.6 Installing the PCI Riser . . . . . . . . . . . . . . . . . . . . . 168
8.10.7 Completing the task . . . . . . . . . . . . . . . . . . . . . . . 168
8.11 Installing a Battery Backup Unit (BBU) . . . . . . . . . . . 169
8.11.1 Required tools . . . . . . . . . . . . . . . . . . . . . . . . . 169
8.11.2 Starting the task . . . . . . . . . . . . . . . . . . . . . . . . 170
8.11.3 Connecting the BBU cable to the BBU . . . . . . . . . . . . . 170
8.11.4 Installing the BBU in the BBU holder . . . . . . . . . . . . . . 171
8.11.5 Connecting the BBU to the Modular RAID controller . . . . . . 173
8.11.6 Completing the task . . . . . . . . . . . . . . . . . . . . . . . 174
8.12 Replacing a Battery Backup Unit (BBU) . . . . . . . . . . . 175
8.12.1 Required tools . . . . . . . . . . . . . . . . . . . . . . . . . 175
8.12.2 Starting the task . . . . . . . . . . . . . . . . . . . . . . . . 176
8.12.3 Disconnecting the BBU from the Modular RAID controller . . . 177
8.12.4 Removing the BBU from the BBU holder . . . . . . . . . . . . 178
8.12.5 Disconnecting the BBU cable from the BBU . . . . . . . . . . 179
8.12.6 Reinstalling a new BBU . . . . . . . . . . . . . . . . . . . . . 179
8.12.7 Completing the task . . . . . . . . . . . . . . . . . . . . . . . 179
9 Main memory . . . . . . . . . . . . . . . . . . . . . . . . . 181
9.1 Installing a CPUMEMR . . . . . . . . . . . . . . . . . . . . 183
9.1.1 Required tools . . . . . . . . . . . . . . . . . . . . . . . . . 183
9.1.2 Starting the task . . . . . . . . . . . . . . . . . . . . . . . . 183
9.1.3 Populating the CPUMEMR . . . . . . . . . . . . . . . . . . . 184
9.1.4 Selecting the CPUMEMR slot . . . . . . . . . . . . . . . . . . 184
9.1.5 Removing the air duct (if applicable) . . . . . . . . . . . . . . 185
9.1.6 Inserting the CPUMEMR in the slot . . . . . . . . . . . . . . . 186
9.1.7 Inserting the air duct in the slot (if applicable) . . . . . . . . . 187
9.1.8 Completing the task . . . . . . . . . . . . . . . . . . . . . . . 187
9.2 Replacing a faulty CPUMEMR . . . . . . . . . . . . . . . . 188

RX900 S1 Maintenance Manual 13
Contents
9.2.1 Required tools . . . . . . . . . . . . . . . . . . . . . . . . . . 188
9.2.2 Starting the task . . . . . . . . . . . . . . . . . . . . . . . . . 188
9.2.3 Identifying a fault on the CPUMEMR . . . . . . . . . . . . . . 189
9.2.4 Removing the CPUMEMR . . . . . . . . . . . . . . . . . . . . 190
9.2.5 Reinstalling a new CPUMEMR . . . . . . . . . . . . . . . . . 190
9.2.6 Completing the task . . . . . . . . . . . . . . . . . . . . . . . 191
9.3 Installing additional DIMM memory modules . . . . . . . . . 191
9.3.1 Required tools . . . . . . . . . . . . . . . . . . . . . . . . . . 191
9.3.2 Starting the task . . . . . . . . . . . . . . . . . . . . . . . . . 192
9.3.3 Selecting the DIMM memory module slot . . . . . . . . . . . . 192
9.3.4 Inserting the DIMM memory module in the slot . . . . . . . . . 194
9.3.5 Completing the task . . . . . . . . . . . . . . . . . . . . . . . 194
9.4 Replacing a faulty memory module . . . . . . . . . . . . . . 195
9.4.1 Required tools . . . . . . . . . . . . . . . . . . . . . . . . . . 195
9.4.2 Starting the task . . . . . . . . . . . . . . . . . . . . . . . . . 195
9.4.3 Removing the DIMM memory module . . . . . . . . . . . . . . 196
9.4.4 Reinstalling a DIMM memory module . . . . . . . . . . . . . . 196
9.4.5 Completing the task . . . . . . . . . . . . . . . . . . . . . . . 197
10 Processors . . . . . . . . . . . . . . . . . . . . . . . . . . . 199
10.1 Installing a processor in a new CPUMEMR . . . . . . . . . . 200
10.1.1 Required tools . . . . . . . . . . . . . . . . . . . . . . . . . . 200
10.1.2 Starting the task . . . . . . . . . . . . . . . . . . . . . . . . . 201
10.1.3 Removing the socket cover . . . . . . . . . . . . . . . . . . . 201
10.1.4 Installing the processor . . . . . . . . . . . . . . . . . . . . . 202
10.1.5 Applying the thermal paste . . . . . . . . . . . . . . . . . . . 203
10.1.6 Installing the heat sink . . . . . . . . . . . . . . . . . . . . . . 205
10.1.7 Completing the task . . . . . . . . . . . . . . . . . . . . . . . 206
10.2 Replacing a processor . . . . . . . . . . . . . . . . . . . . . 206
10.2.1 Required tools . . . . . . . . . . . . . . . . . . . . . . . . . . 207
10.2.2 Starting the task . . . . . . . . . . . . . . . . . . . . . . . . . 207
10.2.3 Removing the heat sink . . . . . . . . . . . . . . . . . . . . . 208
10.2.4 Removing the processor . . . . . . . . . . . . . . . . . . . . . 209
10.2.5 Installing the processor . . . . . . . . . . . . . . . . . . . . . 210
10.2.6 Applying the thermal paste . . . . . . . . . . . . . . . . . . . 211
10.2.7 Installing the heat sink . . . . . . . . . . . . . . . . . . . . . . 213
10.2.8 Completing the task . . . . . . . . . . . . . . . . . . . . . . . 214
10.3 Replacing a heat sink . . . . . . . . . . . . . . . . . . . . . 215

14 Maintenance Manual RX900 S1
Contents
10.3.1 Required tools . . . . . . . . . . . . . . . . . . . . . . . . . 215
10.3.2 Starting the task . . . . . . . . . . . . . . . . . . . . . . . . 215
10.3.3 Removing the heat sink . . . . . . . . . . . . . . . . . . . . . 216
10.3.4 Applying the thermal paste . . . . . . . . . . . . . . . . . . . 217
10.3.5 Installing the heat sink . . . . . . . . . . . . . . . . . . . . . 219
10.3.6 Completing the task . . . . . . . . . . . . . . . . . . . . . . . 220
11 Optical and backup drives . . . . . . . . . . . . . . . . . . 221
11.1 Replacing the optical drive . . . . . . . . . . . . . . . . . . 221
11.1.1 Required tools . . . . . . . . . . . . . . . . . . . . . . . . . 222
11.1.2 Starting the task . . . . . . . . . . . . . . . . . . . . . . . . 222
11.1.3 Removing the optical drive . . . . . . . . . . . . . . . . . . . 223
11.1.4 Replacing the optical drive in the installation frame . . . . . . 223
11.1.5 Installing the optical drive . . . . . . . . . . . . . . . . . . . . 224
11.1.6 Completing the task . . . . . . . . . . . . . . . . . . . . . . . 225
12 Front panel and external connectors . . . . . . . . . . . . . 227
12.1 Replacing the control panel . . . . . . . . . . . . . . . . . 228
12.1.1 Required tools . . . . . . . . . . . . . . . . . . . . . . . . . 228
12.1.2 Starting the task . . . . . . . . . . . . . . . . . . . . . . . . 228
12.1.3 Removing the control panel . . . . . . . . . . . . . . . . . . . 229
12.1.4 Disconnecting the control panel cable . . . . . . . . . . . . . 230
12.1.5 Connecting the control panel cable . . . . . . . . . . . . . . . 231
12.1.6 Installing the control panel . . . . . . . . . . . . . . . . . . . 232
12.1.7 Completing the task . . . . . . . . . . . . . . . . . . . . . . . 233
12.2 Replacing the front panel module . . . . . . . . . . . . . . 234
12.2.1 Required tools . . . . . . . . . . . . . . . . . . . . . . . . . 234
12.2.2 Starting the task . . . . . . . . . . . . . . . . . . . . . . . . 234
12.2.3 Removing the front panel module . . . . . . . . . . . . . . . . 235
12.2.4 Inserting the front panel module . . . . . . . . . . . . . . . . 237
12.2.5 Completing the task . . . . . . . . . . . . . . . . . . . . . . . 238
12.3 Replacing the USB board . . . . . . . . . . . . . . . . . . . 239
12.3.1 Required tools . . . . . . . . . . . . . . . . . . . . . . . . . 239
12.3.2 Starting the task . . . . . . . . . . . . . . . . . . . . . . . . 239
12.3.3 Removing the USB board . . . . . . . . . . . . . . . . . . . . 240
12.3.4 Installing the USB board . . . . . . . . . . . . . . . . . . . . 241
12.3.5 Completing the task . . . . . . . . . . . . . . . . . . . . . . . 241

RX900 S1 Maintenance Manual 15
Contents
12.4 Replacing the I/O board . . . . . . . . . . . . . . . . . . . . 242
12.4.1 Required tools . . . . . . . . . . . . . . . . . . . . . . . . . . 242
12.4.2 Starting the task . . . . . . . . . . . . . . . . . . . . . . . . . 242
12.4.3 Removing the PCI Riser . . . . . . . . . . . . . . . . . . . . . 243
12.4.4 Removing the I/O board . . . . . . . . . . . . . . . . . . . . . 244
12.4.5 Installing the I/O board . . . . . . . . . . . . . . . . . . . . . . 244
12.4.6 Installing the PCI Riser . . . . . . . . . . . . . . . . . . . . . 245
12.4.7 Completing the task . . . . . . . . . . . . . . . . . . . . . . . 245
13 Management and diagnostics modules . . . . . . . . . . . . 247
13.1 Replacing the local service display . . . . . . . . . . . . . . 248
13.1.1 Required tools . . . . . . . . . . . . . . . . . . . . . . . . . . 248
13.1.2 Starting the task . . . . . . . . . . . . . . . . . . . . . . . . . 248
13.1.3 Removing the local service display . . . . . . . . . . . . . . . 249
13.1.4 Inserting the local service display . . . . . . . . . . . . . . . . 250
13.1.5 Completing the task . . . . . . . . . . . . . . . . . . . . . . . 251
13.2 Replacing the chassis ID board . . . . . . . . . . . . . . . . 252
13.2.1 Required tools . . . . . . . . . . . . . . . . . . . . . . . . . . 252
13.2.2 Starting the task . . . . . . . . . . . . . . . . . . . . . . . . . 252
13.2.3 Removing the chassis ID board . . . . . . . . . . . . . . . . . 253
13.2.4 Installing the chassis ID board . . . . . . . . . . . . . . . . . . 256
13.2.5 Completing the task . . . . . . . . . . . . . . . . . . . . . . . 259
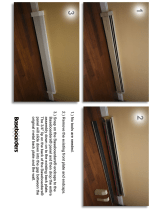
14 Baseboard . . . . . . . . . . . . . . . . . . . . . . . . . . . 261
14.1 Replacing the lithium battery . . . . . . . . . . . . . . . . . 262
14.1.1 Required tools . . . . . . . . . . . . . . . . . . . . . . . . . . 262
14.1.2 Starting the task . . . . . . . . . . . . . . . . . . . . . . . . . 263
14.1.3 Replacing the faulty battery . . . . . . . . . . . . . . . . . . . 263
14.1.4 Completing the task . . . . . . . . . . . . . . . . . . . . . . . 264
14.2 Installing the UFM . . . . . . . . . . . . . . . . . . . . . . . 264
14.2.1 Required tools . . . . . . . . . . . . . . . . . . . . . . . . . . 264
14.2.2 Starting the task . . . . . . . . . . . . . . . . . . . . . . . . . 265
14.2.3 Inserting the UFM . . . . . . . . . . . . . . . . . . . . . . . . 265
14.2.4 Completing the task . . . . . . . . . . . . . . . . . . . . . . . 266
14.3 Replacing the UFM board . . . . . . . . . . . . . . . . . . . 267
14.3.1 Required tools . . . . . . . . . . . . . . . . . . . . . . . . . . 267
14.3.2 Starting the task . . . . . . . . . . . . . . . . . . . . . . . . . 268

16 Maintenance Manual RX900 S1
Contents
14.3.3 Removing the UFM . . . . . . . . . . . . . . . . . . . . . . . 268
14.3.4 Completing the task . . . . . . . . . . . . . . . . . . . . . . . 269
14.4 Installing the TPM . . . . . . . . . . . . . . . . . . . . . . . 270
14.4.1 Required tools . . . . . . . . . . . . . . . . . . . . . . . . . 270
14.4.2 Starting the task . . . . . . . . . . . . . . . . . . . . . . . . 270
14.4.3 Inserting the TPM . . . . . . . . . . . . . . . . . . . . . . . . 271
14.4.4 Completing the task . . . . . . . . . . . . . . . . . . . . . . . 272
14.5 Replacing the TPM . . . . . . . . . . . . . . . . . . . . . . 273
14.5.1 Required tools . . . . . . . . . . . . . . . . . . . . . . . . . 273
14.5.2 Starting the task . . . . . . . . . . . . . . . . . . . . . . . . 274
14.5.3 Removing the TPM . . . . . . . . . . . . . . . . . . . . . . . 274
14.5.4 Completing the task . . . . . . . . . . . . . . . . . . . . . . . 275
14.6 Replacing the baseboard . . . . . . . . . . . . . . . . . . . 276
14.6.1 Required tools . . . . . . . . . . . . . . . . . . . . . . . . . 277
14.6.2 Starting the task . . . . . . . . . . . . . . . . . . . . . . . . 277
14.6.3 Sliding the local service display outward . . . . . . . . . . . . 278
14.6.4 Disconnecting the cables . . . . . . . . . . . . . . . . . . . . 279
14.6.5 Removing the fan cage . . . . . . . . . . . . . . . . . . . . . 280
14.6.6 Removing the CPUMEMR guide . . . . . . . . . . . . . . . . 281
14.6.7 Removing the air guide . . . . . . . . . . . . . . . . . . . . . 282
14.6.8 Removing the baseboard . . . . . . . . . . . . . . . . . . . . 283
14.6.9 Inserting the baseboard . . . . . . . . . . . . . . . . . . . . . 284
14.6.10 Installing the air guide . . . . . . . . . . . . . . . . . . . . . . 285
14.6.11 Inserting the CPUMEMR guide . . . . . . . . . . . . . . . . . 286
14.6.12 Inserting the fan cage . . . . . . . . . . . . . . . . . . . . . . 287
14.6.13 Connecting the cables to the baseboard . . . . . . . . . . . . 288
14.6.14 Sliding the local service display inward . . . . . . . . . . . . . 289
14.6.15 Completing the task . . . . . . . . . . . . . . . . . . . . . . . 289
15 Cables . . . . . . . . . . . . . . . . . . . . . . . . . . . . . 291
15.1 Replacing the fan cables . . . . . . . . . . . . . . . . . . . 292
15.1.1 Required tools . . . . . . . . . . . . . . . . . . . . . . . . . 292
15.1.2 Starting the task . . . . . . . . . . . . . . . . . . . . . . . . 292
15.1.3 Removing the fan cage . . . . . . . . . . . . . . . . . . . . . 293
15.1.4 Removing the CPUMEMR guide . . . . . . . . . . . . . . . . 294
15.1.5 Removing the fan cable . . . . . . . . . . . . . . . . . . . . . 295
15.1.6 Installing the fan cable . . . . . . . . . . . . . . . . . . . . . 297
15.1.7 Inserting the CPUMEMR guide . . . . . . . . . . . . . . . . . 299
15.1.8 Inserting the fan cage . . . . . . . . . . . . . . . . . . . . . . 300

RX900 S1 Maintenance Manual 17
Contents
15.1.9 Completing the task . . . . . . . . . . . . . . . . . . . . . . . 300
15.2 Replacing the control panel cable . . . . . . . . . . . . . . . 301
15.2.1 Required tools . . . . . . . . . . . . . . . . . . . . . . . . . . 301
15.2.2 Starting the task . . . . . . . . . . . . . . . . . . . . . . . . . 302
15.2.3 Removing the control panel . . . . . . . . . . . . . . . . . . . 302
15.2.4 Disconnecting the control panel cable . . . . . . . . . . . . . . 303
15.2.5 Connecting the control panel cable . . . . . . . . . . . . . . . 304
15.2.6 Installing the control panel . . . . . . . . . . . . . . . . . . . . 305
15.2.7 Completing the task . . . . . . . . . . . . . . . . . . . . . . . 306
15.3 Replacing the chassis ID board cable . . . . . . . . . . . . 307
15.3.1 Required tools . . . . . . . . . . . . . . . . . . . . . . . . . . 307
15.3.2 Starting the task . . . . . . . . . . . . . . . . . . . . . . . . . 307
15.3.3 Removing the chassis ID board . . . . . . . . . . . . . . . . . 308
15.3.4 Disconnecting the chassis ID board cable . . . . . . . . . . . . 310
15.3.5 Connecting the chassis ID board cable . . . . . . . . . . . . . 311
15.3.6 Installing the chassis ID board . . . . . . . . . . . . . . . . . . 312
15.3.7 Completing the task . . . . . . . . . . . . . . . . . . . . . . . 314
15.4 Replacing power cables of the optical drive, the SAS backplane,
or the power distribution board . . . . . . . . . . . . . . . . 315
15.4.1 Required tools . . . . . . . . . . . . . . . . . . . . . . . . . . 315
15.4.2 Starting the task . . . . . . . . . . . . . . . . . . . . . . . . . 315
15.4.3 Sliding the local service display outward . . . . . . . . . . . . 316
15.4.4 Disconnecting the cables . . . . . . . . . . . . . . . . . . . . 317
15.4.5 Removing the fan cage . . . . . . . . . . . . . . . . . . . . . 318
15.4.6 Removing the CPUMEMR guide . . . . . . . . . . . . . . . . 319
15.4.7 Removing the air guide . . . . . . . . . . . . . . . . . . . . . 320
15.4.8 Removing the baseboard . . . . . . . . . . . . . . . . . . . . 321
15.4.9 Removing the power distribution board . . . . . . . . . . . . . 322
15.4.10 Disconnecting the defective power distribution cable(s) . . . . . 323
15.4.11 Connecting the new power distribution cable(s) . . . . . . . . . 324
15.4.12 Installing the power distribution board . . . . . . . . . . . . . . 325
15.4.13 Inserting the baseboard . . . . . . . . . . . . . . . . . . . . . 326
15.4.14 Installing the air guide . . . . . . . . . . . . . . . . . . . . . . 327
15.4.15 Inserting the CPUMEMR guide . . . . . . . . . . . . . . . . . 328
15.4.16 Inserting the fan cage . . . . . . . . . . . . . . . . . . . . . . 329
15.4.17 Connecting the cables to the baseboard . . . . . . . . . . . . 330
15.4.18 Sliding the local service display inward . . . . . . . . . . . . . 331
15.4.19 Completing the task . . . . . . . . . . . . . . . . . . . . . . . 331
15.5 Replacing the SAS cable, the SATA cable, the front video
connector cable, or the front USB cable . . . . . . . . . . . 333

18 Maintenance Manual RX900 S1
Contents
15.5.1 Required tools . . . . . . . . . . . . . . . . . . . . . . . . . 333
15.5.2 Starting the task . . . . . . . . . . . . . . . . . . . . . . . . 334
15.5.3 Sliding the local service display outward . . . . . . . . . . . . 335
15.5.4 Disconnecting the cables . . . . . . . . . . . . . . . . . . . . 336
15.5.5 Removing the fan cage . . . . . . . . . . . . . . . . . . . . . 337
15.5.6 Removing the CPUMEMR guide . . . . . . . . . . . . . . . . 338
15.5.7 Removing the air guide . . . . . . . . . . . . . . . . . . . . . 339
15.5.8 Removing the baseboard . . . . . . . . . . . . . . . . . . . . 340
15.5.9 Opening the cable guides . . . . . . . . . . . . . . . . . . . . 341
15.5.10 Closing the cable guides . . . . . . . . . . . . . . . . . . . . 342
15.5.11 Inserting the baseboard . . . . . . . . . . . . . . . . . . . . . 343
15.5.12 Installing the air guide . . . . . . . . . . . . . . . . . . . . . . 344
15.5.13 Inserting the CPUMEMR guide . . . . . . . . . . . . . . . . . 345
15.5.14 Inserting the fan cage . . . . . . . . . . . . . . . . . . . . . . 346
15.5.15 Connecting the cables to the baseboard . . . . . . . . . . . . 347
15.5.16 Sliding the local service display inward . . . . . . . . . . . . . 348
15.5.17 Completing the task . . . . . . . . . . . . . . . . . . . . . . . 348
16 Appendix . . . . . . . . . . . . . . . . . . . . . . . . . . . . 351
16.1 Mechanical overview . . . . . . . . . . . . . . . . . . . . . 351
16.1.1 Front side . . . . . . . . . . . . . . . . . . . . . . . . . . . . 351
16.1.2 Rear side . . . . . . . . . . . . . . . . . . . . . . . . . . . . 352
16.1.3 Top view . . . . . . . . . . . . . . . . . . . . . . . . . . . . . 354
16.2 Mounting order for SSD and HDD modules . . . . . . . . . 358
16.3 Memory board configuration . . . . . . . . . . . . . . . . . 359
16.4 PCIe slot to CPUMEMR assignment . . . . . . . . . . . . . 362
16.5 Expansion card configuration table . . . . . . . . . . . . . 364
16.6 Cabling . . . . . . . . . . . . . . . . . . . . . . . . . . . . . 367

RX900 S1 Maintenance Manual 19
1 Introduction
This Maintenance manual provides procedures for:
● Replacing faulty units to get the system back to normal operation.
● Expanding the server configuration by using optional hardware components
available within the same release to meet new requirements.
● Upgrading the server by replacing existing hardware with high-capacity
components to meet new requirements or to react on release upgrades that
provide new functionality or require additional capacity.
The manual at hand focusses on local maintenance tasks to be done at the
server site. It is recommended to prepare these local maintenance tasks by
remote diagnostics procedures introduced in the "ServerView Suite Local
Service Concept - LSC" manual on the ServerView Suite DVD 2.
V CAUTION!
The document at hand comprises procedures of a wide range of
complexity. Check the profile of qualification for technicians before
assigning tasks. Before you start, carefully read "Classification of
procedures" on page 27.

20 Maintenance Manual RX900 S1
Introduction
1.1 Where to find which information?
While the Maintenance manual focuses on maintenance procedures to bring
the system back to normal operation, individual manuals provide detailed
background information on the board layout, indicators, or BIOS Setup. Other
documentation such as service foils attached to the server covers or the
illustrated spares catalogue available in the internet (not applicable for the
Japanese market) help you to organize your work, see figure 1.
This section provides information on:
● "Documents you need at hand" on page 21
● "Accessing PRIMERGY documentation" on page 24
Figure 1: Hardware-related customer documentation
/