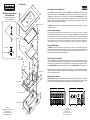
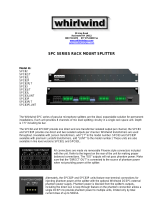
Whirlwind WB1 Wallbox is a versatile and durable solution for mounting audio connectors in walls. Its reversible door allows for left or right-side opening, and magnetic strips ensure a secure closure even with cables plugged in. The WB1* can be installed directly into a wall cutout or onto a WB1BB NEMA Type 1 electrical backbox for added support. Removable side and bottom panels provide unlimited configuration options for connector mounting, making it suitable for various audio applications.
Whirlwind WB1 Wallbox is a versatile and durable solution for mounting audio connectors in walls. Its reversible door allows for left or right-side opening, and magnetic strips ensure a secure closure even with cables plugged in. The WB1* can be installed directly into a wall cutout or onto a WB1BB NEMA Type 1 electrical backbox for added support. Removable side and bottom panels provide unlimited configuration options for connector mounting, making it suitable for various audio applications.

-
 1
1

Whirlwind WB1 Wallbox is a versatile and durable solution for mounting audio connectors in walls. Its reversible door allows for left or right-side opening, and magnetic strips ensure a secure closure even with cables plugged in. The WB1* can be installed directly into a wall cutout or onto a WB1BB NEMA Type 1 electrical backbox for added support. Removable side and bottom panels provide unlimited configuration options for connector mounting, making it suitable for various audio applications.
Ask a question and I''ll find the answer in the document
Finding information in a document is now easier with AI
Related papers
-
 Whirlwind WMKPVC User manual
-
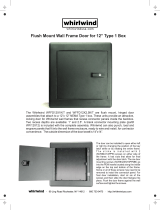 Whirlwind Wall Frame Door User manual
-
 Whirlwind Presswall User manual
-
 Whirlwind WF Wall Frame User manual
-
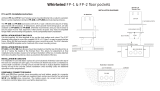 Whirlwind FP-1 and FP-2 Operating instructions
-
 Whirlwind "CONNECT" Digital Snake User manual
-
 Whirlwind ES4 User manual
-
 Whirlwind SPC83LUNT User manual
-
 Whirlwind co2a User manual
-
 Whirlwind PW-1 Personal Wedge User manual


Other documents
-
Mircom LT-926 FA-301-DF Operating instructions
-
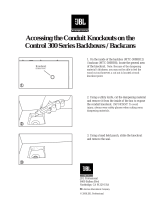
Siemens FB-300 Backboxes and Door User manual
-
-
 Calculated Industries 8115 User manual
-
FSR PWB-FR-450-BLK Installation guide
-
Power Acoustik PPF-4, PPF-5, PPF-6 Owner's manual
-
 MegaTech Whirlwind 3000 User manual
-
 JBL Professional Car Speaker 300 User manual


