Page is loading ...

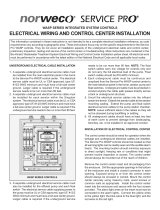
CONTROL CENTER WITH MCD TECHNOLOGY
INSTALLATION AND OPERATION INSTRUCTIONS
The advanced integrated circuitry of the Service Pro control center simplifies the Singulair installation, improves system
performance and allows for communication with the Service Pro website. The control center insert and enclosure provide
space for power and communication wiring connections. The integrated circuitry continually monitors both motor over current
and under current conditions and minimizes nuisance alarm conditions using the automatic restart feature. To reduce
unnecessary service calls, the control center shuts down the Singulair aerator in the event of an over current or an under
current alarm condition, illuminates the alarm light and begins an automatic two hour aerator restart attempt sequence before
activating the audible alarm and telemetry system.
Service Pro MCD and TNT control centers are equipped with an automatic telemetry system designed to communicate
through a toll free telephone number or an Internet connection. In the event of an alarm condition that cannot be corrected by
the control center’s self-diagnostic sequence, the telemetry system contacts the Service Pro remote monitoring center. The
monitoring center identifies the alarming control center and logs the time that the message was received and specific alarm
condition reported. The monitoring center then automatically updates the website and notifies the responsible Norweco
distributor or service provider by email, fax or telephone. In addition to documenting alarm conditions, the website tracks the
date, time and duration of service visits, service contract renewals and maintains a complete database for every Singulair
system registered. Access to the information is password protected and available to licensed distributors, sponsored service
providers, health departments and system owners.
These instructions are not intended to be a complete electrical, telecommunication or network system installation reference.
Telecommunication and network system policies as well as electrical code requirements vary according to geographic area.
Consult your local policies and regulations prior to installing the Service Pro control center. Refer to the Electrical Wiring and
Control Center Installation instructions for additional details.
INSTALLATION OF ELECTRICAL CONTROL CENTER
Although the aerator is not installed until system start-up,
the Service Pro control center should be wired for operation
when the tank and underground electrical cable are installed.
Complete steps 1 through 10 of the “Underground Electrical
Cable Installation” section of the Electrical Wiring and Control
Center Installation instructions. The control center should
be located so the warning light can be seen and the audible
alarm heard. The mounting location should minimize
exposure to direct sunlight, freezing rain or conditions that
might prevent routine inspection or access. The control
center should always be mounted out of the reach of children.
If the Singulair system is to be remotely monitored, the steps
in the Getting Started Website Instructions can be completed
either before or after Service Pro control center installation.
Detach the control center cover from the enclosure, remove
the insert from the mounting posts and set the control center
insert aside. Remove two of the three
1
/
2
" knockouts in the
bottom of the control center enclosure if you are not using
any auxiliary alarm inputs. Remove all three of the knockouts
in the bottom of the control center enclosure if you are using
the auxiliary alarm inputs. NOTE: All alarm wires must be
in a conduit separate from the power lines. Install a conduit
connector into each of the openings. Remove the knockout
for the communications cable only if the communication
grommet will be used. For installations requiring a NEMA
3R rated enclosure, remove the
1
/
8
" drain opening knockout
to vent moisture from the enclosure. Exposed wiring to or
from the control center should always be enclosed in conduit.
NOTE: Be sure to assemble the hub to the conduit before
CONTROL CENTER INSERT
NETWORK

©MMXII NORWECO, INC. NORWALK, OHIO U.S.A.
MANUFACTURED BY
NORWECO, INC.
NORWALK, OHIO
U.S.A. 44857
www.norweco.com
SERVICE PRO
®
CONTROL CENTER INSTRUCTIONS (Page 2 of 6)
jacket
7
/
16
" from the end of the insulated wire lead. Twist
the four ground leads together and secure the connection
with a yellow wire nut connector.
CAUTION: Never allow the white neutral leads and
ground leads to be spliced together or connected to
common terminals. Failure to connect the Service Pro
control center to a proper ground will void the Singulair
system warranty.
5. Connect the black lead of the underground electrical
cable from the aerator to the red wire provided on the
circuit board. Use at least #14 AWG black solid copper
wire. To connect to the power connector lead, strip off
the insulation jacket
7
/
16
" from the end of each wire lead.
Twist the stripped leads together and secure the
connection with a yellow wire nut connector.
6. If auxiliary alarm inputs are being used, skip to
AUXILIARY ALARM INPUTS.
7. Inspect your work to make sure there are no breaks in
the wiring insulation and that all connections are secure.
8. Before installing the control center insert, energize the
circuit breaker in the main electrical service panel and,
with your electrical multi-meter, test the voltage being
supplied. Set up the meter to read AC voltage on the
0-150 volt scale. Place one probe of the meter into the
yellow wire nut connector attached to the black lead
and one probe into the yellow wire nut connector attached
to the white lead. It should read between 109 volts and
connecting the hub to the enclosure. Mount the enclosure
securely. The following steps should be performed by the
installing electrician to complete system wiring:
1. Use a dedicated 115 volt AC, single-phase, 15 amp
(maximum) circuit breaker in the main electrical panel
for service to each Singulair aerator.
CAUTION: Make sure the circuit is de-energized. Check
it with an electrician’s test light before proceeding.
Remember that other circuits in the service panel may
remain energized as you are working. Use only tools
with insulated handles, stand in a dry location and
work with extreme care.
2. Connect the black wire from the dedicated breaker in
the main service panel to the black wire provided on the
circuit board. Use at least #14 AWG black solid copper
wire. To connect to the wire leads, strip off the insulation
jacket
7
/
16
" from the end of each insulated wire lead.
Twist the stripped leads together and secure the
connection with a yellow wire nut connector.
3. Wire from the neutral in the main service panel to both
the neutral wire in the underground electrical cable from
the Singulair aerator and the white wire provided on the
circuit board. Use at least #14 AWG white solid copper
wire. Strip off the insulation jacket
7
/
16
" from the end of
each insulated wire lead. Twist the three stripped leads
together and secure the connection with a yellow wire
nut connector.
4. Install a grounding conductor from the ground lug in the
main service panel to the control center. This wire, along
with the non-insulated ground lead in the aerator
underground electrical cable and the green ground wire
attached to the optional telephone communications
module, if equipped, must all be connected to the green
wire provided on the circuit board. Strip off the insulation
CONDUIT OPENINGS
POWER CONNECTIONS
NETWORK

INSTALLATION AND OPERATION (Page 3 of 6)
SERVICE PRO
®
CONTROL CENTER WITH MCD TECHNOLOGY
121 volts. If it is within these limits, place one probe of
the multi-meter into the yellow wire nut connector
attached to the red lead and one probe on the power
connector pin attached to the white lead. The meter
should read zero volts. Once these readings are
confirmed, place the dedicated circuit breaker in the
main service panel in the “off” position.
9. The conduit openings in the control center must now be
sealed. Expanding foam sealant is recommended for
this purpose. Insure sealant complies with local code
requirements. Follow manufacturer’s instruction when
adding expanding foam sealant into the conduits.
IMPORTANT: The conduit openings must be sealed to
prevent moisture and corrosive gas from entering the
control center enclosure which could result in a fire,
explosion or damage to the control center. Failure to
properly seal all conduit openings will void the Singulair
system warranty.
10. Close the insulator and snap the insert into position.
11. When the auxiliary inputs are used, label the
corresponding auxiliary alarm light located on the front
of the Service Pro control center insert using the labels
provided.
12. Clearly label the dedicated circuit used for each Singulair
aerator on the door of the main electrical service panel
in the home. Replace the service panel dead front and
enclosure cover.
13. Make sure the selector switch in the control center is in
the “off” position.
14. Complete the steps outlined in the “Before Leaving”
section of the Electrical Wiring and Control Center
Installation instructions.
AUXILIARY ALARM INPUTS
The Service Pro control center will accept alarm inputs that
generate several different types of output: a 5 to 120 volt AC
or DC signal, a normally open relay circuit or a normally
closed relay circuit. The inputs on the control center are
male 0.110" quick connect terminals and accept standard
female 0.110" insulated quick connect receptacles. When
connecting to the three auxiliary alarm inputs:
1. Determine the type of output that is generated by the
alarm device you wish to connect.
2. Route the leads through one of the conduits not being
used for power lines into the bottom of the enclosure.
Be sure to pull enough wire to comfortably reach the
two auxiliary terminals you will be connecting to on the
back of the control center insert.
3. Crimp the insulated female 0.110" quick connect
receptacles to the ends of the alarm leads.
4. Connect the leads to the corresponding auxiliary alarm
inputs. When connecting a relay circuit, connect to the
“RELAY +” and “RELAY -” terminals. For a voltage input,
connect the leads to the auxiliary alarm terminals
marked “V+” and “V-”.
5 When connecting a device that uses a relay contact
setting, you will need to set the jumper for the correct
relay configuration. If the alarm circuit is normally closed,
place the jumper over the bottom two jumper pins closest
to the ‘C’ label. If the alarm circuit is normally open,
place the jumper over the top two jumper pins closest
to the ‘O’ label (see CONNECTING AUXILIARY ALARM
INPUTS on Page 3 for reference).
CONNECTING AUXILIARY ALARM INPUTS
AUXILIARY ALARM LABELS
NETWORK

©MMXII NORWECO, INC. NORWALK, OHIO U.S.A.
MANUFACTURED BY
NORWECO, INC.
NORWALK, OHIO
U.S.A. 44857
www.norweco.com
SERVICE PRO
®
CONTROL CENTER INSTRUCTIONS (Page 4 of 6)
COMMUNICATION CABLE
INSTALLATION REQUIREMENTS
If a telephone connection will be utilized, a telephone line
must be installed unspliced from the telephone box to the
Service Pro control center. Before installing the telephone
line, familiarize yourself with the equipment and policies of
the local telephone service provider. The Service Pro control
center is not compatible with digital telephone service. With
DSL Internet service, a DSL filter will need to be connected
to the telephone jack on the Service Pro controls to insure
proper operation of the monitoring feature. If a telephone
line is not available, one will need to be installed by the local
telephone service provider or an Internet communication
module should be utilized.
If an Internet connection will be utilized, a network cable
must be installed from the home Internet connection to the
Service Pro control center. The network cable will typically
be plugged into a switch or router that distributes Internet
service in the home. Regardless of whether the
communications will take place through a phone line or the
Internet, the following steps must be performed to complete
system wiring:
1. Make sure the dedicated circuit breaker in the main
service panel is in the “off” position. Using the auxiliary
input conduit or one of the grommets provided, run the
telephone or network cable into the bottom of the
enclosure. NOTE: The telephone or network cable
cannot be installed into a conduit with any power lines.
Crimp the appropriate phone or network jack on the
communications cable in the control center.
2. Connect the telephone or network cable into the jack
provided on the control panel. Connect the other end of
the communications cable to the existing telephone
system or home Internet service.
3. Snap the control center insert into position. Close the
control center cover.
RESET BUTTON
The reset button on the Service Pro control center is used
to perform multiple tasks during installation and operation.
To activate the reset button, apply pressure with your index
finger. The button is activated when a “click” is heard. The
reset button can be used to silence the audible alarm, turn
on the aerator when it is in an off cycle or restart the run
cycle when the aerator is currently running. The reset button
is also used to test the control center audible and visual
alarms and telemetry system. NOTE: Excessive pressure
on the reset button should be avoided.
To test the alarms, press and hold the reset button for
approximately five seconds until the alarms activate and
then release. After five seconds, the panel will call out and
deliver an alarm test message to the Service Pro monitoring
system. Once the communication is complete, the control
center will return to normal operation.
The reset button can also be used to record service visits.
When arriving on site, press and hold the reset button for
five seconds until the alarm test feature activates, then
release the button. After the control panel has completed
the alarm test call, routine service should be performed on
the Singulair system. Once system service has been
completed, press and hold the reset button again for five
seconds until the alarm test feature activates. The Service
Pro control center will register two alarm test calls received
within a four hour period as a service visit. The date, time
and duration of the service visit will be logged in the database
for future reference.
TELEMETRY SYSTEM COMMISSIONING
Each control center is shipped with the integrated telemetry
system disabled. All other monitoring, diagnostic and local
alarm functions will operate as designed. The reset button
is used to enable the integrated telemetry system once the
communications cable has been connected. This process
is referred to as commissioning the control center.
Commissioning notifies the Service Pro monitoring center
that the control center is functional and ready to transmit
information.
To commission the control center, insure the dedicated circuit
breaker in the main service panel is in the “on” position and
the communications cable is properly installed. Place the
control center selector switch in the “off” position. While
RESET BUTTON AND SELECTOR SWITCH
NETWORK

INSTALLATION AND OPERATION (Page 5 of 6)
SERVICE PRO
®
CONTROL CENTER WITH MCD TECHNOLOGY
the dial so that the arrow points to the “continuous” position.
Use a small blade screwdriver to rotate the adjustment dial
to the desired position. The timer is factory preset and
should only be adjusted after carefully reviewing the Time
Clock Setting and Service Instructions.
ALARM CONDITION OPERATING SEQUENCE
When the control center detects an over current or an under
current alarm condition, the alarm light will activate and flash
a code that specifies the alarm condition that was detected.
If an under current or open motor condition is detected, the
alarm light will flash two short flashes. If a high water or over
current condition is detected, the alarm light will flash
steadily. If either an over current or an under current alarm
condition is detected, the Singulair aerator is shut down
and an automatic system restart sequence begins. With
the alarm light flashing, the control center will automatically
attempt to restart the aerator every five minutes for a period
of two hours (24 restart attempts). The control center
monitors motor current during each restart attempt. If the
proper level of current is detected, the control center returns
the aerator to normal operation and turns off the alarm light.
Pressing the reset button while the alarm light is flashing
causes the control center to attempt to restart the aerator
holding in the reset button, place the selector switch in the
“on” position. Continue to hold the reset button until the red
alarm light illuminates. Release the reset button and allow
the telemetry system up to sixty seconds to call out and
complete the commissioning process. The yellow light will
illuminate during the call out process.
If commissioning is successful, the alarm light will flash 5
short flashes and stop as verification. If commissioning is
unsuccessful, the alarm light will flash a pattern that indicates
the cause of the failed communication. The pattern will
display repeatedly. If the commissioning is not successful,
refer to the table below for troubleshooting information.
Conduct an alarm test to confirm commissioning was
successful. If the yellow light does not illuminate during the
alarm test, recommission the panel and refer to the table
below for troubleshooting information.
AERATOR TIMER
Each control center is supplied with an adjustable timer
that determines the run time of the aerator. The timer is
adjustable in 5 minute increments up to continuous operation
and will not permit the aerator to run less than 30 minutes
out of each hour. Full time operation is achieved by turning
RED ALARM LIGHT DIAGNOSTIC CODES
CONDITION RED ALARM LIGHT FLASH PATTERN
Successful commissioning
Flash 5 short and stop
Alarm test
Flash 10 short and stop
Service visit start
Service visit end
Communications cable not plugged in Flash 1 short, 1 long - pause 3 seconds & repeat
Phone line in use in home Flash 2 short, 1 long - pause 3 seconds & repeat
Number called is busy Flash 3 short, 1 long - pause 3 seconds & repeat
Remote monitoring center error
Flash 4 short, 1 long - pause 3 seconds & repeat
Phone service terminated
Service Pro panel communication error Flash 5 short, 1 long - pause 3 seconds & repeat
Control failure Illuminate continuous
Aerator under current Flash 2 short - pause 3 seconds & repeat
Aerator open motor Flash 2 short - pause 3 seconds & repeat
Aerator over current
Flash evenly until serviced
Auxiliary one, two and three

©MMXII NORWECO, INC. NORWALK, OHIO U.S.A.
MANUFACTURED BY
NORWECO, INC.
NORWALK, OHIO
U.S.A. 44857
www.norweco.com
SERVICE PRO
®
CONTROL CENTER INSTRUCTIONS (Page 6 of 6)
operations of the equipment. If this happens the telephone
company will provide advance notice in order for you to make
necessary modifications to maintain uninterrupted service.
If trouble is experienced with the Service Pro control center,
for repair or warranty information, please contact Norweco,
Inc. If the equipment is causing harm to the telephone
network, the telephone company may request that you
disconnect the equipment until the problem is resolved.
SERVICE PRO WEBSITE & REGISTRATION
The telemetry system, standard with Service Pro MCD and
TNT control centers, is engineered to interface with the
Service Pro monitoring center. The Service Pro monitoring
center allows the homeowner, service provider, licensed
Norweco distributor and authorized regulatory entities online
access to Singulair wastewater treatment system records.
Records generated by the Service Pro control center
(heartbeat record, alarm conditions, service records) can be
accessed at www.servicepromcd.com. For access to
the website, contact your local distributor or Norweco, Inc.
Permanent record retention and remote monitoring of the
Singulair system will begin when the following steps have
been completed:
The “Add New Subscriber” section of the website has
been completed by the Singulair distributor or service
provider
The system is started up and the Service Pro control
center is commissioned
Three copies of the signed Service Pro Subscriber
Monitoring Agreement are received by Norweco
A control center can be commissioned either before or after
the new account has been registered with the Service Pro
monitoring center. However, if the commissioning step is
performed first, the registration of the new account must be
completed within 30 days of commissioning.
The Getting Started Website Instructions provide details on
registering a new account on the Service Pro website. Add
each new account by using the information recorded on the
Monitoring Agreement form.
The Monitoring Agreement is completed with the owner of
each system to be monitored by the website. The top three
copies of the Agreement should be submitted to Norweco.
This activates monitoring and satisfies Norweco’s warranty
registration procedure. Refer to the Subscriber Monitoring
Agreement Guide for further information.
and counts toward the 24 restart attempts. If the aerator
does not restart after 24 attempts, the audible alarm and
the alarm light activate.
After both audible and visual alarms are activated, press the
reset button and the control center will attempt to restart
the aerator again. If the proper current level is not detected,
the audible alarm beeps three times, then silences. The
alarm light continues to flash and the control center interrupts
power to the aerator. If the alarm condition is not corrected
and the control center resets after 48 hours, the audible
alarm will automatically reactivate. If a control failure is
detected, the alarm light will illuminate continously and the
audible alarm will activate. If an auxiliary alarm condition is
detected, the audible alarm and the corresponding auxiliary
alarm light will activate.
If the telemetry system on the Service Pro control center
has been commissioned, the system will then attempt to
call out after a five minute delay and deliver an alarm message.
The system will call the Service Pro monitoring center every
48 hours until the alarm condition is corrected and the control
center is reset. The Service Pro control center uses
advanced diagnostic technology to monitor the Singulair
system for proper operation. In the event an alarm condition
is encountered, the control center will display a series of
flashes from the alarm light located in the center of the control
panel (refer to the Red Alarm Light Diagnostic Codes chart
on Page 5 for further reference).
SYSTEM HEARTBEAT FEATURE
The Service Pro control center contains a system heartbeat
feature that will call out every 30 days to inform the
monitoring center that the Singulair system is functioning
as designed. If the heartbeat call is not received, the
monitoring center will notify the distributor or service provider
that service is required at that location.
FCC COMPLIANCE
This equipment complies with Part 68 of the FCC rules and
the requirements adopted by the ACTA. The label on the
inside of the control center cover contains, among other
information, a product identifier in the format
US:S2KMM00BMCD. If requested, this number must be
provided to the telephone company.
If the Service Pro control center causes harm to the telephone
network, the telephone company will notify you in advance
that temporary discontinuance of service may be required.
But if advance notice isn’t practical, the telephone company
will notify the customer as soon as possible. Also, you will
be advised of your right to file a complaint with the FCC if
you believe it is necessary.
The telephone company may make changes in its facilities,
equipment, operations or procedures that could affect the
/