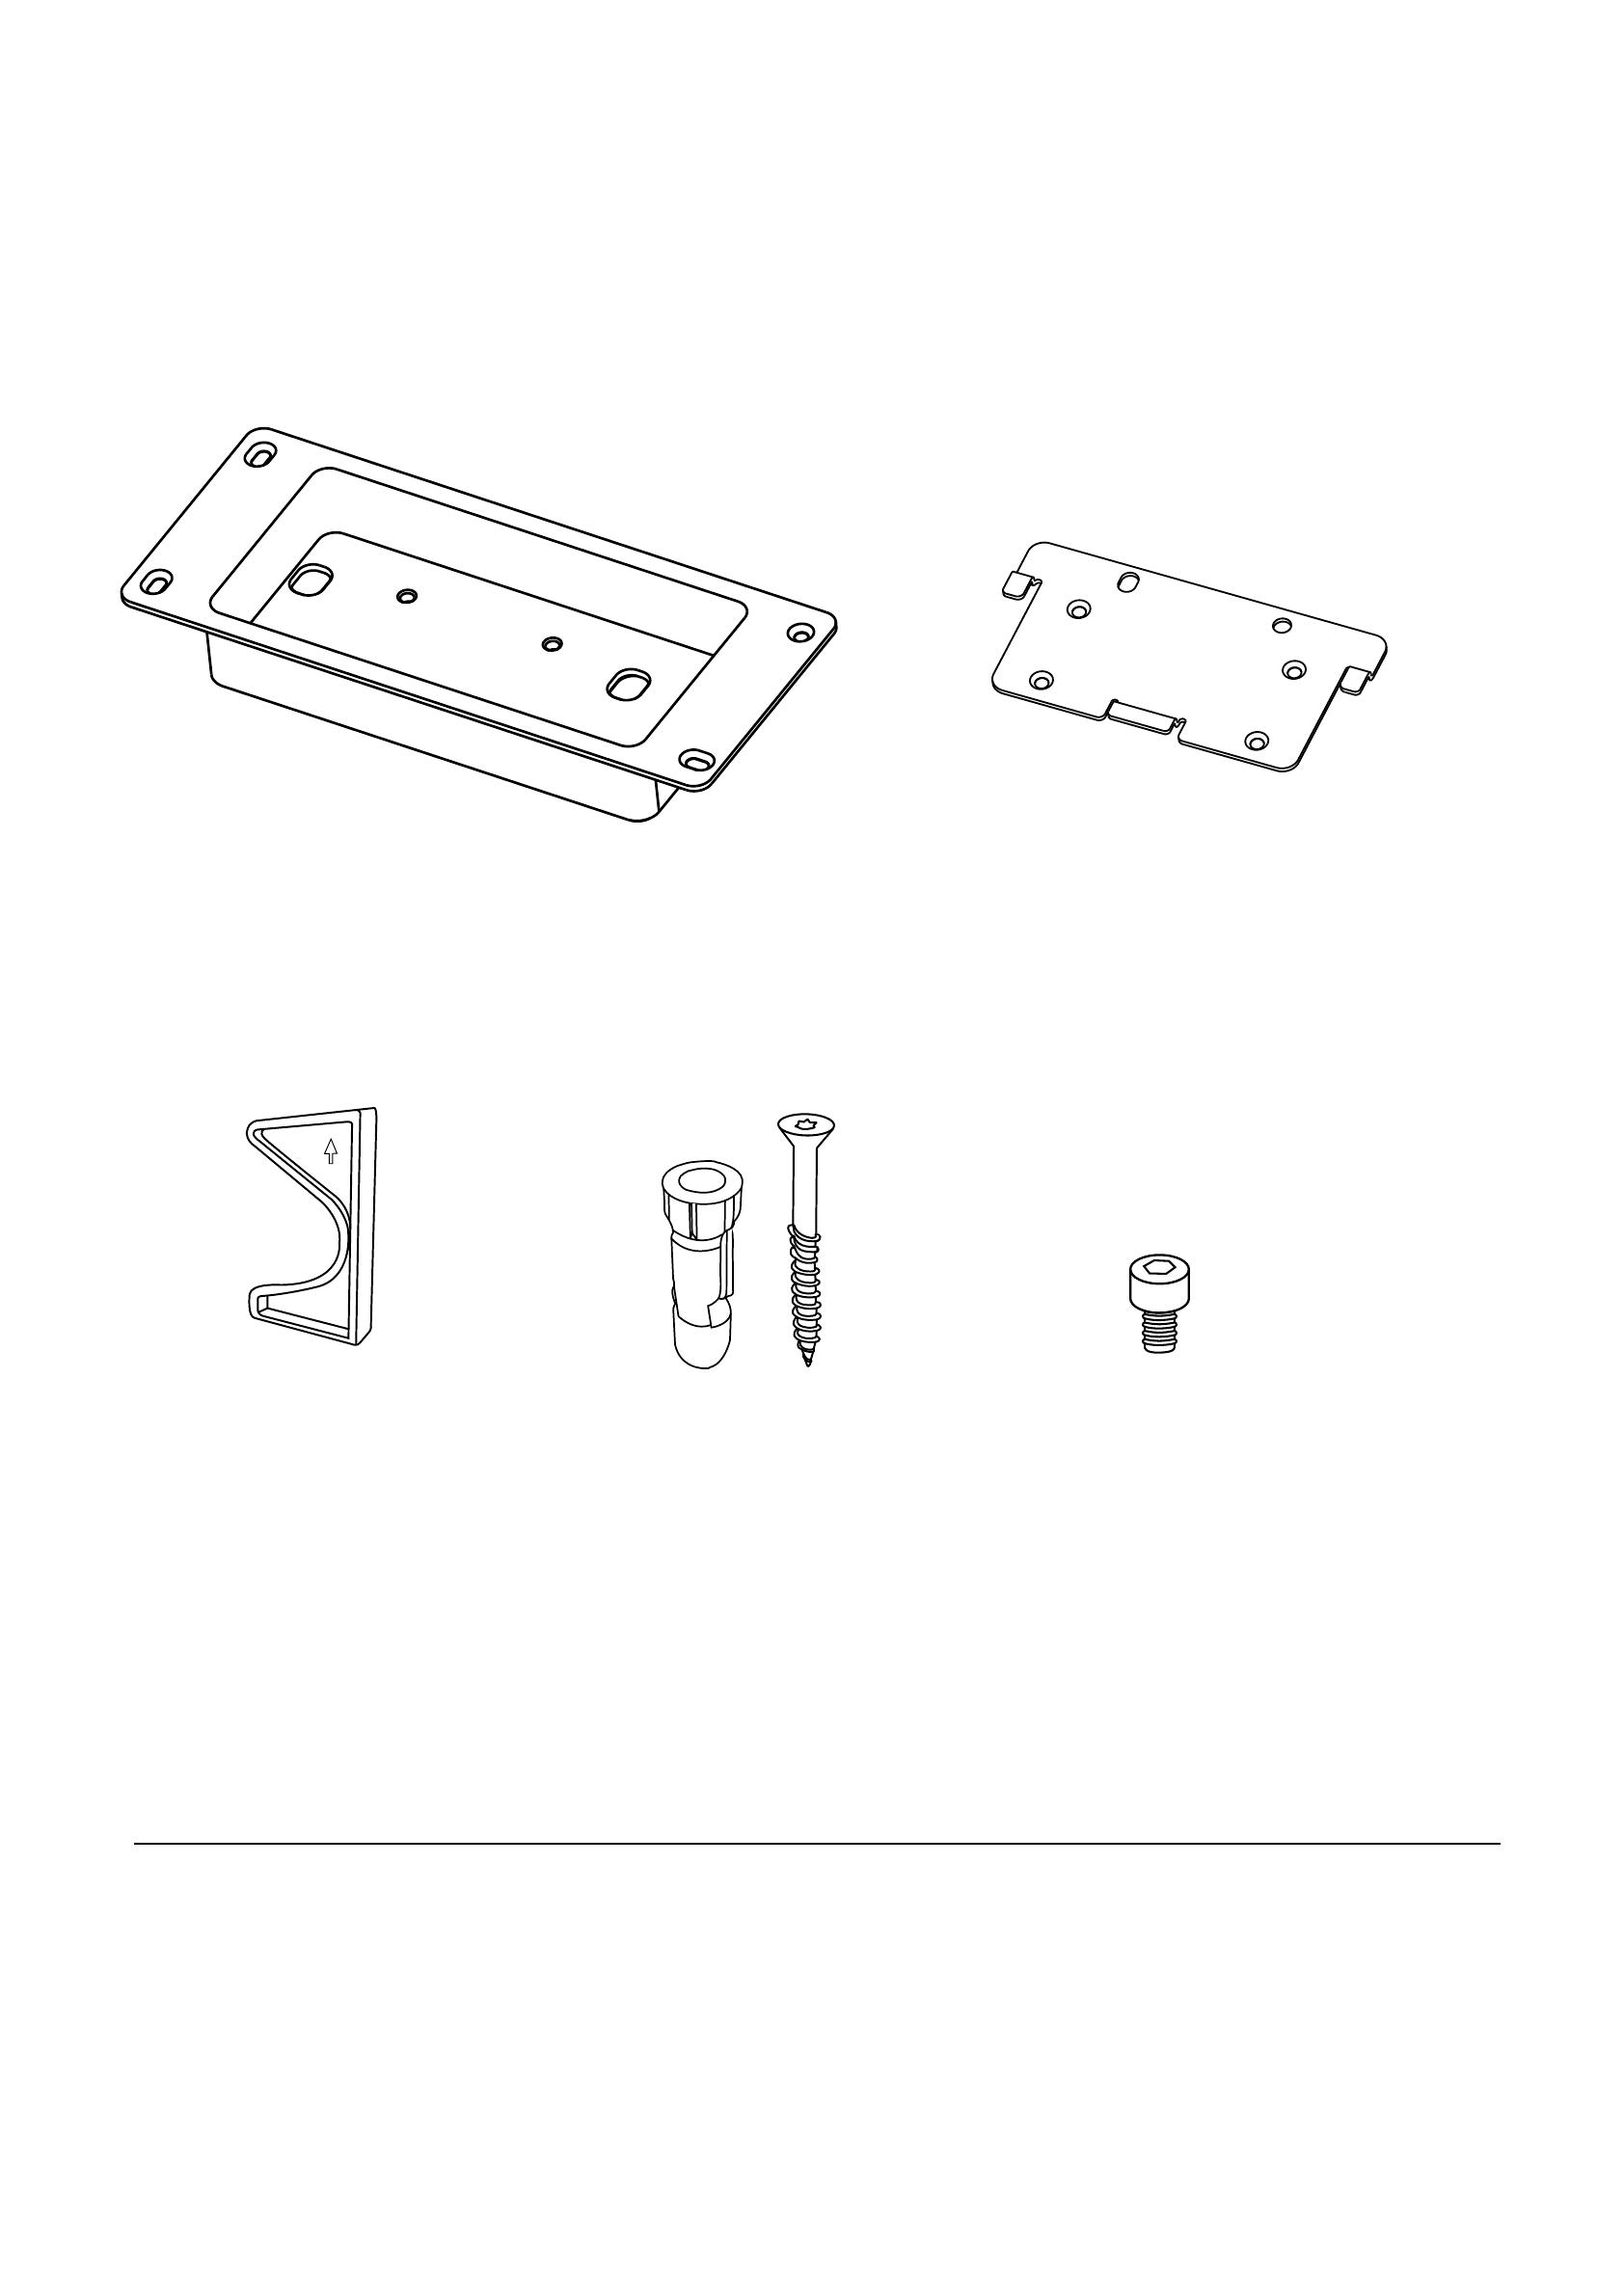
Jabra PanaCast 50 Room System ZR (P50 AU charger & Lenovo ThinkSmart Kit) Assembly Instructions

Type
Assembly Instructions
Recessed Wall Mount
for Jabra PanaCast 50
Wall bracket Mounting plate
Tilt lock Fisher wall plug
5/16 (8mm)
(4 pcs)
M5 x8
(2 pcs)
Disclaimer: Though products can be designed to meet the Americans with Disabilities Act (ADA) guidelines,
the United States federal government does not issue approvals or certify specific products as ADA-com-
pliant, nor does any other body. Jabra does not certify that this product is prima facie compliant with all
aspects of the ADA as the application, placement, and surroundings of the product within the space impact
accessibility and usability. However, following the instructions provided herein may allow the product to
comply with certain ADA standards in eect from time to time.
Cut a hole in the wall. The hole should be a minimum of 3 - 1/8” (8cm)
below the screen.
1
2
3
Mark the wall with drill holes and then drill into the wall using an
5/16” (8mm) drill bit.
Attach the wall bracket to the wall using the supplied screws.
6 - 3/16’’ (157mm)
Width
3 - 1/32
(77mm)
Height
1 - 1/8
(29mm )
Depth
7 - 5/16(186mm)
Width
2 - 7/16
(62mm)
Height
Φ 5/16 (8mm)
Remove the original mounting plate from the Jabra PanaCast 50.
The screws will be reused in Step 5.
Attach the tilt lock and new recessed mounting plate to the Jabra
PanaCast 50. Ensure that the tilt lock is in the unlocked position.
4
5
Plug in the necessary cables.
Attach the Jabra PanaCast 50 to the wall bracket.
If the Jabra PanaCast 50 is installed un-
derneath the screen, ensure the camera
is pointing straight ahead. Move the tilt
lock to the locked position to prevent
the camera from being able to tilt up
and down.
6
7
8
  • Page 1 1
  • Page 2 2
  • Page 3 3
  • Page 4 4

Jabra PanaCast 50 Room System ZR (P50 AU charger & Lenovo ThinkSmart Kit) Assembly Instructions

Type
Assembly Instructions

Ask a question and I''ll find the answer in the document

Finding information in a document is now easier with AI