Page is loading ...

TM
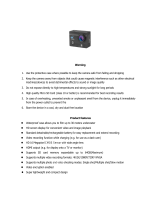
9941 4K Manual
Please read through this user manual before using the product and keep the manual for
future reference. Product appearance and/or specifications are subject to change without
notice. Before using this camera, please insert a micro SD card (class 10 card, no larger than
64GB) into the 9941/9942 Wi-Fi camera. Camera functions will not work without a micro
SD card inserted into the camera. Please note the camera does not include a micro SD card
inside the package, the micro SD card must be purchased separately.
ROX Series by WASPcam
6500 W. Cortland St., Chicago, IL 60707
1 (773) 889-3087
info@waspcam.com

Table of Contents
Preface .......................................................................................................................................................2
Manual Disclaimer ..................................................................................................................................2
Safety Precautions ................................................................................................................................. 2
System Requirements ..........................................................................................................................3
Features .................................................................................................................................................... 4
Camera Diagram .................................................................................................................................... 4
Accessories ...............................................................................................................................................5
Button Functions................................................................................................................................... 6
Camera Functions ................................................................................................................................. 6
Installing the Micro SD Card ............................................................................................................. 6
Battery........................................................................................................................................................7
Switching Camera On and O ..........................................................................................................7
Switching Modes & Changing Settings .........................................................................................7
Camera Modes ........................................................................................................................................8
Video Recording Mode ........................................................................................................................8
Photo Mode ..............................................................................................................................................8
Video Playback Mode ...........................................................................................................................8
Settings Menu ......................................................................................................................................... 9
Downloading the WASPcam ROX App .......................................................................................10
Download from iTunes .......................................................................................................................10
Download by iPhone ............................................................................................................................ 11
Android Smartphone ........................................................................................................................... 11
Using the Wi-Fi ...................................................................................................................................... 11
Connecting to External Devices ..................................................................................................... 12
Playback on HD TV ............................................................................................................................. 12
View Files on PC / MAC ..................................................................................................................... 12
Technical Specifications .................................................................................................................... 12
Copyright ................................................................................................................................................ 13
1

Preface
This product is an action-sports camera tailored to meet the demands of today’s
active lifestyles! This action camera is perfect for vehicle data recording,
photography, outdoor sports, home security, and watersports. It allows you to film
anytime, anywhere.
Manual Disclaimer
Every eort has been made to ensure that the contents of this manual are correct
and up to date. However, no guarantee is made regarding the accuracy of the
contents. The manufacturer reserves the right to change the manual contents and
product specifications without notice.
Safety Precautions
• Do not store the product in dusty, dirty, or sandy areas, as its internal components
may be damaged.
• Do not store the product in hot areas. High temperatures can shorten the life of
electronic devices, damage batteries and warp or melt certain plastics.
• Do not store the product in cold areas. When the product warms up to its normal
temperature, moisture can form inside, which may damage the electronic circuits.
• Do not attempt to open the casing or attempt your own repairs. High-voltage
internal components create the risk of electric shock when exposed.
• Do not use harsh chemicals, cleaning solvents or strong detergents to clean the
product. Wipe the product with a slightly damp soft cloth.
• Do not open the battery cover while an image is being recorded. Doing so will not
only make storage of the current image impossible, it can also corrupt other image
data already stored on the SD card.
• If the product or any of its accessories are not working properly, please contact
WASPcam at (773) 889-3087 or info@waspcam.com. Our sta will assist you and if
necessary, arrange for the product to be repaired or replaced.
• Test for proper operation before using the camera.
• WASPcam is not responsible for any collisions, damage or personal injuries
resulting from the use of the ROX Action Camera.
• WASPcam is not responsible for any legal repercussions from use of the ROX
Action Camera or from the sharing of footage.
WASPcam is not responsible for any property damage or lost/stolen ROX
Action Cameras.
2

System Requirements
The camera requires a computer with the following minimum specifications for4K video
playback:
• Monitor capable of displaying 4K resolution
• 4th Generation Intel® Core ™ processor family / AMD A10-7800 APU
• 8 GB of RAM
• DirectX 9 compatible graphics solution
• Available hard disk space
The camera requires a computer with the following minimum specifications for full HD video
playback:
• Windows® 7 or later / MAC OS X 10.8 or later
• Intel® Core Duo™ / AMD Dual-Core CPU
• 2 GB of RAM
• DirectX 9 compatible graphics solution
• Available hard disk space
3

Features
The camera and its included accessories oer a variety of features and
functions including:
• A water-resistant case that allows you to film underwater up to 98 ft. (30 m)
• Built-in Wi-Fi: Connects camera to Smartphones via WASPcam ROX App
• High definition screen that displays and plays back recorded videos
• Removable battery that is easy to replace with a spare to prolong the recording time of the
camera
• Video recording while charging
• Video recording while battery powered
• HD wide-angle lens
• Supports memory cards up to 64GB maximum storage space, class 10
• Multiple video recording formats: 4K/2.7K/1080P / 720P
• Records video in .MP4 format
• Multiple photo shooting modes: Single shot, Burst, and Continuous
Shooting (Time-lapse)
• Compact size
Camera Diagram
OK
Button
Power /
Mode
Button
Lens
Indicator Light Battery Compartment
Micro USB
Micro SD
Card Slot
Mic
Up/WiFi
Button
Speaker
4
Micro
HDMI Port
Down /
Microphone
Button

5
Accessories
The following items are included in the camera package. If any items are missing or
damaged, contact WASPcam immediately.
• Matte Black Waterproof Camera Casing
• ROX 4K Camera
• Flat / Curved Adhesive Mounts
• Camera Holder
• Camera Holder Clip
• Basic Buckle Mount
• Straight Joint Mounts x3
• Bike Bar Mount
• J-Hook Buckle Mount
• Micro USB Charging Cable
• 3M Stickers x2 / Zip Ties x4
• Tripod Mount
• Tripod Mount Adapter
• Rechargeable Lithium-Ion Battery
• Velcro Straps x3
• 9941 4K Instruction Manual

6
Button Functions
Camera Functions
Installing the Micro SD Card
To insert the SD card
• Find the Micro SD card slot
• Insert the card into the slot (make sure the card is facing the correct way)
• Push the card into the slot until it clicks
**Note – Please use a minimum speed Class 10 card, maximum 64GB storage
capacity. WASPcam recommends a name brand card such as Lexar®, SanDisk®,
Kingston® or Gigastone.
Follow these steps in reverse order to remove the SD card.
**Note - Please ensure that the SD Card is inserted in the correct orientation or you
may damage the SD card and/or SD card reader.
Power/Mode Button Turns the camera on & o.
Change between Video mode, Photo
mode, Playback mode, and settings
menu.
OK Button
OK
Enter and confirm settings in the settings
menu.
Start/stop recording in Video Mode.
Take a photo in Photo Mode.
Up Button
Scroll up through the settings.
Scroll through videos/photos in Playback
Mode.
Hold to enter Wi-Fi mode.
Press to zoom in.
Down Button
Scroll down through the settings.
Scroll through videos/photos in playback
mode.
Hold to turn on/o Mic
Press to zoom out

7
Battery
• Use only the type of battery that came with the camera. Using any other type
of battery may damage the equipment and invalidate the warranty.
• Do not short the battery terminals. The battery could overheat.
• Do not attempt to split or peel the outer casing.
• Remove the battery if the camera is not going to be used for a long time. If the
battery is left unused for more than 3 months, charge the battery before use.
1. Installing and Removing the Battery
• Pull the battery door to release
• Correctly install the battery into the camera as directed by the +/- symbols
• Remove Battery: Open the battery door to take the battery out
2. Charging
• Charging can be done by either connecting the camera to a computer or
USB power adapter
• Charge the camera in a vehicle by connecting it to a USB car charger
• The camera can record video while charging
• The camera will charge even when it’s powered o
Switching Camera On and O
• Press and hold the Power / Mode button for 3 seconds to turn it on/o
Switching Modes & Changing Settings
Switch between video recording, photo, & playback modes and the settings menu by
pressing the Power / Mode button. An icon in the upper left of the screen will show
the current mode.
In the settings menu choose a setting with the Up/Down buttons and select with the
OK button. Press the Power / Mode button to exit the settings menu.

8
Camera Modes
Video Recording Mode
Press OK to start recording. A record icon in the bottom will start to flash. Press OK
again to stop recording. The record icon will disappear.
Video Recording Notes:
Resolution: Higher resolutions result in larger video files.
Loop Recording: When loop recording is turned on video files will be at the specified
length. When the SD card is full the oldest loop recording file(s) will be deleted
automatically so new files can be recorded.
Exposure: In very bright environments set the Exposure Value (EV) as a positive
number. For very dark environments set the EV to a negative number. The larger the
value the greater the exposure value is compensated.
Photo Mode
Press OK to take photos.
Photo Notes:
Exposure: In very bright environments set the Exposure Value (EV) as a positive
number. For very dark environments set the EV to a negative number. The larger the
value the greater the exposure value is compensated.
Playback Mode
Press Up/Down to scroll through the files on the SD card
Press OK to playback the video file
During video playback, long press Up/Down to forward/backward

MENU OPTION SETTINGS
Video Settings
Video Resolution 4K 30FPS / 2.7K 30FPS / 1080 60FPS
/ 1080P 30FPS / 720P 60FPS / 720P
30FPS
Microphone √
Time-lapse O / 0.5s / 1s / 2s / 5s / 10s / 30s / 60s
Loop Recording O / 1minute / 3minutes / 5minutes
Slow Motion
1080 60FPS / 720P 120FPS
Photo Settings
Photo Resolution 16MP / 12MP / 8MP
Timer O / 3s / 5s / 10s / 20s (camera will take
a photo after selected amount of time)
Camera Settings
Exposure +3 +2 +1/ 0 / -1 / -2 / -3 (used to adjust
the amount of light let into the camera
sensor, use positive setting in bright
conditions and negative setting in dark
conditions)
White Balance Auto / Sunny / Cloudy / Incandescent
Light / Fluorescent Light (Helps balance
color in certain lighting to make footage/
images look more natural)
Image Rotation
/ √ (Rotates the image 180°)
Driving Mode / √ (Turns on loop recording, auto re-
cord, and auto shutdown. Camera turns
on and starts recording automatically
when connected to the car and the car is
on)
Light Source Frequency Auto / 50Hz / 60Hz
LED Indicator Light √
Screen Saver O / 10s / 30s / 60s (After a period of
inactivity, the camera’s LCD will turn o
to conserve power. Press OK to wake up
the LCD screen)
Auto Power O O / 1min / 3mins / 5mins (turns camera
o after selected period of inactivity)
Date/Time Stamp / √
Settings Menu
(Default settings in bold.)
Press Up/Down buttons to scroll through the settings and select with the OK button.
Press the Mode button to go back and to exit the menu.
9

System Settings
Language English, French, Dutch, Portuguese,
Polish, Spanish, Italian, Simplified
Chinese, Traditional Chinese, Japanese,
Russian, Korean, Thai, German, Arabic
Date/Time Allows users to set the current date and
time
Beep Sound √
WiFi / √ (Check to enter WiFi mode)
Format YES / NO (formats the SD card and
erases all data from the SD card)
Restore Defaults YES / NO (Resets all settings to the
default values)
Firmware Version Displays camera’s current version
(YYYYMMDD VX.X)
To view the videos/photos on a computer, attach a USB cable to export the videos
and photos onto a computer to play. You can also take the Micro SD card out and
access the files with a card reader.
10
Downloading the WASPcam ROX App
Click iTunes icon to open iTunes.
Click Store to open the iTunes Store.
Enter “WASPcam ROX” into the search
bar. Click download under the WASPcam
ROX Icon.
Once it’s finished the WASPcam ROX
icon will show on your home screen.
Download from iTunes

Using the Wi-Fi
To enter the camera’s Wi-Fi interface, press and hold the up button. You can also
turn the camera Wi-Fi on from the system settings menu. The camera’s LCD screen
will change to a Wi-Fi symbol. Once the Wi-Fi has initialized on the camera, the LCD
screen will show the network name (ssid) and password (pwd) required to connect a
Smartphone to the Wi-Fi.
Step 1: Initialize the Wi-Fi on the camera
Step 2: On a Smartphone, enter the Wi-Fi settings
Step 3: Connect the Smartphone to the ROX camera’s Wi-Fi network
(network name is displayed on the camera’s LCD screen)
Step 4: Enter the password displayed on the cameras LCD screen
Step 5: Wait for the Smartphone to connect to the camera’s Wi-Fi
Step 6: Once Wi-Fi is connected, open the WASPcam ROX App. The app will
connect the Smartphone to the ROX camera
Step 7: Once the connection is successful, the Smartphone will display what the
camera sees on the screen
Step 8: The camera photo/video recording can now be controlled from the
Smartphone
11
Click the App Store icon. Click search
icon.
Click the search field and enter
“WASPcam ROX”, click the search
button.
Click the icon and click download.
Once it’s finished the WASPcam ROX
icon will show on your home screen.
Open the Google Play Store on your
phone.
Enter “WASPcam ROX” into the search
bar and hit search.
Click on the WASPcam ROX icon to view
the app page.
Click the install button to install the
WASPcam ROX to your phone.
Once it’s finished, the WASPcam ROX
icon will appear in your application
menu. .
Download by iPhone
Download to Android Smartphone
WASPcam ROX App

Connecting to External Devices
Playback on HD TV
Turn the camera on, connect the HDMI port in the camera to the TV via an HDMI
cable (not included) and choose HDMI mode on the TV. The LCD screen on the
camera will turn o automatically and now all operations and functions can be seen
on the TV.
View Files on PC / MAC
Connect the camera to the computer using the included USB cable. The LCD Screen
displays USB Mode and Charging Mode. Press the up/down buttons to select USB
Mode and the OK button to confirm. Click on the camera drive and the subfolder
DCIM to view videos and photos.
12
Screen 2 inch LCD Screen
Lens 170°A + wide-angle lens
Language Options English / French / Dutch / Portuguese,
Polish / Spanish / Italian / Simplified
Chinese / Traditional Chinese / Japanese
/ Russian / Korean / Thai / German /
Arabic
Video Resolution 4K 30FPS / 2.7K 30FPS / 1080 60FPS
/ 1080P 30FPS/ 720P 60FPS / 720P
30FPS
Video Format .MP4
Compressed Format of Videos H.264
Resolution of Photos 16M / 12M / 8M
Storage MicroSD (Class 10 – max 64GB)
Shooting Modes Single Shot / Self-timer (3s / 5s / 10s /
20s) Continuous shooting (Time-lapse)
Power Source Micro USB, 5V 250mA
Battery Capacity 900mAh
Recording Time 1080P / About 70 minutes
Charging Time About 3 hours
Dimensions 29.8x59.2x41mm
Technical Specifications

13
Copyright
© Copyright 2017.
All rights reserved. No part of this publication may be reproduced, transmitted, tran-
scribed, stored in a retrieval system or translated into any language or computer lan-
guage, in any form or by any means, electronic, mechanical, magnetic, optical, manu-
al or otherwise, without the prior written permission of the Cobra Electronics.
© 2017 Cobra Electronics Corporation, 6500 W Cortland Street, Chicago, IL 60707
Cobra, the snake design, ROX logo are proprietary trademarks of Cobra Electronics
Corporation. All other trademarks and trade names are those of their respective own-
ers.
Cobra Electronics
(773) 889-3087
Apple, the Apple logo, iPhone, and iPod touch are trademarks of Apple Inc., regis-
tered in the U.S. and other countries. App Store is a service mark of Apple Inc.
Android, Google Play and the Google Play logo are trademarks of Google Inc.
HDMI, the HDMI logo, and High-Definition Multimedia Interface are trademarks or
registered trademarks of HDMI Licensing, LLC in the United States and/or other coun-
tries.
SanDisk, the SanDisk logo, Store Your World in Ours CompactFlash, Cruzer, Image-
Mate RescuePR SanDisk Extreme and SanDisk Ultra are trademarks of SanDisk Cor-
poration. © 2006 SanDisk Corporation All rights reserved.
Lexar is a trademark of Micron Technology, Inc.
Kingston is a trademark of Kingston Technology Corporation.
/