Page is loading ...

NEO STREAM HD CAMERA
WITH WI-FI
User Manual
QC-8077
Capture all of your adventures in amazing HD
quality with Wi-Fi streaming to your smart
device. Full HD at up to 60fps, or 8MP photos.
Take it diving down to 30m below, or hiking at
2000m above, it’ll capture everything from first
steps to first summits. Want more information?
Visit movii.com.au/neostream

2
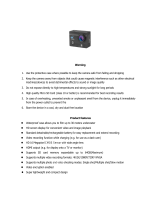
WARNINGS
• Handle it with care - do not drop the camera.
• Do not expose the camera to strong magnetic
objects, such as magnets and electrical motors.
Strong magnetic fields may cause the camera to
breakdown or cause image/sound damage.
• Avoid exposing the camera to strong radio waves.
• Never expose the unit to high temperatures, or
direct sunlight for prolonged periods.
• Always choose branded microSD cards for use
with this camera. Generic cards may impair
performance and cause record/playback issues.
• Do not place microSD cards near strong magnetic
objects to avoid data loss.
• In the case of overheating, smoke, or an unpleasant
smell in the process of charging, unplug your
device immediately to prevent a fire hazard.
• While the unit is charging, keep the product out
of the reach of children. The charging cord may
present an accidental choking/suocation or
electric shock hazard for children.
• Store the unit in a cool, dry and dust-proof place.

3
PRODUCT FEATURES
• Water-resistant casing (up to 30m)
• Colour LCD for video & photo playback
• HD wide angle lens
• HDMI output
• Web camera
• Records videos while charging
• Supports storage cards up to 64GB maximum
• Multiple video recording formats: 2k, 1080p and
720p
• Supports MP4 recording format
• Multiple photo shooting modes: single shot,
self-timer (2s, 5s & 10s) and continuous
• Video encryption enabled
• Super lightweight and compact
• Replaceable battery

4
OPERATION
microSD
Card Slot
Start / Stop Recording &
Take Photo Button
Power / Recording
Indicators
Battery Cover /
Compartment
Micro
USB Port
Mini HDMI
Output
Power / Mode Button
Up & Wifi
Button
LCD Screen
Down
Button

5
Inserting a microSD card
Please choose a branded microSD card as neutral
cards are not guaranteed to work normally. Format
it on your computer before use. Insert the card into
the card slot on the side of the camera.
Installing and removing batteries
The camera comes with a 3.7V Li-ion battery
included. The battery compartment is located on
the bottom of the camera. To replace the battery,
slide the release lever and the battery compartment
cover will pop up slightly. Remove the cover and lift
the battery pull tab. Carefully remove the battery
from the compartment. Place a new battery in the
compartment and replace the cover.
Charging your camera
You can charge your camera by either connecting
it to your computer (via the USB cable included)
or charging from your car’s cigarette lighter socket
(using the car charger cable also included).
You can continue to record video while charging
your camera. Simply switch to “Vehicle-mounted
Mode” from the menu.

6
Turning your camera ON/OFF
Press and hold the POWER/MODE button for
3-5secs to turn the camera on and o.
Switching between modes
Switch between video recording, photo shooting,
slow motion, timer, playback and the menu by
pressing the POWER/MODE button until you reach
the desired mode.
Recording video
Switch to video recording mode. A video icon will
appear in the upper left corner of the screen. Press
the OK button on the top of the camera to start
recording and a red record icon will flash at the
bottom of the screen. Press the OK button to stop
recording.
Taking photos
Switch to photo shooting mode. A camera icon
will appear in the upper left corner of the screen.
Press the OK button to take photos. Shooting
options include single shot, self-timer (2s, 5s & 10s)
and continuous.

7
Slow motion mode
Switch to slow motion mode. A slow motion icon
will appear at the upper left corner of the screen.
Press the OK button on the top of the camera to
start recording in slow motion and a red record icon
will flash at the bottom of the screen. Press the OK
button to stop recording.
Time-lapse mode
Switch to time-lapse mode by pressing the POWER/
MODE button until you reach menu mode. Press
the OK button to select menu mode. Using the up
and down arrow buttons on the side of the camera,
navigate to the “time-lapse” menu selection and
select a timing (0.5s/1s/2s/5s/10s/30s/60s). Press
the OK button and navigate back to video mode. A
timer icon will appear at the bottom left corner
of the screen. Press the OK button and the camera
will then automatically take photos at the timing
you have selected. You can then compile the photos
into a time-lapse on your computer after exporting.
To turn o time-lapse mode, navigate back to the
menu and select “close”.

8
Exporting video/photos
Switch to playback mode. After you are finished
recording, connect the camera to your computer
via the USB cable included and export your photos/
videos to your computer. Alternatively, you can
remove the microSD card from the camera and
export the photos/video to you computer using a
card reader.
Camera Wi-Fi App
1. On your iPhone® or iPad® go the the App Store.
Search for “XDV” and download the XDV app.
2. Turn on your camera and navigate to menu mode.
Select “Wi-Fi” from the menu. The SSID and
WPA2 password for the camera’s Wi-Fi signal will
show on the screen.
3. On your iPhone® or iPad®, go to Settings > Wi-Fi.
Select the SSID and enter the WPA2 password
(123456789) showing on your camera screen.
Enter the WPA2 password showing on your
camera’s screen.
4. Open the XDV app and select the SSID from the
menu to connect.
5. You now have full remote control over your
camera from your iPhone® or iPad®. You can take
photos, video and slow motion footage using

9
SET-UP OPTIONS
Bike Mount
Belt Clip
Car Mount
your device as the remote control, as well as store
media for oine playback.

10
LCD 2.0LTPS
Video Resolution 3840 x 2160 @ 30fps (Interpolated)
2704 x 1524 @ 30fps (Interpolated)
1920 x 1080 @ 60fps / 30fps
1280 x 720 @ 120fps / 60fps
Video Sound ON/OFF
Time-lapse OFF/0.5S/1S/2S/5S/10S/30S/60S
Loop Recording OFF/2mins/3mins/5mins
Slow Motion 1080P@60FPS/720P@120FPS
Language Options English/German/French/Spanish/
Italian/Portuguese/Chinese Traditional
& Simplified/Japanese/Russian
Video Format MP4 (H.264 Compressed)
Photo Resolution 8 megapixel
Storage MicroSD up to 64GB (Class 10)
Shooting Mode Single Shot, Self-timer (2s/5s/10s) &
Continuous
USB Interface USB 2.0
Power Source Interface 5VDC @ 1A
Battery Capacity 900mAh
SPECIFICATIONS

11
Battery Life Up to 1.5hrs
Charging Time 3hrs (approx.)
Operating System (OS) Windows XP/Vista or above, Win7/8/10
& Mac OS
Dimensions 77(W) x 43(D) x 65(H)mm (with case)
59(W) x 31(D) x 41(H)mm (without
case)
SPECIFICATIONS (CONTINUED)

12
BOX CONTENTS
HD Camera USB Cable USB Cable
Shield Case
Adhesive Base Plates
Remote Control
Helmet Straps
Mount Joiner
Handle Bar Mount
Suction Cup Mount
Cable Ties
Safety Cable
Waterproof Case

DISTRIBUTED BY:
TechBrands by Electus Distribution Pty. Ltd.
320 Victoria Rd, Rydalmere
NSW 2116 Australia
Ph: 1300 738 555
Int’l: +61 2 8832 3200
Fax: 1300 738 500
www.techbrands.com
Made in China
/