Page is loading ...

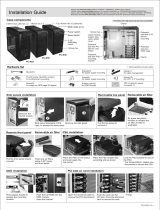
Motherboard installation
C50.C3900.00
Loose screws, remove the linker bar,
and install the motherboard.
CD-ROM / HDD
module
Multi-media wireless
70mm fan
70mm fan
POWER SW
RESET SW
POWER
LED
H.D.D LED
SPEAKER
WHITE
GRAY
WHITE
BLUE
WHITE
NC
GREEN
WHITE
ORANGE
BLACK
NC
NC
RED
GROUND
PWR
GROUND
Reset
PLED-
PLED+
IDE_LED-
IDE_LED+
Speaker
+5V
Front panel cable
installation guide
Please visit www.lian-li.com for FRANCE / GERMANY / SPAIN user's manual
Veuillez visiter www.lian-li.com pour le manuel d’installation en FRANÇAIS/ALLEMAND/ESPAGNOL.
Visite el sitio Web www.lian-li.com para obtener el manual del usuario en FRANCÉS ALEMÁN Y ESPAÑOL
Besuchen Sie bitte www.lian-li.com für die französische/ deutsche/ spanische Gebrauchsanleitung
Installation Guide
Removable the HDD/
CD-ROM module
2. Slide it backward to release.
CD-ROM installation guide
‧Slide the CD-ROM into the CD-ROM cage
‧Located screws on both sides
If push bottom of DVD or CD-Rom are not
touched when you push bezel's bottom,
then you should take a rubber to stick on
the push bottom of DVD or CD-ROM.
Please remove the tary bezel for the optical drive with larger tray opening
HDD installation (2)
1. Fasten the HDD screws with
anti-vibration rubber rings to the
HDD.
2. Insert the HDD into the HDD cage with the
anti-vibration kit, you may add extra screw
to secure the HDD.
HDD installation (1)
1. Insert rubber ring.
2. Fasten screw to secure the HDD.
1
2
Screw (10)
to fix drive and motherboard
Cable tie (2)
for cable
Thumb screw (1)
spare part
Buzzer wire (1)
Thumb screw (1)
for HDD extra fixing
Screw (4)
to fix HDD
Thumb screw (4)
to fix HDD
Rubber ring (8)
for HDD
Clam (1)
to secure wire
Installation guide CD (1)
Remote controller (1) Rubber (2)
Screw(2)

Multi-media wireless installation
1
12
1
10
1
2
12
1
13
24
20
11
10
1
2
1
4
3
1
Connect with MB
Connect
with PSU
Connect with P5 (Purple)
Connect with P6 (Grey)
78
2
1
1
5
1
1
Yellow+
Black, Blue-
Yellow+
Black, Blue-
Black-
Blue+
P5 (Purple)
P6 (Grey)
R S
T
SE
E
W
1
2
3
4
White
Blue
White,
Grey,
White
Grey
Connect with MB
Grey connect power SW+
R
WPO
WE
S
/

