Page is loading ...

www.barretteoutdoorliving.com
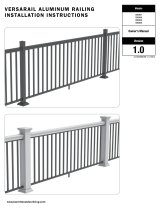
VERSARAIL ALUMINUM STAIR RAILING
INSTALLATION INSTRUCTIONS
73013153
73013154
73013155
73013156
Models
Owner's Manual
Version
1.0
1.0
VERSASTAIR_BOM V1 3/2012
VERSASTAIR_BOM V1 3/2012

*2 PERSON INSTALLATION RECOMMENDED
BEFORE YOU BEGIN:
It is the responsibility of the installer to meet and/or exceed all code and safety requirements, and to obtain all required building
permits. The deck and railing installer should determine and implement appropriate installation techniques for each installation.
Barrette Outdoor Living and its distributors shall not be held liable for improper or unsafe installations.
VERSARAIL ALUMINUM STAIR RAILING
INSTALLATION INSTRUCTIONS
6' Stair Kits Include:
(2) Rails
(1) Top Rail Profi le
(2) Locking Strips
(15) Balusters
(1) Stair Bracket Kit with Screws
• (2 Top Rail Brackets)
• (2 Bottom Rail Brackets)
Bracket
Bracket
Bracket
Bracket
Bracket
Bracket
Balusters
Balusters
Rail
Locking Strip
Base Mount
Base Mount
Base Trim
Base Trim
Post
Post
Post Top
Post Top
Top Rail Profi le
Rail
Locking Strip

STEP 1.
STEP 2.
STEP 3.
Install Aluminum Post and Base Trim
1.1) Trim Post sleeve to desired length. In most cases, the post at
the bottom of the stairs will need to be longer than the post
on the deck, to accomodate stair angles. (41" bottom stair post
is recommended for a 36" fi nished rail height. 47" bottom stair
post is recommended for a 42" fi nished rail height.)
1.2) Make sure the top and bottom posts for stairs are installed so
the base trims are installed at the nose of each tread.
1.3) Check to ensure the posts are plumb.
Closely follow post installation instructions.
Prepare the bottom rail
2.1) Place a temporary 5/4" deck board on top of stair
noses for proper spacing underneath rails.
Ridges
3.1
3.4
3.6
3.2-3.3
3.2-3.3
Assemble your stair section
3.1) Place top and bottom rail on a smooth, fl at and clean surface. Then orient the top and bottom rails so that the "ridges" inside the rails are in the same
direction and facing up.
3.2) Thread all pickets through holes in rails being careful to have the "hole" in each picket going in the same direction, and proper direction. (Holes should
face the rail ridges.)
3.3) Make sure pickets threaded through rails are about 2" above rail and in-line with each other.
3.4) Snap in bumps from plastic locking strip into holes of the pickets for both top and bottom rails. Make sure arrows on locking strips face rails.
3.5) Push fi rst picket into bottom rail, followed by the second and third, until the last picket. Then repeat for top rail. The engagement between the rails,
pickets and locking strip is about 75% at this point.
3.6) Stand up rail section and fully lock the pickets into the rails. Place one foot on the top of the bottom rail, between second and third picket while at
the same time placing a hand under the bottom of the top rail between second and third picket. Push with foot and pull with hand until locking is
complete (You should hear a snap). Repeat this process for the middle and end of the panel. All the pickets should now be "locked" into the top and
bottom rails. (NOTE: If a snap is not heard or felt, use a rubber mallet to tap underneath of top rail to ensure a full connection.)
3.7) If the aluminum rail is to be installed with no vinyl topper line up hand rail profi le on top of the top rail. Press it down onto the top rail so it fi ts snug.
Temporary
deck board
2.1

Slide bracket covers on ends of both top
and bottom rails. (NOTE: Bracket covers are
not used on the top rail when a rail topper
is installed.)
3.8
STEP 3. (CONTINUED)
STEP 4.
Size/Cut rails to length
4.1) Place assembled stair section onto installed temporary deck board and clamp stair section
to installed posts.
4.2) Remove temporary spacer board.
4.3) Hold stair bracket (both bracket and base) against the installed stair posts and mark end of
bracket (Repeat in all four bracket locations).
4.4) While holding brackets and bases on posts, mark base holes on post for pre-drill locations
(repeat in all four bracket locations).
4.5) Remove clamped stair section from posts.
Locate your previously marked lines on your stair rail section, add 1" from your
predetermined marks for bracket depth and cut all four marks at a 90° angle.
Add 1"
4.3
4.1
4.4
4.5

5.5
STEP 5.
STEP 6.
Install Stair Rail section
5.1) Using previous marks on posts (made in step 4.4)
pre-drill with 5/32" drill bit in all locations.
5.2) Attach all four bases to posts with #10x3/4" fl at
head screws provided.
5.3) Slide brackets onto ends of assembled stair rail
section in all four locations.
5.4) Slide entire stair rail section with brackets in
between installed stair rail posts and line up with
installed bases.
5.5) While holding stair section with brackets in
between already installed bases, pre-drill through
side holes on plates into back leg of brackets with
9/32" drill bit and connect brackets to bases with
1/4" sex bolts provided.
Installing Elite Composicore Rail Topper
If using Elite Composicore rail toppers as an add-on
to your aluminum rail sections follow these next
steps to fi nish your installation.
6.1) Hold your Composicore stair rail next to the
completely installed aluminum stair section.
6.2) At the edge of each post (entire distance from
post to post) trace the exact angle of the stair
installation onto the Elite Composicore rail.
6.3) Using a chopsaw cut the Elite composicore rail to
the exact line traced in Step 6.2.
6.4) Attach Elite Composicore rail to the already
installed aluminum stair rail section. Place the cut
Composicore railing over the alumiinum top rail,
fi tting between posts.
6.5) Then, on both sides and both ends of railing,
pre-drill through side of Composicore railing with
1/8" drill bit into the aluminum railing. Attach
Composicore topper to aluminum railing stair
section with four 3/4" color matched screws
provided.
5.4
5.2
6.1
6.2

www.barretteoutdoorliving.com
VERSASTAIR_BOM V1 3/2012
/


