Page is loading ...

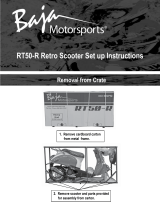
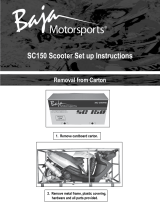
1. Removecardboardcarton
from metal frame.
2. Removewire strapsand foam
covering from handlebars.
3. Remove boltsholding metal
frame to rear of scooter.
4. Remove axle bolt holding metal
frame to front forks.

5. Removemetalframe and parts
includedfor assembly.
QTY1
QTY4
Frontfender Frontwheel
Frontwheelspacer
QTY1

Partslistedbelowfoundunderseat
Mirrors
ManufacturerCertificate
of Origin
OwnersManual
Floorboardcover/mat
Plasticvin cover
ToolKit Battery Box

Axle bolt
Alignmentgroove
on frontfork
.
Speedsensor
Alignspeedsensorbetween
front wheeland front fork.
Alignmenttab on
speedsensor
Frontwheel
spacer
.
Placefront wheel spacerbetweendisc
brakeandfork onaxle bolt.Attachfront
wheelwithaxle boltprovided.
Torqueto 33ft.lbs.
Spacer
.
Removebrakecaliperspacer
beforeattachingbrakecaliperto
front wheel usingboltsprovided.

Handlebar stem
9. Attach handlebar assembly to
stem using bolt provided.
Nut
Bolt
Nut

10. Attach front fender. Lineuptabsof fender
withslotsonscooter.Securewithfour philliphead
screwsand one phillipheadboltandwasher.
11. Attach leftand rightmirrors
to handlebars.

Battery located in
floorboard under mat.
12. Refer to battery section of
owners manual for correctinstallation
and chargingof battery.
The following procedureis very dangerousand should be performedwith utmostcare and attention. Wear
protective eyewear,rubber gloves,and havewater availableshould electrolyte come in contactwith skin or
eyes. KEEPALL CHILDRENAWAYFROM THEAREAWHILE THIS PROCEDUREIS BEING PERFORMED.
POISON - CAUSES SEVERE BURNS
Contains sulfuric acid.
Avoid contactwith skin, eyes, or clothing
Toprevent accidents, rinse empty container with water.
ANTIDOTE:
External- flush with water
Internal- Call physicianimmediately.Drink large quantities of water ormilk.
Followwith milk of magnesia, beateneggs or vegetable.
Eyes- Flushwith water for 15minutes and get promptmedicalattention.
KEEPOUT OF REACH OF CHILDREN.

Note:The followingpageisforvehicleswith battery'scontainingseparateelectrolytepack.Most
battery'swill comewith theelectrolytealreadysealedintothe battery.
Preparingthe battery:
Placebatteryonlevelsurface.Removesealingtape
from top.(seefigure20)
Takethe electrolytecontainerout ofthe plasticbag.
Placeelectrolytecontainerupsidedownwiththe
sealedsilvermouthsof theelectrolytebottlesinline
withthesix fillerholesof the battery.(seefigure21)
Pushthe containerdownstronglyenoughto breakthe
silverseals.
As electrolytestartsflowinginto battery,air bubbles
will comeupfrom themouthsof the plasticelectrolyte
bottles.
Leavebottlesupsidedownin batteryholesuntil
electrolyteiscompletelydrained.
Neverleavechildrenunattendedaroundbattery.
If air bubblesceaseto float to the topof theelectrolyte
bottles,tap lightlyontop.
DO NOTremovecontainerfrom batterywhile it is
draining.
Nevercutor pierceelectrolytecontainer.
Afterall theelectrolytehasdrainedfrom the bottles
intothe battery,pullplasticelectrolytebottlesgently
outof the battery.
Discardemptyelectrolytebottlesinawaste areathat
is inaccessibleto childrenand animals.
Afterfillinglet batterystandfor at least30 minutes
beforecharging.Thisallowsthe electrolyteto
penetrateplatesfor optimumperformanceand ensures
longerbatterylife.
After30 minutesthe batteryis readyfor its initial
charge.Placecapstriplooselyoverthe fillingholesas
showninthe picture.(seefigure22)
Figure20
Figure21
Figure22

Howto InitiallyChargethe battery:
1. Connectthe redpositive(+) cableto the redpositive(+)
poleof thebattery.
(seefigure23)
2. Connectthe blacknegative(-) cableto the black
negative(-) poleof the battery.(seefigure24)
Note:The red positive(+)cablehasa largerdiameter
thanthe blacknegative(-) cable.
.
Chargingrate:Chargebattery@0.7Amps for
5 ~ 10 hours.
• Afterchargingiscomplete,pressdownfirmlywith
bothhandsto seatthe caps.(Do not poundor
hammer.)The batteryisnowsealed.(seefigure25)
• Locatebatterycompartmentonscooter. The
batterycompartmentis locatedunderthefloorboard.
(seefigure26)
• Attachredpositive(+)cableto positive(+)terminal
on battery. Thenattachblacknegative(-)cableto
negative(-)terminalon battery.
Figure23
Figure24
NEVERREMOVETHESTRIPOFCAPS
NORADDANYWATEROR ELECTROLYTE.
Figure25
Figure26

13. Fill engine with correct amount of oil. Refer
to owners manual for oil typesand quantity.
14. Fillgastankasspecifiedinownersmanual. I
Oil Plug.
15. Referto ownersmanualfor proper
startinginstructions.
ATTENTION:Side kickstandmustbeplaced
in uprightpositionin orderto startengine.
!!WARNING!!
Thisenginemaybeshippedwith packingoil
in it.Thisoil shouldbe drainedand replaced
with new oilas describedintheowners
manual.Neverattemptto startenginewith-
outfirstreplacingthe engineoilwiththe
properamountand gradeas describedin
theownersmanual.
/


