F02

HARFO F02 User manual

  • Hello! I am an AI chatbot trained to assist you with the HARFO F02 User manual. I’ve already reviewed the document and can help you find the information you need or explain it in simple terms. Just ask your questions, and providing more details will help me assist you more effectively!
F02 全自动闭锁说明书
Deadbolt with Fingerprint & Keypad
Model No.: F02
Components list
Please check the above components carefully to make sure all items have been
received. If any items are missing, please contact Customer Service (See page for
contact information).
Please read this manual carefully before installing and operating!
Tools Required
(1) Phillips screwdriver
(2) Tape measure
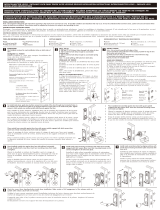
Installation Guide
1. Check The Doors Dimension
1Measure to confirm the thickness of the door is between 1-3/8” and 2-1/8”
(35~54mm).
2Measure to confirm the diameter of the hole in the door is 2-1/8” (54mm).
3Measure to confirm the backset (as shown below) is either 2-3/8” (60mm)
or 2-3/4”(70mm).
4Measure to confirm the diameter of the hole in the door edge is 1”
(25mm).
Spindle
Knob
2. Install Deadbolt and Strike
1Set the Deadbolt backset to 60mm(2-3/8”) or 70mm(2-3/4”) to fit your
door hole.
2Insert the Deadbolt into the door hole, and tighten Screw A to fix the blot.
Install Striker Box and Striker Plate also with Screw A into the door frame.
3. Install Exterior Panel
1Keep the Deadbolt retracted and the Spindle of the Exterior Panel
horizontal, install the Exterior Panel by aligning the Spindle with the hole of the
Deadbolt.
2Make sure the cable go through the hole of the door under the Deadbolt.
4. Install Interior Panel
1Route the cable through the hole on the lower side of
Striker Box
Striker Plate
the Interior mounting plate.
2Secure the Interior mounting plate with Screw B.
3For right-hinged doors, keep the knob in a horizontal position; For
left-hinged doors, keep the knob in a vertical position before moving to the next
step.
(Right-hinged doors) (Knob in a horizontal position)
(Left-hinged doors) (Knob in a vertical position)
4Insert the connector of the cable into the socket on the Interior panel
firmly, put the excess wire into the door, and secure the Interior panel with the
Interior mounting plate together with 3 Screw C.
5. Install Batteries
1Insert 4 AA batteries and install battery cover.
硬件配置
项 目
参 数
备 注
键盘
8 路触摸键盘
休眠状态#键为门铃键
键盘灯
8 路白色 LED 灯
电池
4 节 5 号碱性干电池
客供
指纹识别
半导体带触摸唤醒 带灯蓝/绿/红三色
板载
蓝牙连接
涂鸦智能 APP
蓝牙联网
声音提示
前喇叭,英文,音量可调
设置按钮
2 个机械按键,放置于后面板
功能键、设置
电池电量检测
电池电量低,本地语音提示
应急供电
Type-C
5.软件配置
5.1 用户存储容量
项目
参数
普通用户
指纹
100
(编号从 51 开始)
涂鸦家庭成员授权为普通用户
密码
50
(编号从 1开始)
涂鸦家庭成员授权为普通用户
备注
①密 码 为 6-10 位 数 字 密 码
密码防窥,可在密码前后输入随机数,限制 20 位;
③临 时 密 码 为 动 11 位 数 字 密 码 , 不 可 用虚 位 密 码 ;
5.2 功能配
项目
参数
报警形式
备注
试错锁定报警
2 分钟内连续 5 次输入错误的用户信息开启报
警,语音播报“系统已锁定”,系统锁定 120s
败 3 次
失败 5 次报警锁定
远 程 开 锁 可 以
解除
低压报警
低于 4.8±0.2V 报警,语音播报“电量不足请更换电池”
初始化模式
任意指纹都可以开锁,初始化密码 012345 开锁
操作超时休眠
动态调整,无响应 12 秒后自动休眠
设置键
①设置键长5秒为初始化;
② 初 始 化 下 点按 开 锁 键 , 更 改 开门 方 向
功能键
①点按关锁
② 关锁后长按反锁,管理员开锁一次/门内开锁一次解除反锁
老化模式
初始化状态开锁后按着指纹 10 秒进入老化模式,再次按指纹/断电退出老化(老化
模式下关闭广播,禁止联网
门铃
亮屏状态下#”键为数字键;
蓝牙 OTA 升级
涂鸦 APP,设备信息中版本升级
性能指标
功能/性能
参 数
备 注
工作电压
4.6-6.4V
标称电压 6V
报警电压
4.8±0.2V
①电池电量检测低,本地语音提示
②低电压报警后开锁次数 50 次以上
静态功耗
平均 110 uA(微安)
①测量方法:长时间待机功耗积分
动态功耗
≤200 mA(毫安)
工作温度
-25~+70
符合《GA374-2019 标准》
存储温度
-40℃~+85℃
湿度要求
<93% RH
静电防护
接触+/-8kV,空气+/-15kV
5.4 初始化操作
6. 操作流程
6.1 基本功能操作
(一)初始化功能
① 任意指纹开锁;
初始化密码 012345 开锁
(二)开锁键
① 点按关锁;
② 关锁后长按反锁,管理员开锁一次/门内开锁一次解除反锁;
(三)设置键
长按 5 秒进行初始化;
② 初始化下点按按键,更改开门方向
6.2 功能说明
①蓝牙为广播式;必须先连接蓝牙,功能设置都只能在 APP 上操作。
②出厂设置状态下是语音播报模式;
③添加指纹时锁端有语音提示
④在 APP 上可操作开启/关闭语音模式;
⑤低电压时,开锁每次都语音提示低电报警;
7. APP 联网说明
7.1 联网说
操作方法:初始化状态下蓝牙为广播式,自动进入配网模式
手机开启、下载并打开涂鸦智能”APP 操作如下
自动发现:添加设备→自动发现→找到设备→开始连接→添加成功
手动添加添加设备→安防监控→智能门锁→门锁(蓝牙)→开始连接→添加
成功
自动发现说明
手动添加说明
7.2 功能操作
主要功能:管理用户、读取开锁记录获取信息列表、获取电池电量、获取门锁私密模式
状态、获取报警信息、获取临时密码、远程开锁远程操作进入添加指纹菜单、设置门锁
量、设置自动关锁时间、蓝牙 OTA 升级
①涂鸦 APP 家庭管理中,设置家庭成员管理员/普通用户身份;
②反锁模式下,只有家庭管理员可开锁
③添加指纹时锁端有语音提示
④添加密码为 6-10 位密码,不能添加连号或同号密码
⑤远程开锁可解除试错告警;
查看设备高级信息
功能设置项;
设备蓝牙 OTA
查看反锁状态、门锁开关状
查看门锁日志(读取开锁记录、用户添加/删除记
录、读取报警信息、读取音量设置记录)
①管理家庭成员身份 ② 添加/删除指纹、密码
设置门锁联动他智能设备、涂鸦 APP 端通
设置门锁音量大小、设置自动关锁时间
滑动操作远程开锁
获取动态临时密码
This device complies with Part 15 of the FCC Rules. Operation is subject to the following two conditions: (1) this device may not
cause harmful interference, and (2) this device must accept any interference received, including interference that may cause
undesired operation
NOTE: This equipment has been tested and found to comply with the limits for a Class B digital device, pursuant to Part 15 of
the FCC Rules. These limits are designed to provide reasonable protection against harmful interference in a residential
installation. This equipment generates, uses and can radiate radio frequency energy and, if not installed and used in accordance
with the instructions, may cause harmful interference to radio communications. However, there is no guarantee that
interference will not occur in a particular installation.
If this equipment does cause harmful interference to radio or television reception, which can be determined by turning the
equipment off and on, the user is encouraged to try to correct the interference by one or more of the following measures:
-- Reorient or relocate the receiving antenna.
-- Increase the separation between the equipment and receiver.
-- Connect the equipment into an outlet on a circuit different from that to which the receiver is connected.
-- Consult the dealer or an experienced radio/TV technician for help.
Warning: changes or modifications not expressly approved by the party responsible for compliance could void the user's
authority to operate the equipment
The devices has been evaluated to meet general RF exposure requirement the device can be used in portable exposure
condition without restriction
/