Page is loading ...

1 0917-1
I. Turn o Cold Water & Tank Valve: Turn cold water supply valve and tank ball valve to the OFF
positions. Turn system faucet to the ON position to release any built up pressure in the RO system.
Once the pressure is released, turn the system faucet to the OFF position.
II. Mount Alkaline Filter on Stage 5 Filter: See Fig. 1. Attach the provided mounting clips on the post
carbon lter (stage 5) and insert the alkaline lter onto the top of the mounting clips.
III. Connect Alkaline Filter to Stage 5 Filter: See Fig. 1. The post carbon lter output (Point A - the
FLOW arrow points to the lter output) will no longer connect to the BLUE tubing from the faucet.
Remove the BLUE tubing lock clip and remove the BLUE tubing. Remove the end plug from the
quick connect tting on the alkaline lter output (Point B). See Fig. 2. Cut appoximately 5” of the
provided WHITE tubing and insert into the post carbon lter output (Point A - the FLOW arrow
points to the lter output) and the alkaline lter (Point B). Secure tubing connections on Point A
and Point B with provided BLUE tubing lock clips.
IV. Connect Alkaline Filter to Faucet: Remove the end plug from the quick connect tting on the al-
kaline lter output (Point C - the FLOW arrow points to the lter output). See Fig. 2. Insert the free
end of the BLUE tubing (previously connected the faucet and the stage 5 lter) into the alkaline
lter output (Point C) and secure tubing connection with a provided BLUE tubing lock clip.
V. Check for Leaks: Turn cold water supply and tank ball valve to ON positions. Check valves, t-
tings, tubing connections and housings to ensure there are no leaks.
VI. Flush Filter: Allow the RO system to run for approximately 3 hours to ll the tank. When the tank
is lled, the RO system will automatically shut-o. The rst tank of water must be drained to ush
the new alkaline lter. Do NOT use the rst tank of water. Turn the RO system faucet to the ON
position to drain the tank. The tank is empty when there is a noticable drop in water pressure from
the RO system faucet. Once the tank is empty, turn the system faucet OFF.
Please see reverse side of this sheet for Stage 6 Alkaline Filter Replacement Guide.
Alkaline Filter Kit Installation
Fig. 1 Fig. 2
A
A
C
B
B C
How to Use Quick Connect Fittings
To Attach Tubing
Remove BLUE tubing lock clip. Insert tubing until it hits
the backstop. Pull on insterted tubing to ensure it is
secured and re-attach BLUE tubing lock clip.
To Release Tubing
Remove BLUE tubing lock clip. Use two ngers to push
in collet to release tubing. While collet is being held,
pull tubing straight out.
1
2
3
1
2
3

2 0917-1
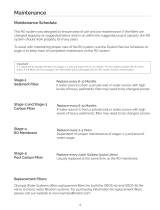
Alkaline Filter Replacement Guide
The alkaline lter should be replaced every 6 months. Please follow the 6th stage alkaline lter replace-
ment steps below.
I. Turn o Cold Water & Tank Valve: Turn cold water supply and tank ball valve to OFF positions.
Turn system faucet to the ON position to release any built up pressure in the RO system. Once
pressure has been released, turn system faucet to OFF position.
II. Remove Tubing & Filter: See Fig. 1. Remove BLUE tubing lock clips and tubing from both sides
(Points A and B) of the used alkaline lter. Remove and discard the used lter.
III. Installing the New Filter on the System: When placing the new 6th stage alkaline lter on the
main system bracket, ensure that the FLOW arrow on the lter is pointing towards the water out-
put to the faucet (BLUE tubing). Remove the end plugs from both quick connect ttings on the
new alkaline lter.
IV. Connect Tubing to the New Filter: See Fig. 1. Re-insert the tubing into both sides (Points A and B)
of the alkaline lter and re-attach the 2 BLUE tubing lock clips to secure tubing connections.
V. Check for Leaks: Turn cold water supply and tank ball valve to ON positions. Check valves, ttings,
tubing connections and housings to ensure there are no leaks.
VI. Flush Filter: Allow the RO system to run for approximately 3 hours to ll the tank. When the tank
is lled, the RO system will automatically shut-o. The rst tank of water must be drained to ush
the new alkaline lter. Do NOT use the rst tank of water. Turn the RO system faucet to the ON
position to drain the tank. The tank is empty when there is a noticable drop in water pressure from
the RO system faucet. Once the tank is empty, turn the system faucet OFF.
Fig. 1
A B
/