Page is loading ...

Included in this box:
●
Five color-coded, 12-inch, AWG 18
wire leads with easy-to-attach spade
lugs for fast installation.
●
Stainless-steel single-gang plate.
●
Replacement bulb
(12V, 1.2W, 15,000-hour life).
●
Resistor (150 ohm, 1 Watt).
FEATURES
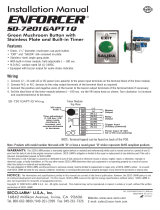
• Large (2” square), illuminated “Handicap” style button.
• Easily recognized blue A.D.A. button.
• Illuminated with a long-life bulb, replacement bulb included.
• Momentary switch, S.P.D.T., N.O./N.C. contacts rated 10 Amps at 125 ~ 250 VAC.
• Includes stainless-steel single-gang face plate.
• Includes five color-coded, 12-inch wire leads with easy-to-attach spade lugs for fast installation.
INSTALLATION
1. Run four wires through the wall to a single-gang back-box (not
included):
a. Two wires for 12VDC or 24VDC for the light.
b. One wire from either the N.O. or N.C. terminal of an alarm
or access control system which can unlock an electrically-
controlled lock.
c. One wire from COM terminal of the alarm or access control
system.
2. Connect four colored wires to the switch (see fig. 1):
a. 2 x GREEN wires, one each to the brass-colored spade
connectors on each side of the black switch.
b. GREEN/WHITE wire to N.C. connector on black switch
(if needed).
c. BLUE/WHITE wire to N.O. connector on black switch
(if needed).
d. WHITE wire to the COM connector on the black switch.
3. Connect the four colored wires to wires from the alarm or access
control system and the light’s power source (see fig. 1):
a. 2 x GREEN wires - To 12VDC or 24VDC source. If 24VDC is
used, then be sure to use the supplied resistor on either one of
the two GREEN wires.
b. GREEN/WHITE wire - To the N.C. terminal of the alarm or
access control system (if needed).
c. BLUE/WHITE wire - To the N.O. terminal of the alarm or access
control system (if needed).
d. WHITE wire - To COM terminal of alarm or access control
system.
4. Screw the plate into the back-box, taking care not to crimp the wires.
ENFORCER
®
Installation Manual
SD-7202BC-HCQ
“Handicap” Push-to-Exit Square
Button with Stainless Plate
2” (51mm)
2.75” (70mm)
2” (51mm)
4.5” (114mm)
2.125”
(54mm)
WARRANTY: This SECO-LARM product is warranted against defects in material and workmanship while used in normal service for a period of one (1)
year from the date of sale to the original consumer customer. SECO-LARM’s obligation is limited to the repair or replacement of any defective part if the unit is
returned, transportation prepaid, to SECO-LARM.
This Warranty is void if damage is caused by or attributed to acts of God, physical or electrical misuse or abuse, neglect, repair, or alteration, improper or
abnormal usage, or faulty installation, or if for any other reason SECO-LARM determines that such equipment is not operating properly as a result of causes other
than defects in material and workmanship.
The sole obligation of SECO-LARM, and the purchaser’s exclusive remedy, shall be limited to replacement or repair only, at SECO-LARM’s option. In no event
shall SECO-LARM be liable for any special, collateral, incidental, or consequential personal or property damages of any kind to the purchaser or anyone else.
SECO-LARMSECO-LARM
SECO-LARMSECO-LARM
SECO-LARM
®
U.S.A., Inc. U.S.A., Inc.
U.S.A., Inc. U.S.A., Inc.
U.S.A., Inc.
16842 Millikan Avenue, Irvine, CA 92606
Tel: 800-662-0800 / 949-261-2999 Fax: 949-261-7326
PITSW1
Website: www.seco-larm.com
E-mail: [email protected]
FILE: DT/DTP/MiSD7202BCHCQ_07B.pmd
ORDER PART# 763-147-1%
Fig. 1--Wiring
Green ( light bulb) 12V or
24V (may require resistor)*
Green ( light bulb) 12V or
24V (may require resistor)*
White (COM)
Max 10A @ 125~250VAC
Blue/White (for N.O.)
(Top Lug)
Green/White (for N.C.)
(Bottom Lug)
Note: Products with model number that ends with "Q" or have a round green "Q" sticker represents RoHS compliant products.
SECO-LARM policy is one of continual development and improvement. For this reason, SECO-LARM reserves the right to change specifications without
notice. Copyright © 2008 SECO-LARM U.S.A., Inc. All rights reserved.
*Note: Use the included 150-ohm, 1-watt
resistor on either one of Green wires
for 24-volt operation.
/


