Page is loading ...

f
11
r
r
1
rf
r
1
i
i
tlJ
v
1
f
1
t
t
oIIlIIIIl
t
l
r
f
l
If
r
1
j
iI
h1
t
It
i
1
It
f
1
r
i
J
1r
1
1
i
1
1
I
J
1
i
f
I
1
II
j
it
I
A
Ir
t
t
t
j
I
tJ
r
r
i
t
j
i
1
J

iF
I
I
I
F
1
c

21
O
TSUN
SERV
CE
flU
Model
C210
Series
v
1
J
M
QUICK
REFERENCE
INDEX
N
SSAN
M0101l
to
10
10KYO
JAI
tJ
I

FOREWORD
This
service
manual
has
been
prepared
for
the
purpose
of
assisting
service
persoimel
of
our
distributors
and
dealers
in
providing
effective
service
and
maintenance
of
the
model
ClIO
series
Sinceprope
main
ena
1ceand
service
are
absolutely
essential
in
satisfying
our
customers
this
manual should
be
kept
in
a
h
mdy
place
for
ready
reference
and should
tie
carefully
studied
This
manual
includes
procedures
for
maintenance
adjustments
minor
service
operations
removal
and
instaJiation
and
for
disaSsembly
and
assembly
of
components
Some
of
these
service
operations
require
the
use
of
Special
Tools
especially
designed
for
effective
perfonnance
of
service
operations
The
special
tools
are
presented
at
the
end
of
the
each section
As
you
read
through
th
maintenance
procedures
in
this
service
manual
you
will
occasionally
come
across
paragraphs
headed
NOTE
CAUTION
or
WARNING
A
NOTE
is
supplemental
information
that
is
important
to
a
particular
procedure
CAUTION
and
WARNING
warn
of
steps
that
must
be
followed
to
prevent
damage
to
some
part
of
the
car
and
or
per
onal
injury
The
Quick
Referenc
e
Index
on
the
first
page
enables
the
user
to
quickly
locate
tlJe
desired
section
At
the
beginning
of
each
individual
section
is
a
table
of
cOntents
which
gives
the
page
nUlnber
on
which
each
major
subject
begins
i
All
parts
in this
manual
conform
to
the
PARTS
CATALOG
Model
C210
and
only
the
genuine
service
arts
liSted
in
this
P
A
TS
CATALOG
rriust
be
used
for
replacements
All
information
illustrations
and
specifications
contained
in
this
manual
are
based
on
the
product
information
available
as
of
October
1971
I
It
should
be
emphasized
that
those
who
use
this
manual
are
responsible
for
revising
the
ontents
according
to
the
SERVICE
JOURNAL
SUPP
EMENT
of
SERVICE
MANUAL
and
SERV
CE
DATA
AND
SPECIFICATIONS
issued
by
the
factory
which
carry
the
latest
factory
approved
service
methods
Rights
for
alteration
at
any
time
of
specifications
and
methods
are
reserved
Liability
for
any
personal
iiljury
or
property
damage
occasioned
by
the
use
of
this
service
D1anual
in
effecting
maintenance
or
repair
of
the
car
is
in
no
way
assumed
by
Nissan
Motor
Coo
Ltd
Accordingly
anyone
using
a
service
procedure
or
tool
which
is
not
pecifically
recommen
led
by
Nissan
must
first
completely
satisfy
himself
that
neither
his
safety
nor
the
car
s
safety
will
be
jeopardize
d
by
the
servic
method
selected
NISSAN
MOTOR
CO
LTD
TOKYO
JAPAN
@
1917
NISSAN
MOTOR
CO
L
ro
Printed
in
Japan
Not
to
be
reproduced
in
whole
or
in
part
withol
It
the
prior
written
permission
of
Nissan
Motor
Company
Ltd
Tokyo
Japan
l

DATSUN
f
Model
C2JO
Series
SECTIONGI
GENERAL
INFORMATION
CONTENTS
MODEL
VARIATION
IDENTIFICATION
NUMBER
CAR
IDENTIFICATION
PLATE
CHASSIS
NUMBER
ENGINE
SERIAL
NUMBER
COLOR
CODE
NUMBER
LABEL
MANUAL
TRANSMISSION
NUMBER
AUTOMATIC
TRANSMISSION
NUMBER
APPROXIMATE
REFILL
CAPACITIES
RECOMMENDED
FUEL
1
1
RECOMMENDED
LUBRICANTS
RECOMMENDED
LUBRICANTS
RECOMMENDED
SAE
VISCOSITY
NUMBER
LIFTING
INTS
AND TOWING
PANTOGRAPH
JACK
GARAGE
JACK
AND
SAFETY
STAND
TOWING
TI
E
DOWN
SPECIAL
TOOL
GI
2
GI 2
GI 2
GI 2
GI 2
GI
3
GI
3
GI
3
GI 3
GI 3
GI
4
GI
4
GI
4
GI 5
GI 5
GI
5
GI
6
GI 6
GI
6
I
1
I
I
0
J

General
Information
MeDEL
VARIATION
I
Differential
carrier
Engine
Wheelbase
Model
Transmission
Model
Gear
ratio
Sedan
MGC210VFM
FS5W7IB
MGC2
IOYAM
3N71B
L24S
Long
wheelbase
RI80
3
900
Hard
top
KMGC210VFM
FS5W71B
KMGC210VAM
3N71B
L24S
L24
engine
with
single
carburetor
Preftx
and
SuffIx
Designations
II
K
Hardtop
o
Sedan
M
L24
engine
G
Long
wheelbase
o
means
no
indication
The
unit
and
car
numbers
are
stamped
and
registered
at
the
factory
The
car
and
engine
identification
numbers
are
used
on
legal
documents
These
numbers
are
used
for
factory
communications
such
as
Teclulical
Re
ports
Warranty
Claims
Service
Jour
naIs
and
other
information
CAR
IDENTIFICATION
PLATE
The
car
identiftcation
plate
is
located
on
the
center
of
the
cowl
top
in
the
engine
compartment
CHASSIS
NUMBER
The
chassis
number
is
stamped
on
the
cowl
top
in
the
engine
compart
ment
and
is
broken
down
as
shown
in
the
foUowing figure
K
M
G
C210
V
F
M
I
M
L
Y
IDENTIFICATION
NUMBER
I
l
M
GC
lO
OOOOU
I
I
LC014
Fig
01
1
Identification
Plate
and
Cha8
i6
Number
Location
Model
Sedan
MGC210
xxxxxx
KMGC210
xxxxxx
Hardtop
GI
2
For
Australia
5
speed
manual
transmission
Automatic
transmisSion
Grand
Touring
r
r
ENGINE
SERIAL
NUMBER
The
engine
serial
number
is
stamped
on
the
right
hand
side
of
the
cylinder
block
The
number
is
broken
down
as
shown
in
the
fgllowing
chart
according
to
the
type
of
tl
O
engine
Engine
model
Engine
number
L24 L24
xxxxxx
j
G1329
Fig
GI
2
Engine
Serial
Numbu
Location

COLOR
CODE
NUMBER
LABEL
The
color
code
number
label
is
stuck
on
the
inner
side
of
the
hood
as
shown
in
the
following
figure
Label
01387
Fig
G
3
Color
Code
Number
Label
Lo
otion
General
Information
MANUAL
TRANSMISSION
NUMBER
The
transmission
serial
number
is
stamped
on
the
front
upper
face
of
the
transmission
case
TM235
Fig
GI
4
Manual
Tranlmiuion
Number
ctltion
AUTOMATIC
TRANSMISSION
NUMBER
The
plate
is
attached
to
the
right
side
qf
the
transl
ission
case
as
sho
Yfl
in
the
following
figure
r
AT344
Fig
GI
5
Automatic
Trammiuion
Number
Location
r
APP
OXIMATE
REFILL
CAPACITIES
Li
er
Imp
measure
Fuel tank
C
Sedan
and
lard
top
60
l3X
gal
Cooling
system
i
t
Without
heater
8si
7
i
qt
With
heater
95
8
qt
J
Engine
oil
1
Without
fIlter
5
0
4
qt
With
fIlter
55
4U
qt
J
Transmission
l
2
0
5
speed
ldanual
3
i
pt
Automatic
5
5
4U
qt
I
Differential
cairier
RI80
1
0
I
Yo
pt
I
Manual
steering
gear
0
29
i
pt
Power
steering
oil
11
I
qt
Air
conditionirig
system
Refrigerant
1
2
kg
2 6
lb
Compressor
oil
0
25
88
fl
oz
RECOMMENDED
FUEL
Use
a
proper
grade
gasoline
of
above
88
octane
rating
GI 3

General
Information
RECOMMENOED
LUBRICANTS
RECOMMEptDE
D
LUBRICANTS
Item
0
c
EO
c
Gasoline
Diesel
Specifications
SAE
classification
SD
or
SE
MIL
L
21
O4B
SAE
classification
CC
or
CD
MIL
IA6152
or
MlL
L
2104C
API
GL
4
MiL
L
2105
API
GL
5
MlL
L
2105B
0
Manual
tr
ission
and
steering
I
Differential
Automatic
T
M
and
power
steering
fluid
Multi
purpose
grease
Brake
and
clutci
fluid
Anti
freeze
Type
DEXRON
N
L
G
1
2
OOT
3
FM
V
S S
No
116
Remark
Refer
to
Recommended
SAE
r
Viscosit
Chart
I
I
I
I
Uthium
soap
base
F
MY
S
S
Federal
Motor
Vehicle
Safety
Standard
Permanent
anti
freeze
Ethylene
glycol
base
RECOMMENDEDSAE
VISCOSITY
NUMBER
I
l
I
I
I
I
2OW
40
2OW
50
I
J
I I
t
15W
60
I
IOW
30
lOW
40
lOW
50
I
II
I
40
to
I
30
1
pow
2OW
I
I
lOW
5W
30
5W
20
Not
com
ended
for
II
s
ed
hIgh
speed
0
dnvlng
GEA
Ol
I
t
75w
l
SSW
L
90
I
fNGINE
OIL
I
I
I
l
l l
29
is
7
4
15
27 38
Oc
20
to
201
40 60
lSOl
100
oF
Temperature
Range
Anticipated
Before
Next
Oil
Change
GI
4
d
1

General
Information
LIFTING
POINTS
AND
TOWING
PANTOGRAPH
JACK
Place
wheel
chocks
at
both
front
and
back
of
tlie
wheel
diagonally
opposite
the
jack position
GlOSS
Fig
GI
6 Whee
Chocks
Apply
the
pantograph
jack
fur
nished
with
the
car
to
the
position
indicated
elow
in
a
safe
manner
WARNING
a
Never
get
under
the
car
while
it
is
supportedJ
only by
the
jack
Always
use
safety
stands
to
support
frame
when
you
have
to
get
under
the
car
b
Block
the
wheels
diagonally
with
wheel
chocD
TA004
Fig
GI
7
Jack
Up
Point
GARAGE
JACK
AND
SAFETY
STAND
WARNING
When
carrying
out
operations
with
the
garage
jack
be
sure
to
support
the
car
with
safety
stands
FRONT
SIDE
I
When
jacking
up
the
front
of
the
car
place
the
chocks
behind
the
rear
wheels
to
hold
them
2
Apply
the
garage jack
under
the
front
suspension
member
Be
sure
not
to
lift
up
the
engine
oil
pan
located
just
behirid
the
suspension
member
1
I
1
GI388
Fig
Gl
S
Front
Jack
Up
Point
3
Jack
up
the
car
gently
just
high
enough
to
place
thehafety
Stands
uiiderl
both
the
side
members
Place
the
Csta
ndsatthe
position
indicated
in
Fig
GI
9
JJ
ll
L
Io
t
11
GI359
ill
lif
1
Front
jack
up
point
2
Front
supporting
point
Fig
GI
9
Front
Jack
Up
and
Supporting
Points
4
Release
the
jack
slowly
GI
S
h
REAR
SIDE
I
When
jackiEg
up
the
ear
of
the
car
place
the
cliocks
at
the
front
side
of
the
front
wheels
to
hold
them
2
Apply
the
garage
jack
under
the
suspension
member
iJ
Fig
GI
IO
Rear
Jack
Up
Point
3
Jack
up
the
car
gently
just
high
enough
to
place
the
safety
stands
under
the
rear
suspension
member
or
the
side
member
Place
the
stands
at
the
positions
indicated
below
1
Rear
j
ck
up
poin
2
Rear
5upporting
point
Fig
GI
l1
Rear
Jack
Up
and
Supporting
Points
4
Release
the
jack
slowly

r
rOWlMG
The
towing
hook
is
located
on
the
torsion
bracke
s
on
ach
side
GI353
Fig
GI
12
Front
Towing
Hook
To
tow
another
car
connect
a
rope
to
the
right
side
rear
towing
hook
The
left
side
rear
hook
is
installed
for
the
tie
down
use
only
G
3
4
Fig
G1
13
R
ar
Towing
Hook
Special
Tools
play
very
important
role
in
the
maintenance
of
cars
These
are
essential
to
the
safe
accurate
and
speedy
servicing
The
working
times
listed
in
the
column
under
FLAT
RATE
TIME
in
FLAT
RATE
SCHEDULE
are
com
puted
based
on
the
use
of
Special
Tools
General
Information
CAUTION
B
Before
towing
make
lUre
that
the
trallSmission
axles
steering
system
Bnd
pOW1
r
train
Bre
in
good
order
If
any
unit
is
damaged
a
d011ey
must
be
used
b
I
the
transmission
is
inoperative
tow
the
car
with
the
rear
wheels
011
the
ground
or
with
the
propeller
shaft
removed
c
When
the
ClIr
is
towed
with
its
front
wheels
on
the
ground
secure
the
steering
wheel
in
a
stJ8ight
ahead
position
with
the
ignition
JleY
turned
in
OFF
position
d
When
towing
en
automatictrBns
mission
model
on
its
rear
wheels
do
not
exceed
30
km
h
20
MPH
Bnd
a
distance
of
10
km
6
miles
e
Release
till
parking
brake
and
set
the
gearshift
lever in
Neutrar
position
before
starting
to
tow
the
car
f
A
towing
rope
should
not
be
cog
nelted
to
the
tie
down
hook
or
any
other
positions
except
those
desaibed
above
g
Do
not
take
up
slack
in
the
rope
too
quickly
h
Always
pull
the
rope
in
a
stJ8ight
direction
with
respect
to
the
hook
Do
not
apply
forca
to
the
hook
in
side
direl
tion
SPECIAL
TOOL
The
identification
code
of
mainte
nance
tools
is
made
up
of
2
alphabeti
calletters
and
8
digital
figures
The
heading
two
letters
roughly
classify
tools
or
equipment
as
GI
6
TIE
DOWN
Front
tie
down
hooks
are
located
on
both
tension
rod
brackets
Rear
tie
down
hooks
are
installed
on
both
sidesofthe
floor
CAUTION
Do
not
tow
car
with
left
hand
tie
down
hook
1
z
J
L
GI363
Fig
G1
14
Rear
Tie
down
Hook
Special
Tool
Special
Tool
Engine
Overhauling
Machine
GGOOOOOOOO
General
Gauge
LMOOOOOOOO
Garage
Tool
HTOOOOOOOO
Hand
Tool
Refe
to
Service
Bulletin
DATSUN
1801
240K
GT
for
Speciai
Tool
list
and
further
information
on
Spe
cial
Tools
STOOOOOOOO
KVOOOOOOOO
EMOOOOOOOO

DATSUN
Model
C210
Series
SECTIONET
ENGINE
TUNE
UP
CONTENTS
ENGINE
TUNE
UP
ET
2
REPLACING
FUEL
FILTER
ET
7
DESCRIPTION
ET
2
CHECKING
FUEL
LINES
Hoses
piping
BASIC MECHANICAL SYSTEM
ET
2
connections
etc
ET
7
ADJUSTING
INTAKE
AND
EXHAUST
REPLACING AIR CLEANER
VALVE
CLEARANCES
ET
2
FILTER
ET
7
CHECKING
AND
ADJUSTING
DRIVE
EMISSION
CONTROL
SYSTEM
ET
B
BELTS ET
2
CHECKING VACUUM
FITTINGS
HOSES
RETIGHTENING
GYLlNDEFI
HEAD
BOLTS
AND
CONNECTIONS
ET
B
MANIFOLD
NUTS
AND
CARBURETOR
REPLACING
P
C
V
VALVE
AND
SECURING
NUTS
ET
3
FILTER
ET
B
CHANGING
ENGINE
OIL
ET
3
CHECKING
VENTILATION
HOSES
ET
B
REPLACING
OIi
FI
L
TER
ET
3
CHECKING
EXHAUST
GAS
RECIRCULATION
CHANGING
ENGINE
pOOLANT
ET
3
E
G R
1
CONTROL
SYSTEM
ET
B
CH
ECKING
COOLlNG
SYSTEM
HOSES
CHECKING
VAPOR
LINES
Hoses
AND
CONNEc
I
O S
ET
4
connections
etc
AND
FUEL
CHECKING
ENGINE
COMPRESSION
ET
4
VAPOR CONTROL
VALVE
ET
9
IGNITION
AND
FUEL
SYSTEM
ET
5
CHECKING
FUEL
TANK
CHECKING
BATTERY
ET
5
VALVE
ET
10
CHECKING
AND
ADJUSTING
IGNITION
SERVICE
DATA
AND
TIMING
ET
5
SPECIFICATIONS
ET
11
REPLACING
DISTRIBUTOR
BREAKER
TROUBLE
DIAGNOSES
AND
POINT
ET
6
CORRECTIONS
ET
12
CHECKING
AND
REPLACING
SPARK
EMISSION
TROUBLE
SHOOTING
ET
19
PLUGS
ET
6
EXCESS
HC
OR
CO
EMISSION
CHECKING
IGNITION
WIRING
ET
6 IN
EXHAUST
GASES
ET
19
ADJUSTING
CARBURETOR
IDLE
RPM
MAIN
CAUSES
FOR
EXCESS
CO
AND
MIXTURE
RATIO
ET
6
HC
AND
NOx
IN
EXHAUST
CHECKING
CHOKE
MECHANISM
GASES
ET
20
Choke
plate
and
linkage
ET
7
SPECIAL
SERVICE
TOOLS
ET
21

r
DESCRIPTIO
To
keep
the
engine
in
top
running
condilion
at
all
times
proper
main
Engine
Tune
up
ENGINE
TUNE UP
tenance
tune
up
is
necessary
More
over
it
is
importlUlt
that
the
engine
b
tuned
up
in
accordance
with
the
main
tenance
shedule
The results
of
proper
engine
maintenance
are
among
others
minimum
e
aus
emissipns
This
sec
tion
describes
proper
maintenance
pro
cedures
BASIC
MECHANICAL
SYSTEM
ADJUSTING
INTAKE
AND
EXHAUST
VALVE
CLEARANCES
Valve
clearance
adjustment
cannot
be
made
while
engine
is
in
operation
To
adjust
proceed
as
follows
1
Start
engine
and
warm
up
engine
sufficiently
then
stop
engine
2
Rotate
crankshaft
to
bring
No
I
cylinder
to
top
dead
center
of
its
compression
stroke
3
Remove
valve
roc
ker
cover
LooSen
pivot
locking
nut
and
turn
pivot
screw
until
specified
clearance
is
obtained
while
engine
is
hot
Using
service
tool
tighten
pivot
locking
nut
securely
after
adjustment
and
recheck
clearance
4
Ordcr
of
valve
clearance
adjust
ments
isas
follows
All
valves
can
be
adjusted
by
rotat
ing
crankshaft
four
complete
turns
Note
When
turning
crankshaft
with
starter
feptove
high
tension
wire
from
ignition
coil
then
turn
it
a
Adjust
valve
clearances@
V
and
Qj
with
cam
lobe
CD
set
at
ex
tremeupward
potition
b
Adjust
valve
clearances@
@
and
@
with
cam
lobe
@
set
at
ex
t
roe
upw
arjl
potition
c
Adjust
valve
clearance
@
with
cam
lobe
V
set
t
extreme
upward
position
d
Adjust
valve
clearance
@
with
earn
lobe
@
set
at
extreme
upward
pos
ition
Note
Numbers
in
circle
agree
with
those
in
figure
T
Tightening
torque
Pivot
lock
nut
49
to
59
N
m
5
0
to
6
0
kg
m
36
to
43
ft
Ib
ET074
Fig
ET
1
Adjusting
ualv
c1
aranc
ET
2
L
Valve
clearance
Unit
mm
in
Hot
Intake
i
0
25
0
010
Exhaust
0
30
0
012
CHECKING
AND
ADJUSTING
DRIVE
BELTS
I
Check
for
cracks
or
damage
Re
place
if
necessary
2
Normal
drive
belt
denection
is
own
in
figure
below
wh
en
moderate
thumb
pressure
is
applied
midway
between
pulleys
Thumb
pressure
98
N
10
kg
221b

Water
pump
pulley
E
T398
Altern
tor
Crankshaft
pulley
RETIGHTENING
CYLINDER
HEAD
BOLTS
MANIFOLD
NUTS
AND
CARBURE
TOR
SECURING
NUTS
Refer
to
the
following
tightening
torque
specifications
Tightening
torque
J
Cylinder
heaa
liolts
1st
turn
39N
m
4
0
kg
m
29
ft
lb
2nd
turn
59N
m
6
0
kg
m
3
ft
ib
3rd
turo
i
69
to
83 N
m
7
0
to
8
5
kg
m
5rto
61
ft
Ib
t
Notes
i
a
When
engine
is
cold
bolts
should
be
tightened
in
two
or
three
steps
in
the
sequence
shown
in
Figure
ET
3
starting
from
center
and
working
out
toward
ends
b
Retighten
cylinder
head
bolts
after
engine
has
wanned
up
Manifold
nuts
12
to
16
N
m
12
to
1
6
kg
m
9
to
12
ft
Ib
Carburetor
nuts
12
to
18
N
m
1
2
to
1
8
kg
m
9
to
13
ft
lb
Engine
Tune
up
Idler
pulley
Unit
mm
in
Fig
ET
2
Drive
belt
tension
Fig
ET
3
Cylinder
head
bolt
tightening
sequence
CHANGING
ENGINE
OIL
1
Check
if
oil
is
diluted
with
water
or
gasoline
Drain
and
refill
oil
if
necessary
Tightening
torque
Oil
pan
drain
plug
20
to
29
N
m
2
0
to
3
0
kg
m
14
to
22
ft
Ib
Notes
a
A
milky
oil
indicates
the
presence
of
cooling
wnter
Isolate
cause
and
take
coriective
measure
b
An
oil
with
extremely
low
viscosity
indicates
dilution
with
gasoline
2
Check
oil
level
If
below the
specified
level
raise
it
up
to
the
Hlevel
ET
3
Engine
oil
capacity
including
oil
filter
Maximum
H
level
5
7
liters
6
US
qt
5
Imp
qt
Minimum
I
level
47
liters
C
5
US
qt
4
Imp
qt
3
Change
engine
oil
in
accordance
with
the
maintenance
schedule
REPLACING
OIL
FILTER
The
oil
filter
is
a
cartridge
type
and
can
b
removed
using
Oil
Filter
Wrench
ST19320000
I
Ch
ck
for
oil
leaks
p
t
gasketed
flange
f
leakage
is
found
retighten
just
enough
to
stop
leakage
If
reo
tightening
is
no
longer
effective
re
place
filter
as
an
assembly
2
When
installing
oil
filter
tighten
by
hand
Note
Do
not
overtighten
oil
ftlter
lest
leakage
should
occii
CHANGING
ENGINE
COOLANT
PERMANENT
ANTI
FREEZE
COOLANT
Note
The
permanent
anti
freeze
coolant
iI
an
ethylene
glycol
base
product
con
taining
chemiCal
inhibitors
to
protect
the
coolirig
systein
from
rusting
and
corrosion
The
anti
freeze
doeS
not
contain
any
glycerine
or
ethyl
alcohol
It
will
not
eVaporate
or
boil
away
and
can
be
used
with
either
high
or
low
temperature
thermostats
It
flows
free
ly
transfers
heat
efficiently
and
will
not
clog
the
JBssages
in
the
cooli
system
The
anti
freeze
must
not
be
mixed
with
other
product
This
cool
ant
can
be
used
throughout
the
sons of
the
year

Whenever
coolant
is
ch
iged
the
cool
ing
syStem
must
be
flushed
and
refilled
with
a
new
coolant
Check
the
coolant
level
See
instnictions
attached
to
the
anti
freeze
c
tain
r
for
mixing
atio
of
anti
freeze
to
water
CHECKING
COOLING
SYSTEM HO
SE
AND
CONNECTIONS
Check
hoses
and
fittings
for
loose
connections
or
deterioration
Retight
en
or
replace
if
necessary
INSPECTION
OF
RADIATOR
CAP
Apply
reference
pressure
88
kPa
0
9
kgJem2
13
psi
to
radiator
cap
by
means
of
a
cap
tester
to
see
if
it
is
satisfactory
Replace
cap
assembly
if
necessary
Fig
ET
4
Te
ti
radiator
cap
COOLNG
SYSTEM
PRESSURE
TEST
With
radiator
cap
removed
apply
reference
pressure
157
kPa
1
6
kgJcm2
23
psi
to
the
cooling
system
by
means
of
a
tester to
detect
any
1e
ge
Engine
Tune
up
Water
capacity
Without
heater
8 2
liters
8
05
qt
7
Yo
lmp
qt
With
heater
8 9
liters
9
XUSqt
7
i
Imp
qt
Fig
ET
5
Coo
i
sy
tem
pressure
test
CHECKING
ENGINE
COMPRESSION
I
Warm
up
engine
sufficiently
2
Disconnect
all
spark
plugs
3
Disconnect
anti
dieseling
solenoid
valve
connector
4
Properly
attach
a
compression
tester
to
spark
plug
hole
in
cylinder
being
tested
Ii
n
It
ET010
Fig
ET
6
T
tingcompreuion
preuure
ET
4
5
Fully
open
choke
valve
6
Depress
accelerator
pedal
to
open
throttle
valves
Note
Do
not
PIlDIP
pedal
7
Start
engine
as
quickly
as
possi
b
e
Compression
pressure
kPa
kg
cm2
psi
at
rpm
Standard
1
177
12
0
171
350
Minimum
883
9
0
128
350
Note
Cylinder
r
Dn
in
cyl
inders
should
not
be
less
than
80
of
tbe
bighest
reading
If
cylinder
compression
in
one
or
more
cylinders
is
low
pour
a
smaIl
quantity
of
engine
oil
into
cylinders
through
the
spark
plug
boles
and
retest
compression
I
If
adding
oil
helps
the
compres
sion
pressure
the
chances
are
that
piston
rings
are
worn
or
damaged
2
If
pressure
stays
low
the
likeli
hood
is
that
valve
is
sticking
or
seating
improperly
3
If
cylinder
con
pr
sion
in
any
two
adjacent
cylinders
is
low
and
if
adding
oil
does
not
help
the
compres
sion
there
is
leakage
past
the
gasketed
surface
Oil
and
water
in
combustion
cham
bers
can
result
from
this
malfunction

Engine
Tune
up
IGNITION
AND
FUEL
SYSTEM
CHECKING
BATTERY
I
Remove
six
vent
plugs
and
check
electrolyte
level
in
each
battery
cell
If
necessary
po
r
distilled
water
OverfloW
Correct
Shortage
t
t
j
t
1
t
EE358
Fig
ET
7
Ch
ckin
electrolyt
kvel
2
Measure
the
specific
gravity
of
battery
electrolyte
Fig
ET
8
E
T372
Checking
specific
gravity
of
battery
electrolyte
Over
1
22
Over
I
20
Full
charge
value
at
200C
680F
1
28
1
26
Permissible
value
Frigid
Climates
Other
climates
Notes
a
Oean
top
of
battery
and
terminals
with
a
olutiOli
of
baking
soda
and
water
Rinse
off
and
dry
with
compressed
air
Top
of
battery
must
be
clean
to
r
current
leakage
L
terminals
arid
from
positive
termini
l
to
hold
down
clamp
f
I
b
In
addition
to
current
leakage
pro
longed
a
umulation
of
acid
and
dirt
M
tOP
of
battery
I11IY
cause
blistering
of
the
I11Iterial
covering
connector
straps
and
corrosion
of
straps
c
After
tightening
tenninaIs
c
t
them
with
petrolatum
tine
to
protect
them
from
cortOllion
Caution
If
the
battery
cables
are
dis
connected
they
mould
be
tightly
clamped
to
the
battery
terminals
to
secure
a
good
contact
CHECKING
AND
ADJUSTING
IGNITION
TIMING
I
Check
spark
plugs
and
di
tributor
breaker
point
for
condition
2
Thoroughly
remove
dirt
and
dust
from
timing
mark
on
crank
pulley
and
timing
indicator
on
front
cover
3
Wa
1
up
engine
sufficiently
ET
5
4
Install
a
timing
light
on
No
I
cylinder
spark
plug
wire
and
install
a
tachometer
5
Set
idling
speed
to
the
following
specifications
650
rpm
M
T
700
rpm
A
T
N
position
6
Check
ignition
timing
with
a
timing
light
if
it
i
100
B
T
D
C
Before
Top
Dead
Center
di
or
Top
dead
center
mark
Fig
ET
9
Checking
ignition
timing
Ignition
timing
M
T
A
T
Timing
B
T
D
C
rpm
100
700
100
650
C
N
posi
tion
If
necessary
adjust
it
as
follows
I
Loosen
etscrew until
distributor
can
be
moved
by
hand
2
Adju
t
ignition
timing
to
100
B
T
D
C
3
Lock
distributor setscrew
and
make
sure
that
timing
is
correct

r
ET399
Fif
ET
10
Adjusting
ignition
liming
REPLACING
DISTRIBUTOR
BREAKERPOlin
Check
d
istributor
breaker
points
fr
abnormal
pitting
and
wear
Re
place
points
periodically
Make
sure
they
are
properly
aligned
and
tHat
point
dwell
and
gap
are
correct
Clean
and
apply
distributor
grease
to
cam
lobes
Note
Do
not
apply
grease
excessive
Iy
ET400
Fig
ET
11
Checking
distributor
point
gap
Point
gap
0
45
to
0
55
nun
0
018
to
0
022
in
Dwell
angle
350
to
410
degrees
CHECKING
AND
REPLACING
SPARK
PLUGS
I
Remove
and
clean
plugs
in
a
sand
blast
cleaner
Inspect
each
spark
Engine
Tune
up
plug
Make
sure
that
they
are
of
the
specified
heat
range
2
Inspect
insulator
for
cracks
or
chips
Check
both
center
and
ground
electrodes
3
If
they
are
excessively
worn
replace
with
new
spark
plugs
4
Replace
spark
plugs
in
accordance
with
the
maintenance
schedule
Fig
ET
12
Cheching
sparh
plug
gap
Tightcning
torque
15
to
25
N
m
15
to
25
kg
m
lito
18
ft
lb
Spark
plug
gap
0
8
to
0
9
mOl
0
031
to
0
035
in
Hellt
range
BP6ES
L45PW
CHECKING
IGNITION
WIRING
Use
an
ohmmeter
to
check
resist
ance
on
high
tension
cables
I
Disconnect
cables
from
spark
plugs
and
remove
distributor
together
with
high
tension
cables
Note
Do
not
remoy
cables
f
I
cap
2
Connect
the
ohmmeter
between
cable
terminal
on
the
spark
plug
side
and
the
oorresponding
electrode
inside
cap
3
If
the
resistance
is
more
than
30
000
ohms
remove
cable
Cram
cap
and
check
the
cable
resistance
only
If
resistance
is
still
more
than
30
000
ohms
replace
cable
assembly
ET
6
f7
l
Fig
ET
13
Checking
high
tension
cable
ADJUSTING
C
RBURETOR
IDLE
RPM
AND
MIXTURE
RATIO
Notes
a
Do
not
attempt
to
screw
in
idle
adjusting
SCTe
V
completely
Doing
so
could
ause
damage
to
iip
which
in
turn
will
tend
o
cause
malfunctions
b
On
automatiC
transmission
models
adjustment
should
be
made
in
N
p
sition
c
In
air
conditioner
equipped
models
idle
adjustment
should
be
carried
out
while
air
conditioner
is
OFF
Idle
adjustment
is
made
by
throttle
adjusting
screw
and
idle
adjusting
screw
after
engine
ds
warmed
up
e
Figure
ET
14
fig
ET
14
I
ttle
End
idl
adju
tingscrelU
With
CO
meter
CO
meter
is
very
useful
tool
for
idle
mixture
adjustment
When
preparing
to
adjust
idle
mixture
it
is
essential
that
meter
be
thoroughly
w
rmed
and
calibrated
Warm
up
engine
sufficiently
and

apply
wheel
chocks
2
Continue
engine
operation
for
one
minute
at
idling
speed
3
Adjust
throttle
adjusting
screw
su
that
engine
specd
is
at
the
specified
value listed
below
Transmission
model
Adjusting
value
rpm
M
T
650
A
T
700
In
N
position
4
Check
ignition
timing
and
if
nessary
adjust
it
to
specifications
5
Adjust
idle
adjusting
screw
so
that
CO
percentage
is
at
the
specifi
ed
value
check
with
CO
mctcr
CO
1
5
10
5
6
Repeat
procedures
described
in
itcm
3
and
5
above
until
CO
percentage
and
engine
speed
are
both
at
the
specified
value
Without
CO
meter
Warm
up
engine
complerely
Check
to
be
sure
that
float
level
and
ignition
timing
are
correct
while
engine
is
at
idle
speed
2
Turn
out
throttre
adjusti
g
screw
gently
unril
specified
engine
speed
is
approximately
obt
llned
TABLE
I
SPECIEIED
ENGINE
r
IDLING
SPEED
M
T
AIT
I
dling
speed
rpm
680
730
In
N
position
3
Turn
idle
adjusting
screw
in
or
out
until
engine
runs
sm
Qthly
at
the
highest
speed
4
Turn
out
throttle
adjusting
screw
until
specified
engine
speed
table
I
is
obtained
5
Readjust
idle
adjusting
screw
until
engine
runs
smoothly
at
the
highest
speed
with
the
highest
vacuo
urn
reading
6
Repeat
steps
4
and
5
until
engine
speed
does
not
rise
in
spite
of
adjust
ing
idle
adjusting
screw
7
Finally
turn
idle
adjusting
screw
clockwise
until
engine
speed
drops
below
specified
rpm
Engine
Tune
up
TABLE
II
ENGINE
SPEED
DROP
M
T
A
T
30
5
30
5
In
N
positio
Idle
limiter
cap
Do
not
remove
this
idle
limiter
cap
unless
necessary
If
this
unit
is
re
moved
it
must
be
readjusted
at
time
of
installation
To
adjust
proceed
follows
I
After
adjusting
throttlc
or
idle
speed
adjusting
screw
check
to
be
sure
that
the
amount
of
CO
contained
in
exhausi
gases
meets
the
established
standard
2 Install
idle
limiter cap
in
position
making
sure
that
the
adjusting
screw
can
rotate
another
1
8
turn
in the
CO
RICH
direction
of
Iso
Idle
limiter
cap
ET031
Fig
ET
15
Setting
idle
limiter
cap
CHECKING
CHOKE
MECHANISM
Choke
plate
and
linkage
I
Check
choke
valve
and
mecha
nism
for
free
operation
and
clean
or
eplace
if
nece
iary
A
binding
can
result
froOl
petroleum
gum
formation
n
choke
shaft
or
from
damage
2
Before
starting
engine
fully
de
press
accelerator
pedal
to
ensure
that
choke
valve
closes
properly
3
Push
choke
valve
with
a
finger
and
check
for
binding
4
Check
to
be
sure
that
bi
metal
cover
index
mark
is
set
at
the
center
of
choke
housing
index
mark
as
shown
below
Note
Do
not
set
hi
metal
cover
index
mark
at
any
position
except
the
center
of
choke
housing
index
mark
ET7
j
L
4
J
e
r
7
2
Thermostat
housing
I
3
Groove
CD
ID
ET034
Fig
ET
16
Bi
metal
setting
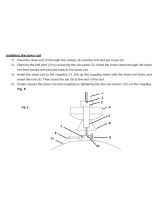
REPLACING
FUEL
FILTER
I
Check
for
a
containinated
filter
and
water
deposit
All
engines
use
a
replaceable
car
tridge
type
fuel
filter
as
an
assembly
2
Replace
fuel
ifilter
in
accordance
with
the
maintenance
schedule
Fig
ET
17
Fuel
filter
CHECKiNG
F
UEL
LINES
Hoses
piping
connections
etc
Check
fuel
lines
for
loose
connee
tions
cracks
and
deterioration
Re
tighten
loose
conne
tions
and
replace
any
d
aged
or
deformed
parts
REPLACING
AIR
CLEANER
FILTER
Air
cleaner
employs
a
wet
pape
type
cleaner
filter
viscous
type
As
this
filter
has
been
specially
treated
at
factory
it
need
not
be
cleaned
before
ultimate
replacement
Even
if
cleaner
filter
should
look
dirty
do
not
at
tempt
to
clean
it
Cleaning
per
formance
is
yonstantly
maintained
even
though
it
looks
contaminated
Care
must
be
taken
not
to
damage
cleaner
filter
Replace
filter
at
recommended
intervals
or
more
often
under
dusty
driving
conditions

r
L
Engine
Tune
up
EMISSION
CONTROL
SYSTEM
CH
c
KINGVACUUM
F
ITT
INGS
HOSES
AND
CONNECTIONS
Check
the
condition
of
fittings
and
hoses
Retighten
or
replace
if
neces
sary
Carburetor
to
thermal
vacuum
valve
Thermal
vacuum
valve
to
E
G
R
control
valve
Carburetor
to
vacuum
tube
Vacuum
tube
to
distributor
Intake
manifold
to
Master
Vac
Intake
manifold
to
F
I
C D
Air
conditioner
equipped
models
1
Thermal
vacuum
valwe
2
Distributor
3
E
G
R
control
valve
4
B
C
D
D
5
Carbure
tor
6
Oasli
pot
ECQ49A
Fig
ET
18
Connecting
vacuum
line
REPLACING
P
C
V
VALVE
AND
FILTER
I
Checking
P
C
V
valve
in
accord
ance
with
the
following
method
With
engin
running
at idle
remove
the
ventilator
hose
from
P
C
V
valve
if
the
valve
is
working
a
hissing
noise
will
be
heard
as
air
passe
through
the
valve
and
a
strong
vacuum
should
be
felt
immediately
when
a
finger
is
placed
over
valve
inlet
2
Replace
P
C
Vvalve
and
filter
in
accordance
with
the
maintenance
sch
dule
Fill
ET
19
Checking
P
C
V
valv
CHECKING
VENTILATION
HOSES
I
Check
hoses
and
hose
connec
lions
fur
leaks
2
Disconncct
all
hoses
and clean
with
compressed
air
If
any
hose
cannot
be
freed
of
obstruclions
replace
Be
sure
that
flame
arrester
is
prop
erly
inserted
in
hose
between
air
cleaner
and
rocker
cover
ET
8
K
EC598
E
T277
Fig
ET
20
Cleaning
wntilation
hose
CHECKING
EXHAUST
GAS
RECIRCULATION
E
G
R
Cf
NTROL
SYSTEM
I
Visually
chec
ntire
E
G
R
con
trol
system
Clean
it
for
eaSe
of
inspec
tion
if
it
is
contaminat
d
with
oil
Replace
rubber
hoses
if
found
cracked
or
broken
2
Then
srart
engine
While
engine
water
is
cooi
increase
engine
speed
from
idling
to
3
000
to
3
500
rpm
noting
if
plate
of
E
G R
control
val
ve
diaphragm
and valve
shaft
move
upwards
as
speed
is
in
creased

It
is
normal
condition
if
diaphragm
does
not
move
at
all
If
not
replace
thermal
vacuum
valve
ET344
Fig
ET
21
Checking
E G R
control
valve
3
After
engine
has
warmed
up
thoroughly
increase
engine
speed
again
from
idling
to
3
000
to
3
500
rpm
noting
if
plate
of
E
G R
control
valve
diaphragm
moves
upwards
as
speed
is
increased
I
t
is
normal
if
diaphragm
moves
upwards
If
not
ch ck
thermal
vacu
um
valve
as
described
in
step
4
4
Make
sure
that
thermal
vacuum
valve
is
open
and
that c
rburetor
vacuum
is
present
at
the
end
E
G
R
control
valve
side
of
vacuum
hose
If
vacuum
is weak
or
not
present
at
all
replace
thermal
vacu
u
TI
valve
EC652
Fig
ET
22
Checking
thermal
vacuum
valve
5
With
engine
running
at
idling
speed push
up
E
G
R
control
valve
diaphragm
by
manually
pressing
bot
tom
dish
It
is
normal
if
engine
loses
stability
6
Remove
E
G
R
control
valve
from
intake
manifold
Visually
inspect
E
G R
control
valve
for
sign
of
damage
wrinkle
or
otherwise
deformation
Engine
Tune
up
Clean
E
G R
control
valve
seat
with
brush and
compressed
air
to
eliminate
clogging
for
E
G R
conrrol
valve
Fig
ET
23
Cleaning
E G R
control
valve
seat
CHECKING
VAPOR
LINES
Hose
connections
etc
AND
FUEL
VAPOR
CONTROL
VALVE
Fuel
unk
and
vapor
vent
line
I
Check
all
hoses
and
fuel
tank
filler
cap
2
Disconnect
vapor
vent
line
con
necting
flow
guide
valve
to
fuel
tank
3
Connect
a
3
way
connector
a
manameterand
a
cock
or
an
equiv
alent
3
way
change
cock
to
the
end
of
the
vent
line
4
Supply
fresh
air
into
the
vapor
vent
line
through
the
cock
little
by
little
until
the
pressure
becomes
3
923
kPa
400
mmH20
15
75
inH20
5
Shut
the
cock
completely
and
leave
it
that
way
6
After
2
5
minutes
measure
the
height
of
the
liquid
in
the
manometer
7
Variation
in
height
should
remain
within
0
245
kPa
25
mmH20
0
98
i
J
j20
8
When
the
filler
cap
does
not
close
completely
the
height
should
drop
to
zero
in
a
short
time
9
If
the
height
does
not
drop
to
zero
in
a
short
time
when
the
fiiler
cap
is
removed
an
obstructed
hose
is
indi
cated
Note
In
case
the
vent
line
is
blocked
the
breathing
in
fuel
tank
is
not
thoroughly
made
thus
causing
in
sufficient
delivery
of
fuel
to
engine
or
vapor
lock
It
must
therefore
be
repaired
or
replaced
3
W
j1J
t
923
kPa
400
mmH20
15 75
inH20
ay
connectur
Cock
Ai
Manometer
IT
Fucl
IiIIcr
cap
F10wguidcvatvc
I
J
Cheek
valve
EC052A
Fig
ET
24
Checking
evaporative
emi
aion
controlsy
tem
Flow
guide
valve
I
Disconnect
all
hoses
connected
to
the
flow
guide
valve
2
While
lower
pressure
air
is
pressed
into
the
flow
guide
valve
from
the
ends
of
vent
line
uf
fuel
tank
side
the
air
should
go
through
the
valve
and
flow
to
crankcase
side
If
the
air
does
ET
9
not
flow
rhe
valve
should
be
replaced
But
when
the
air
is
blown
from
crank
case
side
it
should
never
flow
to
the
other
two
vent
lines
3
While
the
air
is
pressed
into
rhe
flow
guide
valve
from
the
carburetor
air
cleaner
side
it
flows
to
the
fuel
tank
side
and
or
crankcase
side

4
This
valve
opens
Vnen
the
imler
pressure
is
13
kPa
10
mmHg
039
inHg
In
case
of
improper
operations
or
breakage
replace
it
J
l
From
J
c1e
ner
From
fuel
tank
I
To
7
nnkcase
k
EC030
Fig
ET
25
Flow
guide
valve
CHECKING FUEL
TANK
VALVE
ti
J
Frunl
I
Check
vulvc
2
Fuel
t
ank
EC053A
Fig
ET
26
Localionof
check
value
Engine
Tune
up
I
Disconl1ecthoses
from
check
valve
2
Remove
check
valve
J
Suck
air
through
portion
A
of
check
valve
A
large
air
flow
should
be
felt
when
sucked
forCedly
labove
2
7
kPa
20
mmHg
0
79
inHg
and
should
not
when
sucked
softly
4
Suck
air
through
portion
B
of
check
valve
A
largeair
flow
should
be
felt
when
sucked
forcedly
above
1
3
kPa
10
rnmHg
039
inHg
and
should
not
when
sucked
softly
5
Suck
air
through
portion
B
while
closing
portion
Awilh
finger
A
large
air
flow
should
be
felt
when
sucked
forcedly
above
4
T
kPa
35
mmHg
1
38
inHg
and
should
not
when
sucked
softly
If
any
of
above
test
results
is
not
satisfactory
replace
check
valve
ET10
Air
c
To
now
guide
valve
From
fuel
tank
EC054A
Fig
ET
27
Check valve
/