Page is loading ...

THERMAL PRINTER
TSP400 Series
TECHNICAL MANUAL
[THIRD EDITION]

NOTICE
• All rights reserved. Reproduction of any part of this manual in any form whatsoever,
without STAR’s express permission is forbidden.
• The contents of this manual are subject to change without notice.
• All efforts have been made to ensure the accuracy of the contents of this manual at the time
of going to press. However, should any errors be detected, STAR would greatly
appreciate being informed of them.
• The above notwithstanding, STAR can assume no responsibility for any errors in this
manual.
© Copyright 1994 Star Micronics Co., LTD.

INTRODUCTION
This manual is intended as a reference for maintenance personnel carrying out periodic maintenance or repair
in the field. It is not intended for general users.
• This manual is comprised of the following chapters.
Chapter 1 Specifications and Operation
Chapter 2 Theory of Operation
Chapter 3 Parts Replacement and Related Adjustments
Chapter 4 Maintenance and Lubrication
Chapter 5 Parts Lists
• First edition : Dec. 1994
Second edition : Jul. 1995
Third edition : March 1997
■ Model Name
TSP 4 1 2 D — 120
Voltage
120 : 120VAC
220 : 220VAC
240 : 240VAC
Interface
D: RS232C
K: RS422A
C: Parallel
None: Without interface
Mechanism type
2: 40 columns
Printer type
1: Standard
4: With autocutter
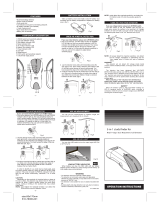
TSP400-series thermal printer
1
2
3
4
5


CHAPTER 1
SPECIFICATIONS AND OPERATION
1. General Specifications .........................................................................................3
2. External Appearance and Internal Configuration ..............................................4
3. DIP-Switch Settings ..............................................................................................5
4. Print-Density Adjustment .....................................................................................8
5. Sensor Adjustment ...............................................................................................9
6. Setting Memory Switches from the Control Panel........................................... 11
7. Test Print..............................................................................................................12
8. HEX Dump............................................................................................................12
9. Page/Line Mode Switch ...................................................................................... 13
10. Exposing the Peripheral Unit Connector .......................................................... 14
11. Changing the Interface Board............................................................................ 15
1

– 2 –
SPECIFICATIONS AND OPERATION

– 3 –
SPECIFICATIONS AND OPERATION
1. General Specifications
Printing method Line thermal direct
Resolution 8 dots/mm (H) × 8 dots/mm (V)
Printable width 75 mm in Line Mode; 80 mm in Page Mode
Printing speeds 50 mm/sec and 25 mm/sec
Printable characters 1 Page mode: ANK, International
2 Line mode: ANK, International, Special, Block graphic, IBM
special, IBM block graphic, Kanji
NOTE: ANK is comprised of ASCII characters and katakana
Character matrixes 1 Page mode
Small 8×16
Standard 16×24
Wide 24×32
OCR-B 16×24
2 Line mode
Kanji 24×24 (12×24)
IBM block graphic 12×24 or 12×32
All others 12×24
Paper
Recommended brands TF50KS-E, TF62KS-E (Nippon Paper Industries)
KP50-HEAEX (New Oji Paper Co., Ltd.)
Width 82 mm (3.25 inches)
Thickness 60 to 150 µm
Roll diameters External 115 mm max.
Internal 25.4 mm (1 inch)
Interface RS232C, RS422A, or Parallel
Dimensions and weight Width 178 mm (TSP412D) 178 mm (TSP442D)
Depth 226 mm (TSP412D) 244 mm (TSP442D)
Height 256 mm (TSP412D) 256 mm (TSP442D)
Weight 3.4 kg (TSP412D) 3.7 kg (TSP442D)
Power supply 120VAC, 220VAC, 240VAC
Ambient conditions Operating 5˚C to 40˚C; 25%RH to 85%RH
Nonoperating -20˚C to 60˚C; 10%RH to 90%RH
Autocutter Lifetime 300,000 cuts (if paper debris is cleared)
Minimum cut length 25.4 mm (1 inch)
Fig. 1-1 External Dimensions
(TSP442)
(TSP412)
178mm
178mm
226mm
244mm
256mm
3.7kg
3.4kg
256mm

– 4 –
SPECIFICATIONS AND OPERATION
2. External Appearance and Internal Configuration
Fig. 1-2 Internal Configuration (TSP412D)
Control Panel
Interface connector
CONNECTOR COVER
(Peripheral unit connector)
Printer cover
Power cord
Power switch
Interface cover

– 5 –
SPECIFICATIONS AND OPERATION
3. DIP-Switch Settings
DIP switches are located on the interface PCB. The number of switches depends on the interface type.
(1) Setting the DIP Switches
Fig. 1-3 DIP-Switch Settings
1Remove the screw holding the ROM cover in place. (The screw is located at the base of the paper-roll holder.)
2Remove the ROM cover, exposing the main and interface PCBs.

– 6 –
SPECIFICATIONS AND OPERATION
Fig. 1-4 Main and interface PCBs
3Set the DIP switches on the interface PCB.
2. DIP-switch values
1RS232C interface
This board has a single 8-bit DIP switch. Switch settings are as follows.
Switch Setting ON OFF
1-1 Baud
1-2
1-3 Handshaking DTR XON/XOFF
1-4 Data length 8 bits 7 bits
1-5 Parity use No parity Parity used
1-6 Parity type Odd Even
1-7 DC1/DC3 Ineffective Effective
1-8 Status of printer power
* All of these are set to ON before the printer is shipped from the factory.
Opening under ROM cover
EPROM
VP4 (Black-mark sensor)
VR1 (Transmissive sensor -
coarse)
DIP switches
Interface PCB (RS232C)
VR3 (Paper-out sensor)
VR2 (Transmissive sensor - fine)
Main PCB

– 7 –
SPECIFICATIONS AND OPERATION
Baud 1-1 1-2
2400BPS OFF OFF
4800BPS OFF ON
9600BPS ON ON
19200BPS ON OFF
Mode
Status of printer power
1-8 ON 1-8 OFF
DC1/DC3 invalid Printer selected Printer de-selected
DC1/DC3 effective Printer selected Printer de-selected
Addressable Printer de-selected Printer selected
To select a mode:
With an RS-232C interface, use DIP switches 1-7 to select the mode. With an RS-422A interface, use DIP switch
#2.
2RS422A interface
This board has two DIP-switches: one 8-bit switch and one 4-bit switch.
DIP switch #1 (8 bits):
Identical to the DIP switch on the RS232C (see above). But note that bit 1-7 is meaningless.
DIP switch #2 (4 bits):
SW2-1 SW2-2 SW3-3 SW2-4
DC1,3 off ON ON ON ON
Address #1 OFF ON ON ON
#2 ON OFF ON ON
#3 OFF OFF ON ON
#4 ON ON OFF ON
#5 OFF ON OFF ON
#6 ON OFF OFF ON
#7 OFF OFF OFF ON
#8 ON ON ON OFF
#9 OFF ON ON OFF
#10 ON OFF ON OFF
#11 OFF OFF ON OFF
#12 ON ON OFF OFF
#13 OFF ON OFF OFF
#14 ON OFF OFF OFF
DC1,3 mode on OFF OFF OFF OFF
* DIP-SW #2 overrides the DIP-SW #1 DC1/3 setting (bit 1-7).
* DIP-SW #2 factory setting: All ON
3Parallel (Centronics) interface
The parallel-interface board has no DIP switches.

– 8 –
SPECIFICATIONS AND OPERATION
Density Adjustment Aperture
About 90˚
About 90˚
Light
Dark
4. Print-Density Adjustment
Adjust the print density in accordance with the sensitivity of the paper being used. The adjustment procedure is as follows.
Fig. 1-5 Print-Density Adjustment
1Remove the interface cover, located the rear side of the printer. The cover fits into place; no screws are used.
2The density adjustor (variable resistor) is now accessible through the aperture located to the left of the interface
connector.
3Insert a screwdriver (regular or phillips-head) into the aperture and rotate as necessary. The adjustor has a
rotational range of approximately 180 degrees.
4
5Avoid setting density too high for sensitive paper types. Excessive dark values may cause the paper to swell,
degrading the image quality.
6Some thermal papers may fail to produce a strong image when running at 50mm/sec printing speed, even at
maximum density setting. If you have this problem, reduce the print speed to 25mm/sec.

– 9 –
SPECIFICATIONS AND OPERATION
5. Sensor Adjustment
There are three different sensors: the transmissive sensor (label start-position detector), the black-mark sensor, and the
paper-out sensor. Adjustment procedures are described below. First note the following general points.
• The transmissive sensor level requires precise setting. Because transmission rates vary widely among different
types of label paper, we recommend that the sensor be readjusted each time the user changes to a different paper
type.
• Because black marks are likely to be similar across different paper types, the black-mark reflective sensor may
not require readjustment each time the paper type is changed. But you will still have to adjust it if the new paper
has a different consistency or uses a different black-mark density, or if the paper-feed routing is changed.
• In most generally not necessary to adjust the paper-out sensor.

– 10 –
SPECIFICATIONS AND OPERATION
Sensor adjustment procedures are as follows.
1) Remove the ROM cover, located beneath the paper-roll holding area.
2) Hold down the FEED and ON LINE buttons while switching on the power, and continue to hold them down until
you hear a triple beep. (This will take about five seconds.) When you hear the triple beep, release the buttons to
enter sensor-adjustment mode.
a) Reflective Sensor
• Insert a non-black area of paper into the mechanism’s sensor area.
• Rotate the main PCB’s reflective-sensor adjustment knob (VR4) to the point where the Head Up LED comes
on.
b) Paper-Out Sensor
• Insert a non-black area of paper into the mechanism’s sensor area.
• Rotate the main PCB’s paper-out-sensor adjustment knob (VR3) to the point where the Paper End LED switches
on.
c) Transmissive Sensor
• Insert the backing portion of a label sheet into the mechanism’s transmissive sensor area. (Insert the backing
part only, not the label itself.)
• Adjust the main PCB’s coarse (VR1) and fine (VR2) transmissive-sensor adjustment knobs to the point where
the Error LED comes on.
Note: When setting paper, be sure to lower the head so that it is close to its normal fixed position.
After the sensor has been adjusted, press the ON LINE switch to exit the sensor adjustment mode and return to the
normal operation mode.

– 11 –
SPECIFICATIONS AND OPERATION
6. Setting Memory Switches from the Control Panel
The TSP400 uses EEPROM memory switches in place of corresponding hardware switches. All EEPROM switch settings
can be changed by software. A number of these switches are also changeable from the control panel.
(1) Paper-Feed Mode (Continuous or Next-Top)
When the feed mode is set to next-top, the printer can come online only if loaded with labels or marked paper. If the printer
fails to come online you will not be able to change the feed-mode setting by command; you will therefore have to change
it using the control panel.
1Hold down the FEED and ON LINE buttons while switching on the power, and continue to hold them down until
you hear a double beep. (You will first hear a single beep, followed by a pause, followed by the double beep.)
Release the buttons immediately after hearing the double beep.
2Press the ON LINE button to select continuous feed (the printer beeps once), or press the FEED button to select
next-top feed (the printer beeps twice). If you select next-top feed, the printer automatically starts paper feed
and looks for the next top.
(2) Sensor Mode
The printer may be set to use either the transmissive or the reflective sensor for next-top detection. You can make this
setting as follows.
1Hold down the ON LINE button while switching on the power, then continue to hold it down until you hear a
double beep. (You will first hear a single beep, then a pause, then the double beep.) Release the ON LINE button
immediately after hearing the double beep.
2Press the ON LINE button to select the reflective sensor (the buzzer beeps once), or press the FEED button to
select the transmissive sensor (the buzzer beeps twice).

– 12 –
SPECIFICATIONS AND OPERATION
7. Test Print
To generate a test print (self-test), hold down the FEED button while switching on the power.
Note: The test print continues as long as the FEED button is held down.
8. HEX Dump
Set the printer into hex-dump mode as follows: hold down the ONLINE button and switch the power on, then release the
ONLINE button as soon as you hear a single beep. The printer is now set to print a hex dump of the data sent from the
host.
Note: The HEX Dump mode continues to be effective until the power supply is turned off.

– 13 –
SPECIFICATIONS AND OPERATION
9. Page/Line Mode Switch
The TSP400 series supports two entirely different command sets: “Page Mode” and “Line Mode.” You can select the
mode either by software or from the control panel. To select from the control panel, proceed as follows.
NOTE: This function will not become meaningful until Line Mode
software has been introduced.
1Hold down the ON LINE button while switching on the power, then continue to hold it down until you hear a
triple beep. (This will take about five seconds.)
2Press the ON LINE button to select Page Mode (the buzzer beeps once), or press the FEED button to select Line
Mode (the buzzer beeps twice).

– 14 –
SPECIFICATIONS AND OPERATION
10. Exposing the Peripheral Unit Connector
When operating in Line Mode, the printer can use the peripheral unit connector to drive a cash drawer or other such external
device. But note that the connector is originally hidden by a portion of the interface cover.
Fig. 1-6 Peripheral Unit Connector
To prepare the connector for use, remove the “connector cover” portion of the interface cover (see illustration) by gently
bending and breaking it with a pliers. Be sure to remove any remaining burrs using a cutter or other such tool.
Connector cover

– 15 –
SPECIFICATIONS AND OPERATION
11. Changing the Interface Board
You can change the printer’s interface by replacing the interface board. The replacement procedure is as follows.
Fig. 1-7 Changing the Interface Board
1Remove the interface cover, located on the rear side of the printer.
2Remove the three screws holding the interface board in place.
3Remove out the board by pulling on the pull sheet fastened to the connector.
4Fit the replacement interface board to the guides and push all the way in so that the connector is fully engaged.
5Fasten the outer plate to the printer with three screws.
6Replace the interface cover.
Note: The printer automatically detects changes in interface type.
Interface
board
Screws (3)
Interface cover
Interface board PCB guide
Printer
Connector

– 16 –
SPECIFICATIONS AND OPERATION
/