GE ZBD1800GSS Installation guide
- Category
- Dishwashers
- Type
- Installation guide
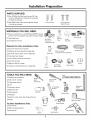
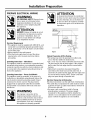
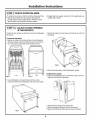
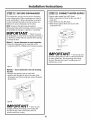
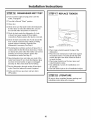
GE ZBD1800GSS dishwasher offers various features to enhance your dishwashing experience. With its built-in design, it seamlessly integrates into your kitchen cabinetry. The dishwasher boasts a spacious interior, accommodating a significant number of dishes, and features adjustable leveling legs for stability on uneven floors. It operates quietly, ensuring minimal disturbance during operation. Additionally, the dishwasher includes a pre-test checklist and a wet test to verify proper installation and performance before regular use.
GE ZBD1800GSS dishwasher offers various features to enhance your dishwashing experience. With its built-in design, it seamlessly integrates into your kitchen cabinetry. The dishwasher boasts a spacious interior, accommodating a significant number of dishes, and features adjustable leveling legs for stability on uneven floors. It operates quietly, ensuring minimal disturbance during operation. Additionally, the dishwasher includes a pre-test checklist and a wet test to verify proper installation and performance before regular use.


-
 1
1
-
 2
2
-
 3
3
-
 4
4
-
 5
5
-
 6
6
-
 7
7
-
 8
8
-
 9
9
-
 10
10
-
 11
11
-
 12
12
-
 13
13
-
 14
14
-
 15
15
-
 16
16


GE ZBD1800GSS Installation guide
- Category
- Dishwashers
- Type
- Installation guide
GE ZBD1800GSS dishwasher offers various features to enhance your dishwashing experience. With its built-in design, it seamlessly integrates into your kitchen cabinetry. The dishwasher boasts a spacious interior, accommodating a significant number of dishes, and features adjustable leveling legs for stability on uneven floors. It operates quietly, ensuring minimal disturbance during operation. Additionally, the dishwasher includes a pre-test checklist and a wet test to verify proper installation and performance before regular use.
Ask a question and I''ll find the answer in the document
Finding information in a document is now easier with AI
Related papers
-
GE GSM1860NSS Operating instructions
-
GE ZBD6880K15SS Installation guide
-
GE GSM2100GBB Installation guide
-
GE GLDT690DWW Installation guide
-
-
GE GSM1800F00WW User manual
-
GE GLD5800L15WW Installation guide
-
-
GE ZBD6400G03BB Installation guide
-
GE GPF65 Installation guide
Other documents
-
Electrolux EIDW1805KS Installation Instructions (English)
-
SPT SD-6501W Installation guide
-
 Brama 1500860 Installation guide
-
 Thor Kitchen HDW2401SS Installation guide
-
Frigidaire FFBD1821MS Installation Instructions English
-
Bertazzoni DW24XT Installation Instructions Manual
-
-
-
-

