Page is loading ...

Assembly Instructions
Caution: You must read this before you proceed
Please look in the Bubble Pack for hardware packs and legs.
Loveseat
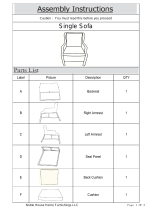
Parts List
Label Picture Description QTY(pc)
A Seat Base 1
B Backrest 1
C Seat Cushion 2
Noble house Home Furnishings LLC
Page 1 OF 12

D Left Arm 1
E Right Arm 1
F Pillow 2
GLeg with 1 Plastic
Gasket 4
Hardware List
Label Picture Description QTY
①
Extra Gaskets, available
for Loveseat
Uneveness/Wobbles
Adjustments
3
②Allen Wrench 1
③Spring Ring 11
④Flat Gasket 11
⑤Bolt(M8*60mm) 11
Noble house Home Furnishings LLC
Page 2 OF 12

Assembly Preparation
Before
Begining
Assembly:
B
C
A
D
E
F
Gx4
x3
x11
x11
x11
x2
x2
Noble house Home Furnishings LLC
Page 3 OF 12

Assembly Steps
This Sofa has multiple parts and may require about 30 minutes to assemble. To give you
an overview of the Sofa parts, the above picture is to help you put the various parts into
perspective. Please read through the instructions below to familiarise yourself with the
parts and steps before assembly.
Step 1
Take the Left Arm (D), Right Arm(E),Seat Cousions(C), Seat Base(A), Backrest(B),
Pillows(F) and a Bubble Pack out from the carton and place them on a clean, non-marring
surface.
FRONT FACING
Seat Cushion(C)
Right Arm (E)
Leg with 1 Plastic
Gasket(G)
Seat Base(A)
Backrest(B)
Left Arm (D)
Pillow (F)
D
E
C
F
B
A
Bubble Pack
x2
x2
Noble house Home Furnishings LLC
Page 4 OF 12

Step 2
Open the Bubble Pack to take out the 4 Wooden Legs (G) and Hardwares.
Step 3
Carefully install the Wooden Legs(G) at the bottom of Left Arm(D) and Right Arm(E).
Insert threaded stem into the mounting position at the corner of Left Arm(D) and Right
Arm(E). Tighten by turning the Legs clockwise.
Take care of the shape of the Legs and ensure they in the correct postions.
Note:The use of Extral Gaskets(①) are OPTIONAL and are especially useful to help
alleviate slight wobbleness. Some Legs may need more than one gasket while
some legs may not need anyway.
D
E
G G
G
G
①
①
①
①
G
③
④
⑤
②
①
Bubble Pack
DE
x3
x11
x11
x11
x4
Noble house Home Furnishings LLC
Page 5 OF 12

Step 4
With assistance from your adult partner, postion Left Arm(D), Right Arm(E) and Seat
Base(A) facedown on a clean, non-marring surface, then attach using Bolts(⑤), Spring
Washers(③) and Washer(④) with Allen Wrench(②).
Pls don't tighten the bolts and just to be bolted half-way at the moment(until to the Step 6).
Insert the Bolts(⑤) inside half as pictured until 4 bolts
each side are all bolted in, but don't tight the bolts at the
moment, in order to make sure assemble the back with
the arm easliy(Step 5).
②
⑤③
④
E
D
A
A
Noble house Home Furnishings LLC
Page 6 OF 12

Step 5
With assistance from your adult partner, align the mounting brackets on the Backrest(B)
with those on the Left Arm(D) and Right Arm(E).
Then slide Backrest(B) downward to make sure it locks into place as pictured. Please
squeeze the armrests properly against the backrest to ensure that the inserts can be
assembled smoothly. When the slot is slightly misaligned, push the top of the armrest
inward so that the slot can match it.
insert
E
B
D
Noble house Home Furnishings LLC
Page 7 OF 12

Step 6
Carefully install the 2 Bolts(⑤) with 2 Spring Rings(③) and 2 Warsher Rings(④) at the
bottom of Seat Base(A), insert the Bolt(⑤) marked "a" first until inside half and then insert
the other Bolt(⑤) marked "b" inside half.
Insert the Botls(⑤) half-way starting at “a” then to “b”
④
⑤
③
②
Then tight the 2 Bolts with Allen Wrench( ②)
Noble house Home Furnishings LLC
Page 8 OF 12

Step 7
Tighten the Bolts on each side of Arm with the Allen Wrench(②).
Then to tighten the Bolts( ⑤) with
Allen Wrench(②).
②
DE
Noble house Home Furnishings LLC
Page 9 OF 12

Step 8
Place the Seat Cushions(C) on the Seat Base (A).
Step 9
Place the Pillows(F) on the Sofa.
Your Sofa is ready for use.
This Sofa can only be used on a flat, level surface.
CC
FF
B
D
CC
E
Noble house Home Furnishings LLC
Page 10 OF 12

Noble house Home Furnishings LLC
Page 11 OF 12

Noble house Home Furnishings LLC
Page 12 OF 12
/


