Page is loading ...

FR1104-G Rear Panel
FriendlyNET
®
Faster, Easier, and Safer Networking
www.asante.com
www.asante.com
••• ••• •••
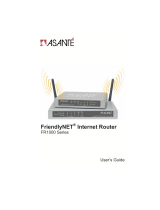
FR1100 Series Routers
Thank you for purchasing an Asanté
FriendlyNET FR1100 Series router. This router
will allow you to share your high-speed
Internet connection with other computers on
your network. To ensure smooth operation,
you will need to configure the router to match
your current Internet Service Provider (ISP).
System Requirements
Before you begin, please verify that you have
the following items:
• Valid Internet connection with user name
and password.
• Broadband (cable or DSL) modem with a
10BaseT port (PCI-based modems are not
supported).
• Network connection for each computer – a
10/100 Fast Ethernet adapter or built-in
10/100 Fast Ethernet port (RJ-45).
AsantéFast 10/100 or FriendlyNET 10/100
PCI recommended.
• Network cable from the router to each
computer. Unshielded twisted pair (UTP)
Category 5 cable is required.
• Supported operating systems:
– Apple Mac OS (8, 9 and X)
– Microsoft Windows (98, 2000, NT and XP)
– Linux/UNIX
• TCP/IP network protocol must be
configured for each computer (refer to
computer configuration on reverse). Each
client must also be configured to accept an
IP address from a DHCP server.
• You will also need a web browser to
configure the router. Microsoft Internet
Explorer or Netscape Communicator
version 4 or later is required.
If you have the FriendlyNET FR1104-G
wireless router, these items are optional:
• Wireless network connection for each
computer. A built-in 802.11b/g (Airport,
Wi-Fi) or adapter for each computer.
FriendlyNET AeroLAN adapters
recommended.
Incompatibilities
Cable or DSL modems using USB or Firewire
connections, asymmetrical dual media
connections, Home PNA or any other non-
Ethernet compatible communication devices
are not compatible with the FriendlyNET
FR1100 Series routers.
Asanté Makes Networking Simple
Setting up your router requires three
basic steps:
1. Install your hardware.
2. Determine the TCP/IP settings for your
specific computer following the instructions
provided for your operating system.
Tip: Record your information and save it for
future reference. You will need to have these
settings if you ever change routers, computers
or service plans.
3. Configure your router.
Hardware Installation
Turn off the power to your computers,
modem and router, then follow these steps
to connect the router to your network:
1. Connect an Ethernet cable from your
computer’s Ethernet port to one of the LAN
ports (numbered 1–4) on the router.
Repeat the process to connect other
computers to the router.
2. Connect an Ethernet cable from your cable
or DSL modem to the router’s WAN port.
Tip: FR1100 Series routers support Auto-
Uplink
™
. If you need to connect more than
four computers to the router, you can
uplink a 10/100 Fast Ethernet switch
(preferred) or hub using an Ethernet cable
to any LAN port on the router. FR1100
Series routers support up to 253 compters
and network devices.
3. Connect the power cord to the router then
turn on your computers and modem.
Determining Network Settings
Follow the Computer Configuration steps
for your computer’s operating system.
FR1104-G Cable/DSL 802.11g
Wireless Firewall Router with
Integrated 4-Port 10/100 Switch
FR1104-G Front Panel
Computer Configuration
The following steps explain how to determine
your current network settings and set up your
computer so that it can be automatically
configured by the router’s DHCP (dynamic
host configuration protocol) feature.
1. From the Apple menu, open your
computer’s TCP/IP control panel.
2. In the Connect Via drop-down list, select
your Ethernet adapter. In Configure, select
Using DHCP Server.
3. The DHCP screen before receiving a
dynamic IP address from the Asanté
router looks as follows:
4. The DHCP screen after receiving a
dynamic IP address from the Asanté
router looks as follows:
5. Close the TCP/IP control panel and Save
the settings.
The TCP/IP configuration of your computer
is now complete. Repeat these steps to
configure additional Mac OS 8 or 9
computers you wish to add to the router.
Router Configuration
All Operating Systems
The router must be configured to match your
Internet service. If you do not know your
Internet connection configuration, please
contact your Internet Service Provider (ISP).
By default, the router is pre-configured with
these settings:
• Automatically set IP addresses for
computers on your LAN (connected to the
router’s ports 1–4). The router acts as a
server for dynamic host configuration
protocol (DHCP) and assigns IP addresses
in the range 192.168.123.100 through
192.168.123.199
• The default LAN IP address for the router is
192.168.123.254 with a subnet mask of
255.255.255.0
• The Internet service connected to the
router’s WAN port uses a dynamic IP
address
Note: To configure the router, you will need
to use the information you collected when
determining network settings (Computer
Configuration) for your operating system.
1. Start your browser and type
http://192.168.123.254 in the location
field. Press Enter.
2. Log in to the router using the default
password (“admin”) and click the Log in
button.
3. From the top navigation bar, click on the
Wizard link.
4. Follow the on-screen instructions.
5. Fill in the network settings using the
information gathered during Computer
Configuration.
6. When you are finished, click Save. You will
be prompted to restart your router for
changes to take effect. Click the Restart
Router button and follow the prompts.
Your router will be restarted and you will
have to log in again.
7. Restart all the computers on your network.
8. To verify your Internet connection, try
connecting to the www.asante.com
website from your web browser.
The basic configuration of your Asanté
router is now complete. See the User’s
Manual for additional information on
advanced settings.
Apple Mac OS 8 and 9 (See reverse for Mac OS X)
© 2004 Asanté Technologies, Inc. Asanté, FriendlyNET and AeroLAN are registered trademarksof Asanté Technologies, Inc. The Asanté logo and Auto-Uplink
are trademarks of Asanté Technologies, Inc. All other brand names and products are trademarks or registered trademarks of their respective holders. All
features and specifications are subject to change without prior notice. 06-00697-00 (01/04)

Computer Configuration
Apple Mac OS X
The following steps explain how to determine
your current network settings and set up your
computer so that it can be automatically
configured by the router’s DHCP (dynamic
host configuration protocol) feature.
1. Go to System Preferences in your Dock.
2. Select Network from the System
Preference panel.
3. Select Show: Active Network Ports and
select the Ethernet port that is connected
to your Asanté router. Uncheck any
unused ports. Click Apply Now.
4. Select the connected Ethernet port
in Show.
5. Be sure that the TCP/IP tab is selected. Now
select Configure: Using DHCP. You will
receive the IP address automatically from
your DHCP server.
Before receiving the IP address from the
router’s DHCP server, your screen will look
like this:
After receiving the IP address from the
router’s DHCP server, your screen will look
like this:
The TCP/IP configuration of your computer is
now complete. Repeat these steps to
configure additional Macs running OS X that
you wish to add to the router.
Computer Configuration
Microsoft Windows XP
The following steps explain how to determine
your current network settings and set up your
computer so that it can be automatically
configured by the router’s DHCP (dynamic
host configuration protocol) feature.
Note: Keep your Windows CD-ROM handy.
You may be asked to insert it so that
Windows can copy necessary files.
1. From the Start button, select
Settings/Control Panel.
2. Click on Network and Internet Connections.
3. Click the Network Connections icon.
4. Double-click on the network.
5. Under the Support tab, click on the
Details… button and record your IP
settings for future reference.
6. Under the General tab, click the
Properties button.
7. Select the Internet Protocol (TCP/IP) and
click the Properties button.
8. Select Obtain an IP address
automatically and Obtain DNS server
address automatically.
9. Click OK and restart your computer.
The TCP/IP configuration of your computer
is now complete. Repeat these steps to
configure additional PCs running Windows XP
on your network.
Computer Configuration
Microsoft Windows 95/98/Me
The following steps explain how to determine
your current TCP/IP settings and configure
them to use DHCP.
Note: Keep your Windows CD handy. You may
be asked to insert it so that Windows can
copy necessary files.
1. From the Windows Start button, choose
Run. In the dialog box, type winipcfg and
click OK.
2. Choose your computer’s Ethernet adapter
card from the options available in the
drop-down list.
Tip: The PPP setting is usually for your dial-up
analog modem. Don’t choose this selection.
3. Expand this dialog box by clicking on the
More Info >> button.
Tip: Next to the DNS Servers field, click the
button to show the Secondary DNS (if
available).
4. From the Windows Start button, choose
Settings and select Control Panel.
Double-click the Network icon.
5. In the Configuration tab, highlight the
TCP/IP protocol line associated with your
network card adapter.
6. Click Properties to open the TCP/IP
Properties dialog. Click the IP Address tab.
Select Obtain an IP address
automatically. Click OK.
7. Click OK again. Windows will begin
copying files to your computer. Click Ye s
to restart your computer with the new
settings.
The TCP/IP configuration of your computer is
now complete. Repeat these steps to
configure additional PCs running Windows
95/98/Me on your network.
Computer Configuration
Microsoft Windows 2000/NT
The following steps explain how to determine
your current TCP/IP settings and configure
them to use DHCP.
Note: Keep your Windows CD handy. You
may be asked to insert it so that Windows
can copy necessary files.
1. From the Windows Start button, choose
Program > Accessories > Command
Prompt.
2. At the command line, type the command
ipconfig/all and press Enter.
3. From the Start Button, select
Control Panel/Network and Dial-Up
Connections. Double-click on the Local
Area Connection.
4. Under the General tab, highlight the
Internet Options (TCP/IP) and click the
Properties button.
5. Select Obtain an IP address
automatically and Obtain DNS server
address automatically. Click OK when
finished. You may be prompted to restart
your computer.
The TCP/IP configuration of your computer is
now complete. Repeat these steps to
configure additional PCs running Windows
2000/NT on your network.
/