Page is loading ...

NOTE:
Before installing your new DVD player, please read this manual carefully, as it will inform
you of the specifications, proper installation procedures and operation procedures. Also
included in this manual are guidelines on how to properly service and care for your new
player. Thank you for buying a Cary Audio Design CINEMA DVD-6 DVD player!
, HDCD
®
, High Definition Compatible Digital
®
and Pacific Microsonics™ are either registered
trademarks or trademarks of Pacific Microsonics, Inc. in the United States and/or other countries.
HDCD system manufactured under license from Pacific Microsonics, Inc. This
product is covered by one or more of the following:
Country
Patent No.
United States 5,479,168 5,638,074 5,640,161 5,808,574
5,838,274 5,854,600 5,864,311 5,872,531
Australia 669114
Other patents pending.
CINEMA DVD-6
192kHz/24bit D/A CONVERTER
HDCD DVD PLAYER
OPERATING MANUAL

Specifications
Video Specifications
Digital Audio Output Specifications
Audio Specifications
The following section describes the CINEMA DVD-6 basic specifications. The specifications are subject to change
or improvement without notice or obligation.
Playback System
Video D/A Converter
Video S/N Ratio
Video Signal Resolution
Signal Formal System
Composite Video Output
S-Video
Component Video Output
DVD Video/Video CD/CD/DVD-RW/DVD+RW/CD-RW
10-bit/54mHz
78.5 dB
540 TV Lines (DVD)
PAL (625/50, 5225/60) / NTSC (525/60, 625/50)
1.0Vp-p (75 ) Sync Negative
Luminance Signal : 1Vp-p (75 load)
Color Signal : 0.286Vp-p (75 load)
Y Output Level : 1Vp-p (75 load)
Pb Output Level : 0.7Vp-p (75 load)
Pr Output Level : 0.7Vp-p (75 load)
Master Clock Jitter
Digital / Analog Converters
Analog Filter
Analog Outputs
Below measurable levels
(3) Burr Brown PCM1738u
3rd Order Bessel
Ended RCA (Front L & R)
Single-Ended RCA (Surround L/R, Center and Subwoofer)
Frequency Range ...........................
Amplifier Linearity .........................
Phase Linearity .............................
Dynamic Range .............................
Signal-to-Noise Ratio .....................
Channel Separation .......................
Total Harmonic Distortion ................
Audio Output Level ........................
2 Hz - 22KHz Fs = 48KHz
2 Hz - 44KHz Fs = 96KHz
0.1dB (20Hz - 20KHz)
3 (20Hz - 20KHz)
117dB (1KHz)
117dB (1KHz)
115dB (1KHz)
0.0004% (1KHz)
2.2Vrms
Coaxial Digital
Optical Digital
Power Input
Power Consumption
Dolby Digital / DTS / LPCM 200mV RMS(75 )
Dolby Digital / DTS / Toslink
Reconfigured at factory
100-120/200-240 VAC, 50-60Hz
28 Watts

1
18
2
3
4
5
6
7
8
9
10
11
12
13
14
15
16
17
19
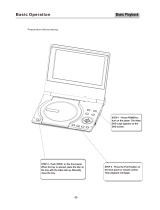
Using the Remote Control
This section explains how to get the best use of the remote control.
The following buttons can be used to operate the DVD player.
OPEN/CLOSE
Press to open or close the disc tray
Number buttons
GOTO
Press to skip to specified title, chapter or time
ANGLE
Press to change the camera angle during DVD multi-angle
scene playback
SETUP
Press to display (or exit) the on-screen
ENTER & UP/DOWN/LEFT/RIGHT
Use to navigate on-screem displays and menus.
Press ENTER to select an option or execute a command
OSD DISPLAY
Press to display information about the disc playing
Press to stop the disc (you can resume playback by pressing (play))
Press to pause playback; press again to restart
POWER
Press to switch the player on or into standby
SUBTITLE
Press to select a subtitle display
AUDIO
Press to select the audio channel or language
MENU
Press to display the top menu of a DVD disc
TITLE
Press to display a DVD disc menu, or the Disc Navigator if
a DVD-RW, CD, Video CD or Mp3 disc is loaded
Press to start or resume playback
Press to jump to the start of the previous / next chapter / track
Press to reverse / forward slow motion playback, frame reverse /
advance and reverse / forward scanning.
ZOOM +/- BUTTONS
Press to enlarge and reduce the screen image.
VOLUME
Press to adjust the vlume
4
3
1
STOP
PAUSE
PLAY
PREVIOUS / NEXT
REVERSE/ FORWARD
2
5
6
7
8
9
10
11
12
13
14
15
16
17
18
19
Using the remote control to operate the DVD player

Making Connections
To accommodate a wide range of home entertainment systems, this player features numerous connection
types for both audio and video, please refer to the instructions on this and the following pages to determine
the best possible type of connections for your system.
Connections to a TV
Before connecting
Refer to the instruction manuals supplied with any and all components that you plan
to connect the DVD Player to.
Be sure to turn off the power of all components to be connected and unplug them
from the wall outlet before making any connections.
Connect the DVD Player to the TV directly. If you connect the DVD Player to a VCR,
TV/VCR combination, or video selector, the playback picture may be distorted as
DVD Video images are copy protected.
Please note that video connections to a TV or monitor are necessary because some
discs require on-screen menu interaction before they can be played.
Using the audio / video connection cable
Using the audio audio/video cable, make audio connections from the 5.1 CH SURROUND
ANALOG OUTPUT L and R jacks to the corresponding audio input jacks on the TV.
In the same manner, make video connection from the VIDEO OUTPUT VIDEO jack to
the corresponding video input jack on the TV.
Be sure to set Audio Setup Speaker Setup Select to "Movie Stereo" using the
on-screen setup menu.
Note
Be sure to match the colors of the plugs on the cable with the corresponding jacks
on the DVD Player and the TV : yellow for video, red for R (right) audio and
white for L (left) audio.

Making Connections
Making component video connections
Optional Video Connections
Visible improvement in DVD Video quality can be achieved by making either S-Video or
component video connections to a TV or monitor compatible with these of connections.
Note
When either S-Video or component video connection is made, it is not necessary to make
composite video connections using the yellow cord of the audio-video cable.
If the TV or monitor has component video inputs, making this type of video connection
will produce the ideal picture quality for the presentation of DVD-Video. Using a component
video cable (sold separately), connect the VIDEO OUTPUT COMPONENT jacks to the
corresponding component video input jacks on the TV.
Actual labels for component video inputs may vary depending on the TV manufacturer.
(E.g. Y, R-Y, B-Y or Y, CB, CR)
In some TVs or monitors, the colors levels of the playback picture may be reduced slightly
or the tint may change. In such a case, adjust the TV or monitor for optimum performance.
Be sure to set Audio Setup Speaker Setup Select to "Movie Stereo" using the on-screen menu.
PROGRESSIVE outputs / inputs
Some TVs or monitors are equipped with component video inputs that are capable of
reproducing a progressively scanned video signal. Connecting to these inputs allows
you to view the highest quality pictures with less flicker.
Interlaced outputs / inputs
Some TVs or monitors are equipped with component video inputs. Connecting to these
inputs allows you to enjoy higher quality picture playback. In some TVs or monitors,
the color levels of the playback picture may be reduced slightly or the tint may change.
In such a case, adjust the TV or monitor for optimum performance.
Making S-Video connections
If the TV or monitor has an S-video input, making this type of video connection will produce
improved picture quality. Using a S-video cable, connect the VIDEO OUTPUT S-VIDEO jack
to the corresponding S-video input jack on the TV.Be sure to set Audio Setup Speaker Setup
Select to "Movie Stereo" using the on-screen menu.

Making Connections
Making discrete 6-channel ANALOG OUTPUT connections
Making stereo audio connections
Digital connections
Optional Audio Connections
This DVD Player provides numerous ways to take full advantage of the digital multi channel sound recorded
on DVD media.
When listening to CD-Audio
For full enjoyment of CD-Audio media, it is recommended to make connections to the 6-channel ANALOG
OUTPUT jacks.
Analog connections
In addition to offering two stereo outputs for connection to a stereo system, two types of multi channel
analog outputs allow you to make connections to an AV component that features multichannel analog input
for full enjoyment of multi channel DVD-Video.
The discrete ANALOG OUTPUT jacks are intended to deliver up to 5.1 channels of multi channel audio from
DVD-Video sources. Connections can be made from the ANALOG OUTPUT FRONT, SURR (surround), CENTER,
and SUBWOOFER jacks to the corresponding input jacks on an AV component with multi channel discrete
audio input jacks.
Note
To ensure proper delivery of sound, be sure to match the names of the jacks on the DVD Player and the
component being connected to.
By making connections to a stereo system, you can improve the quality of the sound of cinematic
presentations as well as make effective use of the DVD Player's ability to playback CDs.
Using an audio cable (sold separately), make audio connections from the ANALOG OUTPUT L and R jacks
to the corresponding jacks on the stereo component.
Note
Be sure to match the colors of the plugs on the cable with the corresponding jacks on the
DVD Player and the stereo component : red for R (right) audio and white for L (left) audio.
Do not make connections to the PHONO or TUNER jacks on the stereo component.
Make digital connections from the DVD Player to an AV component that features digital input capability
or one or more multi-channel audio decoders to realize the full cinematic experience made possible by
the DVD format. This DVD Player features one set of optical and coaxial digital audio output jacks and
can output Dolby digital, DTS and PCM bitstreams. Make connections from the DIGITAL OUTPUT OPTICAL
jacks to the digital optical input jack on the AV component using an optical fiber cable (sold separately).
Make connections from the DIGITAL OUTPUT COAXIAL jacks to the digital coaxial input jack on the AV
component using a coaxial cable (sold separately). It is not necessary to make more than one type of
digital connection to a single component. When you are making connections to an amp or receiver that
has internal Dolby Digital, DTS, Decoding capabilities.

Getting Started
Switching On
Using the on-screen displays
Setting up with the Setup Navigator
1 If a disc is playing, press stop
2 Press SETUP
3 Select Video Setup
The front panel POWER button switches the player on and off. When the player is off, it can only be
switched bank on using the same front panel button. When the player is on, you can put it into standby
using the POWER button on the remote control.
After making sure that everything is connected properly and that the player is plugged in, press POWER
on the front panel to switch the player on.
Also, switch on your TV and make sure that it is set to the input you connected the DVD player to.
For ease of use, this player makes extensive use of graphical on-screen displays (OSDs). You should get
used to the way these work as you'll need to use them when setting up the player, using some of the
playback features, such as program play, and when making more advanced settings for audio and video.
All the screens are navigated in basically the same way, using the cursor buttons to change the
highlighted item and pressing ENTER to select it.
Using the Setup Navigator you can make a number of other initial settings for this player.
Also turn on your TV and make sure that it is set to
the correct video input.
The on-screen display (OSD) appears
DVD-6 SETUP-MENU
VIDEO SETUP
AUDIO SETUP
DISC SETUP HDCD SETUP
EXIT SETUP
VIDEO SETUP
DEFAULTS
DVD-6 SETUP-MENU
VIDEO SETUP
AUDIO SETUP
DISC SETUP HDCD SETUP
EXIT SETUP
GOTO VIDEO SETUP MENU
DEFAULTS

Getting Started
The default setting of this player is NTSC and
unless you notice that the picture is distorted
when playing some discs, you should leave it set
to MULTI. If you experience picture distortion
with some discs, set the TV system to match your
country or region's system.
Doing this, however, may restrict the kinds of
disc you can watch.
If you have a widescreen TV, select the (Wide)
setting - widescreen DVD software is then shown
using the full screen area. When playing
software recorded in conventional (4:3) format,
the settings on your TV will determine how the
material is presented - see the manual that
came with your TV for details on what options
are available.
4 Select "TV DISPLAY"
5 Select "TV TYPE"
If you have a conventional TV, select either
NORMAL (Letter Box) or NORMAL (Pan&Scan).
In LetterBox mode, widescreen software is shown
with black bars at the top and bottom of the screen.
Pan & Scan chops the sides off widescreen
material to make it fit the NORMAL screen (so even
though the image looks larger on the screen,
you're actually seeing less of the picture).
6 Select "Exit Setup"
Or press SETUP to quit the DVD-6 setup-menu
without making any changes.
Congratulation, first time setup is complete !
--VIDEO SETUP--
TV DISPLAY
VFD MODE
TV TYPE
ANGLE MARK
CAPTIONS
SET TV TYPE
PIC MODE
MULTI
PA L
NTSC
SCR SAVER
WALL PAPER
SETUP-MENU
DVD-6 SETUP-MENU
VIDEO SETUP
AUDIO SETUP
DISC SETUP HDCD SETUP
EXIT SETUP
EXIT SETUP-MENU
DEFAULTS
--VIDEO SETUP--
TV DISPLAY
VFD MODE
TV TYPE
ANGLE MARK
CAPTIONS
SET TV DISPLAY MODE
PIC MODE
WIDE
NORMAL / PS
NORMAL / LB
SCR SAVER
WALL PAPER
SETUP-MENU

PLAYBACK
(1) Playback
1 Turn on the Power.
- Press the power button, the standby indicator lights turns off and the power turns on.
- When in standby mode, press the POWER button of remote control unit.
2 Press the OPEN/CLOSE button to open the disc tray.
3 Set the disc in the disc tray.
4 Press the OPEN/CLOSE button.
- For many interactive DVDs and video CDs with playback control, a menu screen appears.
In this case use the procedure in step 6 to select the desired item.
* Interactive DVDs are DVDs including multiple angles, stories, etc.
5 Press the PLAY button.
6 Use the cursor buttons ( , , and ) to select the desired item.
- For some discs there is a second menu screen. If so, press the button to display the next menu screen.
(See the disc's jacket.)
* The cursor buttons ( , , and ) do not work for video CDs, Use the number buttons to select the
desired item.
7 Press the ENTER button.
- The desired item is selected and playback starts.
- You can return to the menu screen by pressing the MENU/TITLE button while the DVD is playing,
though this depends on the disc.
- Press the PLAY button during playback of a video CD to return to the menu screen.
NOTES :
- If appears on the TV screen while buttons are being operated, that operation is not possible on
the DVD-6 or with that disc.
- Set the disc in the disc guide.
- Do not place more than one disc in the disc tray.
- The disc keeps turning while the menu screen is displayed on the TV screen.

PLAYBACK
(2) Stopping Playback
.
During playback, press the STOP button on the main unit or the remote control unit,
playback stops and wall paper is displayed.
<Resume play memory function (DVD only)>
- With the DVD-6, when the STOP button is pressed, that position is stored in the memory.
At this time," PLAY " flashes on the display. When the PLAY button is pressed after pressing the
STOP button, playback resumes from the position at which it was stopped. The resume play
memory function is cancelled if the disc tray is opened or the STOP button is pressed a second time.
- If you do not want to continue playing the disc or to save electricity press the POWER button
on the main unit to turn the power off or press the POWER OFF button on the remote control unit to
set the power to the standby mode.
(3) Playing Still Pictures (Pausing)
During playback, press the STILL/PAUSE button on the remote control unit.
- Press the PLAY button to resume normal playback.
(4) Forward/Reverse Searching
During playback, press one of the REW/ FF buttons on the remote control unit.
: Reverse direction
: Forward direction
- When pressed again, the search speed increases (in four steps).
- Variable in 4 steps for CDs, 4 steps for DVD video (movie part), DVD video and video CD discs.
- Press the PLAY button to resume normal playback.
Note :
In some cases the menu screen may reappear when one of the REW/FF buttons is
pressed during menu playback on a video CD.

PLAYBACK
(5) Skipping to the Beginning of Chapters or Tracks
Cueing using the SKIP button
During playback, press one of the skip buttons on the main unit or the remote control unit.
: Reverse direction (PREVIOUS)
: Forward direction (NEXT)
- A number of chapters or tracks equal to the number of times the button is pressed is skipped.
- When the skip back button is pressed once, the pickup returns to the beginning of the currently
playing chapter or track.
Chapter/track
Chapter/Track
Chapter/track
Chapter/Track
Playing positing
Reverse direction Forward direction (direction of playback)
Cueing using the number buttons
Press the GOTO MODE button during playback.
- The GOTO mode switches each time the button is pressed.
For D VD v id eo d is cs : T it le _ _ / _ _ C ha pt er _ _ _ / _ _ _
For D VD v id eo d is cs : T it le _ _ / _ _ T im e _ _ : _ _ : _ _
For C Ds a nd v id eo C Ds : G OTO _ _ : _ _
*The GOTO mode set by pressing the GOTO MODE button is stored in the memory
until the button is pressed again.
However, the GOTO mode returns to the default mode when the power is turned off.
- Use the number buttons to input the number to be played.
Note :
Some DVD video and video CD discs do not operate as described in this manual
due to the intentions of the discs' producers.
Note :
In some cases the menu screen may reappear when one of the SKIP buttons is pressed
during menu playback on a video CD.

PLAYBACK
(6) Selecting the still image
During playback, press the PREVIOUS or NEXT button on the remote control unit.
- On some discs the image cannot be selected due to the intentions of the discs' producers.
(7) Playing bonus groups
1 In the stop mode, press the TITLE button on the remote control unit to set the search mode to "GROUP".
2 Use the number buttons to input the bonus group number.
3 Use the number buttons on the remote control unit to input the password (3 digits),
then press the ENTER button.
- Playback starts from the first track in the specified group.
- In some cases the password must be input at the menu screen.
In these cases, follow the instructions on the screen.
- Once the password is input, the disc can be played as many times as you want until it is removed.
- If you make a mistake when inputting the password, press the ENTER button on the remote control unit.

Changing the Default Settings
Make the initial settings to suit your usage conditions before starting playback.
The initial settings are retained until they are next changed, even if the power is turned off.
1
Turn on the power.
- Press the power button, the power indicator lights turns off and the power turns on.
2
3
In the stop mode, press the SETUP button.
- The setup (default settings) screen appears.
NOTE: For some menus, the initial values can
be changed during playback.
(1) VIDEO SETUP
Use this to set the DVD-6 screen mode.
(TV aspect and TV type.)
(2) AUDIO SETUP
Use this to set the DVD-6 audio output
mode.
(Digital and LPCM output settings.)
(3) DISC SETUP
Use this to set the language to be used
when playing the disc.
If the set language is not offered on that
disc, the discs default language is set.
(4) HDCD SETUP
Use this to set the HDCD Digital Output
word and HDCD Digital filter.
(5) DEFAULTS
Use this to reset the factory defaults
settings.
(6) EXIT SETUP
Use this to exit the setup.
(1) Select "VIDEO SETUP". (See page 16)
(2) Select "AUDIO SETUP". (See page 19)
(3) Select "DISC SETUP". (See page 23)
(4) Select "HDCD SETUP". (See page 26)
Use the and cursors buttons to select the desired setting item, then press the Enter button.
To exit the setup mode
*
Use the cursor button to select "EXIT SETUP", then press the ENTER button. It is also
possible to quit by pressing the SETUP button on the remote control unit.
DVD-6 SETUP-MENU
VIDEO SETUP
AUDIO SETUP
DISC SETUP HDCD SETUP
EXIT SETUP
VIDEO SETUP
DEFAULTS

Changing The Default Settings
When "VIDEO SETUP" is selected
.
1
2
3
4
See page 15.
Use the and cursor buttons to select the desired setting, then press the ENTER button.
(1) TV DISPLAY
Use this to set the shape of your TV's screen.
(2) TV TYPE
Use this to set your TV's video format
(NTSC, PAL or MULTI).
(3) PIC MODE
The play DVD video, select the desired video
mode ("VIDEO", "FILM", "AUTO").
(4) VFD MODE
Use this to select the brightness of the VFD
Display.
(5) ANGLE MARK
Use this to set the MULTI-ANGLE scenes on
DVD Discs.
(6) CAPTIONS
Use this to set whether of not to display the
closed captions recorded on DVDs.
(7) SCR SAVER
Use this to set a constant image is not
displayed for a dangerously long time.
(8) WALL PAPER
Use this to select the image to be shown on
the screen in the stop mode and CD play
mode.
--VIDEO SETUP--
TV DISPLAY
Audio Setup
VFD MODE
TV TYPE
ANGLE MARK
CAPTIONS
VIDEO SETUP
PIC MODE
WIDE
NORMAL / PS
NORMAL / LB
SCR SAVER
WALL PAPER
SETUP-MENU

Changing The Default Settings
When "VIDEO SETUP" is selected
.
5
(2) When "TV TYPE" is selected:
NTSC (Factory default)
Select this when your TV's video format is
NTSC. If NTSC is selected, output format is
fixed to NTSC.
PAL
Select this when your TV's video format is
PAL. If PAL is selected, output format is
fixed to PAL.
MULTI
Select this when your TV is compatible with
both the NTSC and PAL formats.
NTSC signals are output from the video
output jacks when discs recorded in NTSC
format are played, and PAL signals are
output from the video output jacks when
discs recorded in PAL format are played.
(3) When "PIC MODE" is selected:
VIDEO
This mode is best suited for playing discs
containing video material.
FILM
This mode is best suited for playing discs
containing film material or video material
recorded with the progressive scan method.
AUTO (factory default)
The set identifies the type of material on the
disc being played (film or video) and selects
the mode automatically. This mode is suited
for playing discs containing both film and
video material.
NOTE:
- If stripes of noise appear on the picture or the picture is unclear when playing a
specific DVD video disc, try changing the video mode.
(1) When "TV DISPLAY" is selected :
NORMAL / PS
Select this to play wide DVDs in the pan &
scan mode (with the sides of the picture cut
off).
Discs for which pan & scan is not specified
are played in the letter box mode.
NORMAL / LB (Factory default)
Select this to play wide DVDs in the letter
box mode (with black strips at the top and
bottom).
WIDE
Select this to play wide DVDs in the
full-screen mode.
Use the and cursor buttons to select the desired setting, then press the ENTER button.
*
--VIDEO SETUP--
TV DISPLAY
VFD MODE
TV TYPE
ANGLE MARK
CAPTIONS
SET TV DISPLAY MODE
PIC MODE
WIDE
NORMAL / PS
NORMAL / LB
SCR SAVER
WALL PAPER
SETUP-MENU
--VIDEO SETUP--
TV DISPLAY
VFD MODE
TV TYPE
ANGLE MARK
CAPTIONS
SET TV TYPE
PIC MODE
MULTI
PA L
NTSC
SCR SAVER
WALL PAPER
SETUP-MENU
--VIDEO SETUP--
TV DISPLAY
VFD MODE
TV TYPE
ANGLE MARK
CAPTIONS
SET PICTURE MODE
PIC MODE
VIDEO
FILM
AUTO
SCR SAVER
WALL PAPER
SETUP-MENU

Changing The Default Settings
When "VIDEO SETUP" is selected
.
(4) When "VFD MODE" is selected:
NORMAL (Factory default)
A normal brightness is set.
MEDIUM
The brightness is set to 50% of the
normal setting.
OFF
The VFD display is switched off.
(5) When "ANGLE MARK" Is selected:
OFF
ON (Factory default)
If you prefer to see the camera icon
on-screen during multi-angle scenes on
DVD discs. Change this setting to ON.
(6) When "CAPTIONS" is selected:
OFF (Factory default)
Select this when you do not want playing the
captions on the screen when playing DVDs
containing English captions
ON
Select this to display the captions on the
screen when playing DVDs containing
English captions.
(7) When "SCR SAVER" is selected:
OFF (Factory default)
ON
If a constant image is displayed on a
conventional CRT-Type TV, it can "burn in"
leaving a ghost image on the screen.
Switch to ON to make sure that a constant
image is not displayed for a dangerously
long time.
(8) When "WALL PAPER" is selected:
BLUE
Select this to display a blue background on
the TV display.
BLACK
Select this to display a black background on
the TV display.
PICTURE (Factory default)
Select this to display the wallpaper on the
TV display.
To Exit the setup mode
Use the cursor button to select "EXIT SETUP", then press the ENTER button. It is also possible to
quit by pressing the SETUP button on the remote control unit.
*
--VIDEO SETUP--
TV DISPLAY
VFD MODE
TV TYPE
ANGLE MARK
CAPTIONS
SET WALL PAPER
PIC MODE
BLUE
BLACK
PICTURE
SCR SAVER
WALL PAPER
SETUP-MENU
--VIDEO SETUP--
TV DISPLAY
VFD MODE
TV TYPE
ANGLE MARK
CAPTIONS
SCREEN SAVER
PIC MODE
ON
OFF
SCR SAVER
WALL PAPER
SETUP-MENU
--VIDEO SETUP--
TV DISPLAY
VFD MODE
TV TYPE
ANGLE MARK
CAPTIONS
CLOSED CAPTION
PIC MODE
ON
OFF
SCR SAVER
WALL PAPER
SETUP-MENU
--VIDEO SETUP--
TV DISPLAY
VFD MODE
TV TYPE
ANGLE MARK
CAPTIONS
ANGLE MARK ON/OFF
PIC MODE
OFF
ON
SCR SAVER
WALL PAPER
SETUP-MENU
--VIDEO SETUP--
TV DISPLAY
VFD MODE
TV TYPE
ANGLE MARK
CAPTIONS
SET VFD MODE
PIC MODE
VIDEO
FILM
AUTO
SCR SAVER
WALL PAPER
SETUP-MENU

Changing The Default Settings
When "AUDIO SETUP" is selected
1
2
3
4
See page 15.
Use the and cursor buttons to select the desired setting, then press the ENTER button.
SPEAKER SETUP
Use this to adjust for the connected speaker
systems.
DIGITAL OUT
Use this to select the digital output's signal
format.
DIGITAL CLOCK (48kHZ/96kHZ)
Use this to set the digital Clock output when
playing DVDs recorded in linear PCM audio.
COMPRESSION
Use this to set the dynamic range output when
playing discs.
PRO LOGIC II
Selection of PRO LOGIC II allows the user to
enable /disable Pro Logic II decoding on two-
channel sources to create a multi-channel
output when SPEAKER CONFIGURATION is
set to DOWNMIX OFF.
When "SPEAKER SETUP" is selected, use the and cursor buttons to select the
item to be set, then press the ENTER button.
SPEAKER SETUP PAGE
It will available. U
se the and cursor buttons to select the
item to be set, then press the ENTER button.
DOWNMIX
Use this to select the multi ch or 2ch of the
different speakers.
FRONT
Use this to select the size of speaker.
CENTER
Use this to select the size of speaker.
SURROUND
Use this to select the size of speaker.
SUBWOOFER
Use this to select the subwoofer on or off.
FRONT POSN
Use this to set the front L & R speaker distance.
CENTER POSN
Use this to set the center speaker distance.
SURROUND POSN
Use this to set the surround L & R speaker distance.
TEST TONE
Use this to test the speaker position.
To exit the SPEAKER SETUP PAGE mode Use the cursor button to select "AUDIO
SETUP" then press ENTER button.
*
--AUDIO SETUP--
SPEAKER SETUP
Audio Setup
COMPRESSION
DIGITAL OUT
PRO LOGIC
AUDIO RELATED
DIGITAL CLOCK
SETUP-MENU
--SPEAKER SETUP PAGE--
DOWNMIX
Audio Setup
SURROUND
FRONT
SUBWOOFER
FRONT POSH
LOUD SPEAKERS SETUP
CENTER
OFF
MOVIE STEREO
STEREO
CENTER POSN
SURROUND POSN

Changing The Default Settings
When "AUDIO SETUP" is selected
5
Use the and cursor buttons to select the desired setting, then press the ENTER button.
(1) When "DOWNMIX" is selected:
Use the and cursor buttons to select
the item to be set, then press the ENTER
button.
MOVIE STEREO
Selected this for systems in which only
two speakers are connected.
STEREO
Select this for systems in which only two
speakers are connected.
When "FRONT", "CENTER","SURROUND","SUBWOOFER' are selected, use the and
cursor to select the speaker to be set then press the ENTER button.
When "FRONT POSN", "CENTER POSN","SURROUND POSN" is selected, use the and
cursor to set the distance from the listening position to the difference speakers then press
the ENTER button.
- The type of speaker used for the front
speakers, center speaker, subwoofer
and surround speakers can be set.
Use the and cursor buttons to select
the speaker type, then press the ENTER
button.
LARGE
Select this when a large speaker is connected.
SMALL
Select this when a small speaker is connected.
NONE
Select this when no speaker is connected.
YES
Select this when a subwoofer is connected.
NO
Select this when no subwoofer is connected.
Use the and cursor buttons to set the
distance from the listening position to the
difference speakers.
* The distance can be set within the range
of 0 to 30 feet (9.2 meters).
* The maximum difference in speaker
distance for which adjustment is possible
is 15 feet (4.5 meters).
OFF (Factory default)
Select this for systems in which three or
more speakers are connected.
0. FT / 0.0 M
30 FT /9.2 M
(2)
(3)
--SPEAKER SETUP PAGE--
DOWNMIX
Audio Setup
SURROUND
FRONT
SUBWOOFER
FRONT POSH
LOUD SPEAKERS SETUP
CENTER
OFF
MOVIE STEREO
STEREO
CENTER POSN
SURROUND POSN
--SPEAKER SETUP PAGE--
DOWNMIX
Audio Setup
SURROUND
FRONT
SUBWOOFER
FRONT POSH
SETUP FRONT SPEAKER SIZE
CENTER
LARGE
SMALL
CENTER POSN
SURROUND POSN

Changing The Default Settings
When "AUDIO SETUP" is selected
6
7
When "DIGITAL CLOCK" (48KHz/96KHz)" is selected :
When "DIGITAL OUT" is selected :
LPCM 96K (Factory default)
When playing linear PCM or packed PCM
DVDs that are not copyright-protected,
for 2-channel PCM audio signal up to 96 kHz,
linear PCM signal are output as such without
being converted from the digital outputs.
When playing copyright-protected linear PCM
or packed PCM DVDs, in consideration of
copyright, no digital signals are output for
sources exceeding 48kHz/16 bits.
(4) When "TEST TONE" is selected, use the and cursor buttons to select the
speaker to be adjusted.
ON
Use the and cursor buttons to select
the test tone, then output the test tone
using the procedure described below.
Front speaker (L)
Center speaker
Front speaker (R)
Surround speaker (R)
Surround speaker (L)
Subwoofer
To exit the SPEAKER SETUP PAGE mode use the cursor button to select "AUDIO OUTPUT",
then press ENTER button.
OFF (Factory default)
*
OFF
ON (Factory default)
When playing DVDs recorded in Dolby
Digital or DTS, bitstream signals are
output terminals. When playing DVDs
recorded in linear PCM or packed PCM,
linear pcm signals are output.
Select "ON" when making digital
connections to an AV amplifier with
built-in Dolby Digital and DTS decoder.
--AUDIO SETUP--
SPEAKER SETUP
COMPRESSION
DIGITAL OUT
PRO LOGIC
SET LPCM OUTPUT TO 48K OR 96K
DIGITAL CLOCK
SETUP-MENU
LPCM 48K
LPCM 96K
--AUDIO SETUP--
SPEAKER SETUP
Audio Setup
COMPRESSION
DIGITAL OUT
PRO LOGIC
SET DIGITAL AUDIO OUTPUT
DIGITAL CLOCK
SETUP-MENU
OFF
ON
/